


How to Hang Wallpaper in the Most Painless Way Possible

By Marilyn Syarto
Wallpaper often gets a bad rap, thanks to the perception that it’s old-fashioned and hard to hang. But many wallpaper designers have hit the refresh button with cool, luxurious, and modern patterns that are somewhat simple to hang depending on the type you choose.
The best way to put up wallpaper? First of all, it takes two people to do a good job. Then, it’s important to wisely choose the type, pattern, and amount of wallpaper you need. And preparation is key: Setting up a proper workstation and correctly preparing the walls so the wallpaper stays on will make the process much easier.
Our wallpaper hanging guide gives you the knowledge you need to hang this decorative home element so it’s smooth and straight.
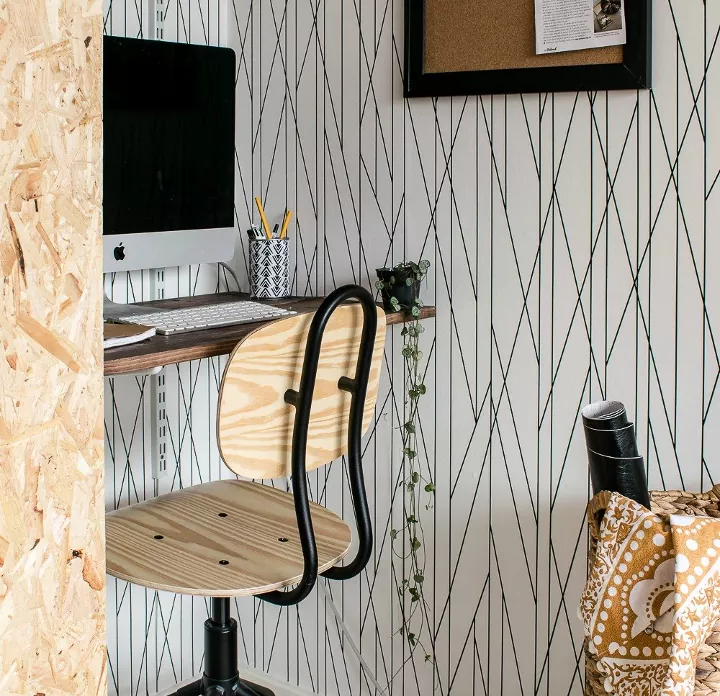
Photo via Medina at Grillo Designs
How to Choose Wallpaper
Wallpaper can instantly and affordably inject color, texture, pattern, depth, and personality into a room. It can also hide a not-so-pretty or stained wall. But how do you choose a wallpaper design? Here are a few important dos and don’ts for beginners:
- Do stick to dense stripes and random patterns with small designs for easy seam matching.
- Don’t choose “drop repeat” patterns (a very regimented repeat pattern that needs precise matching). They are difficult to match and can cause waste (and headaches).
- Do pay attention to labels or descriptions of the wallpaper. You’ll likely want to opt for random match or drop match wallpaper. These match types are the easiest to line up during installation, advises Wallpaper Boulevard.
- Do consider scale if you have patterned upholstery or curtains. Choose a different scale of wallpaper pattern than curtain fabric pattern, whether it’s smaller or larger.
- Do look for pre-trimmed paper so you don’t have to worry about trimming selvages on the edges.
- Do match the style of wallpaper to your decor. For example, choose abstracts and geometrics for modern rooms, florals for casual or Victorian interiors, plaid or gingham for country and rustic spaces, and embossed or reflective for formal or glam areas.
- Do choose one or two colors from your decor to repeat in your wallpaper choice to tie the room together—deeper colors and bold patterns make a space feel intimate and lighter colors and papers with delicate prints and lighter colors make a room feel spacious.
- Don’t choose silk, grass, cloth, or textured wallpapers unless you are advanced at wallpaper hanging; if you accidentally get paste on the wallpaper front, it’s nearly impossible to wipe off.
When to Use Metallic Wallpaper
How to Measure for Wallpaper
Wallpaper rolls come in all sizes, widths, and lengths. The absolute easiest way to measure wallpaper to figure out how much you need is to use an online calculator. The calculator on Wallpaper Direct’s site is easy and straightforward—all you will need to do is measure your space and plug the measurements into the calculator.
To manually determine how much you need, calculate the total square footage of the space you are wallpapering and divide that number by the roll’s square footage. Wallpaper typically comes as what’s termed a “double roll” that covers about 66 square feet.
Buy an Extra Roll
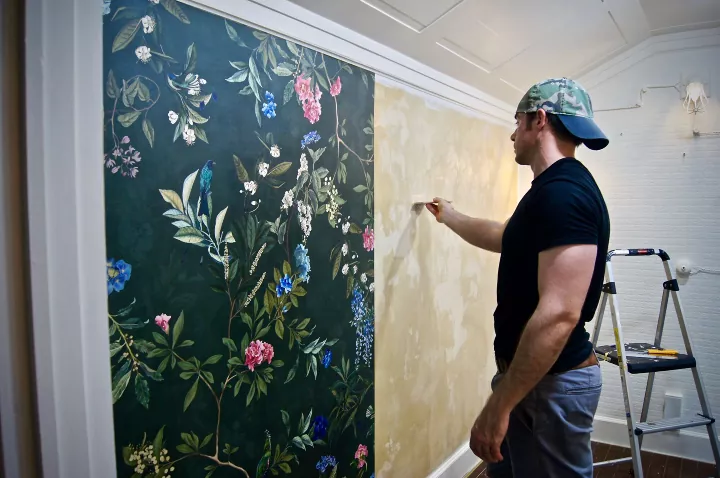
Photo via Bryan's Workshop
How to Hang Wallpaper
The general and basic steps to hanging wallpaper apply to unpasted and pre-pasted products. Stick-and-peel wall coverings are easier. However, according to This Old House, most wallpaper is sold as prepasted paper-backed vinyl for easier hanging.
When you get your wallpaper home, open up each package, unroll it, and begin to roll it back up the opposite way and keep it that way for about five to 10 minutes. Doing this will destroy the “memory” the wallpaper has to curl in one direction, straightening out the paper enough to make hanging it easier.
Tools and Materials Needed:
- Wall patch kits (optional)
- Tools to remove outlet and switch covers
- Wall primer (color matched, optional)
- Wallpaper primer or sizing
- Long portable table
- Tarps or plastic for floors
- Tall step ladder
- Water
- Bucket
- Measuring tape
- Pencil
- Measuring stick or L-square
- Scissors
- Paint roller
- Large sponge
- Seam roller
- Wallpaper brush
- Utility knife and sharp blade
- Plastic wallpaper edger/smoothing tool
- Small plastic edger or putty knife (for trimming)
Step 1: Prep the Walls
Prepping the walls can take a few days if you want the wallpaper to hang right. Fix holes and bumps to smooth out the wall and remove outlet covers and switches—you will want to wallpaper up to the opening so the edges are covered by the outlets.
Prime the wall with a color that matches the wallpaper (have the paint store color match) in case the wall comes through the seams. Then prime the walls with wallpaper primer. Primer helps wallpaper stick to the wall and it makes it easier if you decide to remove the wallpaper.
Step 2: Set up the Work Area
Now it’s time to prepare the space for wallpapering. After prepping the walls, protect floors from wallpaper paste or water by laying down a tarp or plastic sheeting. Then unfold a long, portable, sturdy table near the wall you will work on papering. Place a bucket of water near the table and keep a tall step stool handy for hanging strips.
Step 3: Measure and Mark the Walls
Measure one wall to find the center point. With a long measuring stick or another straight-edge tool, draw a vertical line from the top of the wall to the bottom to create your plumb line (where you will begin to hang the wallpaper). Make additional vertical lines on the walls in both directions, each spaced the same width as a strip of wallpaper.
Step 4: Cut the Wallpaper Strips
Use scissors to cut strips to match the rectangles you made along the wall. For each strip, measure the height of the wall and add two inches to both the top and bottom of the piece you cut and mark the line on the paper (you can see here when a super-precise pattern can cause a lot of waste). As you cut the strips, make sure any patterns will match up at the seams.
Step 5: Book the Wallpaper
For prepasted wallpaper:
- Put the paper flat on the table with the back of the strip facing you.
- Dip the paint roller in the bucket of water and roll it all over the back of the wallpaper strip. Make sure every part of the wallpaper is covered in water to activate the paste on the wallpaper.
- Activate the paste by booking the wallpaper: Loosely fold up one half of the wallpaper to the center so it rests backing to backing, then loosely fold up the other half to do the same. Do not crease the paper while booking.
- Let the strip of paper sit booked like this for two to five minutes (per the recommendations on your wallpaper) while the paste activates. You have about 15 minutes total time to hang a strip of paper before the glue starts to dry.
For non-prepasted wallpaper:
If you’re hanging paper that is not prepasted and you need to brush on wallpaper paste, do not be stingy with the amount of paste you brush on, or else the wallpaper will not stay stuck on the wall. Give a thick and generous amount of paste in the corners, seams, top, and bottom of each strip.
Step 6: Hang Strip and Match Seams
Take the strip and get on your step ladder. Unfold the top of the strip and hold that end of the strip up to the top of your wall, aligning one edge with the plumb line. Affix the strip to the wall, making sure to tightly butt edges.
With the wallpaper brush and plastic edger, begin smoothing the strip into place. Unfold the bottom fold of the strip, align, and smooth it out. Take a few minutes to completely align and smooth the strip, pressing out air bubbles. Let the top and bottom excess stay hanging at this point. Use the wallpaper seam roller to smooth edges and then use a wet sponge to remove excess paste that has seeped out from behind the strip.
Removing Air Bubbles
Step 7: Trim the Wallpaper Strip
Once the strip is hung, then you can trim the piece. Some people wait until the entire wall is wallpapered before doing this, it’s up to you, but here is how to do it:
- Take the edger (or putty knife) in one hand and your utility knife in the other.
- Press the wallpaper up with the edger and cut the excess off at the top of the strip with the knife.
- Do the same for the bottom of the strip.
Step 8: Continue Hanging Strips and Meet Seams
Repeat Steps 5-7 for each strip of wallpaper, meeting seams edge to edge and matching patterns if necessary without overlapping the strips of wallpaper.
Step 9: Tackle Inside Corners
If you are wallpapering adjacent walls, never overwrap wallpaper to fit inside corners. It won’t look very neat and will likely start to sag over time. Instead, cut strips to fit into the corners, but with the slightest overhang of excess paper. Here’s what to do:
- Measure the inside corner and trim a dry strip to fit the space but add ⅛ of an inch to the width of the strip.
- Hang the paper so the ⅛ inch turns the corner onto the adjacent wall.
- Handle the adjacent wall as you would other walls—by starting in the middle of the wall.
- Leave the corner bare until you have to cover it.
- When the time comes to finish the adjacent corner, measure and cut a strip for the adjoining wall that will tightly butt up to that overlapped seam.
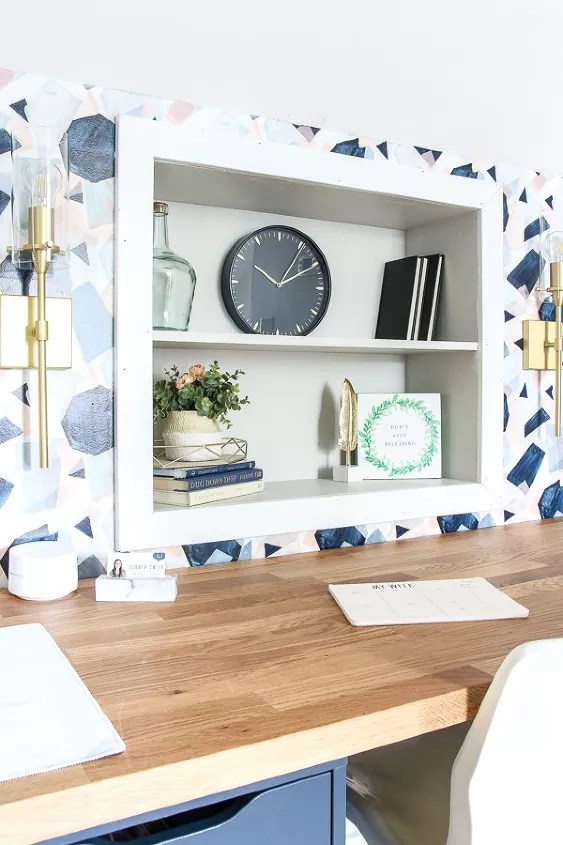
Photo via Carmen Smith
How to Tackle Tricky Wallpaper Situations
Not every room (in fact, almost no room in a house) is a perfect box. Here’s how to wallpaper around a few common hurdles in a room.
How to Wallpaper Around Outlets
If you have a strip that will be placed over an outlet, protect the outlet by covering it up with a piece of regular paper or plastic. Cover the outlets (whose faceplates you took off in Step 1 above) with the paper strip and then trim the excess away with a small pair of scissors. Do this as soon as you hang the piece so the paste doesn’t drip inside the outlet. Once you replace the outlet cover, the raw edges will be hidden.
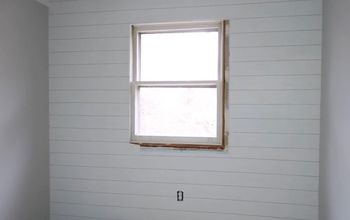
How to Wallpaper Around Windows
Let the wallpaper strip overhang over the window frame and then trim just like you do at the ceiling and baseboard using a knife and straightedge. Use small scissors to cut diagonal snips where you need to carefully trim and tuck under the wallpaper, such as around the window apron and ledge.
How to Wallpaper Around Outside Corners
Handle outside corners the same way you would an inside corner…with a small bit of overlap of about ⅛ inch to ¼ inch.
Have you learned a few tricks and lessons from a wallpaper job you tackled? Let us know what you can share with the Hometalk community to make the process easier. (Yes, we know, use peel-and-stick!)


Frequently asked questions
Have a question about this project?