


How to Fix Squeaky Floors 3 Different Ways

By Brooke Ressell
Have you ever tried to tiptoe past a baby’s room after you finally got them to sleep? Or maybe you tried to sneak into the kitchen for a late-night snack without anyone else finding out. Whatever the case may be, it becomes nearly impossible to walk quietly around the house when floor squeaks and creaks are just waiting to happen at any given moment.
Whether your house is older than you or it’s basically brand new, squeaky floors often come with the territory of being a homeowner. And they can make a quick trip across the room a very loud announcement for whatever it is that you’re doing—and disturbing your family members in the process.
Fortunately though, deciding to fix creaky floors once and for all doesn’t have to mean calling a professional and paying off a large bill. We’ll show you how to fix squeaky floors on your own in the quickest and easiest ways possible, so you’ll never have to shuffle around the creaky spots on your floor again.
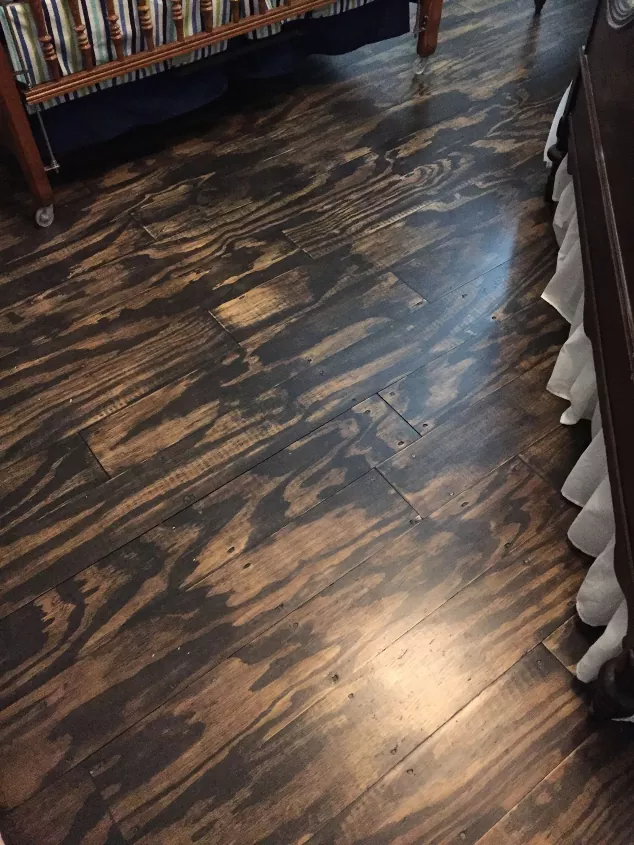
Photo via SHARI B
Why Your Floors Are Squeaky
There are many contributing factors when it comes to squeaky floors. You can find squeaky spots on hardwood, vinyl flooring, and laminate. You can even hear creaks as you walk across carpeted floors as well.
Before trying to fix a squeaky floor, you want to find out exactly why your floors are squeaky in the first place. Here are three reasons that your floors may squeak as you walk over them:
- You may have issues with your subfloors. From not being level to pulling away from or sliding over the top of their joists, your subfloors may need to be screwed down tighter so that they stay firmly in place. This could also be a result of improper installation; if your subfloor was never attached securely to the joists underneath it, the subfloors will loosen over time and start to make creaking sounds as you walk on them.
- You may have issues with temperature and humidity. Throughout the year, temperature and humidity changes can cause your wood floors to contract and expand, which can eventually make them rub against each other or pull loose from the subfloor.
- You may have issues with settling. All homes settle over time, and this settling could cause your floor to rub together or start to pull loose from the subfloor and joist below.
How to Fix Squeaky Floors from Above
When you don’t have access to a crawl space or basement, it may seem impossible to stop squeaky floors on your own. Luckily, you can learn how to reduce squeaky floors from above with these simple steps.
Tools and Materials
- Stud finder
- Masking tape
- Drill and drill bits
- Hammer
- Slim finishing nails
- Wood putty
- Tape measure
- Sanding block
- Wood repair crayon or stain marker to match floor color
- Measuring tape
Step 1: Locate the Squeak
Walk around the room and locate the squeak that you would like to repair.
Step 2: Locate the Floor Joist
Use your stud finder along the floor to locate the floor joist closest to the squeaky spot.
Step 3: Mark the Floor Joist
Mark where the floor joist is with a piece of tape.
Step 4: Drill Pilot Holes
Drill a pilot hole through the joint in the floor at a 45-degree angle. Then, drill a second pilot hole through the floor joint at a 45-degree angle in the opposite direction. For other drill bit uses, read this helpful article.
Step 5: Tap Nails In
Take your hammer and tap one slim finishing nail into each of the pilot holes. Countersink the nails, or hammer them below the surface of the wood or laminate, so that they’re less visible and they don’t have sharp edges sticking up above the floor.
Nail Sizes
Step 6: Fill the Hole
Next, fill the hole with wood putty and let it dry thoroughly. The length of dry time will vary based on the product you’re using, so follow the instructions provided by the manufacturer. Read our advice for filling holes with wood putty here.
Step 7: Lightly Sand
Once the wood putty dries, lightly sand over the top of each hole with a sanding block. Rub gently and be careful not to scratch the flooring or remove the wood stain or finish.
Step 8: Touch Up the Wood Stain
Use a wood repair crayon or stain marker to touch up the area you’ve sanded. Just make sure the crayon or marker is a close match to the original floor color. Check out our tips for touching up stained floors here.
Step 9: Repeat As Necessary
Depending on the size of your squeak, you may need to repeat Steps 4-7 on floor joists on either side of the floor joist you’re currently working on or down the length of the first floor joist you marked.
In many homes, the floor joists will be located exactly 16 inches apart. So you can use a tape measure to locate each floor joist rather quickly but still use a stud finder to confirm.

Photo via Shutterstock
How to Fix Squeaky Floors from Below
Learning how to repair squeaky floors from below—typically from the crawl space or basement of your home—is an even easier process than fixing it from above. It’s also the only solution you have if you happen to be working with vinyl or tile floors. Here’s how to fix squeaky floors from below.
Tools and Materials
- Drill and drill bits
- Wood screws
Step 1: Locate the Squeak
Fixing squeaky floors from below is a two-person job. One person should be walking around on the floor above to indicate where the squeaky spot is while the second person should be listening carefully in the crawl space or basement below.
Step 2: Drill Pilot Holes
Once the source of the squeak is located, drill pilot holes up through the joist and subfloor and into the bottom side of the floor above.
Step 3: Drive Screws
Before starting this step, you want to have a pretty accurate estimate of how thick the joist, subfloor, and flooring are all together, and buy the right size wood screws accordingly. Calculating this incorrectly could result in you driving the wood screw too far up and out through the top of your finished floor and damaging it in the process. Estimating the thickness from above can be tricky, so if possible, pull the flooring up in a corner somewhere to measure it or try to access the flooring from below in a basement or crawlspace if you have one.
Drive short wood screws through the pilot holes to secure the floor tightly onto the subfloor and floor joist.
Step 4: Repeat As Necessary
Check to see if the squeak is still there. Depending on the size of your squeak, you may need to repeat Steps 2 and 3 on either side of the floor joist you’re currently working on or down the length of the first floor joist you screwed into.
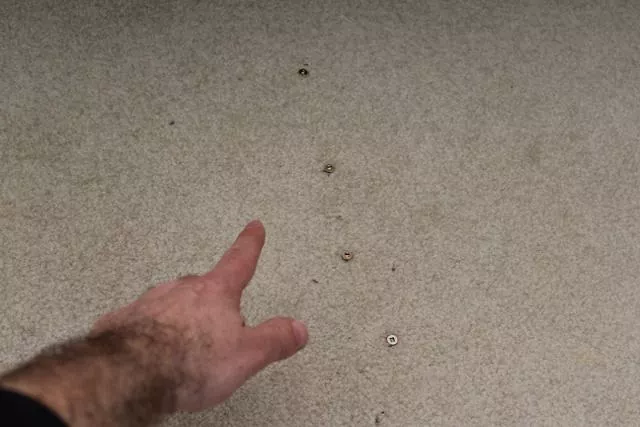
Photo via Home Repair Tutor
How to Fix Squeaky Floors Under Carpet
How do you fix squeaky floors under carpet? It’s simple! And you don’t even have to wait until you’re ready to pull all the carpet out and replace it again.
Tools and Materials
- Hammer
- Stud finder with deep scanning (optional)
- Masking tape
- Drill and drill bits
- Tape measure
- 3-inch wood screws
- Channel-lock pliers or side cutters (optional)
Step 1: Locate the Squeak
Walk around the room until you find the squeaky spot that you want to fix.
Step 2: Locate the Floor Joists
Get down on your knees and use a hammer to tap around the carpeted floor until you find a floor joist. A dull thud means that you’re tapping directly above a floor joist, while a hollow sound means that it’s empty space below. You can also use a stud finder with a deep scanning option to locate floor joists beneath your carpet as well.
Step 3: Mark the Floor Joist
Once you find the first floor joist under the carpet and close to the source of the squeak, mark it with a piece of tape.
Step 4: Find Additional Floor Joists
Next, measure 16 inches from the tape to find the next floor joist over. If the floor joists in your home are not exactly 16 inches apart, you can continue to find them with your hammer and/or stud finder.
Step 5: Mark Down the Length of the Floor Joists
Depending on how large the source of the squeak is, you may need to mark one or more floor joists with tape on either side of and down the length of the first marked floor joist. In other words, small squeaks may be fixed with one or two screws while larger squeaks may need more.
Step 6: Screw Into the Floor Joists
Once the floor joists are marked with tape, drill a three-inch screw into the carpet, through the padding and subfloor, and into the floor joist below.
Step 7: Countersink or Snip
You may either countersink the screw into the joist or stop drilling when the top of the screw is level with the top of the carpet then use channel lock pliers or side cutters to snip the screw head off.
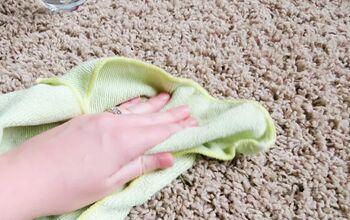
Step 8: Brush the Pile
Once the screw is countersunk into the floor joist or the screw head is snipped off, you will no longer see the screw beneath the carpet. However, you may want to brush the carpet pile lightly with your hand to cover up the spot where you drilled.
Step 9: Repeat As Necessary
Depending on the size of your squeak, you will need to repeat Steps 6-8 as necessary at each spot along the floor joist that you previously marked with tape.
Floor Repair Kits
Have you been successful in fixing squeaky floors? Tell us about it in the comments below!


Frequently asked questions
Have a question about this project?