


How to Remove Tile Backsplash and Replace Drywall If Needed

By Judy Schumer
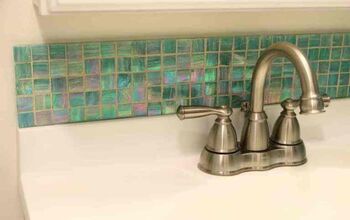
Your kitchen is one of the most-used rooms in the house, so you should love being in it. Your kitchen can also set the tone for decorating your whole house, and the backsplash can help define the look you want. Whether your backsplash style is clean and modern or colorful and eclectic, all use different materials to pull the design together.
Because tastes change, there might come a time when you want to remove the tile backsplash in your space to make way for new tile or paint. Changing out the backsplash can give your entire kitchen a new look, but to change it, you’ll need to learn how to remove tile backsplash. There are multiple ways to get the job done, but we want to help you do it the easiest way possible.
There are two ways to remove tile backsplash, and which way you tackle all comes down to the material with which your backsplash was installed. We'll cover everything you need to know in this guide and walk you through the process of removing backsplash step-by-step.
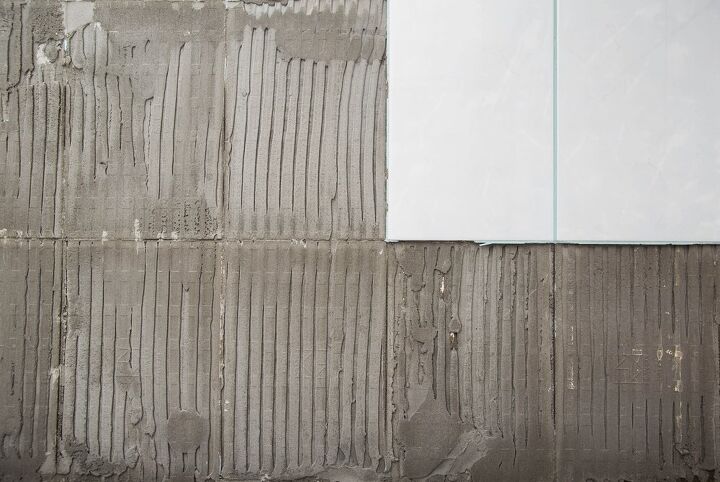
Photo via Shutterstock
Tile Backsplash Removal Safety
No matter what type of tile you have to remove, be sure to wear safety gear. Safety goggles and heavy work gloves are a must because tile can break into shards that can cause serious injury to unprotected hands and eyes. A construction face mask will keep you from breathing in adhesive dust, which can cause severe damage to your lungs.
How to Assess Tile Before Removing
Besides safety preparation before removing your tile backsplash, you’ll need to find out what was used to adhere the backsplash tile. The material behind your tile will help determine which method you use to remove it.
Almost all tile is applied with thinset adhesive or mastic adhesive. Other installation types (like liquid nails) will require drywall removal, covered later in this tutorial. To determine which type of adhesive you have, you’ll need to remove a tile or two using the technique below in the section “How to Remove Tile Backsplash.” Here are the properties of each type of adhesive and how to take it off drywall:
- If there is a thin, almost crackly coating underneath, your tile is adhered with thinset adhesive. In this case, use a heavy-duty putty knife to scrape the adhesive off the wall.
- If there is a rubbery, semi-soft adhesive underneath, you’re working with mastic adhesive. You’ll need to use medium grit (between 100 and 120) sandpaper to remove the adhesive from the drywall.
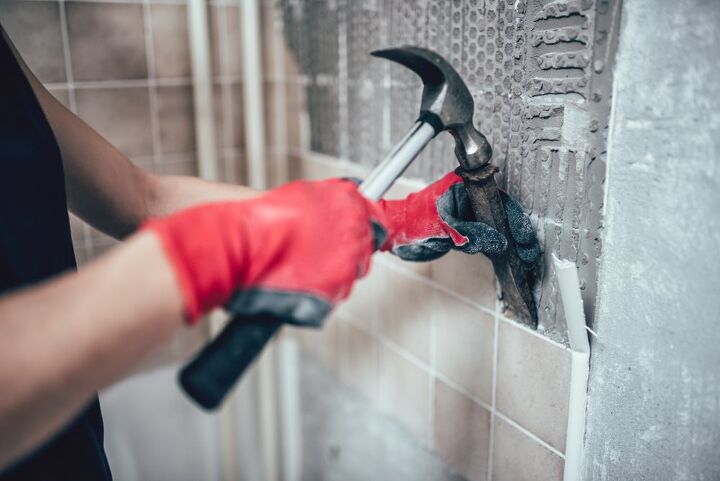
Photo via Shutterstock
How to Remove Tile Backsplash
When removing a tile backsplash, take your time. This is the part of the job that requires patience. By working slowly and carefully, you'll save hours of time because you won’t have to fix or replace heavily damaged drywall caused by a rushed tile removal.
Before starting, gather all your tools so you can easily move from step to step without searching for a needed tool.
Tools and Materials Needed:
- Safety goggles
- Heavy work gloves
- Construction face mask
- Drop cloths
- Screwdriver
- Hammer
- 9-in-1 tool
- Putty knife
- Utility knife
- Sanding block
- Medium grit sandpaper (100-120 grit)
- 6-inch drywall knife
- Drywall joint compound (if needed)
- Paint and supplies (if needed)
Step 1: Put On Safety Gear
Put your goggles, work gloves, and construction face mask on to protect yourself during the tile removal.
Step 2: Clear and Protect the Sink and Counters
Clear everything from your counters. Use the drop cloths to cover the entire surface of your counters and your sink. Chunks and shards of tile will fall as you remove it, which can destroy your garbage disposal if they fall into it.
Step 3: Turn Off Electricity
You’ll be working around exposed outlets, so be sure to turn off all electricity to the areas where the backsplash is being removed.
Step 4: Remove Outlet and Light Switch Covers
Unscrew and remove all outlet covers and light switch faceplates to completely remove any tile underneath.
Step 5: Remove the Grout
Use the sharp edge of the 9-in-1 tool to break up the grout to make the tile removal easier. Use the hammer to lightly tap the tool as you move it along each grout line. You can use the putty knife for hard-to-reach areas. Take your time and go over the grout lines as needed; the goal is to remove as much of the grout as possible.
Step 6: Remove the Tiles
Beginning at the top end of your backsplash, work in small sections to remove the tiles. Place the sharp edge of your 9-in-1 tool under the edge of the tile and gently tap with your hammer to pry the tile off. Work from the top of the section down to the bottom, then begin the next column of tiles.
Step 7: Smooth the Residual Adhesive
Once your tiles are removed, you’ll be left with either thinset or mastic adhesive on the drywall. If you have thinset, remove it by scraping it away with the putty knife. I’d you have mastic adhesive residue, remove it by attaching your sandpaper to the sanding block and sand the adhesive until it’s smooth.
Step 8: Repair Drywall Nicks or Gouges
Even if you’re super careful when removing a tile backsplash, you’ll probably end up with a few nicks or gouges. Use your drywall knife and joint compound to repair the drywall. Let dry, sand down the spot that you repaired, and prime and paint as needed.

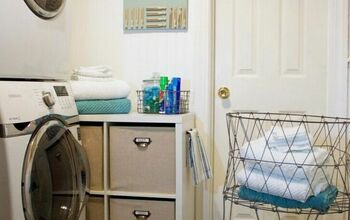
Photo via Ashley@Biggerthanthethreeofus
How to Remove Tile and Drywall
There are times when tile refuses to come off easily. If it was installed using a heavy amount of adhesive or the wrong type of adhesive (like liquid nails or mortar), you won’t be able to remove it using a hammer and 9-in-1 tool.
Unfortunately, you’ll need to completely remove the drywall that the tile is attached to get rid of the tile itself. To remove the drywall and the tile backsplash attached to it, follow the steps below.
Tools and Materials Needed:
- Safety goggles
- Heavy work gloves
- Construction face mask
- Drop cloths
- Screwdriver
- Stud finder
- Painter’s tape
- Dremel tool
- Piece of drywall
- Pencil
- Sanding block and 150-grit sandpaper
- Tack cloth or paper towel
- Two short pieces of 1x4s (wood)
- Drywall knife or serrated knife
- Utility knife
- Drywall screws (at least 12 and 1 ¼ in size)
- Drill
- Construction adhesive/joint compound
- Putty knife
- Drywall joint tape
- Paint and supplies
Step 1: Put On Safety Gear
Put your goggles, work gloves, and construction face mask on to protect yourself during the tile removal.
Step 2: Clear and Protect the Sink and Counters
Clear everything from your counters. Use the drop cloths to cover the entire surface of your counters and your sink. Chunks of tile will fall as you remove it, which can destroy your garbage disposal if they fall in.
Step 3: Turn Off Electricity
You’ll be working around exposed outlets, so be sure to turn off all electricity to the areas where the backsplash is being removed.
Step 4: Remove Outlet and Light Switch Covers
Unscrew and remove all outlet covers and light switch faceplates to completely remove any tile underneath.
Step 5: Remove the Grout
Use the sharp edge of the 9-in-1 tool to break up the grout to make the tile removal easier. Use the hammer to lightly tap the tool as you move it along each line. You can use the putty knife for hard-to-reach areas. Take your time and go over the grout lines as needed. The goal is to remove as much of the grout as possible.
Step 6: Mark Studs
Use a stud finder along the wall and mark off studs with tape. You won’t be touching these, and it might be helpful to know where they are so you avoid cutting into them.
Step 7: Cut Away Drywall
Because you removed the grout, you’ll have an easier time cutting through sections of drywall.
Working in sections, use the Dremel tool to cut through the drywall around the tiles. Cut between the grout lines, starting with the bottom row of tile. Work from the bottom (near the counter) to the top (near the bottom of the cabinets). Stop after every three to four feet and go to Step 8.
Step 8: Pull Away the Drywall
Once you have cut through the drywall holding the entire backsplash, start in a corner area and begin pulling the drywall out. The drywall will pull away with the tile attached, leaving bare framing in its place.
Repeat Steps 7 and 8 until the tile backsplash has been completely removed.
Step 9: Sand the Edges
Using a sanding block with 150 grit paper, smooth out the edges where your drywall was cut. Wipe away dust with a tack cloth or a paper towel.
Step 10: Install Wood Backing
If you’re working on an empty section where there is no stud, you will need to give the drywall scrap you’re about to install something solid to attach to, such as wood.
Place one piece of wood behind the square opening on the left side and use drywall screws, at least three on each side, to attach the wood to the edge of the drywall. Make sure the hole overlaps the wood by about 1 ¼ to 1 ½ inches. Apply the second piece of wood to the right side of the opening the same way.
Step 11: Apply Adhesive
When the wood is in place, use a putty knife to apply construction adhesive to the face of each piece of wood. If you’re working on a section that has a stud, apply the adhesive to the face of the stud.
Step 12: Secure the Patch
Put the clean patch of drywall up to the gap so it fits into the space. Press it in so it makes contact with the adhesive on the wood. Then use drywall screws, at least three on each side, and your drill to attach the patch to the wood.
Step 13: Spread More Adhesive
Use a putty knife to spread a generous amount of compound around the edges of the drywall patch. Feather it as you apply it around the edges so it blends into the wall’s surface.
Step 14: Apply Tape
Apply drywall tape to the compound around the edges of the patch and cut the tape with a utility knife. The compound will hide the tape and smooth out the patch. Let the compound dry completely.
Step 15: Sand and Paint
Sand the compound with the sandpaper block once the compound is dry. If necessary, add more thin coats of compound and repeat steps until the patch is smooth.
Lightly sand the final coat of dry compound and clean up shavings with a tack cloth. Then prime and paint the wall.
Have you replaced your backsplash? Share what you’ve done in the comments below!


Frequently asked questions
Have a question about this project?