Carving a Workshop Stool With an Angle Grinder

by
Average Joe's Joinery
(IC: blogger)
4 Materials
$100
10 Hours
Advanced
This project consists of taking an existing cast iron stool base and giving it a unique look with a custom made carved wooden seat. I use an angle grinder to carve the seat and a router to add the personalised logo on the back. I hope you like it.
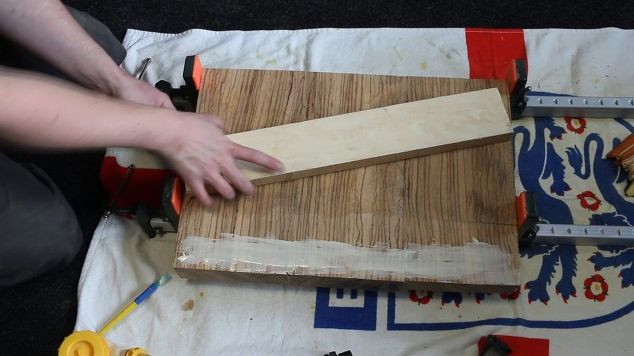
I glued up 3 pieces of 50mm thick Zebrano to make a black that was roughly 45cm x 35cm x 5cm.
I then added a strip of maple to the back which will later become a lower back support and also receive a carved logo, The maple was roughly 45cm x 6cm x 2.5cm.
I added some layout lines to the blank to give me a guide to cut and carve to. I don't think its an exact science. I just drew some curves that looked pleasing to the eye. I tried to maximise the size of the seat itself though so stayed close to the edges of the blank.
I then used my band saw to cut out the shape of the seat. The 2 sides got straight edge and curve to meet the back. The front got two scoops cut out to make it more comfortable on your thighs.
I used a stop on my drill to create holes to the depth I wanted to carve down to. When I start carving I know that as soon as the holes disappear then I'm at the correct depth. This technique is very simple but also very effective.
To carve the seat I used an angle grinder with a Saburr Tooth Carving Wheel attached. This wheel acts a lot like a rasp. The coarse wheel makes quick work of removing bulk material. The wheel also has holes in so you can see your guide lines through the wheel while its spinning. That's a great feature!
Best advice I can give is to take it slow. As with a lot of techniques the slower you go the more control you have. I prefer to make shallow, steady swipes with the grinder. You will soon get a feel for how quickly it removes the wood. Its best to establish your edges first so work slowly up to your guide lines before removing the bulk material. This will create a buffer zone so if you were to go a bit too aggressive you will have an area of safety away from your guide lines.
The sweeping motion has its deepest point in the centre of each leg area. This is where holes come in handy. You can keep going and not have to worry about the depth until the holes disappear. At than point its time to start evening everything out.
Both sides get a similar dip in the middle and they both meet at the back. This leaves a crest of a wave in the centre of the seat. I always leave it quit long to help with centring everything. Once you are happy with the rough look of the seat you can start to nibble away at the wave to make it its final size. I left a length of roughly 6cm. Best way to tell if the length is right though is to actually sit on the seat. Give it a test run! If you feel any really high spots or dips now is the time to deal with those. If its feeling and looking good its time to move onto sanding.
After the seat was sanded nice and smooth I moved onto routing the logo design on the back rest.
Using some self adhesive paper I applied the logo to the backrest and then I used a router to carve out the design.
After leaving overnight to fully set I came back and sanded the Milliput flush to reveal the design underneath.
I drilled 4 mouting holes to fit it to the cast iron base and then applied 3 coats of Osmo top oil. This finish is designed for kitchen workstops and workbenches so its ideal for a workshop stool. I really like how it brings out the colour and grain in the Zebrano.
It really makes the black Milliput shine too.
{
"id": "4656819",
"alt": "",
"title": "",
"video_link": "https://www.youtube.com/embed/g_pNVBLpevo",
"youtube_video_id": "g_pNVBLpevo"
}
{
"width": 634,
"height": 357,
"showRelated": true
}
I've made a full build video on my YouTube channel if you would like to check it out.
I really hope you liked this project and give the technique a go for yourself.
Enjoyed the project?
Suggested materials:
- Zebrano Hardwood
- Maple Hardwood
- Milliput Epoxy Putty (http://amzn.to/2uwBk93)
- Osmo Top Oil (http://amzn.to/2uATAfy)

Want more details about this and other DIY projects? Check out my blog post!
Published February 7th, 2018 4:22 AM






Frequently asked questions
Have a question about this project?