


Painting Fabric on Chairs, Roadside Chair Makeover
I tried my hand at painting fabric when I gave these roadside chairs a makeover recently. Luckily, it went well! I am excited to tell you all about it!
Out on a walk, we found a set of wood chairs with worn upholstered seats sitting out by the curb with a big FREE sign. I have been hoping to learn how to paint upholstered furniture, and these were the perfect first project since it was just the fabric seat to paint! Jason picked them up in the truck, and I set to work giving them a makeover. They had some stains and imperfections, so I didn’t have anything to lose in painting them! Worst case, they would also be a great first upholstery project! 😉
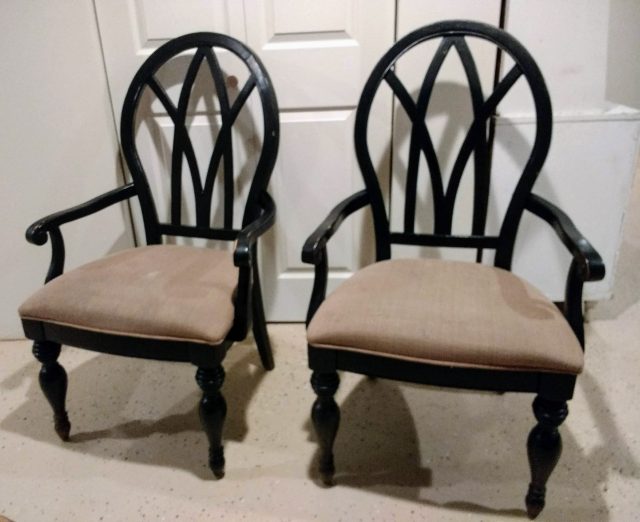
First, I gave them both a thorough cleaning. I wiped down the wood with all purpose cleaner, and scrubbed the seats with upholstery cleaner. They look pretty nice here, but I can assure you they look way better in this photo than in real life!
I did some research on painting over upholstery, and in the interest of keeping this project low budget and simple, I opted to paint the fabric part of the chairs with a mixture of fabric medium, latex paint, and water.
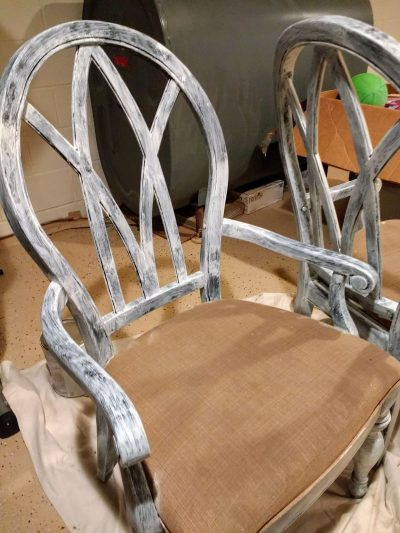
I started with the wood portion of the chairs before moving on to the fabric seats. First, I applied a coat of Kilz primer.
After the primer coat dried completely, I followed up with two coats of the latex sample paint.
One thing I learned is I should try really hard in the future NOT to get paint on the upholstery! I thought it would just be covered later anyway so it wouldn’t matter much. However, plain latex paint has a way thicker texture, and it took a couple extra coats than I would have needed otherwise to cover anywhere the paint splattered.
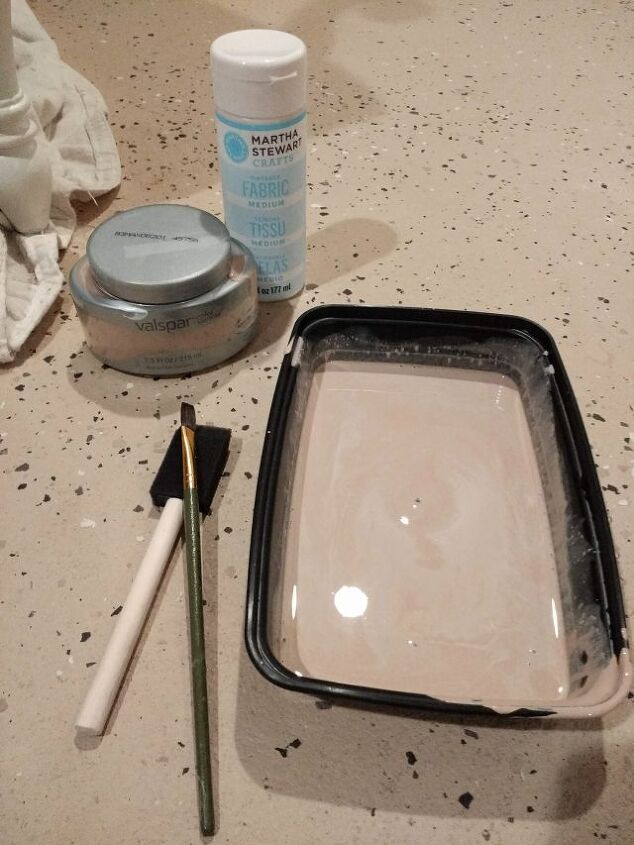
Next, it is time to paint the fabric. I mixed equal parts latex, fabric medium, and water. The mixture is extremely watery, which helps the fabric better absorb the paint. The color I picked was just a few shades different then the original. It is just a bit lighter and less yellow.
Before painting on the first coat, I lightly sanded the fabric to remove any obvious pilling, then wet the fabric of the chair with a spray bottle.
Using a sponge brush, I wiped on the watery paint mixture. I used the small paint brush, or the smallest foam brush to get the edges where the fabric meets the wood.
If the fabric paint accidentally rubbed onto the wood, it is very easy to wipe off since it is so watery.
In between each coat, I sanded the fabric to keep it pliable and remove pilling. I think this step makes a huge difference in the fabric feeling less stiff at the end.
I still had some fabric medium and sample paint left at the end of the project, so for a small project like this, you really don’t need much.
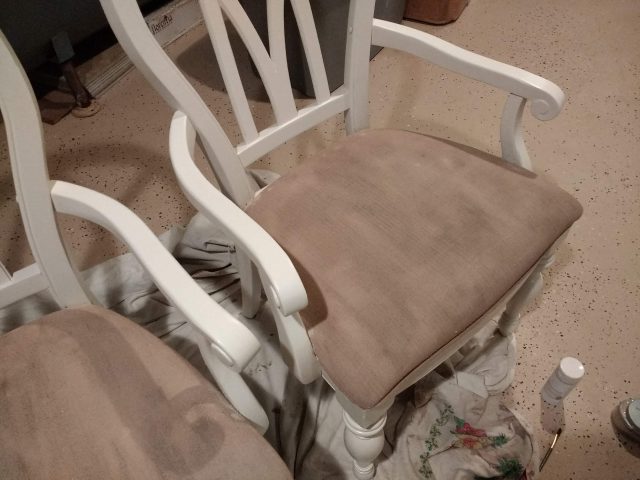
In the end, the fabric feels a bit stiffer, but still feels like a fabric chair! The fabric I started with was pretty stiff anyway, so I am happy with the outcome.
I was able to get a beautiful set of chairs. The best part is it was for well under $20, since I always have a hodge podge collection of latex sample paints on hand.
For even more details and a thorough supply list, please click through to view my original post!
Have you tried painting fabric chairs? I'd love to hear about it! For another fun low budget decor project, check out this thrift store makeover with gel stain!
Resources for this project:
See all materials


Frequently asked questions
Have a question about this project?