


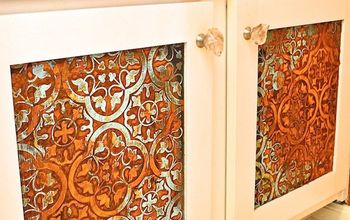
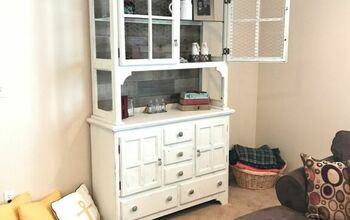
Stenciled Cabinet

This cabinet needed a facelift! We chose a beautiful stencil to modernize and refresh this bathroom staple.
This cabinet had previously been painted and it was time to modernize and refresh this cute piece to use in our master bathroom for some additional storage. We started by cleaning the piece with Krud Kutter and rinsing it.

Then we used our favorite sander - the Surfprep 3 x 4 electric ray with squishy foam pads around the raised and rounded surfaces. If you love what this sander does use my code AMINI10 to save on your purchase and every supply purchase afterwards! We switched to a flat sanding sheet for the flat surface areas after we finished the raised ones.
Then we chose a beautiful black by Amy Howard Home. This one step paint has a built in primer and top coat. It is essentially an all in one.

We used their synthetic brush to apply and ended up doing two coats, lightly sanding in between each one.

Next we used a beautiful silk screen stencil by Amy Howard Home and a dabbing brush by Redesign with Prima. We used an acrylic craft paint for the contrasting white.

Thr beauty of stenciling is that you can use all of the stencil or pieces of it. We used what we could fit onto the surface and it worked out perfectly. A tip for stenciling is to off load most of the paint on your brush on a shop towel or paper plate prior to dabbing it onto the actual surface you are stenciling.

Since the paint includes a top coat all that was left was to reattach the hardware and enjoy!


Frequently asked questions
Have a question about this project?