


DIY Ugly Duckling Hutch Makeover

I just moved. Let me back track a little. I just moved into a house that was not the house I was supposed to move into. Originally, on the day I was to settle on the sale of my home, I was also supposed to settle on the purchase of my neighbor’s house. I had spent the better part of a month measuring, planning, and falling in love with the house. A week before settlement, I had to walk away due to the discovery of excessive mold and plumbing issues! Now I was going to be without a home for an undetermined amount of time. Lo and behold (God is good), the following week I stumbled across my current home and was only displaced for the month it took to get everything settled.
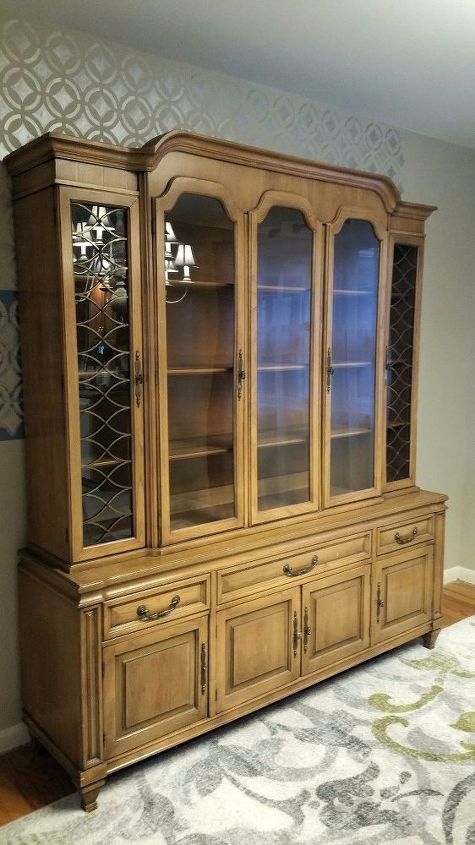
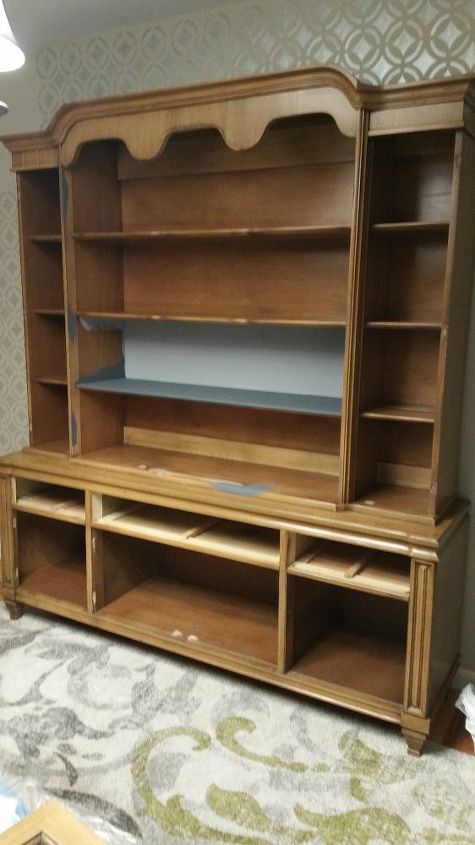
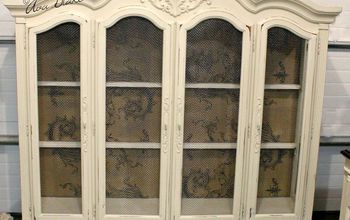
During my measuring, planning, and falling in love phase, I purchased a large hutch from our local thrift store. It was perfect for the neighbor’s dining room! Now, I needed to make if perfect for MY dining room! Thanks to Hometalk and Fusion Mineral Paint, I was able to transform this ugly duckling into the swan it was meant to be…
Tools and Materials
- Plastic drop cloth
- Screwdriver
- Hammer
- Plastic wood
- Sandpaper
- Rag
- Krug Kutter
- Paintbrush
- Fusion Mineral Paint
- Rustoleum in Antique Pewter
- Fusion Mineral Beeswax
Before beginning the project, I laid out a plastic drop cloth and masked around the feet of the hutch. This piece was so large that I just had the movers set it in place and I worked on it there.
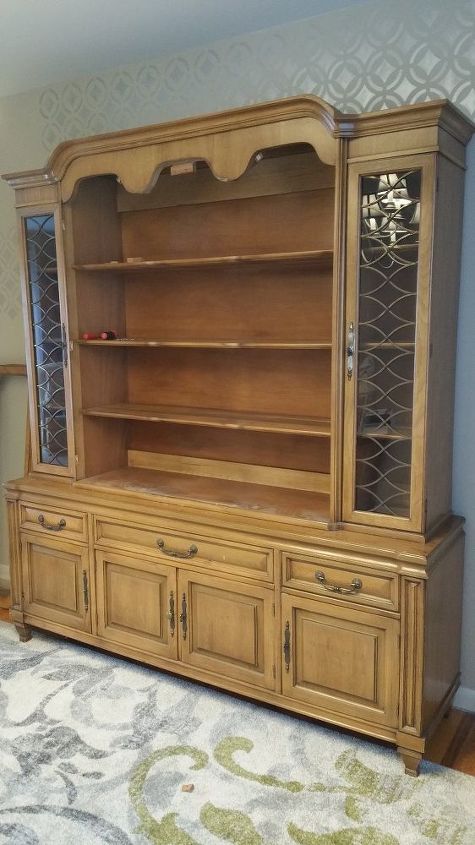
I knew I wanted to give the piece an updated look. After much time spent on Pinterest, I decided to remove the three, center, upper glass panels and the two, center, lower cabinet doors. The screwdriver was able to accomplish most of the work, but there were pieces of blocking that were visible from the front once the panels were removed. For this, I employed a hammer and a lot of patience!
To create a smooth appearance, I needed to fill in all of the holes from the hinges and magnets. For this I applied plastic wood with my finger. Once it dried, I sanded it until it was even with the wood surface.
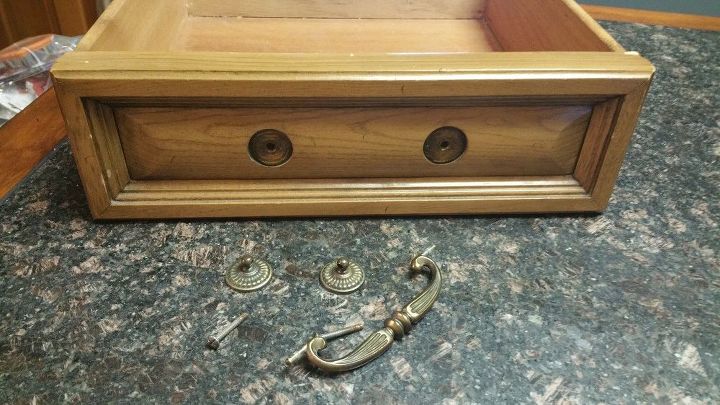
I removed the rest of the doors and hardware. The glass and metalwork was removed from the doors as well. With a rag and my Krud Kutter, I thoroughly cleaned the entire piece (including doors, drawers, and inside the cabinets). Be sure to have the room well ventilated because this stuff reeks! Let the piece dry overnight.
The glass and metalwork was removed from the doors as well.
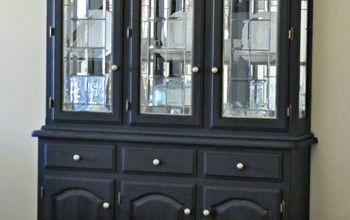
I couldn’t wait to dive in with the paint! Truthfully, I had already experimented with one of the shelves. The paint and finish was given to me through a collaboration between Fusion Mineral Paint and Hometalk. It is only fair that I give an honest assessment of the paint, so here goes…I LOVE IT!!! I am a novice at this. As a matter of fact, this is my FIRST furniture painting makeover. I was intimidated to say the least. Anyway, it was all for naught. The color was beautiful. I used a brush, but once dry you could not detect any brushstrokes. It dries to a beautiful, velvety flat finish.
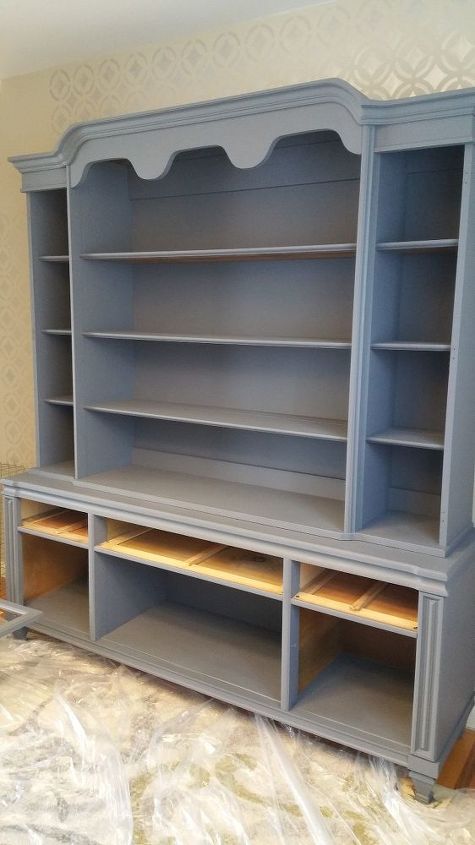
One coat would have been acceptable, but I did not want to go through all of this trouble to find out that I should have done two coats. This hutch took two jars to complete two even coats. Since I have no previous experience with this kind of paint, I’m not sure if that is a lot or not, but frankly, I couldn’t be more satisfied with the results.
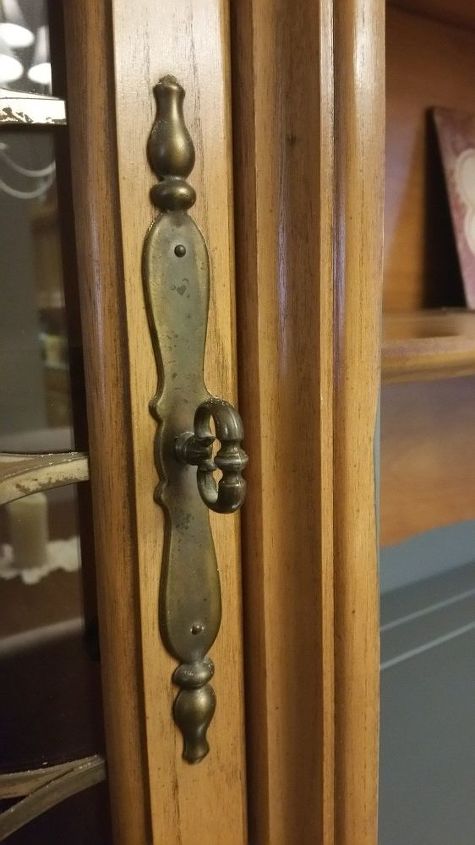
Let’s not forget the hardware and metalwork. I moved into a 1980’s saturated home. We spent two weeks removing wallpaper and carpet (mauve). Most of the metal trims and fixtures were brass or goldtone. My thought was to replace what I could with tones of flat silver (brushed nickel, pewter, etc). The metalwork is what drew my eye to this hutch in the first place, so I had no intention of removing it. Instead, I got out my trusty can of Rustoleum in Antique Pewter and sprayed all of the hardware and metalwork. I had contemplated replacing all of that hardware but once I saw how beautiful it came out, I decided to spend those dollars somewhere else. At this point, I let the metal dry thoroughly.

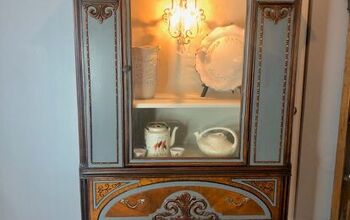
It was time to apply the Fusion Mineral Beeswax finish to the unit and the doors. This wax goes on like melted butter and it smells soooo nice! It gives depth to the paint and also provides a protective coat. I like the feel of the wood better with the finish on than without. I replaced all of the hardware and metalwork and then re-attach the doors! This is the most tedious step, but because I was so close to the finish line, I didn’t mind at all. I went to three Home Goods stores and Hobby Lobby to finally zero in on the right bins for my hutch. I couldn’t decide between metal & wood baskets, cloth baskets, or these galvanized bins. Well, I guess I did finally decide and I really love the way they look. Decorating the shelves is a work in progress...several future projects will pay homage to my family.
Resources for this project:
See all materials


Comments
Join the conversation
-
Love the step by step details! This looks amazing!
-
Great job ! You ‘ve inspired me to work on a hutch I have, too.similar color, Thank you.


Frequently asked questions
Have a question about this project?
This is going to be a LONG SHOT but do you know the manufacturer of this cabinet? I have an older, smaller cabinet that has a similar design on the glass. I'd love to get something similar!
Hi, did u have to do any sanding so the so the paint would adhere to the surface ?
How many jars of paint did it take?