


A DIY Laundry Room Renovation on a $500 Budget!
A laundry room remodel for only $500? Yep, you heard that right!
** GET ALL LINKS AT MY ORIGINAL BLOG POST! **
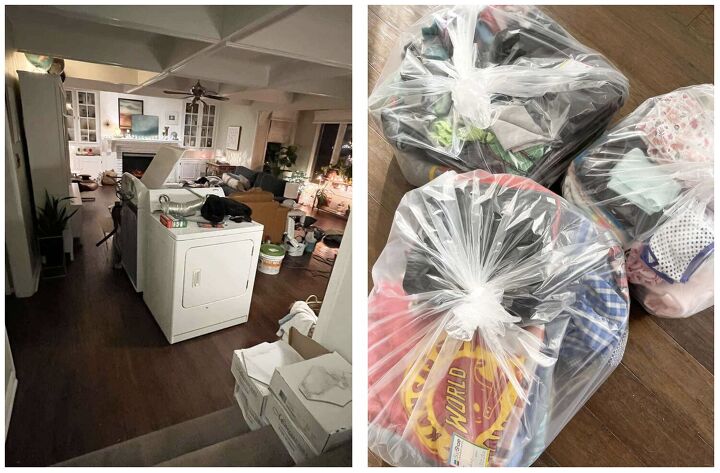
A few years ago we quickly updated our laundry room for a couple hundred bucks, which tided me over for a bit. Here’s a quick before and the in-between after:
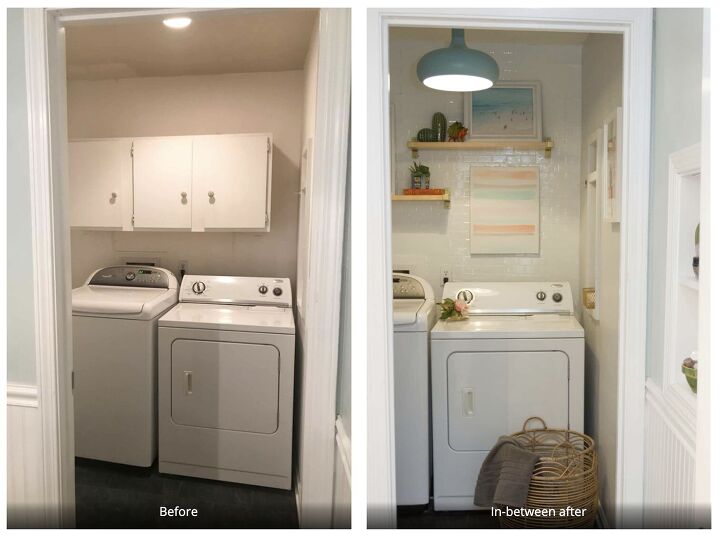
Keep scrolling for the after, after!
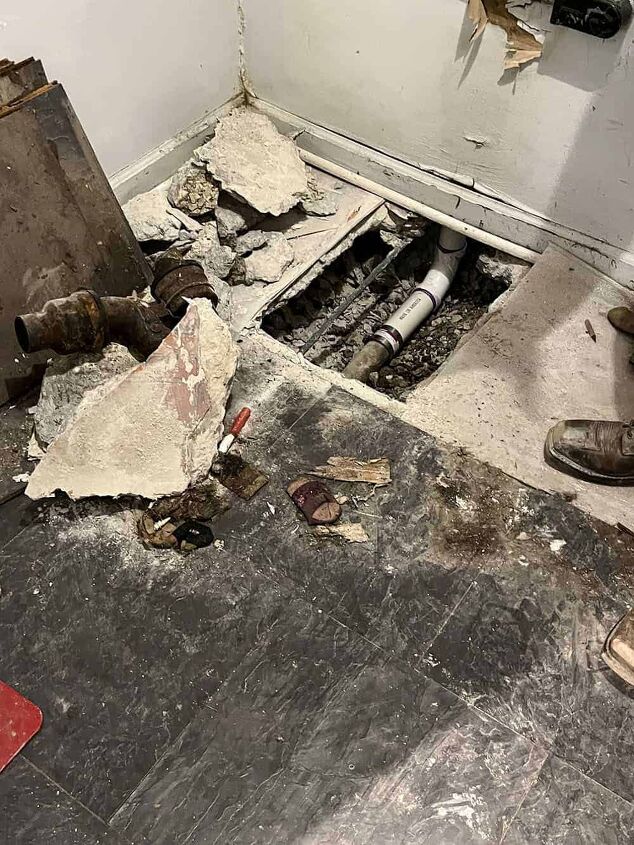
Recently we had a water drain and leak issue that got much worse over time, so we knew we needed to empty the room and fix the problem.
The flooring was removed and the concrete was jack hammered to fix the drain issue. During that project we found moldy sheetrock and a layer of water under the vinyl tiles. We weren’t surprised, but knew a remodel was necessary.
Note: The cost of the plumbing fix is not included in the $500 price tag since most of you will not have to do this step, fingers crossed :)
I immediately started to gut the rest of the room.
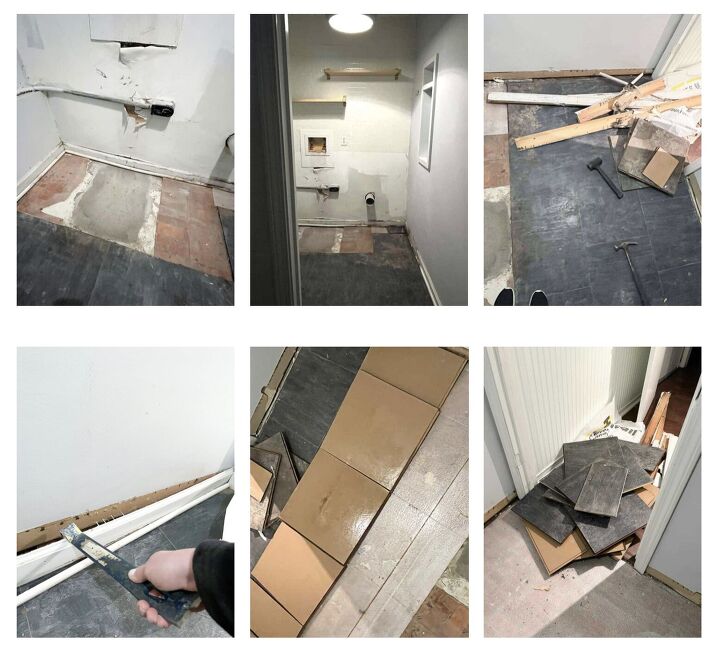
The hardest part was removing the layer of linoleum from the concrete. We had to use numerous tools over the course of a week to get it all removed.
The most helpful tools included a scraper that goes on the tip of the sawzall plus a mallet and pry bar combo.
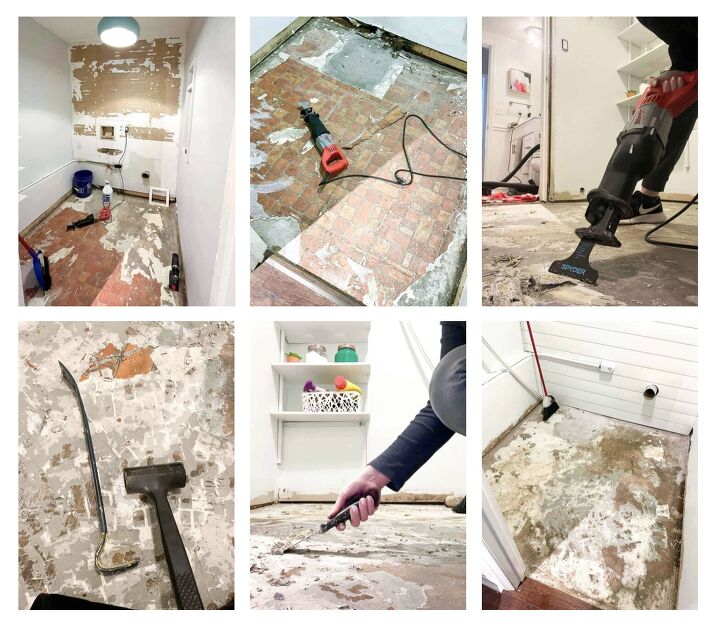
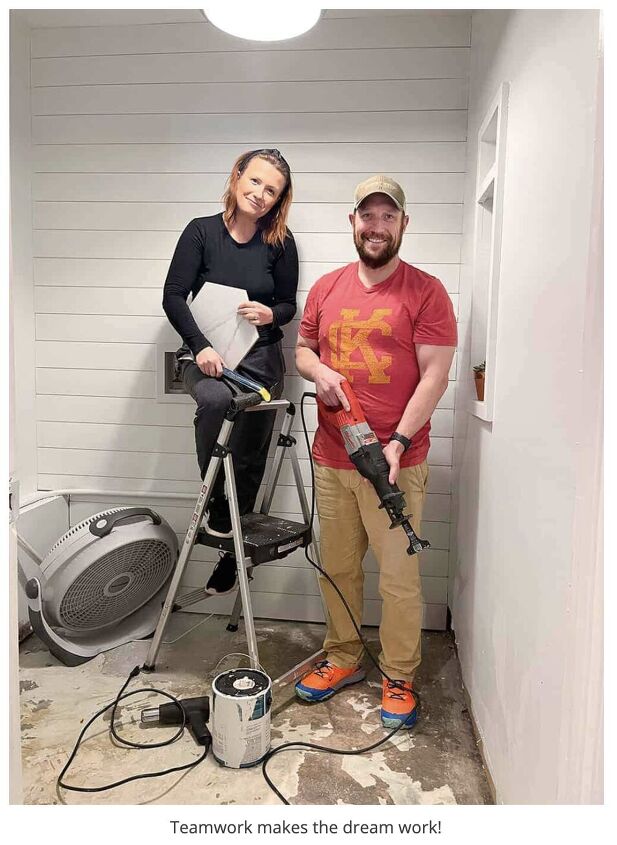
Another hard part was being without our washer and dryer for 3 long weeks. They sat in the middle of our lower living room – Very annoying, ha! We had to send our laundry out to be washed at week two – The best $30 ever spent!
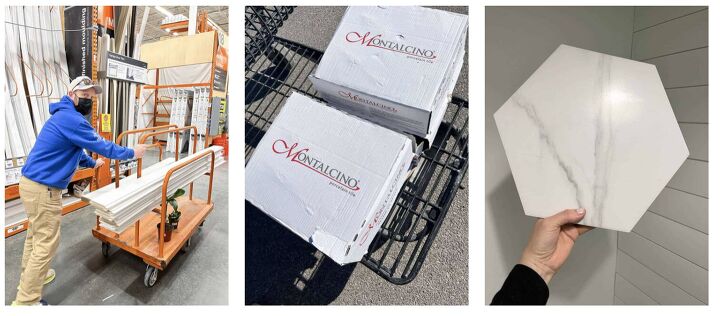
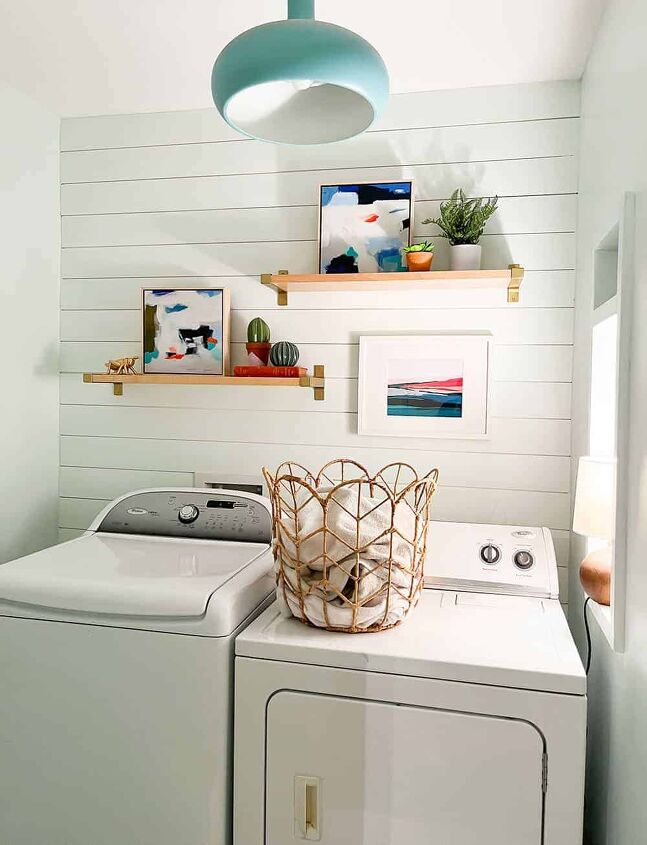
Once the laundry room was gutted, Ted and I went out to purchase new sheetrock sections, floor tile, and nickel gap boards for the back wall.
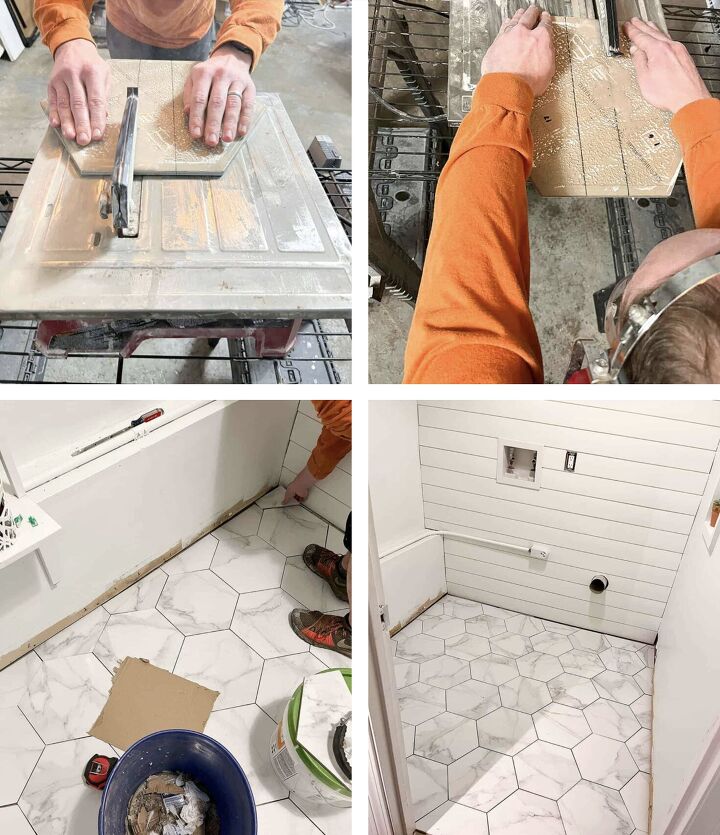
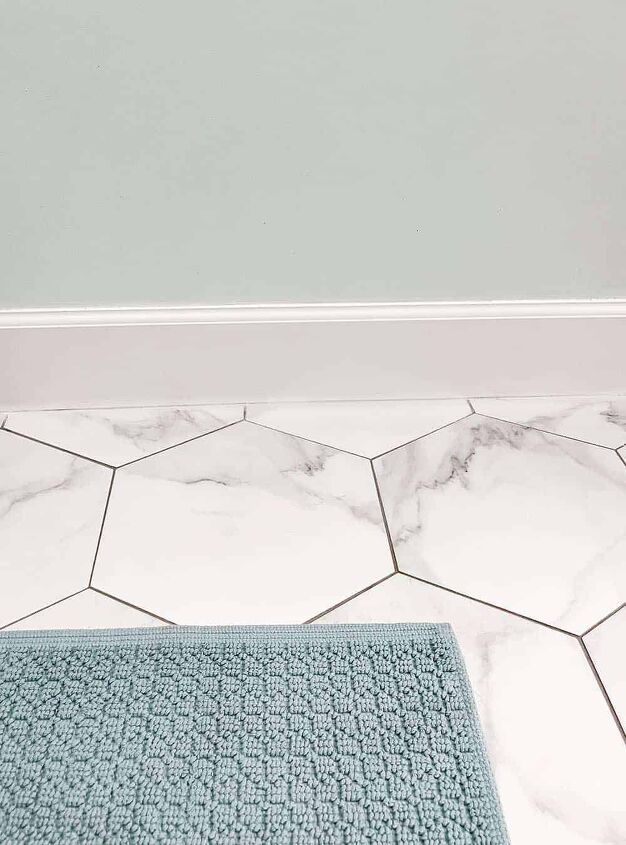
We bought the nickel gap wood (about 20 pieces) at Home Depot and the Montalcino Shiloh Bianco porcelain hexagon floor tile at Floor and Decor.
The wall behind the washer and dryer was originally covered in subway tile stickers, which didn’t hold up very well. I was excited to replace it with a simple nickel gap (shiplap) wall.
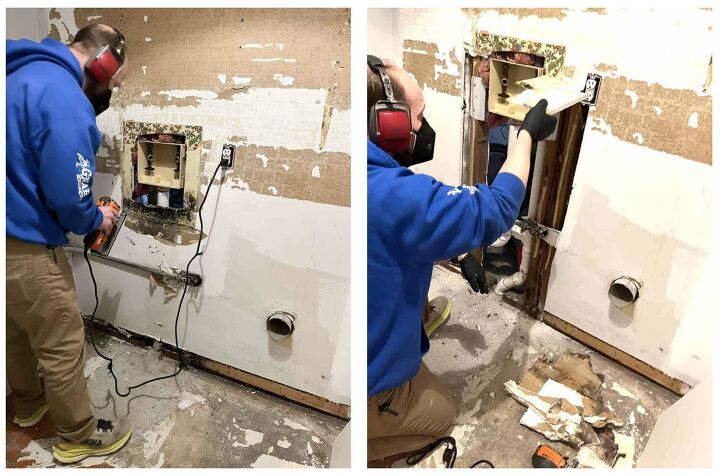
Before we could start on the nickel gap, we had to replace the moldy sections of sheetrock.
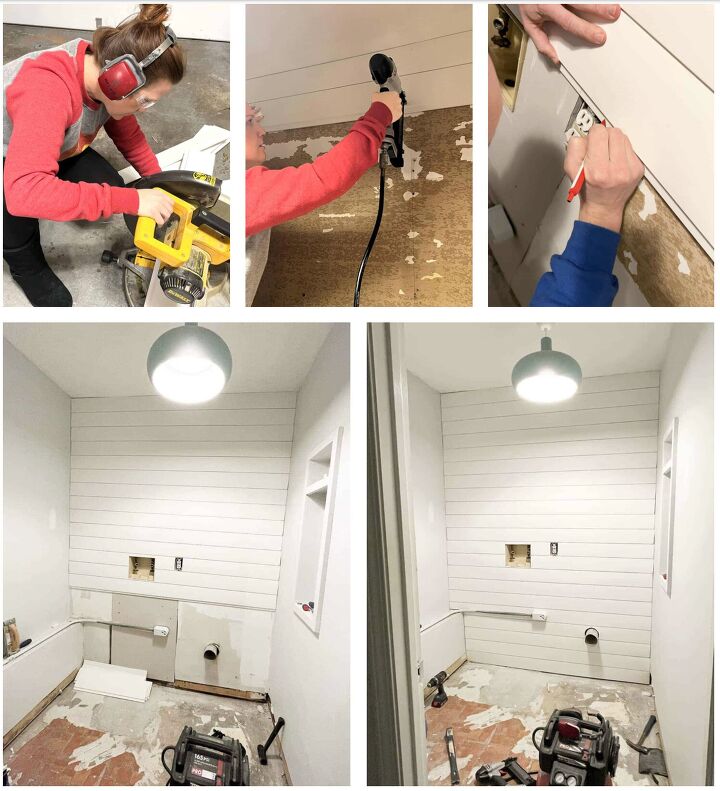
Next up was the nickel gap wall!
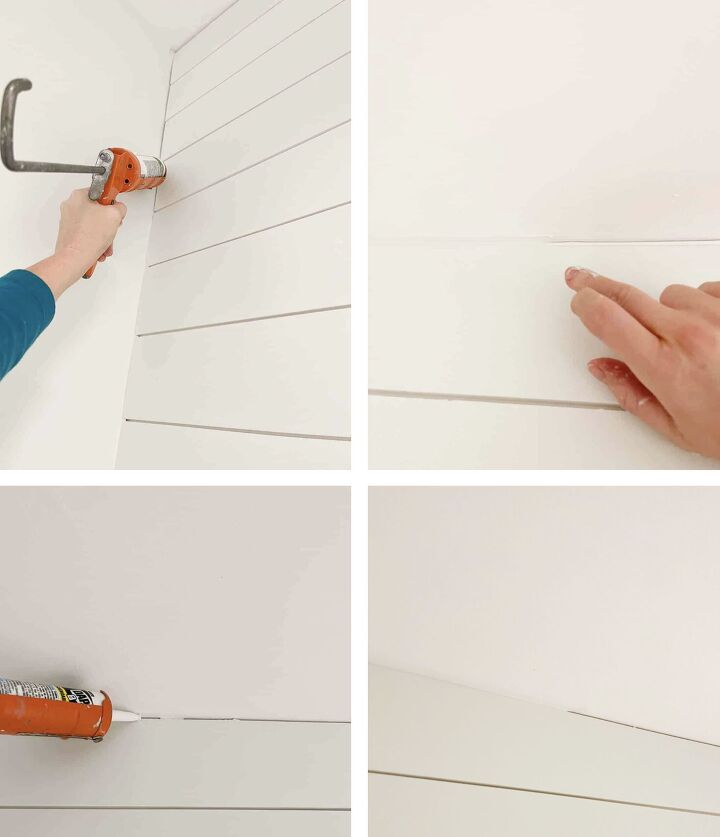
Ted and I measured, cut, and installed each slat with the nail gun. I was so excited to see a fresh, new wall! What a difference!
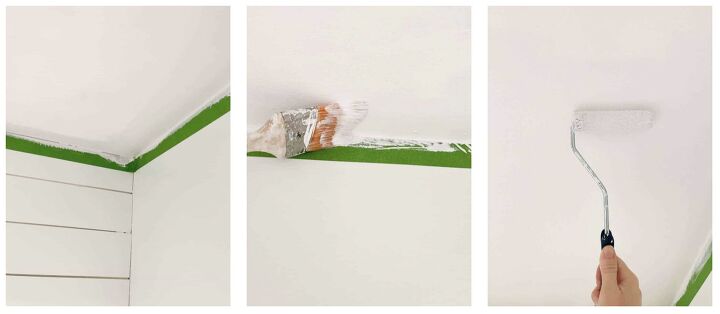
I filled in all the nail holes with wood filler, caulked all the gaps, and then painted the entire room in Silence by Valspar. My Cricut lamp really came in clutch while painting – it puts off such amazing light!
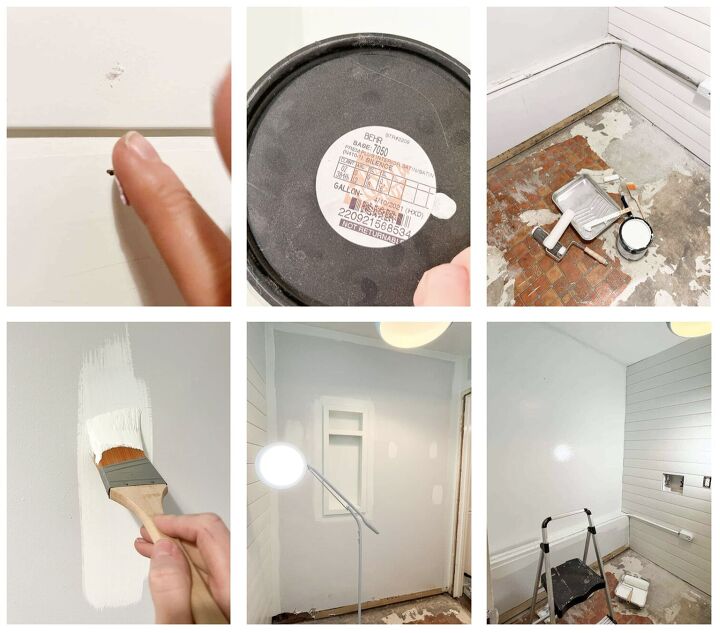
I also painted the ceiling with a fresh coat of ceiling paint. I love that it goes on purple and dries white.
Moving onto our laundry room floor tiles!
Ted is the tile guy, so he took over for this part thankfully – he’s so meticulous!

The fill tiles were laid, and it was time for the cut pieces. Ted set up with wet saw and cut the side pieces down to size and glued down. He finished with grout in the color Timberwolf.
I absolutely love these affordable tiles!
Baseboard and door trim time!
We purchased a taller baseboard with minimal detail at the top and nailed it in place. Eventually we will replace all baseboards in the whole house with this same base.
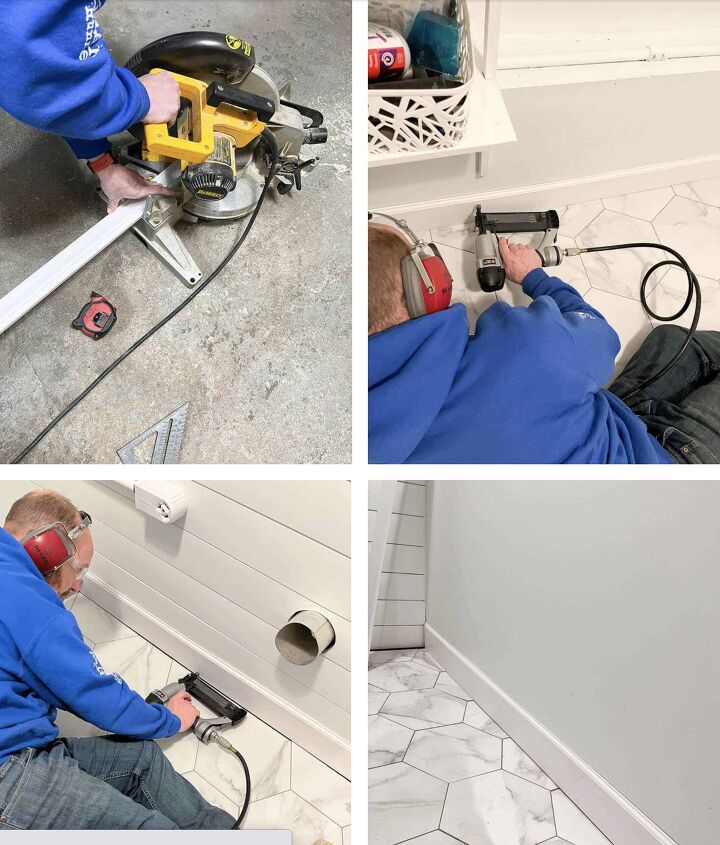
I filled in the nail holes, taped off the trim on the floor and wall, then painted two coats of paint (SW White Gallery).

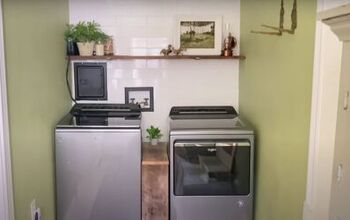
Once everything was dry, we pulled the washer and dryer back into the room!
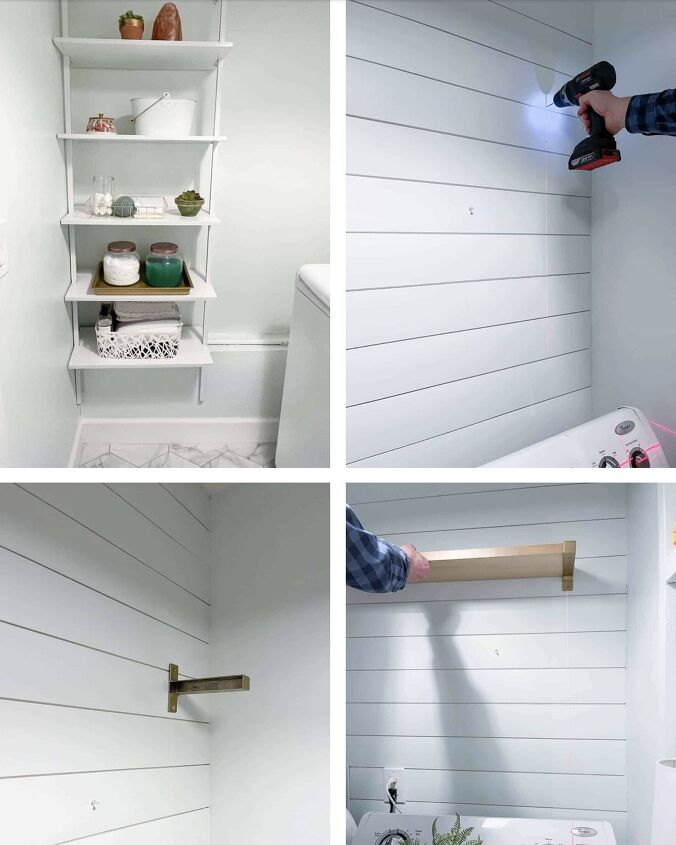
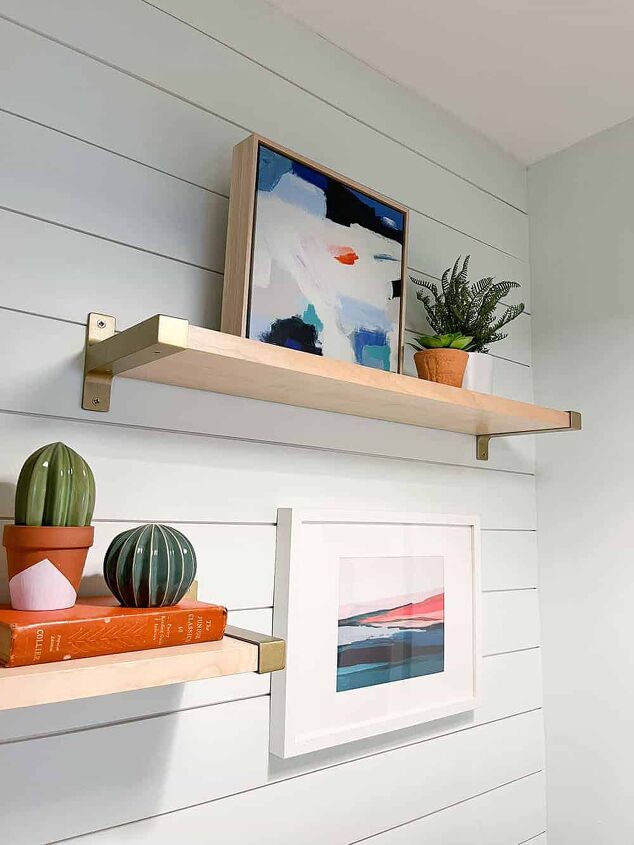
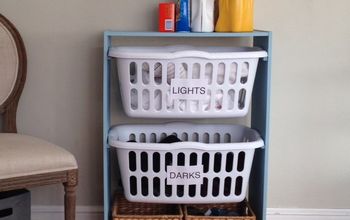
I re-hung the storage shelf ( similar option) and Ted installed my decor shelves. He is much more meticulous than I am, haha!
And the most fun part – styling the laundry room shelves!
Note: We don't personally require many laundry room items other than detergent and a few other items, so the decor shelf works for us. If you require more products, etc these shelves could be used for storage.
I mostly used items that I had on hand, but did purchase a set of two affordable framed canvases. I wanted a pop of orange and turquoise, so I added it myself with acrylic paint, a foam brush, and even my fingers. Once dry, I added them to the shelves. I love this art!

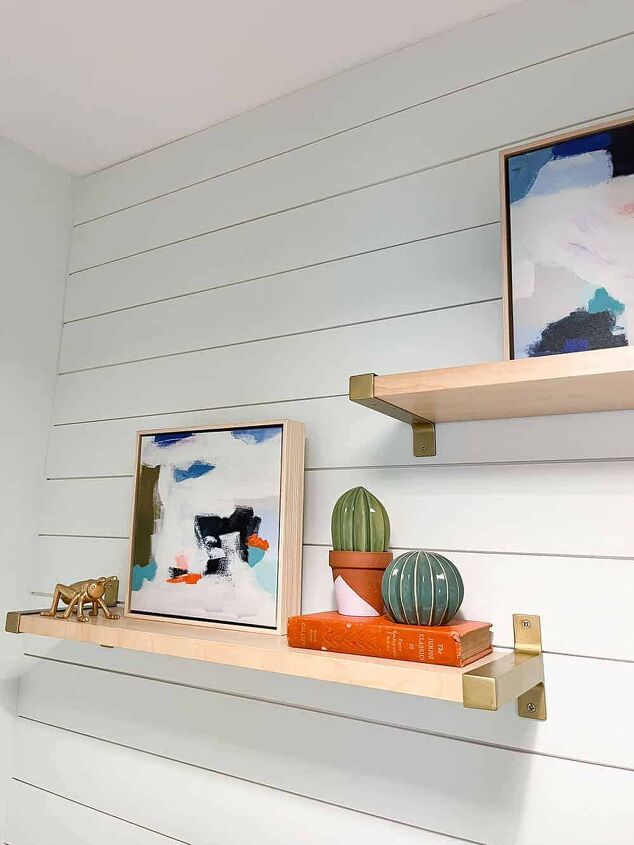
The framed art below the shelf was a birthday gift from a friend. I love how all the colors tie together!
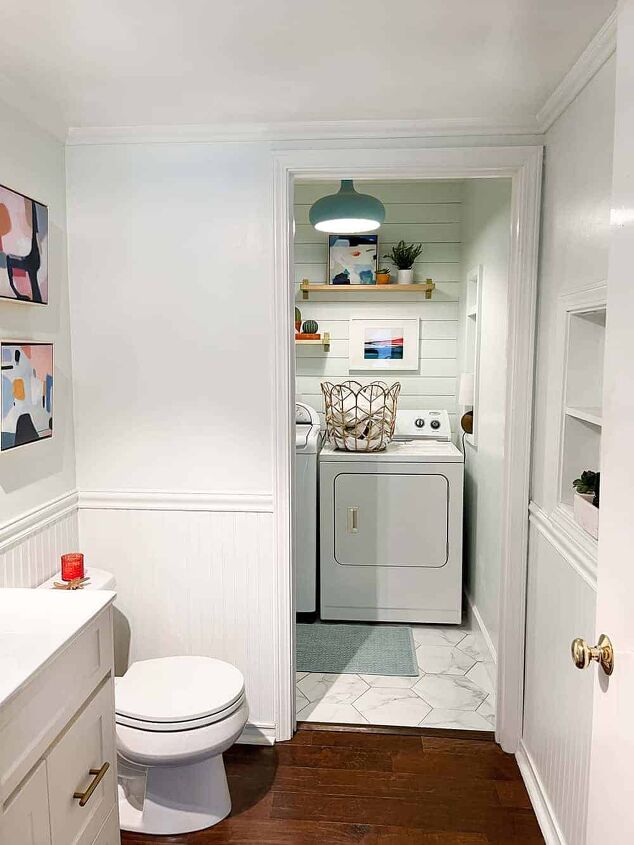
A zoomed out view of the laundry room, which is connected to a half bath!
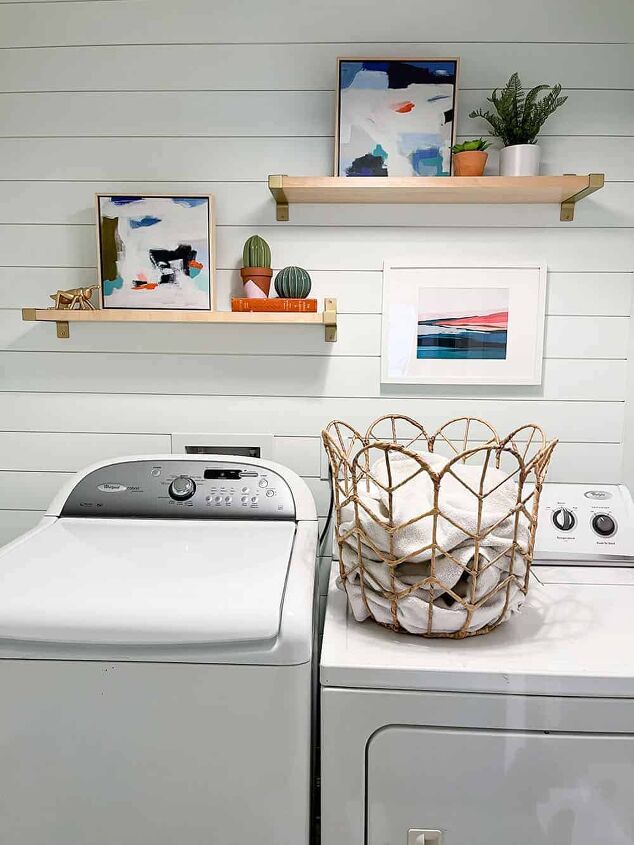
I purchased a sturdy wicker wrapped basket as well.
I am excited for the day that we might have a matching washer and dryer, but they both still work so we won’t replace until they die. 🙂
And a closer look at the baseboards and tile…
Here’s a look at the room with the pendant light turned off and only the dim lamp light.
As I mentioned, the laundry room is connected to a half bath. Here’s a look at that coordinating space.
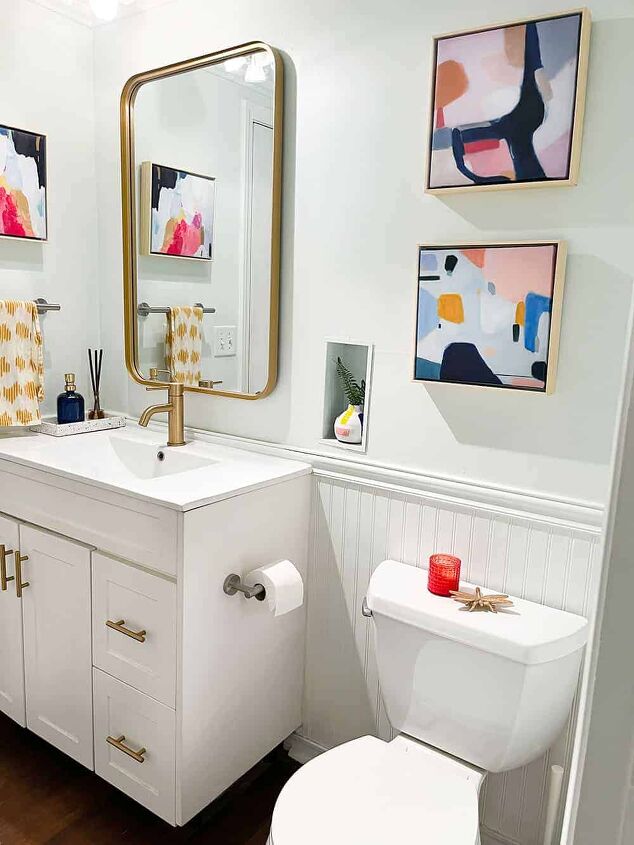
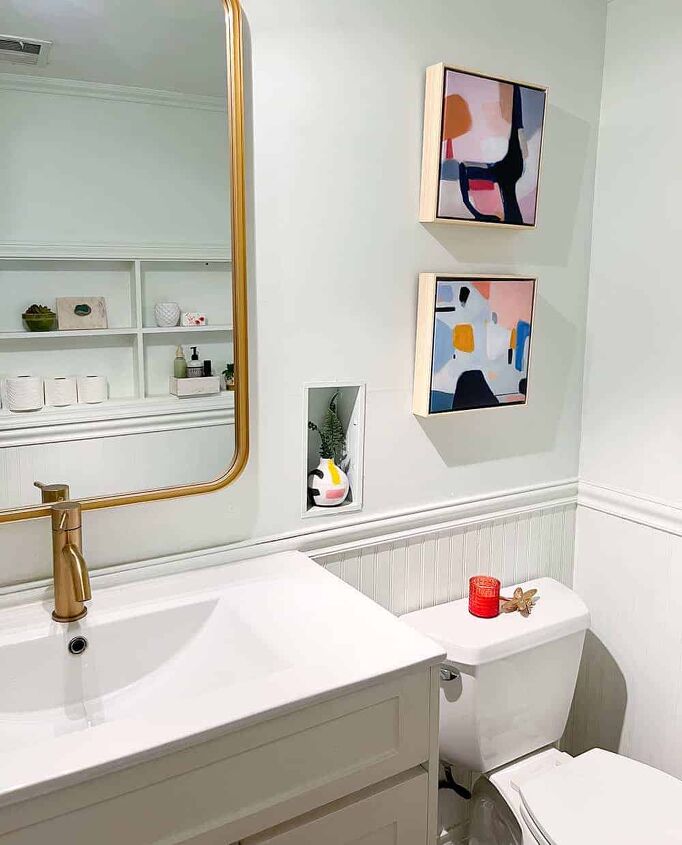
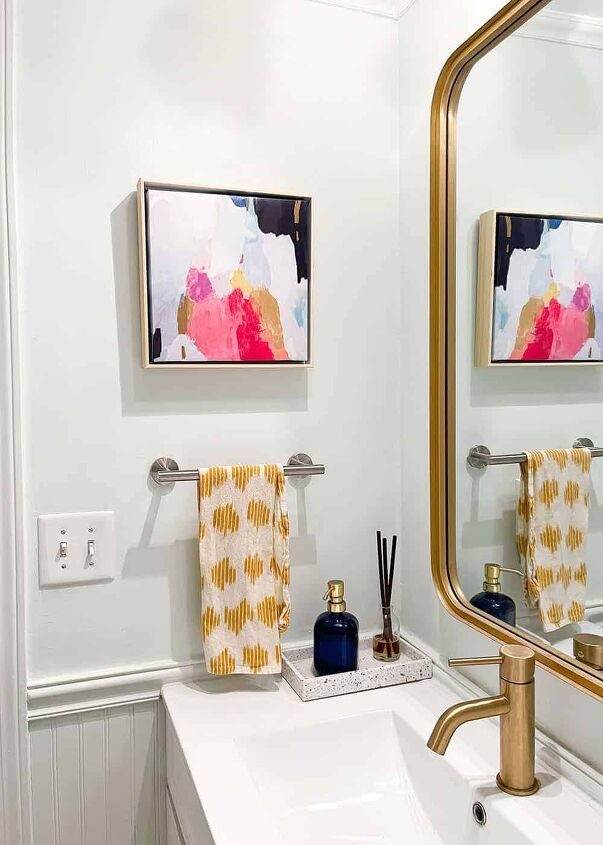
The framed canvases, sink, accessories and mirror are from Target, the vase and hand towel are from RE, the dragonfly and candle are from the Target Dollar Spot, and the affordable brass faucet is from Amazon.
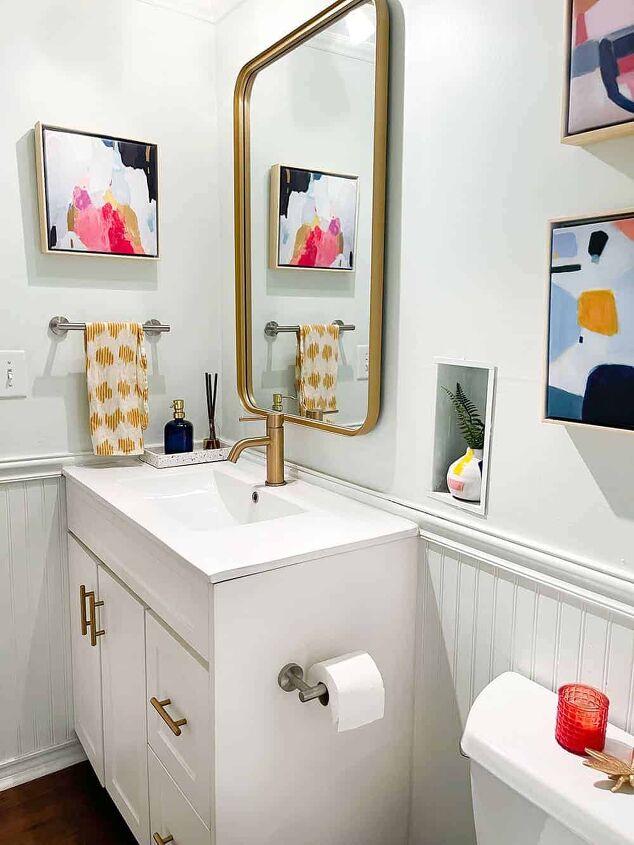
I love this $50 brass faucet!
The brass cabinet pulls were only $20 from Amazon.
hile we worked on the laundry room, we also installed a new Kohler toilet to replace the 1972 version.
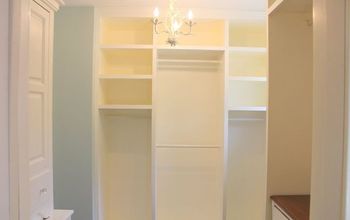
And finally, here is a view of the built in cabinet on the opposite wall. This detail came with the house.

I hope you like our DIY laundry room renovation! We’re so happy with it!
Anyone else recently update a laundry room or planning to? I’d love to hear all about it on social – Pinterest, Instagram, and Facebook.

Comments
Join the conversation
-
Great job. Looks amazing. Not your average laundry room. Great share
-
You nailed it!


Frequently asked questions
Have a question about this project?
Could you tell me where you purchased the decor shelves used above the washer n dryer please ? They’re just what I’ve been searching for !!! Robyn