


How to Make an Easy DIY Foam Fireplace Without Using Power Tools

I’m feeling cozy and lazy, which means it’s time for me to make a DIY foam fireplace. Watch me turn a funky space in my living room into a DIY fireplace with a few pieces of foam, hot glue, peel-and-stick brick, a vision, and all for under $100.
This is shockingly easy, so if you’re looking for a way to cozy up your home, this might be your next project.
Tools and materials:
- 2-inch foam insulation board (from a hardware store) 8 feet x 4 feet
- Level (for straight cuts)
- Pencil
- Box knife, file, or other cutting tools
- Mask and goggles (for cutting foam)
- Sandpaper
- Vacuum
- E6000 adhesive glue
- Hot glue
- Faux brick (peel-and-stick tile, from Amazon)
- Painter’s tape
- Paper (for template)
- Joint compound and joint knife
- Paint and paintbrush
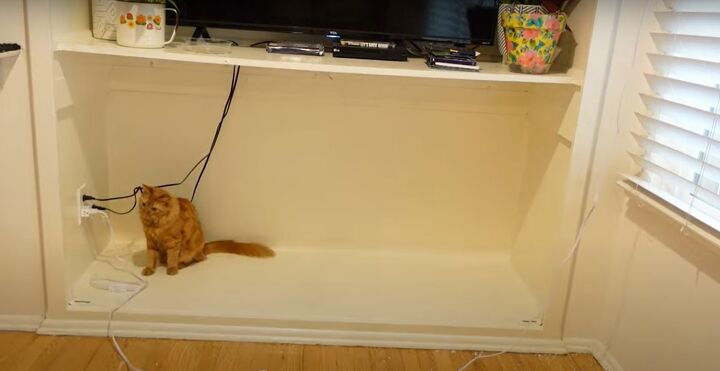
Where the faux fireplace will go
I have an odd alcove in my living room that was once a closet. I turned the closet into a media center, but now I realize that it would make a really cool place for a faux fireplace.
I’m going to build a 3D foam fireplace mantel instead of just the facade so it looks less like a piece of scenery and more realistic. However, I’m going to use battery-operated candles in the fireplace for safety reasons.
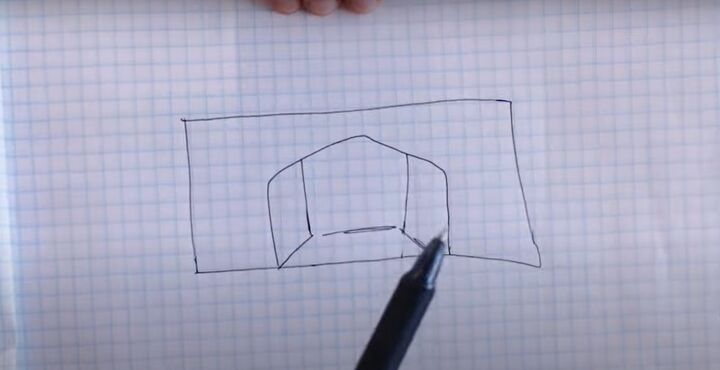
1. Draw your plan
Draw out your plan on paper. You can see here that I will make the facade, but add three more pieces of foam set at an angle to create the 3D effect.
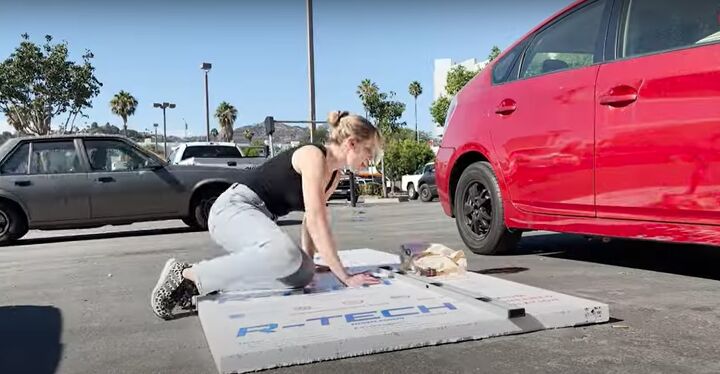
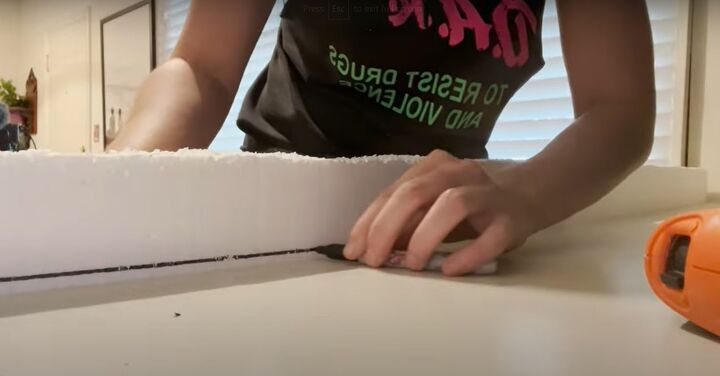
2. Cut the foam
I spent $26 on this piece of foam board. I measured out the pieces I needed so I could fit them all in the car. Once the foam was in my living room, I worked on getting the sides sized perfectly to be snug and flush with the cubbyhole.
Tip: It’s very messy to cut and sand foam board so get your vacuum ready.
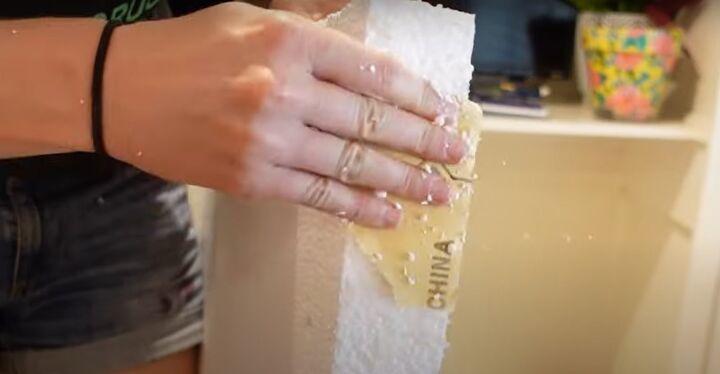
3. Sand the foam
When you get the board home, sand the cut sides to smooth it out. Sand it until it fits snuggly in the opening.
4. Cut the top to fit
Once the sides are done, trace the top of the foam board to see where to cut. Remove the foam from the opening to cut it down to size.
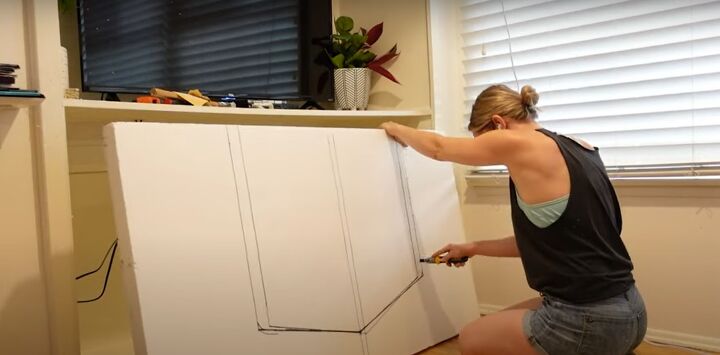
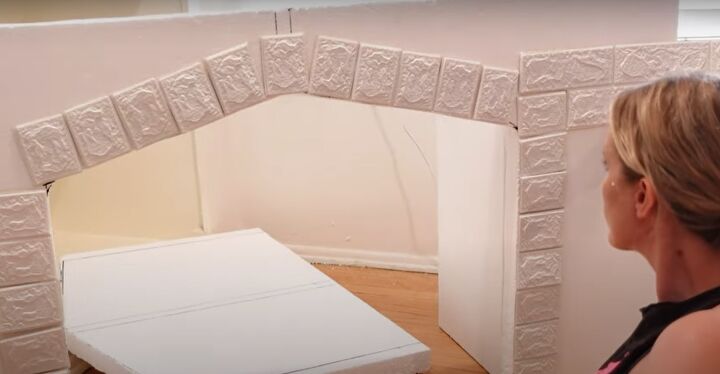
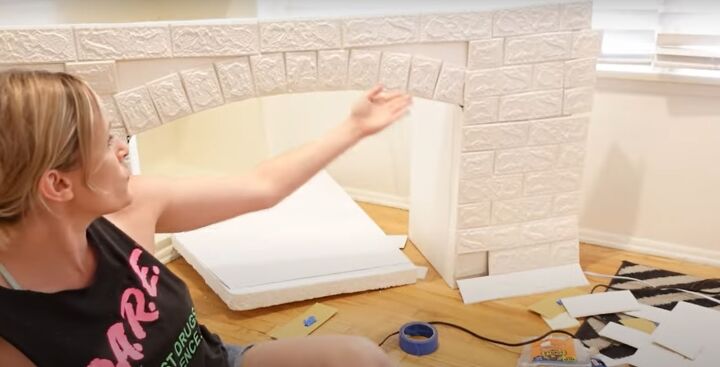
5. Measure and cut for the fireplace opening
Carefully measure where and what style opening you want for your fireplace’s hearth area. I chose an angled and slightly peaked top. Cut the opening with your cutting tool. Sand the edges to smooth them out.
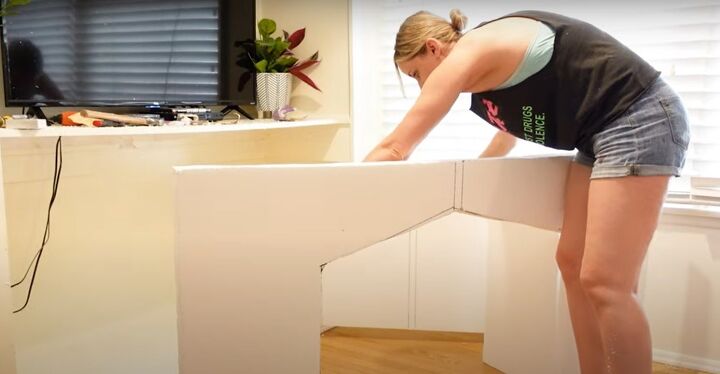
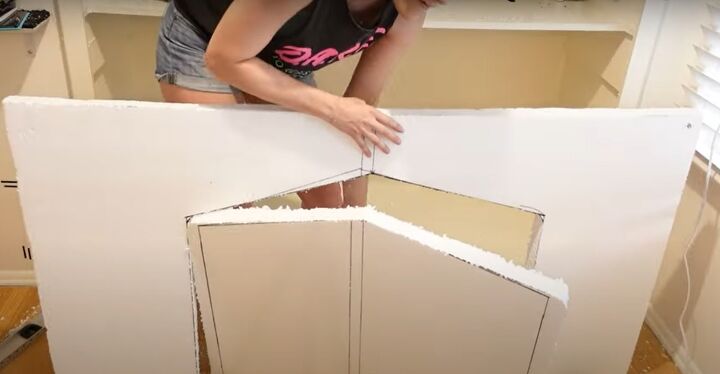
6. Assemble the interior panels
You will have a faux back panel and two side panels for the 3D look. Glue the pieces of foam together with E6000 adhesive (long-setting glue) and hot glue (dries immediately) for extra stability.
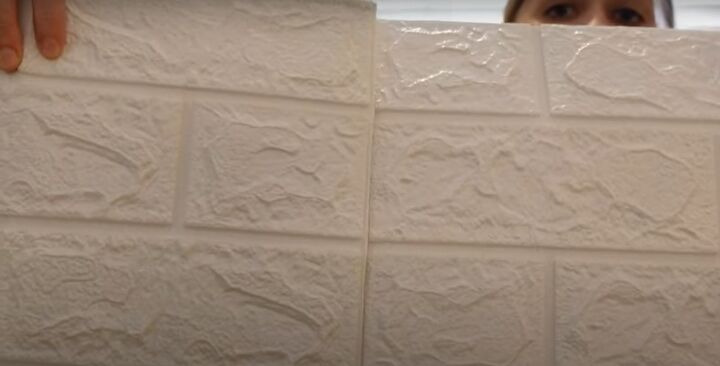
7. Cut faux brick
The seams of faux brick do not match up naturally. I cut out bricks from the panels so I could stagger them to make a more natural seam. I used the tiles I cut out to create a border around the opening.
8. Place tiles for the border first
Before you peel-and-stick the border, place them around the opening for fit to see if it looks good. Use painter’s tape to hold the tiles in place and so you can easily take them off and rearrange them until you achieve the look you like.
9. Place brick on the facade
Add bricks on the facade using painter’s tape so you can see how it all fits together. You may end up rearranging tiles a few times until you like the look. I finally had a border pattern I liked after a few tries.
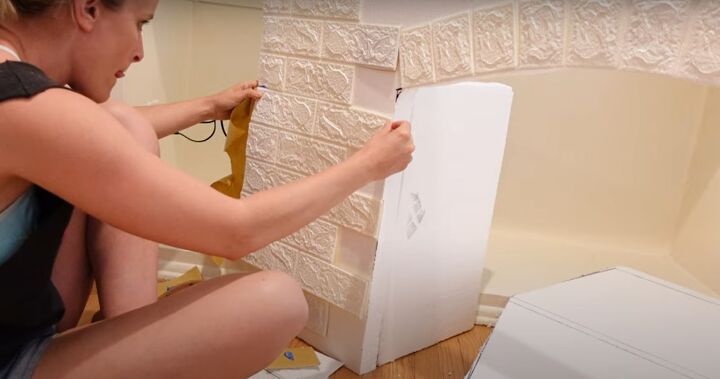
10. Peel-and-stick tiles
Now you get to peel-and-stick the tiles in place on the foam facade and interior pieces. Scary, I know!
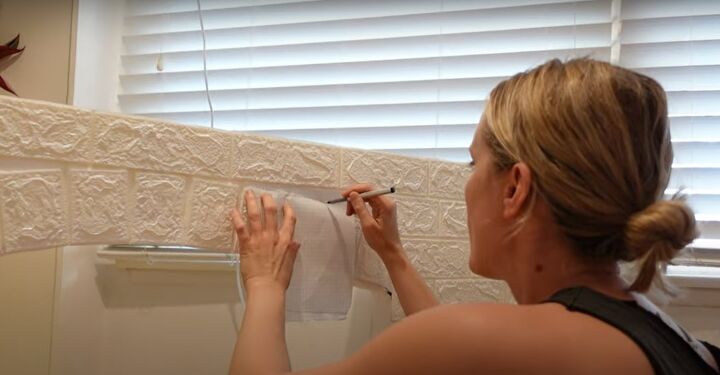

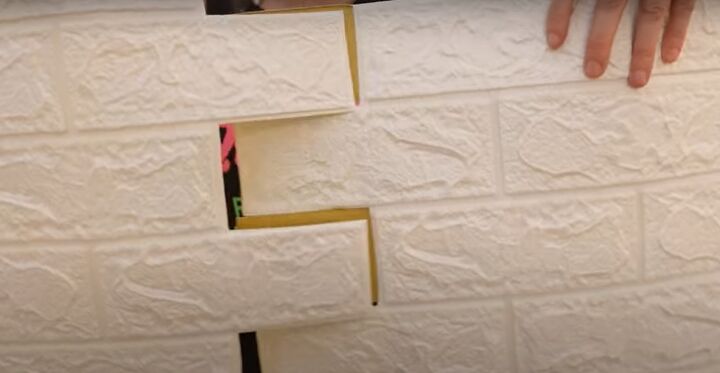
11. Cut tiles to fit odd gaps and corners
Depending on your design, you will need to cut the tiles to fit odd angles and spaces on the facade and inside the hearth. You can create a tiny paper template to help you cut a tile to the right size.
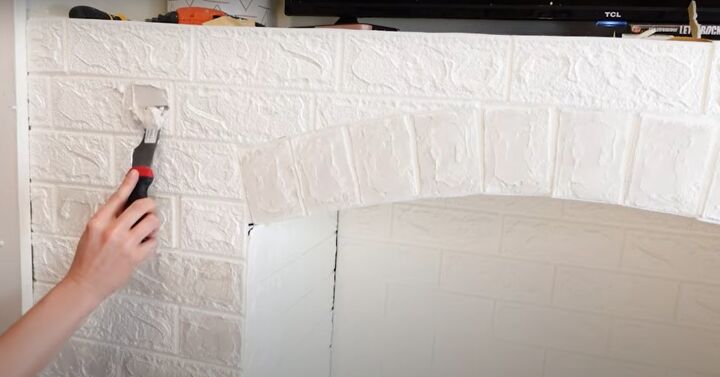
12. Tone down the texture
To make the faux brick look less faux, I added a thin layer of joint compound over some (not all) of the tiles to mix up the pattern a bit. Add a layer of joint compound over the top of the fireplace, too, just to smooth it out.
Note: Joint compound adds weight to a tile, so you may have to hot glue and use E6000 to put the tile back up.
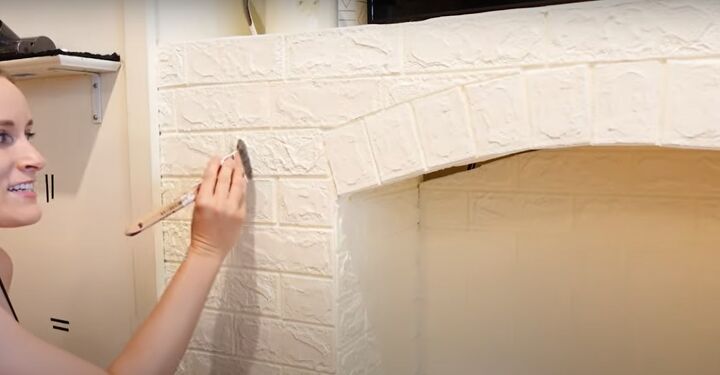
13. Paint the tiles
These tiles are very bright white. To tone it down, I painted the faux brick over with Antique White paint.
Note: You may have to add a piece of foam and brick to fill in gaps (see above in the hearth).

Here are the before (I sold the credenza) and the after photos! The television “sits” on the shelf above the fireplace and looks like a mantel.
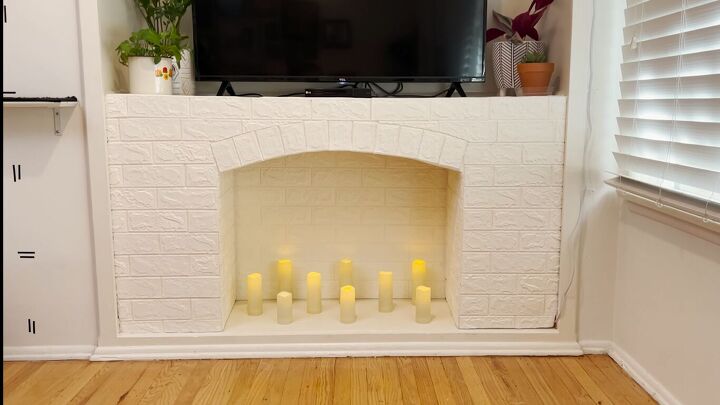
DIY foam fireplace
This DIY foam fireplace is beautiful and all for under $100! Note that the floor is just the white built-in shelf, it is not foam.
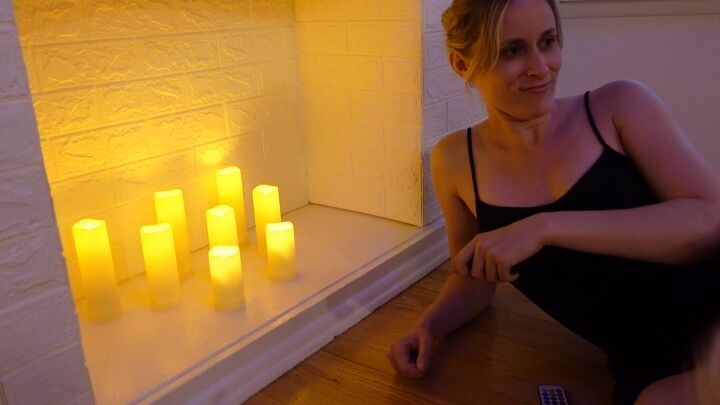
I added eight battery-operated flameless candles to the hearth and it feels so cozy when I switch them on!
This is one of the best DIY projects I’ve done! I love it. Let me know what you think of this DIY faux fireplace in the comment section below.
Comments
Join the conversation
-
Yes, if not black then Grey or Stone colour! It would also look more realistic if you had a thick shelf on top as a mantle. Otherwise Great Job, I once had to make a fire and surround (as a temp) measure for Santa , one Christmas. Well done you!
-
Genius!


Frequently asked questions
Have a question about this project?
Can you easily remove and return the fireplace back in place to access the electrical wall outlet?