


DIY Side Yard Walkway Pergola
This DIY side yard walkway pergola has been on our to-do list since we moved in several years ago. Our outdoor space really feels more complete and I am so excited to share with you!
Hometalk Recommends!
Last year I was honored to partner with The Home Depot to transform this walkway from a blah space, overcrowded with drooping roses, into a more inviting space with wow factor! It was a super duper cool experience! Now I’m sharing more of the backstory as well as the tutorial.
When we started the project I was very pregnant, then baby came early and we hadn’t finished! We were mostly done, but there was about 5% left. Plus, whenever we worked on the pergola it was raining. This wasn’t the normal Seattle drizzle, it was wild storm systems. There were a series of storms called ‘bomb cyclones’ that brought record-breaking floods. Drama of some sort always finds it’s way into our projects!
Anyway, let’s chat about the pergola.
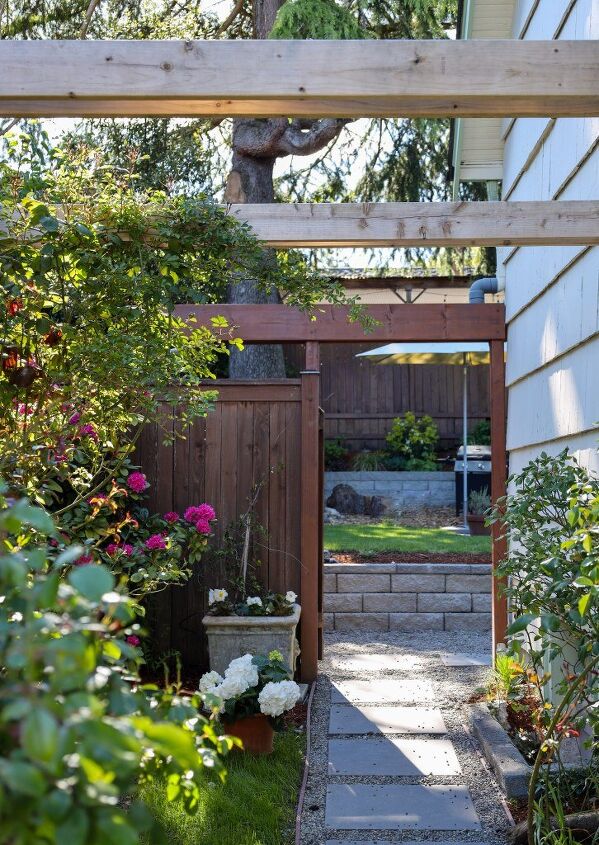
As you walk up our front stairs, the first thing you see is the pergola.
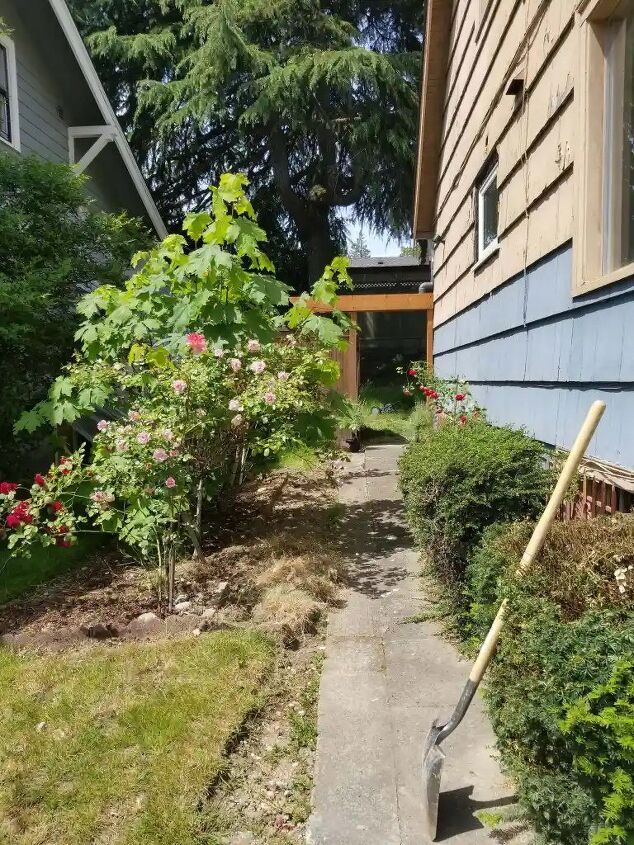
Not only would I like the path to be more clear, I would also like it to be a magical experience. I imagine that the former matriarch of the house chose these roses and would like to continue her legacy by making the roses a feature rather than a nuisance you have to fight to make your way to the back yard.
The previous family had about a dozen rose bushes in different areas. We transplanted some to replace the bushes seen in the above photo, creating a sort of a rose alley.
Next step to improving this area? Build the pergola!
Gather materials.
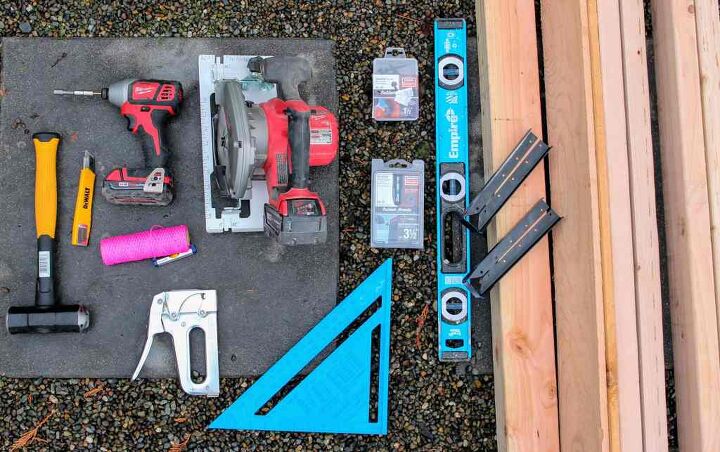
Not shown here, but later in the article are Loctite glue and Fence post supports.
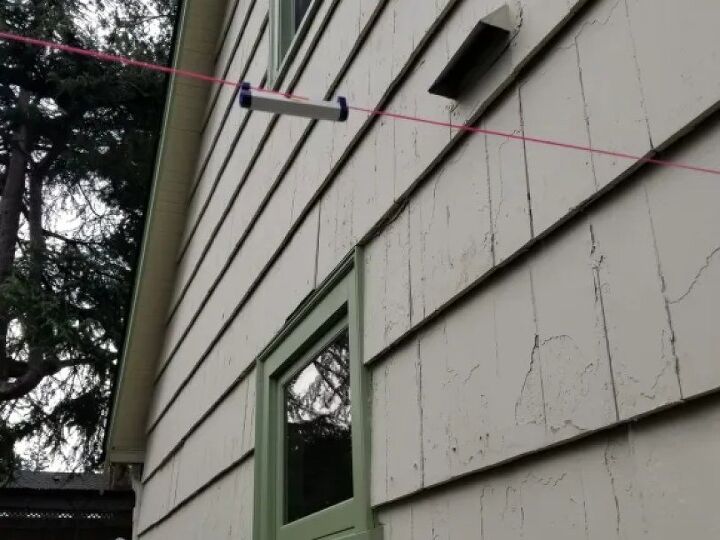
Measure the spacing of the posts and check that heights are level. You will do this throughout the project to ensure level heights.
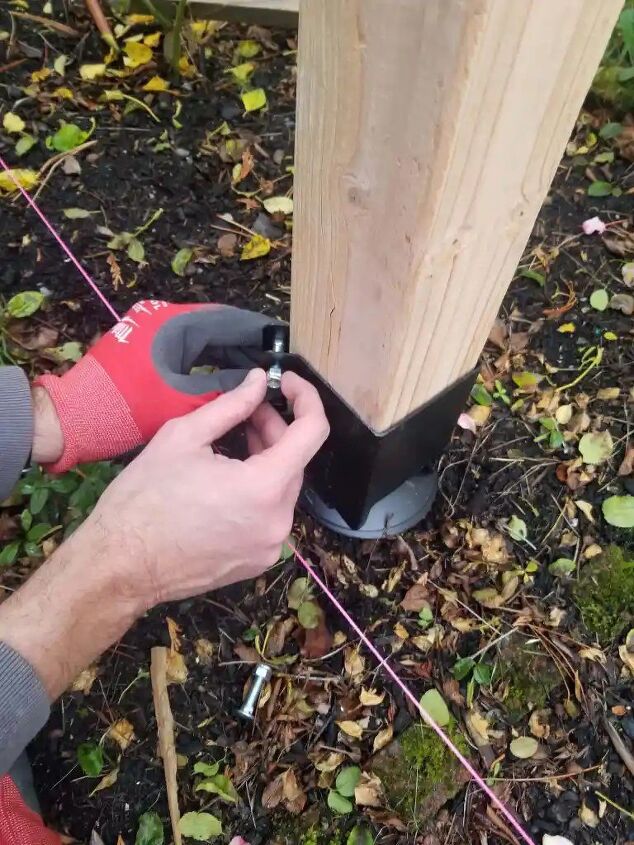
Drive post support into the ground.
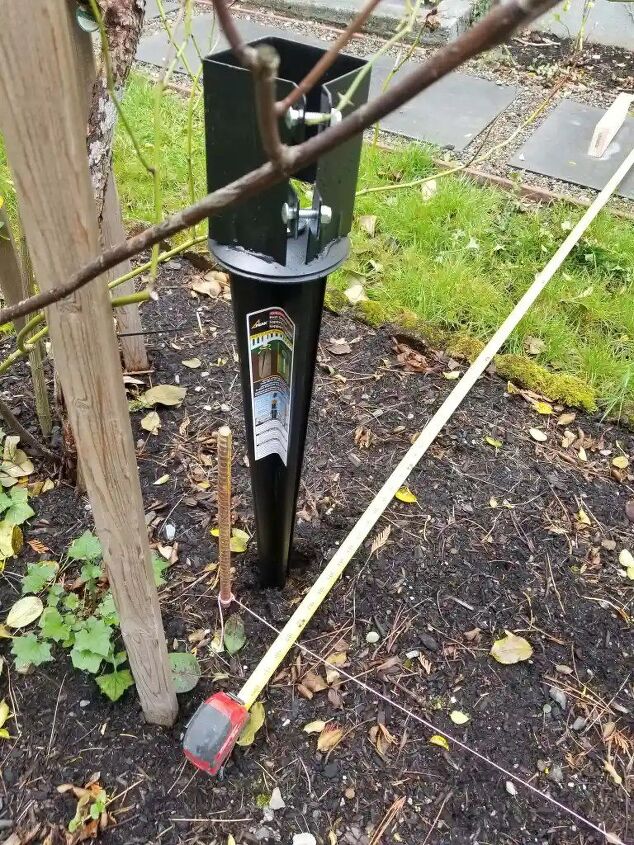
Set posts into post supports.
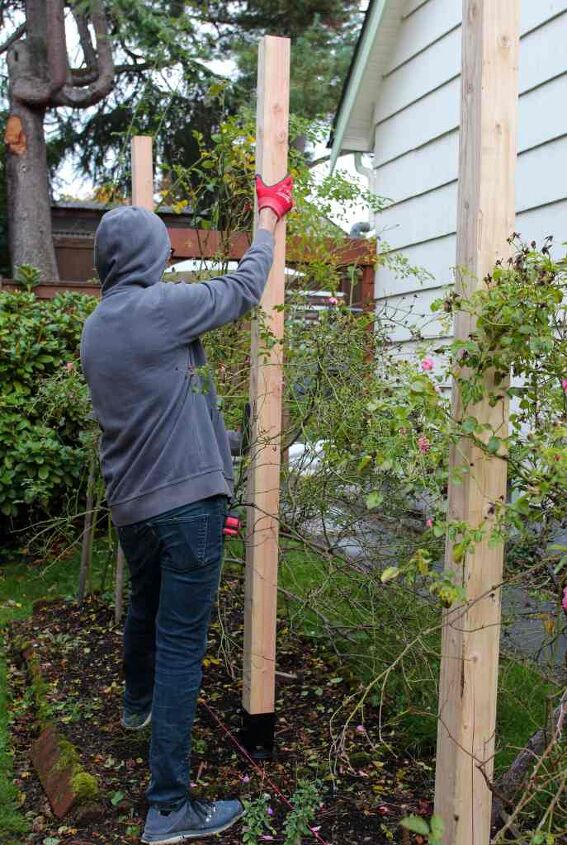
Tamp posts into post supports.
Secure screws into post supports.
Screw joist hanger to building.
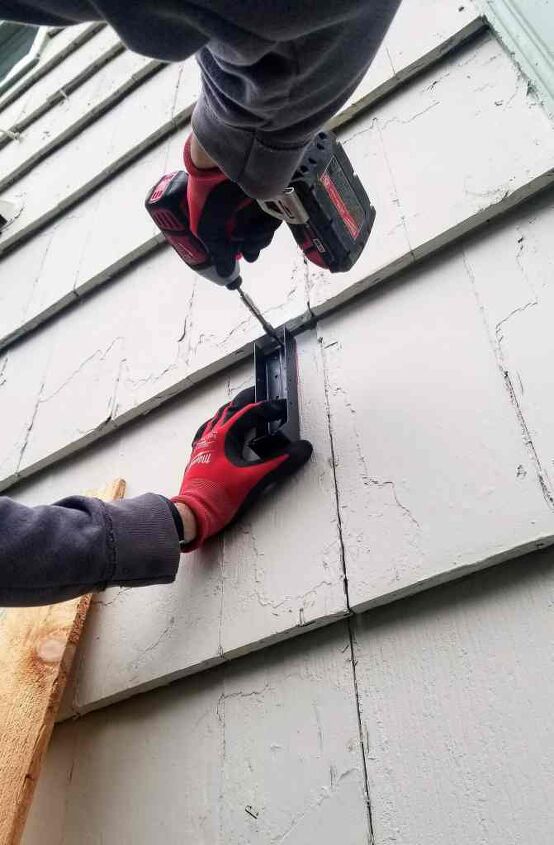
If you are building a free standing pergola, this step won’t be necessary. Since our pergola is designed to attach to our house, we used joist hangers to hold the 2×6’s that stretch over the walkway and connect to the posts.
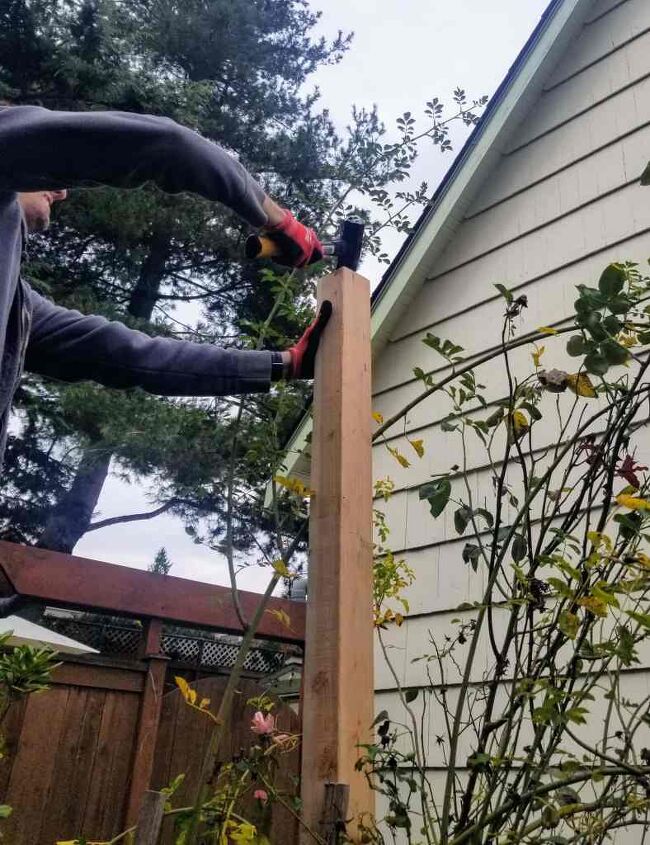
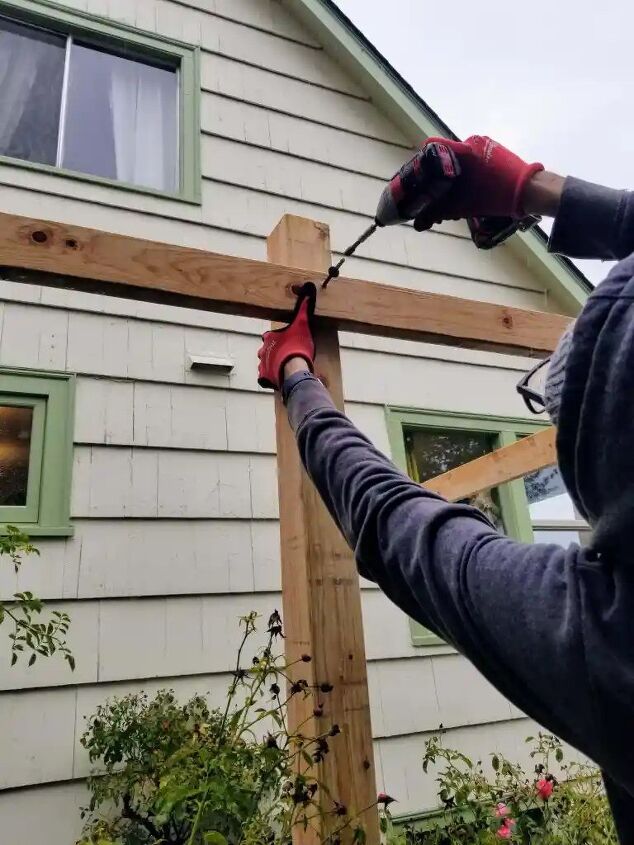
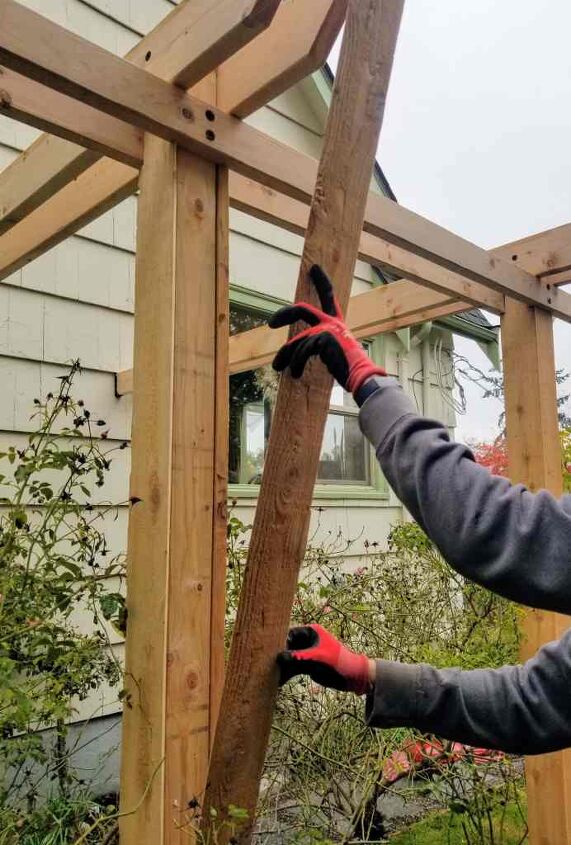
Use structural wood screws to connect 2×4’s to posts.
Mill cedar fence posts to create facing around the posts.
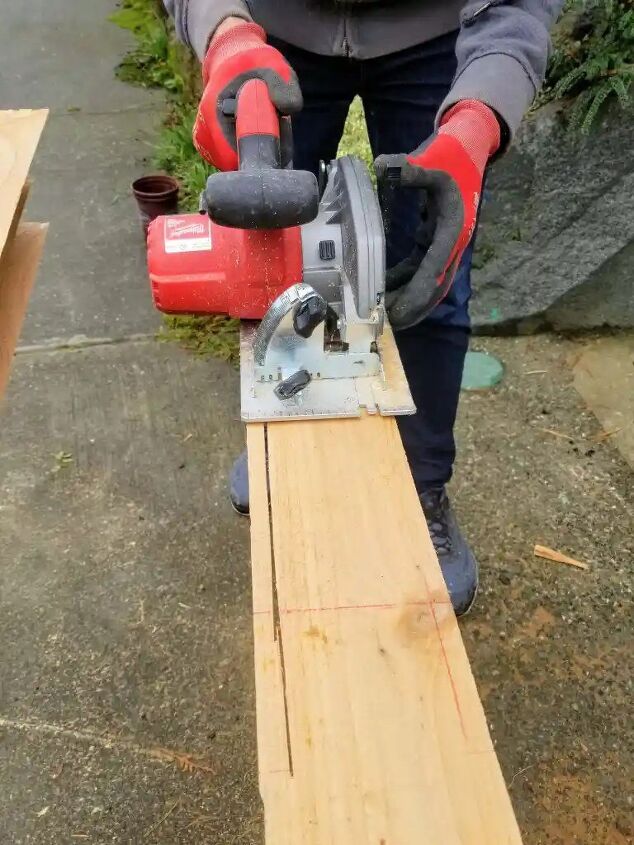
For a more finished look, we used cedar fence posts to cover the 4×4’s.
Apply Loctite glue to cedar boards.
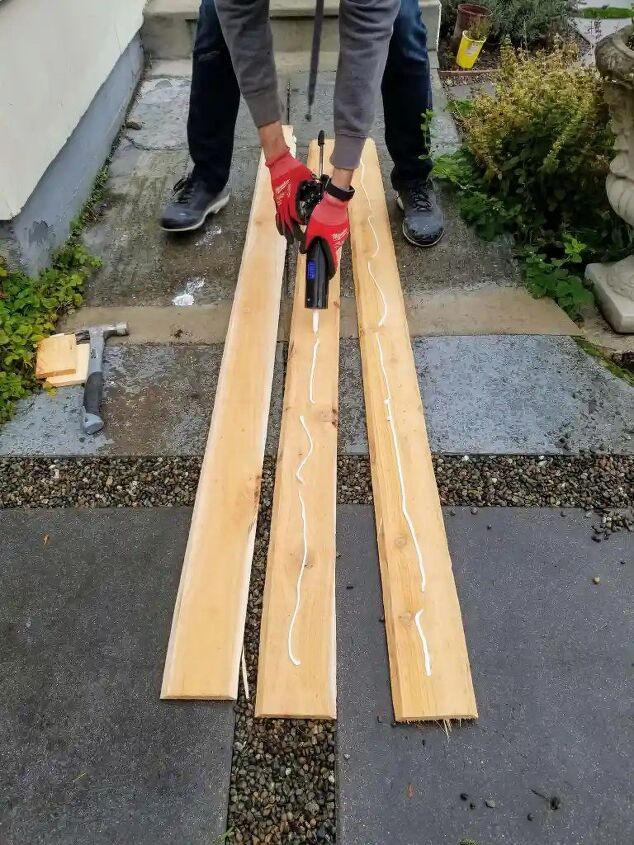
Attach cedar to 4×4 posts.
Press glue to stick cedar boards to the 4×4.
Use 16-gauge nail gun to attach cedar facing.
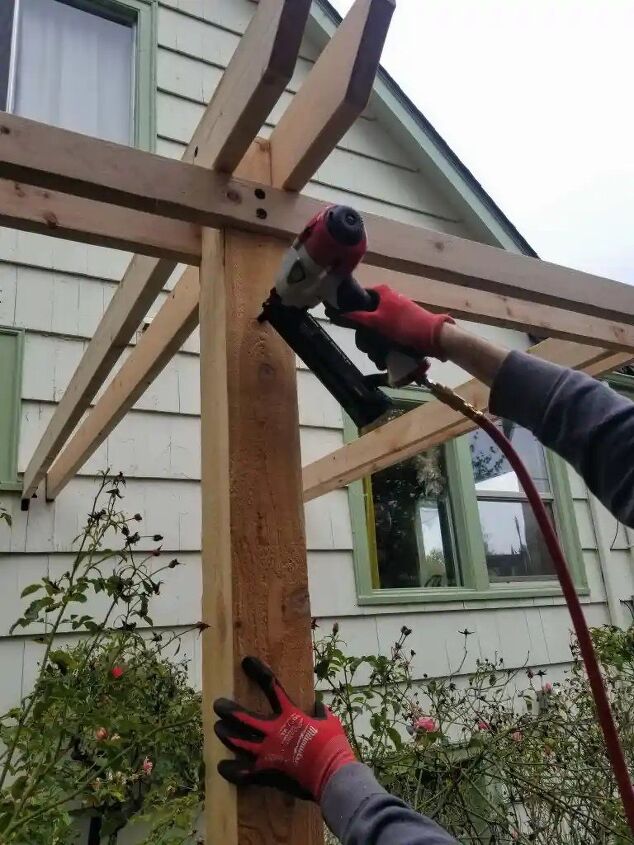
Once, the four sides of cedar boards are attached to the 4×4, nail them in place.
Note- the 2×4 boards were cut at a 45 degree angle.
Then you are done!
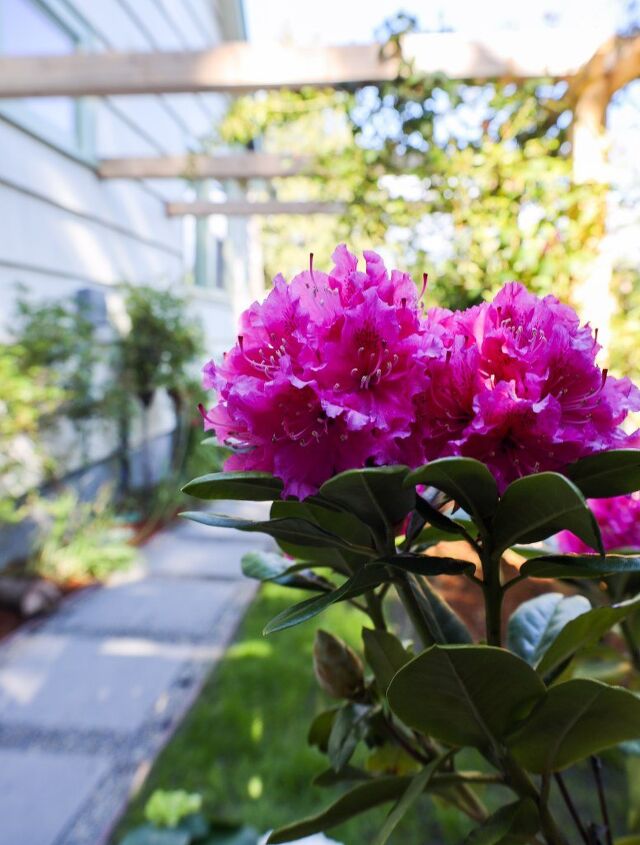
We still want to stain our pergola. As I type this, I wonder if it would have been easier to stain the wood before building…
On Instagram I have a video walking under the pergola during Christmas season. And I shared some of the in-process footage too.
For more outdoor projects, make sure to check these out:
A picket fence up-cycle you don’t want to miss!
I hope you will follow along on my other social channels!
Resources for this project:
See all materials


Comments
Join the conversation
-
What I can see of it in the pics looks very promising. I wish there would have been a pic or two that showed the completed pergola instead of just random ‘beauty shots’ of flowers or blurry ‘work-in-progress’ shots. I’d like to see the whole thing in its completed state.
-
Thanks for your comment Hope!
I had to wait for the roses to bloom to capture the full effect. You can see the pergola with roses here: https://thisdearcasa.com/diy-side-yard-walkway-pergola/
It is basically an expanded version of this Hometalk post.
And this shows the staining process: https://thisdearcasa.com/outdoor-fall-decorating-tips-for-staining-a-pergola/. I'll have to update this Hometalk post with links to my updated one :)


Frequently asked questions
Have a question about this project?
Nice job! Where do you get and what is the brand of your drive-in post supports. I have never seen such a thing and it would help me with my own project immeasurably.
Thank you.