


DIY Outdoor Toss Game - Golf Version
2 Materials
This is a simple DIY build of a toss game that folds flat. It is a great project for a gift or something for yourself.

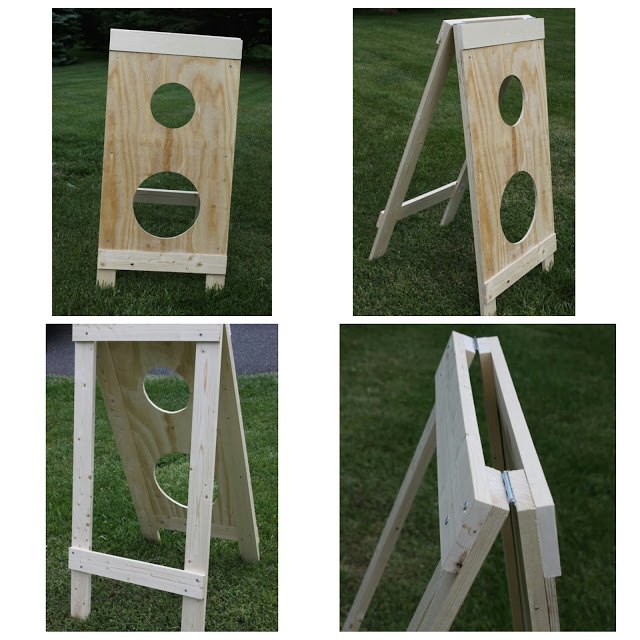
The materials are listed on our blog post, and I have also included step by step photo instructions below Step 1 is to measure and mark the boards. The common board will be used to make the legs and the braces. Measure four legs at 1" by 4" x 2', and the brace will be 2' by 3'.

Step 1 is to measure and mark the boards. The common board will be used to make the legs and the braces. Measure four legs at 1" by 4" x 2', and the brace will be 2' by 3'.

The next step is to create the front a panel. Looking at the 2' by 3' plywood board vertically, mark 9" from the top and 9" from the bottom. Nail a nail into the center of the bottom mark. Tie one end of a string around the nail head, and the one end around the pencil ensuring the string is 6" from nail to pencil. Next draw a circle keeping the string tight as you go around. You should now have a 12" diameter circle.
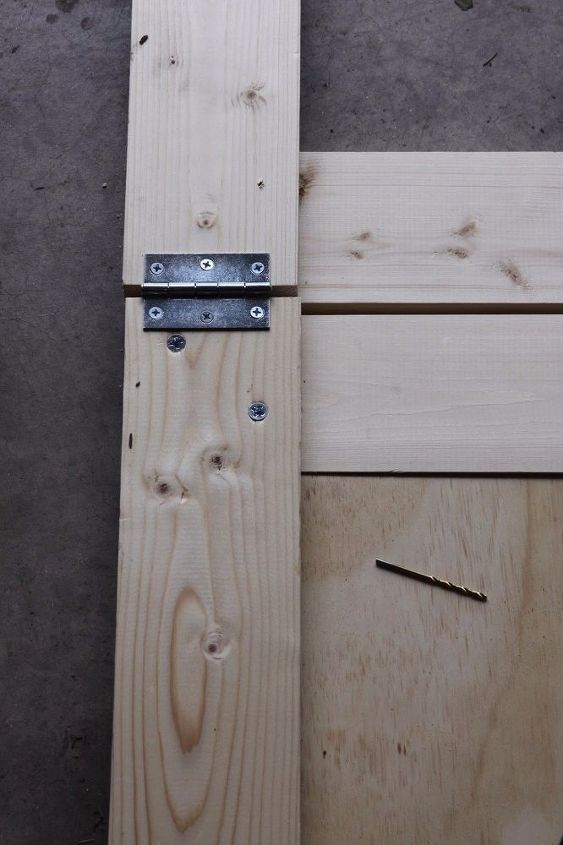
Attach the hinges to the boards by laying both frames back to back with the plywood and braces facing outward. Using the drill, secure the hinges to the top side of each frame.
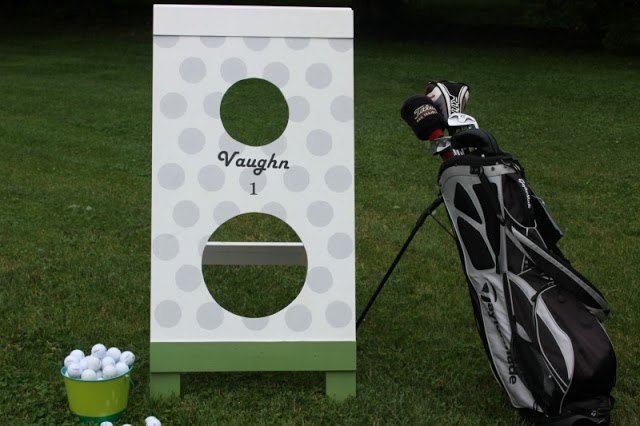
Here is the fully assembled project. We used paint to make it look like a golf ball sitting in the grass, and even added vinyl lettering to make our name the name of the golf ball.
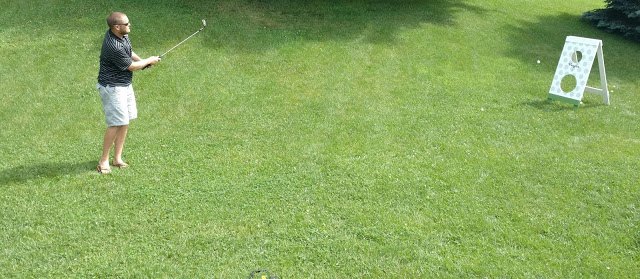
Trying out the new project with a wiffle ball golf ball or a regular golf ball works too!

Want more details about this and other DIY projects? Check out my blog post!
Comments
Join the conversation
4 of 8 comments
-
Too cute now I need to try and make one
-
As added incentive to make the target, a net stapled to the back to catch the balls would keep the yard from becoming as much of a polka dot paradise or a scavenger hunt if you have bushes. I remember all the time I spent in the words of the golf course in New England hunting my father's wayward golf balls. It's not always as much fun for kids as adults may think it is. LOL


Frequently asked questions
Have a question about this project?