


Easy DIY Glamping/Backdrop Idea – Spruce'n'Spice
Easy DIY Glamping/Backdrop Idea
By on September 10, 2021
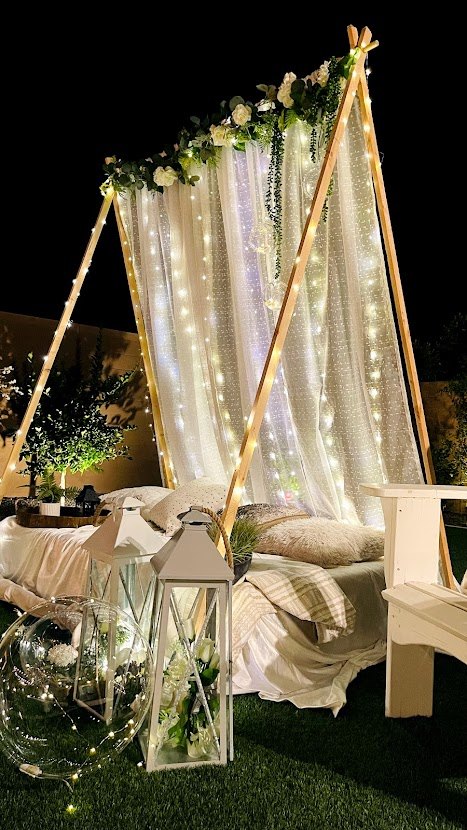
Some myths about DIY I constantly hear – you need lot of equipment’s, expertise, time, patience!! Well I am here to bust them all, a project that almost anyone can attempt. A DIY Glamping tent! Ready in less than an hour!!!
The beauty of this project is – it’s so so versatile. It can be used in your backyard for glamping, or date night, party backdrop for birthdays, baby showers.. possibilities are just endless. I am already dreaming of using it for our Diwali party, this would be just perfect backdrop for some family pictures. WAIT, did I tell you that all you need to build this was a DRILL. Yes, you heard me right… just one basic household tool!!
Let’s get to it!!
You need
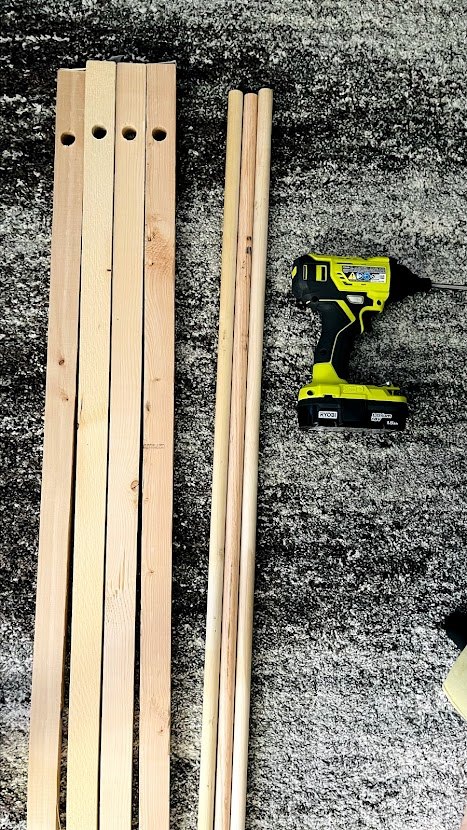
Drill – I use THIS.
Spade bit – 3/4in
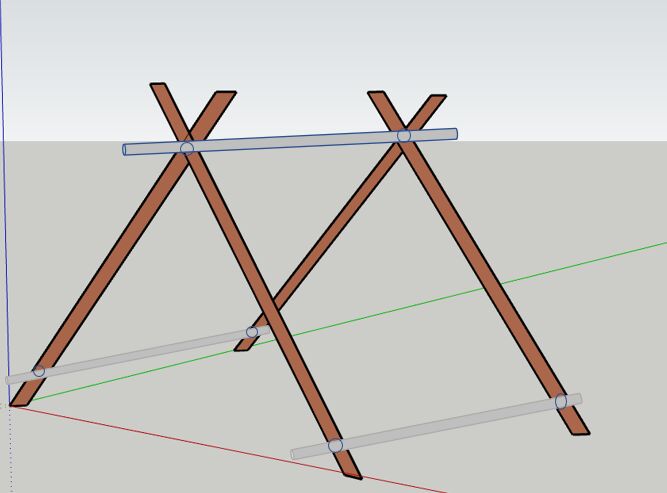
4 – 1x2x8ft furring strip boards.
3- 3/4 inch dowels (6ft)
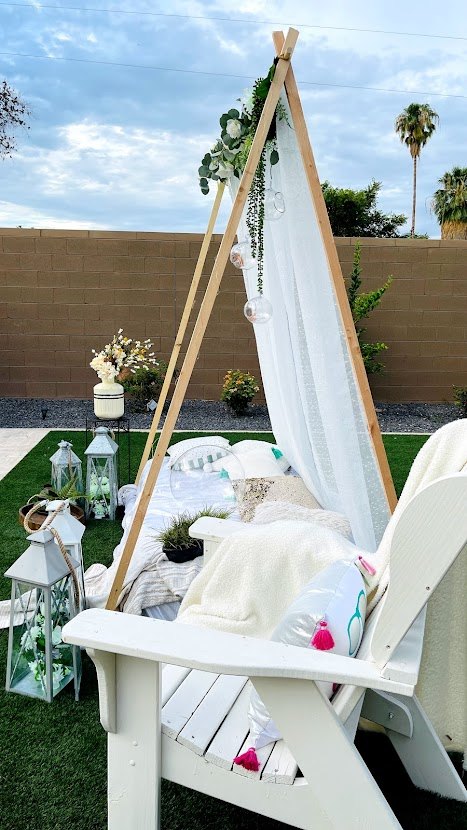
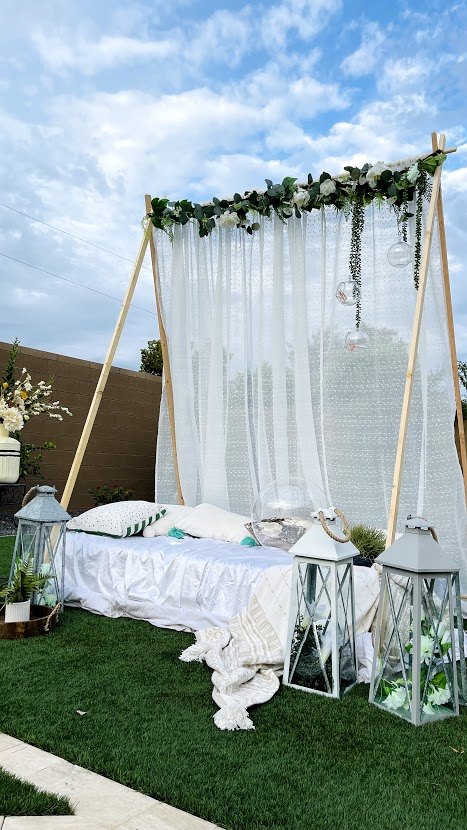
Decor I Used
Sheer curtains
Eucalyptus garland with roses
Faux Eucalyptus vines
Faux succulent vines
Tealight globe holder
Fairy light
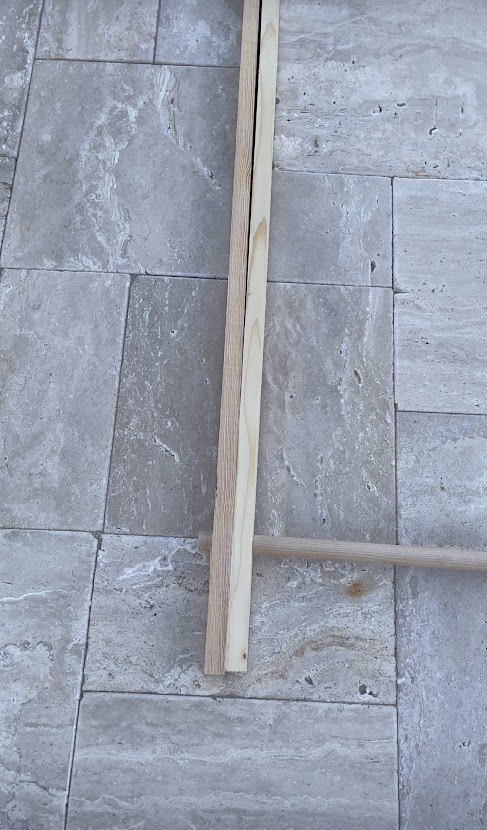
- Start by marking 6″ from the top and 2.5″ from the bottom of each 1×2 board. 6″ hole will act as your top section for tent and 2.5″ would be our bottom. Drill holes on these markings using a 3/4in drill bit. Repeat for each board. This is pretty much all that is needed from your drill.
- Sand the drilled holes and boards to be sure it’s smooth. You don’t want your background fabric damaged due to any rough edges.
- Now, let’s get to assembling. Start by placing two boards on top of each other making sure drilled holes are aligned. Now take your first dowel and insert it through the top 6″ hole.. use few clockwise twist motions get them pass through both. Leave around 2inch overflow for stability.
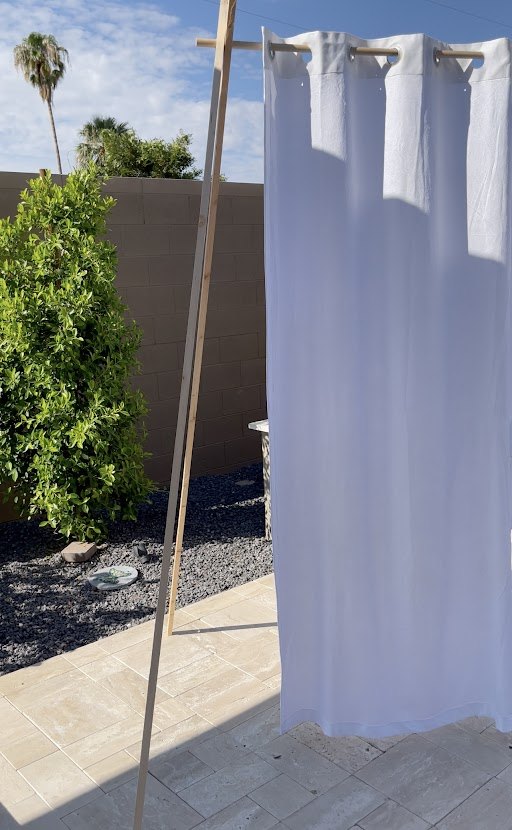
- Take your backdrop curtain and slide them in through the dowel. I used 9′ long sheer curtain. This step is completely optional and can be customized to your needs.
- Take the next two boards and attach it to the other side in similar manner like above making sure that you leave atleast 2″ overhang on the other side too. At this point you should have the tent standing with the backdrop curtain.
- Adjust the tent to your desired length. Take the second dowel and attach it to the lower holes on one side and repeat the process for the third dowel. Your tent is now ready to glam!
- Added a kids mattress at the bottom, covered it with some sheets. Vines, globes and fairly lights on the top. Tada! We are ready for a peaceful and fun family time!!
I have a entire story highlight saved on Instagram detailing the process.

If you ever try this, do tag me. I would LOVE to see your versions!!
Categories: Beginner Friendly, DIY, Easy Build
Tagged as: Backdrop, DIY, easy, Glamping, Party Ideas, Quick, Tent
Resources for this project:
See all materials


Comments
Join the conversation
-
WOW!
-
It looks very romantic! It would be a beautiful addition to a backyard wedding, etc. Very nice!!!


Frequently asked questions
Have a question about this project?
How do you stabilize the uprights? Could you att. to stakes or string to hold the rt/lt legs from sliding?