


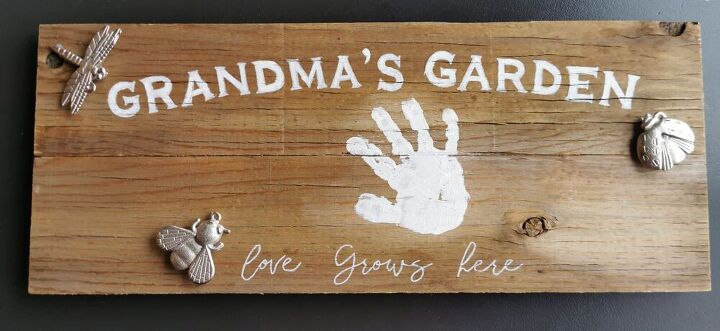
RUSTIC GARDEN SIGN

Last year around this time, my mother coyly sent me a photo of her friend’s charming garden sign. It was a wood sign with hand-painted lettering that said: “Grandma’s Garden”. I got the hint. So this year, I thought it would be special to make a custom sign for my mother’s garden so she can join the “proud grandmas” posse.
We built our outdoor living space three years ago. In the process, we accumulated lots of extra lumber which now currently resides in a huge pile below the deck. It’s such a shame to get rid of such good lumber. So I’ve come up with a few projects to use up this wood: our front porch bench, potting bench, a garden vegetable basket, and this rustic garden sign I’m sharing with you today.
Cutting the Pieces
The rustic and weathered look is very popular for gardens. Lucky for me, after three years of exposure to the elements, I didn’t have to fake this look with my wood. If you’re looking for ways to “antique” your wood, there are lots of tutorials on Pinterest.

I rummaged through the pile and found a narrow strip of 1/4″ thick pine plywood and cut two 18″ length pieces from this. These boards will make up the face of the sign.
I also found a 1″ wide by 1/4″ thick piece of cedar and cut three pieces 7″ in length. These pieces will serve as the backing to the sign.
Putting the Sign Together
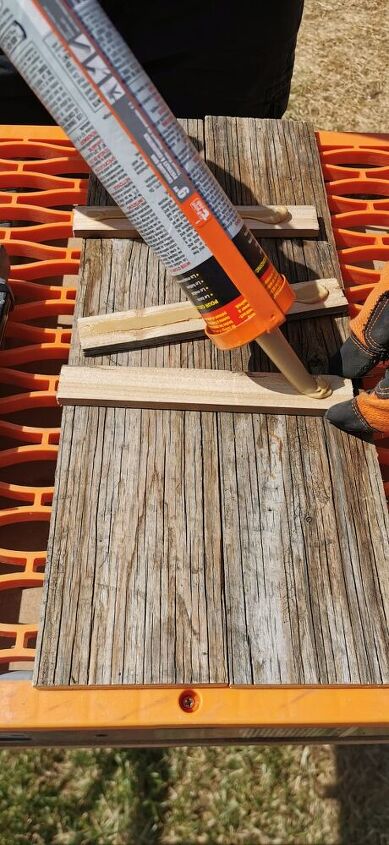
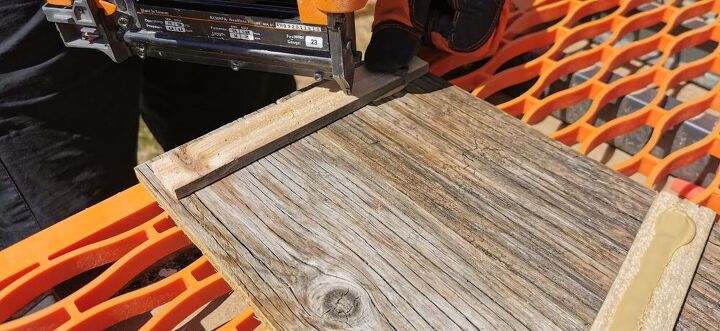
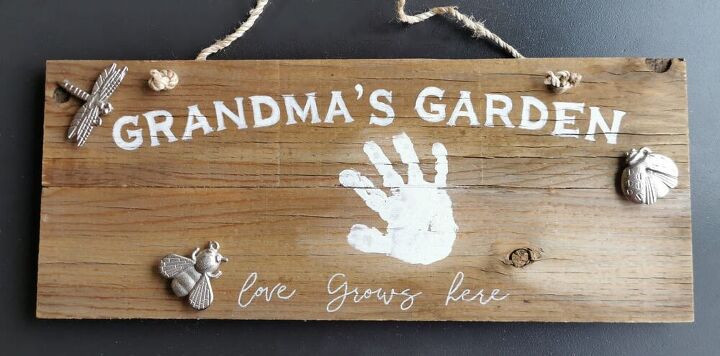
To put the sign together, the 18″ pieces were laid down flat we used construction adhesive on the 7″ cedar strips to adhere them to the back of the boards. To make sure everything held together since the sign will be outside, the strips were also nailed to the face boards with a pneumatic nailer and micro pins. The final measurement of my sign is 7.5″ height x 18″ length.
Hand-painted Lettering
I’m not the greatest free-hander, so I designed the placement of the lettering in Adobe Illustrator. The fonts I used are free downloadable fonts for personal use: Copperplate Gothic Bold and Synthia.
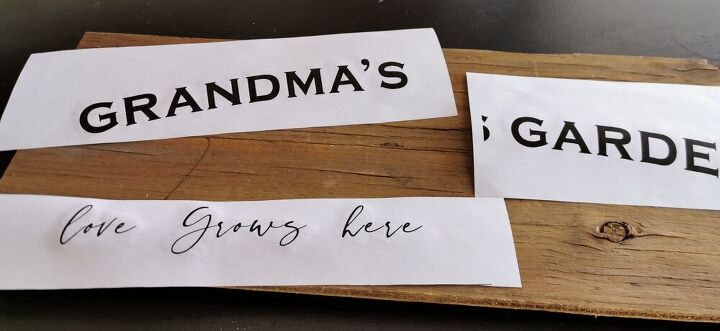
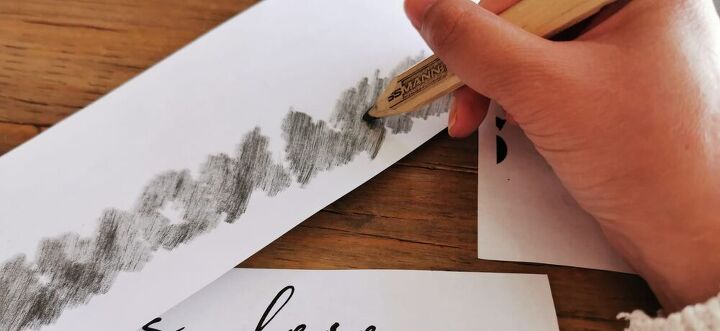
After I printed the letters, I used a pencil to shade the back of the printout. Then, I placed the printout on the sign, pencil-shaded side down, and traced the letters. This transfers the design onto the wood without having to use graphite transfer paper, which I did not have on hand.

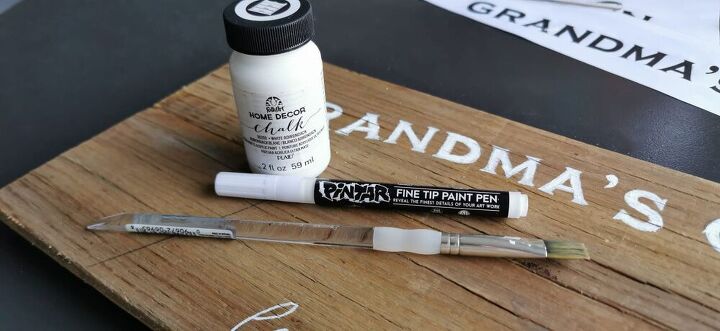
Once the letters were transferred to the wood, I used a white acrylic paint pen to colour them in. I found that the paint pen was really soaking into the wood and not giving me the bright white pop I was hoping for. So I went over everything with white chalk paint.
Decorating the Sign

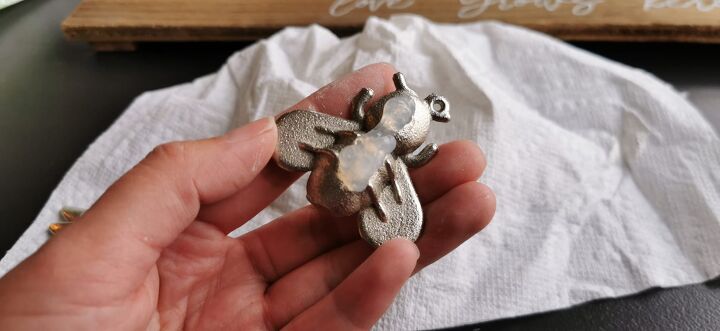
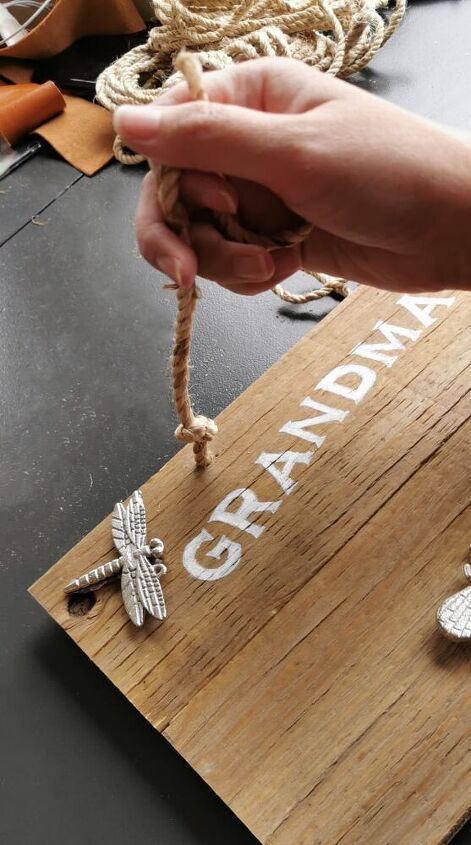
I found these cute tablecloth weights at the Dollarstore of all places! Four of them for $2.50 – what a find! Using silicone on the backs of the weights, I adhered the ornaments to the board to add a bit more charm.
Finishing Touch
Baby Badau’s handprint in white chalk paint is the finishing touch on this piece. As the number of grandchildren grows, they can add their handprints to this sign, too!
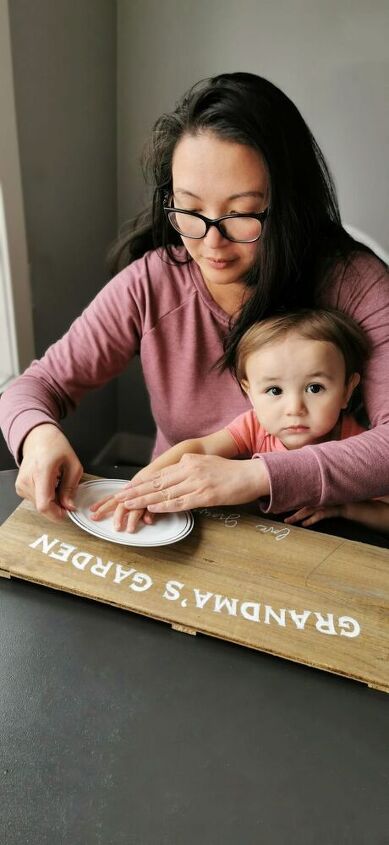
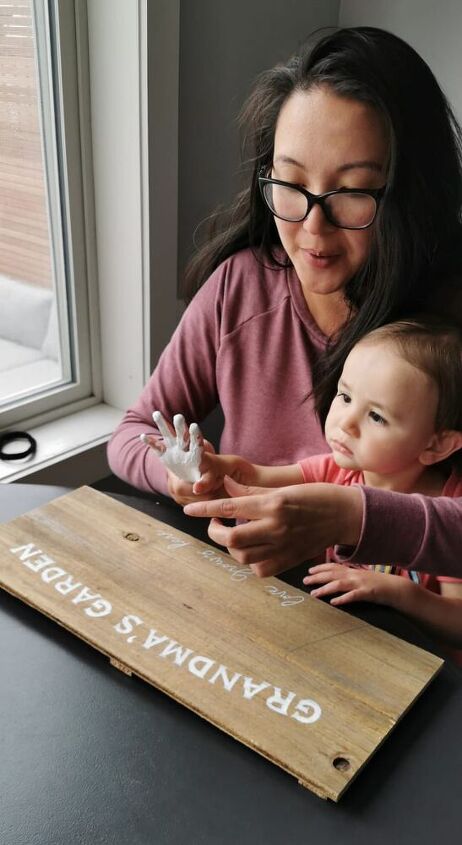
Lastly, I drilled two holes near the top of the sign and threaded jute string through to create a hanger. Now grandma can hang it wherever she pleases!
Check out my blog at https://www.inpursuitofchic.com for more DIY and party ideas :)
Comments
Join the conversation
-
What a great idea! Just love this and especially using the baby’s hand for the handprint! So precious. You’ll never believe this but I had a set of the very same tablecloth hangers that I purchased at the Dollar Tree several years ago. I gave the dragonfly and the bee to two different friends because they collected them. I still have the ladybug somewhere here at home. I’ll find it when I’m not looking for it. But I did find the butterfly. Great project and thanks for sharing.


Frequently asked questions
Have a question about this project?