How to Create a Rose Trellis

Hey Freinds! I’m so glad that you are here. I am so excited to share this project with you. Don’t you just love a cottage in the English countryside covered in roses? Me, too! Today, I am going to show you how I created a rose trellis for the gable above my front door. Let’s go!
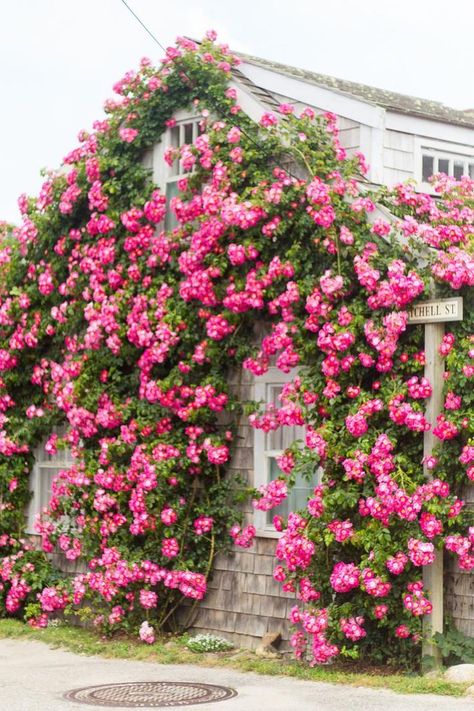
Isn’t this cottage incredible? I absolutely love the look of roses growing on a house. It’s just so charming. I have a great gable above my fron door with a arch covered with natural stone. It’s pretty, but it is defintely needs some roses to climb on it.
When we first saw this house, my husband and I sat at the end of the driveway and knew it was “the one” before we even drove down the driveway. I knew that with loads of love, sweat, blood and tears, that we could make it the home of our dreams.
You may remember that we recently remodeled our front porch, see the post here. It definitely needed it. After the porch was finished, I bought these gorgeous urns and antiqued them, you can see the post here. The picture of the rose covered cottage above is my inspiration. Isn’t it magical? Oh, what wonderful times must be had in a rose covered cottage. My dream is that the roses in my urns will grow up and cover the gable, then just keep on growing. My roses are a pale pink. They will look so lovely on the stone gable. I just needed to add a trellis for the roses to grow on.
These are the supplies that I used for this simple project and all of it cost less that $30. Isn’t that amazing? The very worst part was having to climb the ladder. I hate that part, I hold onto the ladder so hard with my knees that I had bruises on them. Anyway, back to the details. I bought 30 feet of cable, one turnbuckle, six eye hooks and two cable clamps.
My plan was to put an eye hook at the peak of the gable, one at the end on the left and right arm of the gable and an eyehook in between the gable and the end, for a total of six eye hooks.
This isn’t the best video that I have ever done. But, I couldn’t figure out a way to show you up close of what I was doinging. I actually tied the phone around my neck, hoping that the phone would capture what I was doing, but It didn’t go as well as I had planned. So please use your imagination.
Now for the fun part. Thread the cable through the cable clamp, then the eye hook and back through the cable clamp. Tighten the tiny bolts on the cable clamp. It is essential to tighten the bolts completely, as they are what is going to hold the cable. I used needle nosed pilers to tighten the bolts.
I attached the cable clamp to the eye hook on the bottom eye hook on the right side. I then threaded the cable up through the middle eye hook, then the peak eye hook and down the left side. The I threaded the cable from the bottom left side across to the right side middle, then to the left side middle and back to the right side bottom.
Now that I was back where I started with the cable, I ran the cable through the second cable clamp, through the eye end of the turnbuckle, then back through the cable clamp and tightened the bolts. It is very important that you unscrew both ends of the turnbuckle before you hook the turnbuckle onto the eyehook, once it’s attached to the eyehook, now tighten the cable by screwing both ends of the turnbuckle. You will need to trim off any extra cable with a cable cutter. Now, you are just about finished.
After I finished the trellis, I wrangled the rose branches and tied them loosely with twine, so that they were all together. Then I carefully twisted the rose branches around the cables. As the rose bush grows, I will need to continue to train the rose bush around the cable until it is established. Ta da! Now, I wait for the rose bush to grow and fill in the gable. I just can’t wait. It is going to be amazing!
Thank you so much for stopping by today. I so appreciate your support.
Hugs and blessings to you,
Renae










Frequently asked questions
Have a question about this project?
What kind of rose did you buy to climb? Also does it bloom all summer?