


How to Refurbish Wind Chimes

by
Pam Hoepner
8 Materials
$10.00
3 Hours
Easy
My wind chimes have seen better days. They have endured 10 years of cold Michigan winters & brutally hot Florida summers. It was time. So, here is how I refurbished them to look as good as new.
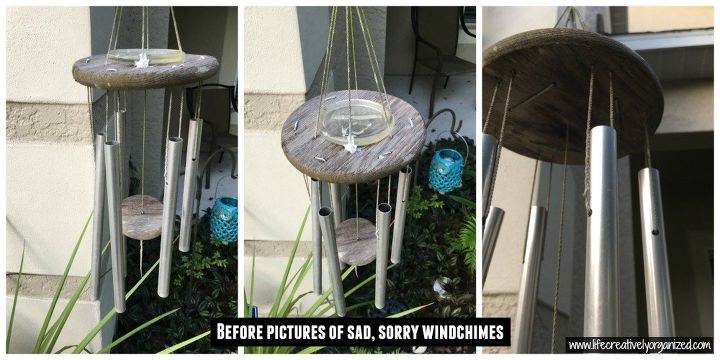
My sad, sorry old wind chimes.
The first thing I did was take pictures from every conceivable angle so I would know how to re-assemble it later.
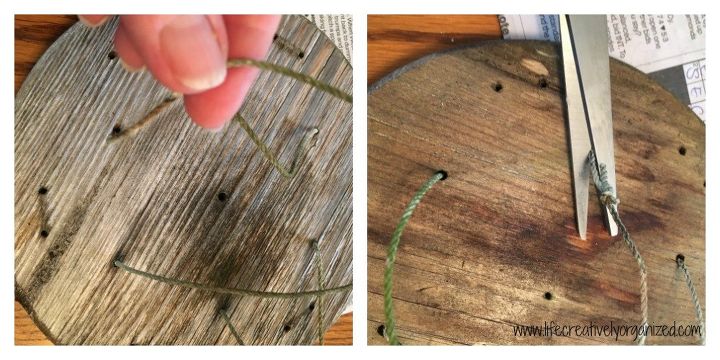
Cut the old strings but keep them.
I carefully cut the strings attaching each piece and set them aside to use for measuring my new strings. Then I cut new pieces to slightly larger than the original pieces, to compensate for tying knots in the strings. (affiliate link) This is the nylon string I used.
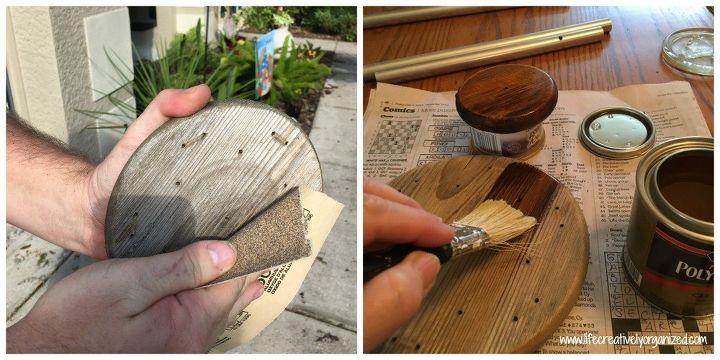
Sanding and staining wood disks.
Next we sanded the very weathered wooden disks. After they were smooth, I sealed them with several coats of clear satin polyurethane. (affiliate link) Here is what I used. I set the smaller one on a cat food can so I could get all of the edges covered. I also poked a toothpick into all the holes to make sure the polyurethane didn't plug them up.
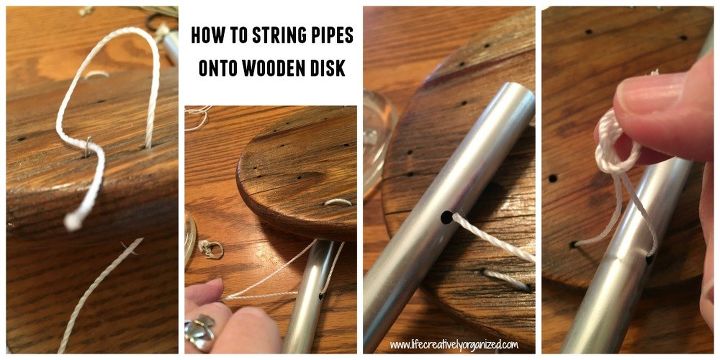
Restringing the pipes.
This is where using my photos came in handy! I made a needle from a small piece of wire. Then I melted the ends of the string in a flame so they wouldn't fray, and I restrung the pipes using my pre-measured strings. I made sure the knots were tucked inside the pipes so they couldn't be seen .
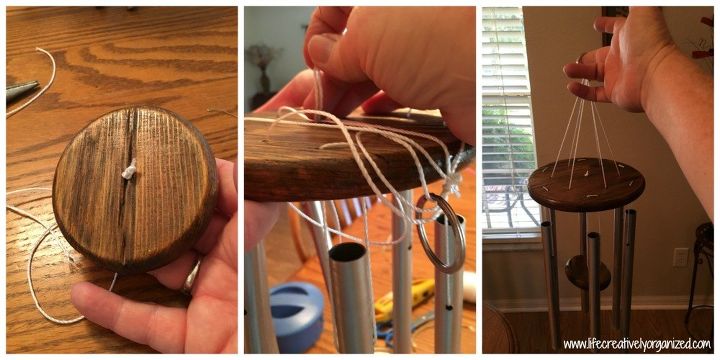
Re-attaching the clapper and hanger.
Next was re-assembling the hanger strings and attaching them to a metal ring for hanging. The last part was attaching the clapper and then the decorative glass piece underneath the clapper.
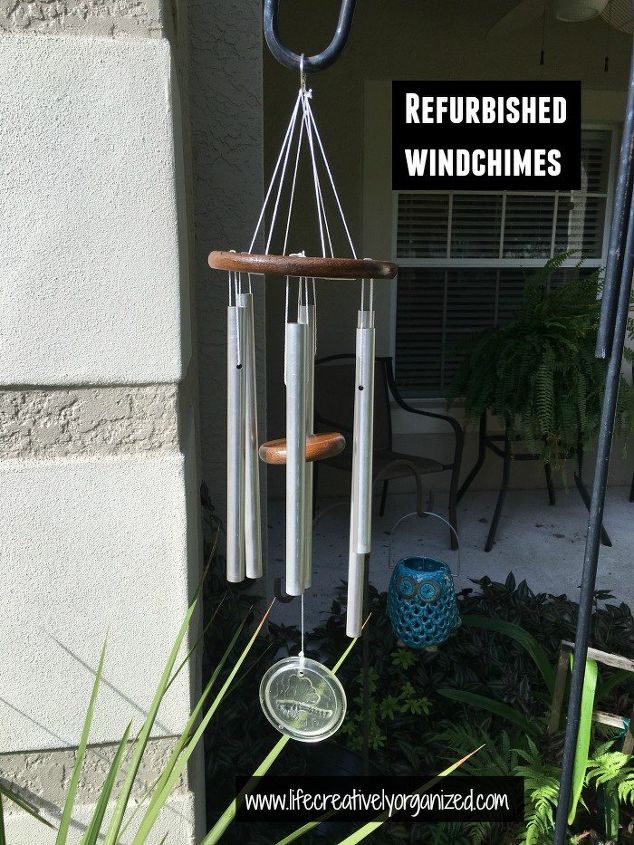
Re-furbished wind chimes. Good as new!
This is my completed project. The wind chimes look good as new! To see the steps in greater detail, visit my blog, Life, Creatively Organized. The link is listed below! :)
Want more details about this and other DIY projects? Check out my blog post!
Comments
Join the conversation
3 of 8 comments
-
You're welcome, Sue! Thanks for the kind words! We lived in the thumb :). So yes, lots of cold and wind :)
-
I recently refurbished a set of windchimes that I thought had been lost until my husband cut down the azalea bushes against the front of our home. I did not even think about taking a pic, but, your project brought back a smile because I know exactly how it feels to see the fruits of your labor. I am sure that you will enjoy them even more.


Frequently asked questions
Have a question about this project?