


Re-purpose Ceiling Fan Into A Spectacular Yard Decoration (Two)

My neighbor likes this idea and so will you. Colors and placement optional.
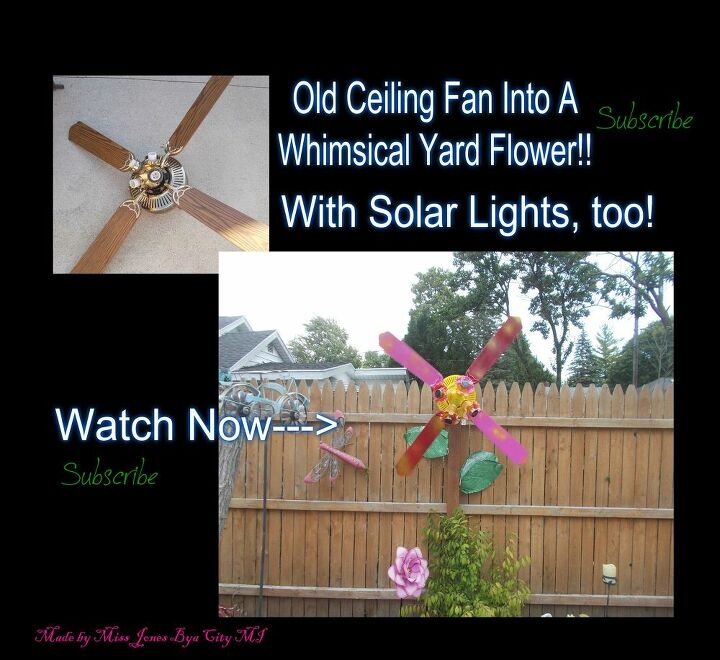
Included is a video journey. I take you along during my frustrations and ideas for this sentimental ceiling fan. Enjoy---> https://youtu.be/xl12dStxwoo
Written Instructions as follows:
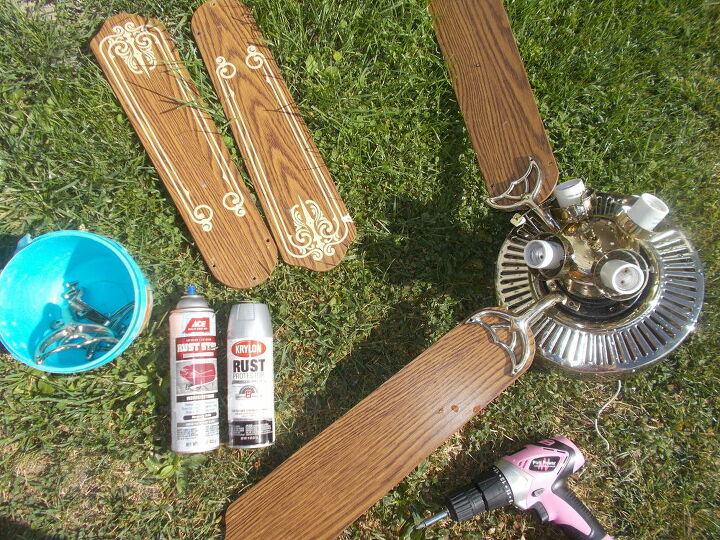
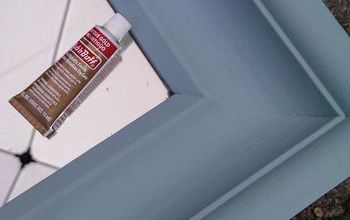
Take apart the entire fan. Wash and dry. Use a bucket to store the nuts and bolts and hardware. Find outdoor primer, paint in the colors you prefer.
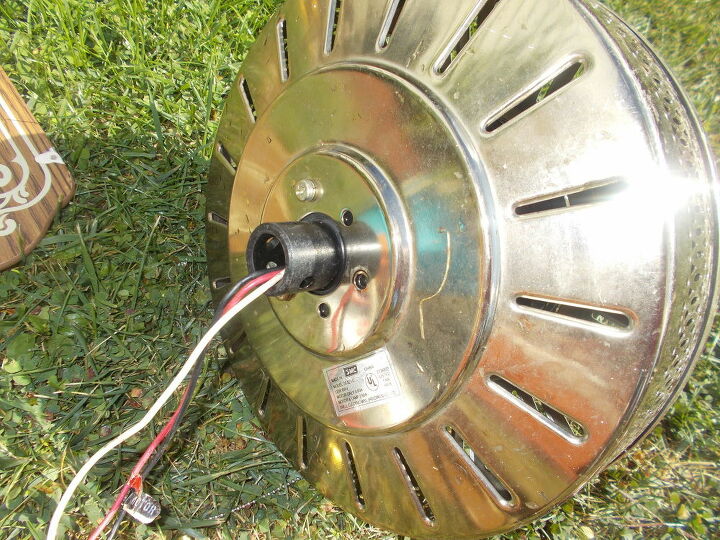
Remove the rod on the back, and expose the wires. These would connect to the ceiling, however, I have to clip them out of the fan.
I use wire cutters, yet, I have to get all the wires, and continue with a heating knife. This area has to be able to replace the rod, and add a strong bolt threw it.
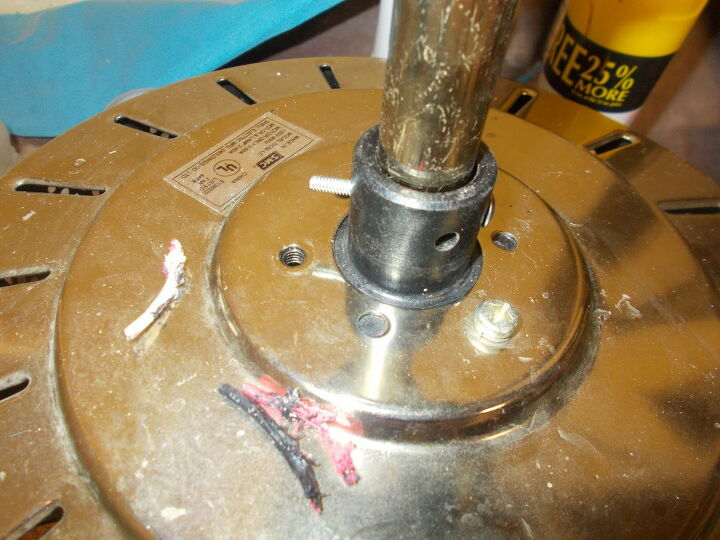
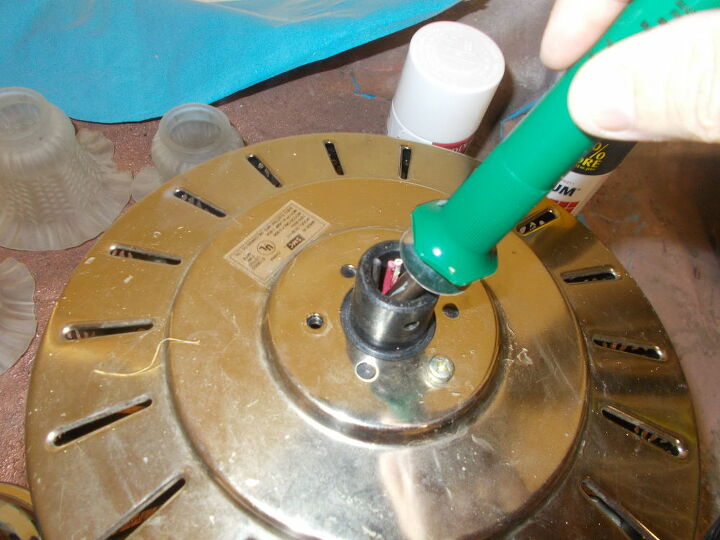
Re-attach the rod. Find a bolt, and a nut. Thread it threw the entire rod.....
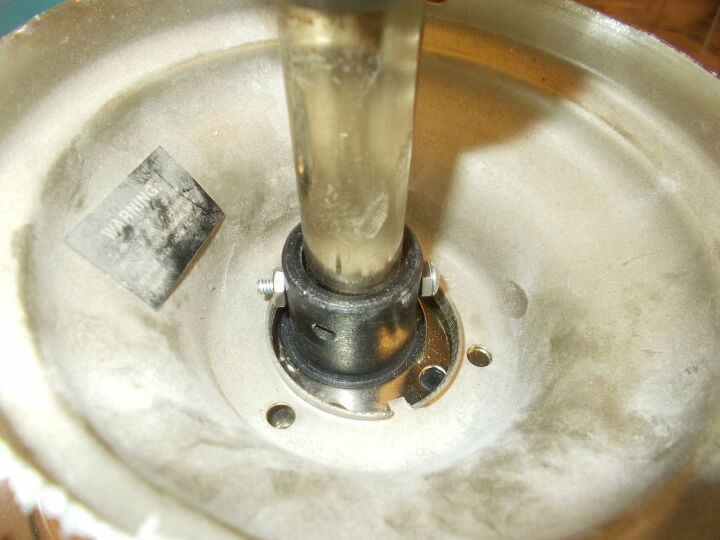
If the bolt works, place the decorative cap back on the rod first, then use the bolt, tighten it. In my video, I ended up NOT using the brass cap, so I removed it, and replaced the bolt and tighten the rod. This is optional.
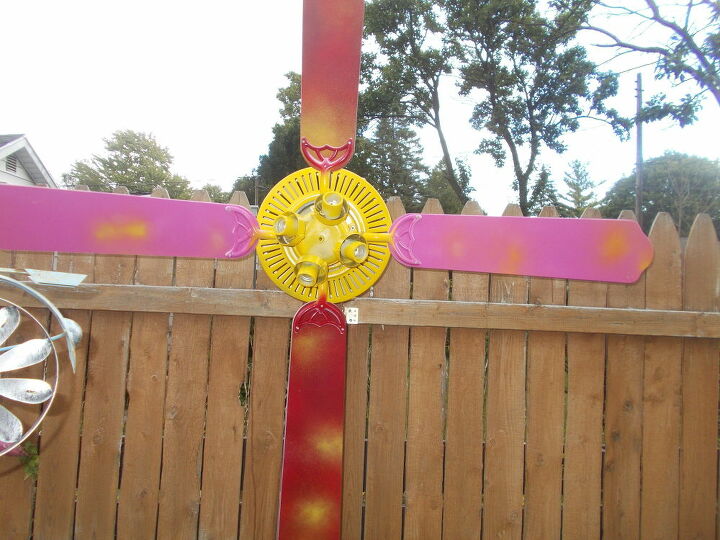
Here, in this picture, is the cap on the rod. Later, I remove it. Paint the parts. Use primer on the blades. The brass, use a good spray paint for that metal. Paint globes if they are from the ceiling fan. I decided to make a spinning flower for the back yard. Not using the globes? Make a spinning wheel and use silver paints or copper paint. The idea can be versatile and for any size fan!
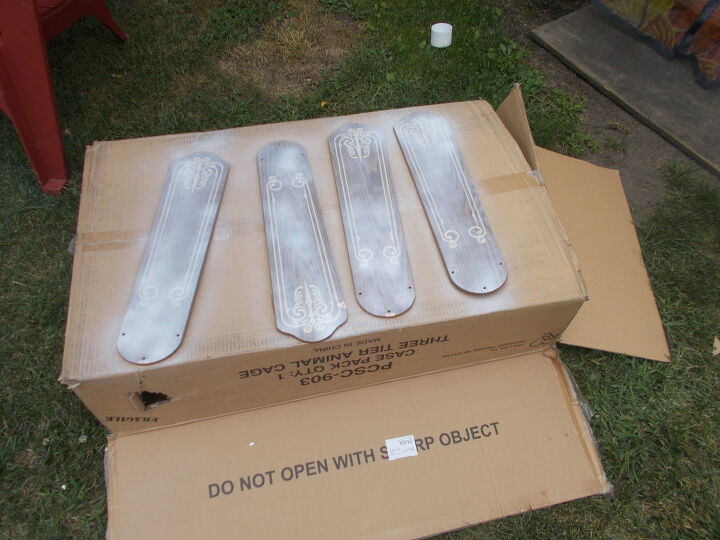
Prime the wood blades. Very important. The painting stage goes on all day. Leave everything to completely dry overnight. Do not assemble until the next day.
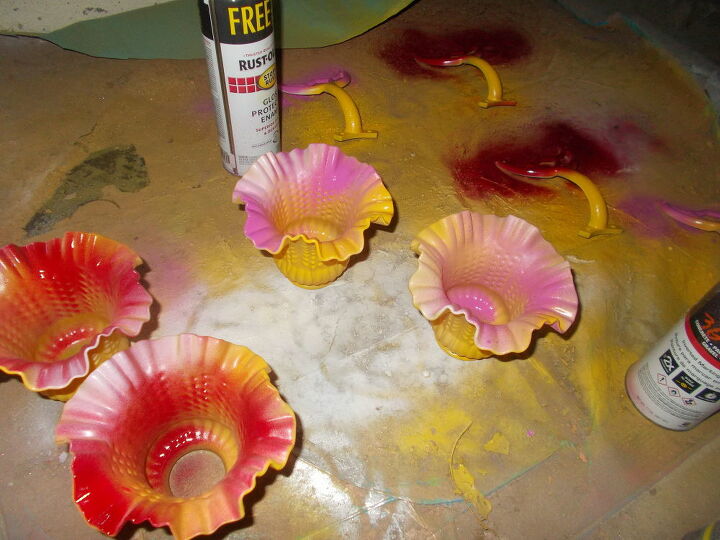
I used spray paints I already had. I used a bolt I already had. Cost so far, not a penny. Use what you already own. Crafting is expensive, and I am a 'pennypinching jones' girl!
Next up, what did I use to brace the fan on the fence post?? Here is a video explaining TWO options. (I hope Hometalk displays the video) The fan must be placed on a cemented, heavy duty fence post. The fan can become free standing, or, up against an existing fence. I did the latter-up against and on TOP of my existing fence post. My son helped me brace it. --->
(Note: Look at the TOP of the page for this demonstration, it does have an advertisement before the video plays!) (20 sec ad)
****************************************
Here is my two ideas to cap the fan on top of a fence post. This is a video, not a photo. If new to Hometalk, Hometalk makes it an advertisement first, before viewing the video. My Youtube link is below, that will take you into the entire journey, if interested.
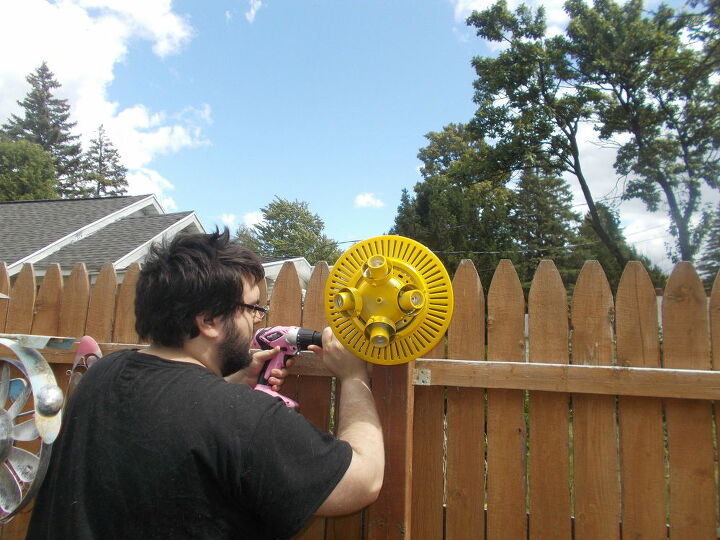
Using TWO "L" brackets from Home Depot, and wood screws, we placed the fan and the rod on top of the post, and cap the device down on the fence post.
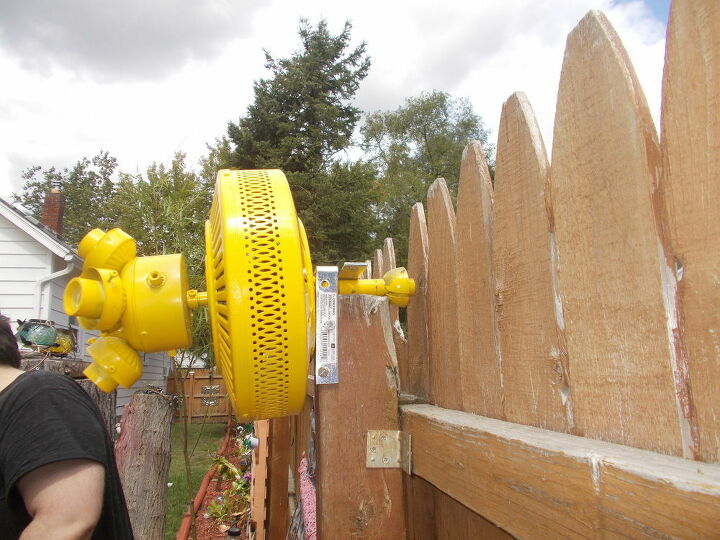
Easy and I can remove it for winter storage. Ceiling fan blades can not survive out in the MI winter weather. No matter how well it is coated with protective spray, they will still warp. So a removable idea is the best for us. **I explain another idea in my YouTube video. Video is attached to this post.
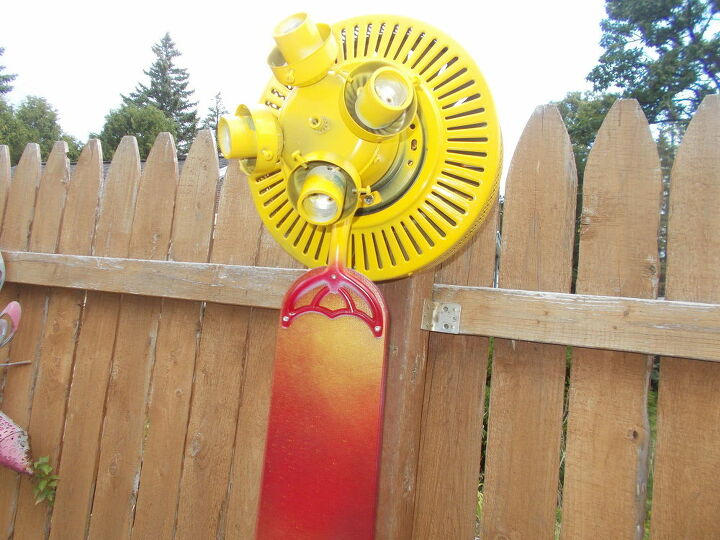
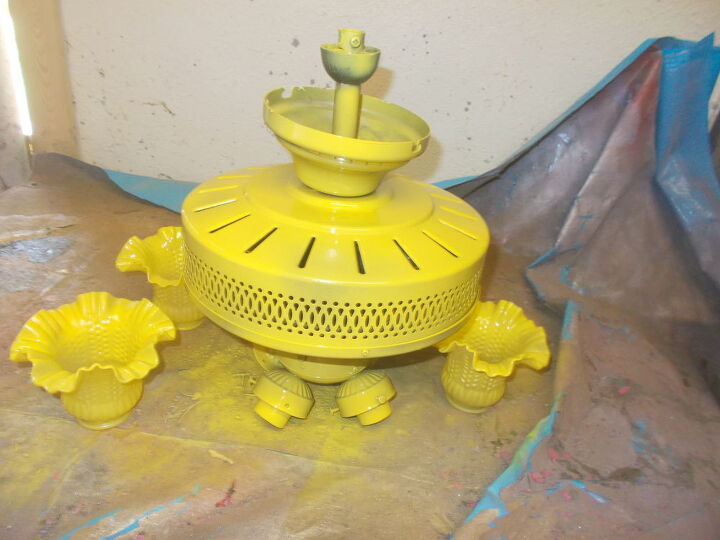
Once the main component of the fan is placed on a post, time to add the pieces back together. Every piece primed, painted, and glossed with clear enamel. Blades first, then the globes. I add solar lights, last.
Without the tulip globes........see a windmill with other colors??? I do! Will be my NEXT re-purpose idea for a ceiling fan.
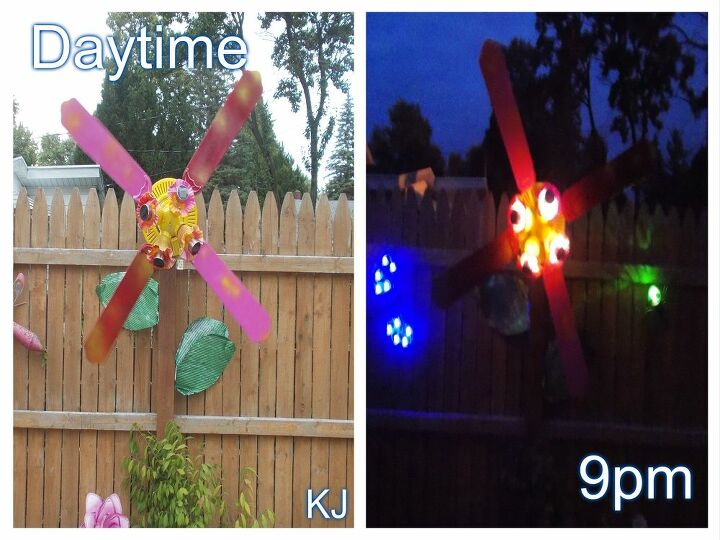
Finally, I did use two disposable cookie tins to make a few 'leaves' and stabled them to the fence post, behind the blades. This is optional. If making a flower, is an idea. If you want to make a rustic windmill, no need for leaves. The solar lights are from Dollar Tree ($1 ea times 4) and so were the disposable cookie tins. Total re-purpose cost for me on this spectacular project was under $10! And, my neighbors like it and this ceiling fan was a gift from friends. I had to keep it and use it some how! Bless!!
Miss SGT., K. Jones, Retired
Bay City, MI
Legacys Little Luxuries Arts And Crafts YouTube


Frequently asked questions
Have a question about this project?