


How to Make Faux Brick Panels Look Custom

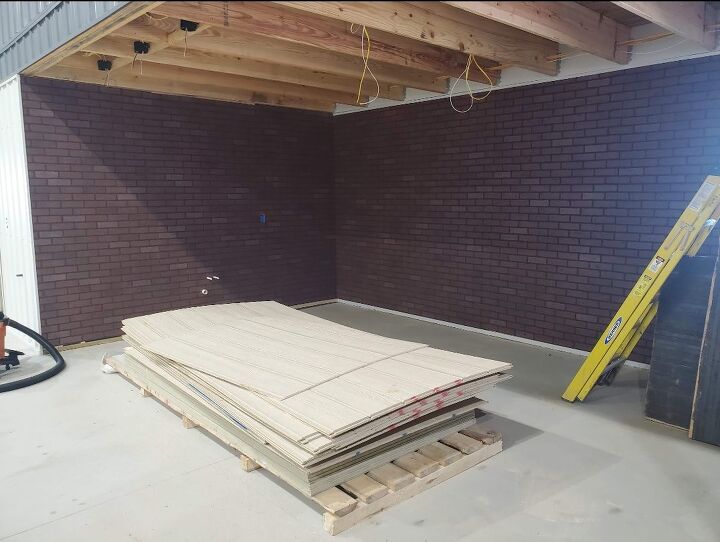
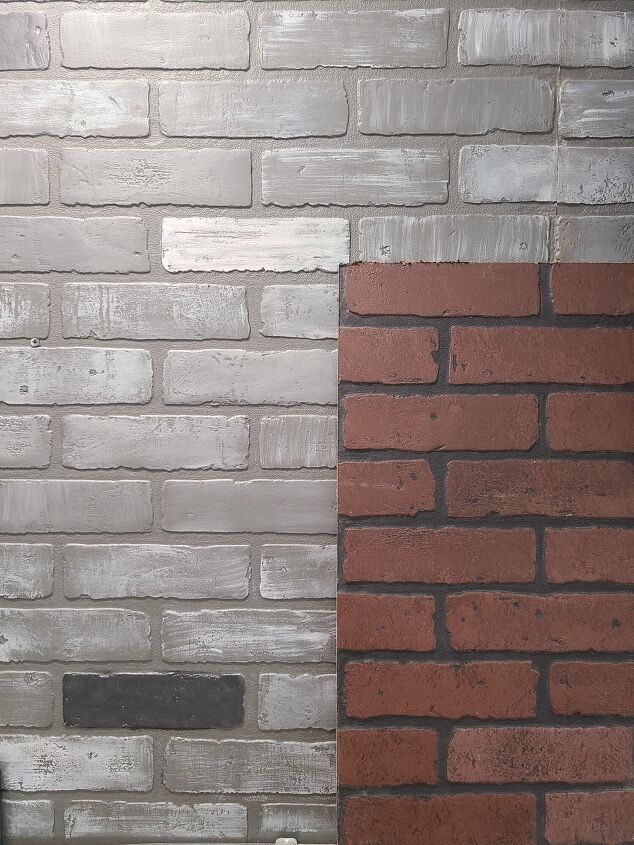
We knew that we wanted brick in our new entertaining space, but honestly, it wasn’t in the budget for real brick. But, the thought of the red brick panels made me cringe.
I did a ton of research on whitewashing or applying a schmear to the panels, but in all of the up close pictures, you could see the red brick through and in some cases it created a pink tint.
So, through some trial and error, I figured out a way to create a custom brick look.
Materials/Tools:
- Faux Brick Panels
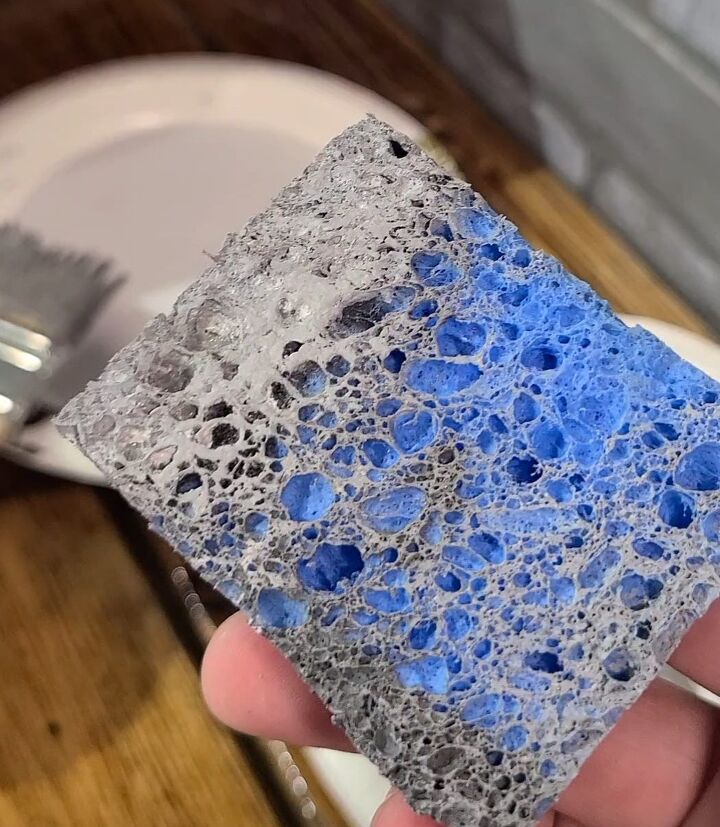
- Sponge – Cut to size
- Wall Paint – Enough for a base coat
- 2 bottles of acrylic paint in your choice of colors
- Paper Plate or Paint Tray
- Paper Towels
Prepping the Panels:
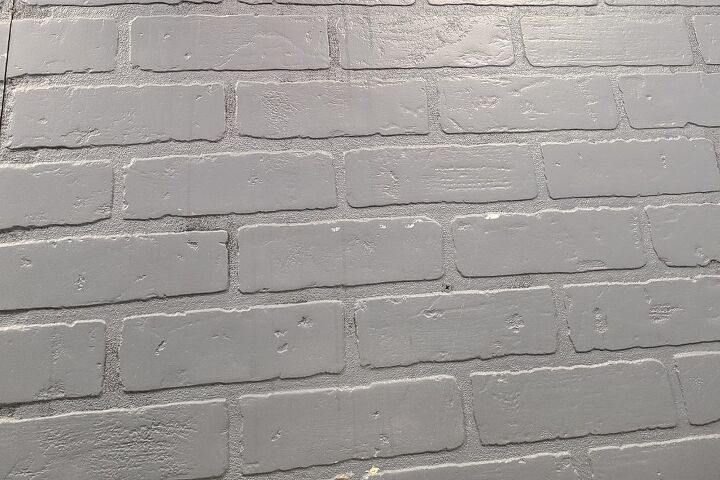
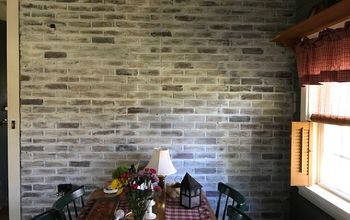
Once the caulk dries, paint your entire panels your base coat color. We chose a charcoal color to complement the colors of our shed and our stained concrete floor. Don’t worry about the grout lines, just paint the entire panels with a solid coat of your base color.
Customizing the Faux Brick Panels
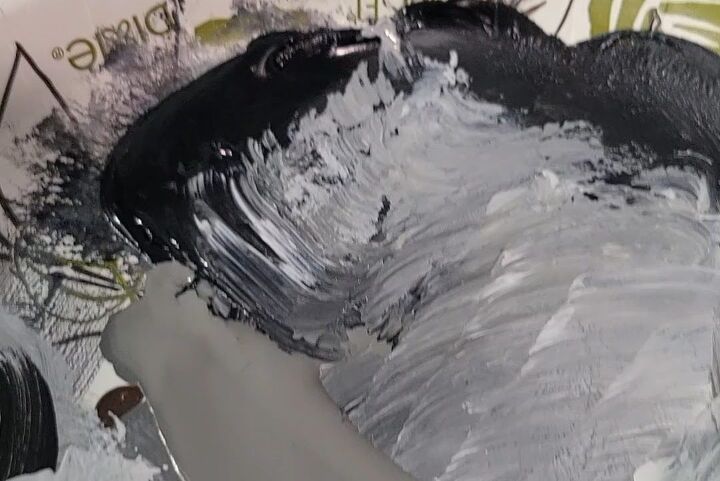
After your base coat has time to dry, you’re ready to get creative.
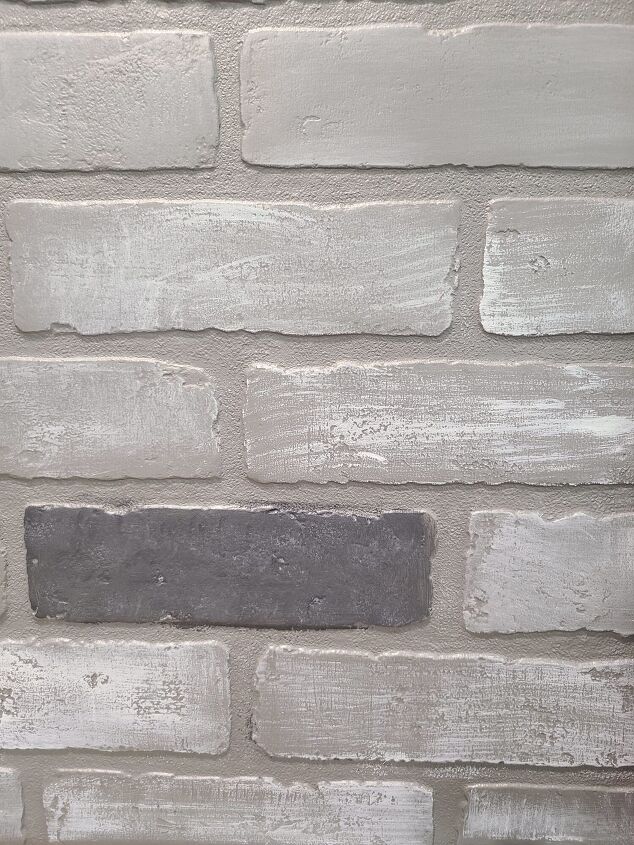
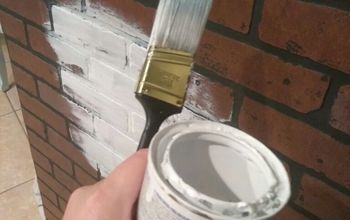
We used a basic kitchen sponge cut to the height of a brick and some acrylic paint. On a paper plate, we added some white, black and some of our base color paint. You could pick to any color or even add more white for a whitewashed appearance.
We started by dipping the sponge in the paint lightly and dry brushing it on with the sponge (blot on a paper towel if necessary to remove excess paint).
On some bricks we worked side to side, others we worked up and down, while on others we swirled the sponge. The goal was to apply the paint lightly so that it highlighted the texture of the bricks.

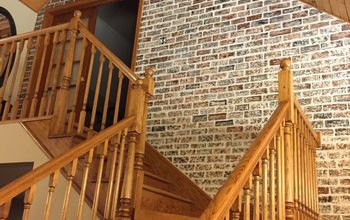
To make the brick look more textured with varying color, we added in lighter bricks and darker bricks emphasizing the natural texture.
If you accidentally get some paint on the grout lines, just use your base paint color to touch it up.
It took two of us about 2.5 hours to paint the top halves of 6 panels of brick.

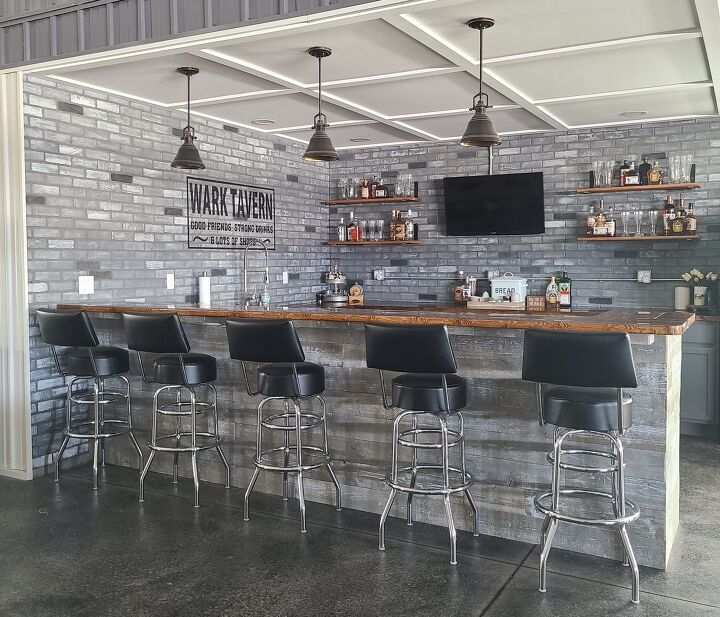
It was such a fun project and I love how it out. We have gotten so many compliments on it from family and friends.
Resources for this project:


Comments
Join the conversation
-
Looks great. I love the look of brick without the trouble or expense. Your bar area is terrific.
-
Excellent! So well done!


Frequently asked questions
Have a question about this project?