


How to Paint an Accent Wall and Change the Entire Look of a Room

By Alexa Erickson
An accent wall invites diversity to the home. The singular walls serve as their own wall decor by adding a pop of color or design that stands out while still complementing the other walls of the room. Sticking to just one wall with that bold color you’ve been dying to try but don’t want to overwhelm a space with is a great way to indulge in your daring side without going overboard.
Enticed yet? We’re here to guide you through not only the physical act of painting an accent wall, but we’ll also provide some creative accent wall ideas and color suggestions. Here’s everything you need to know about how to paint an accent wall to create a stunning focal point in a room.
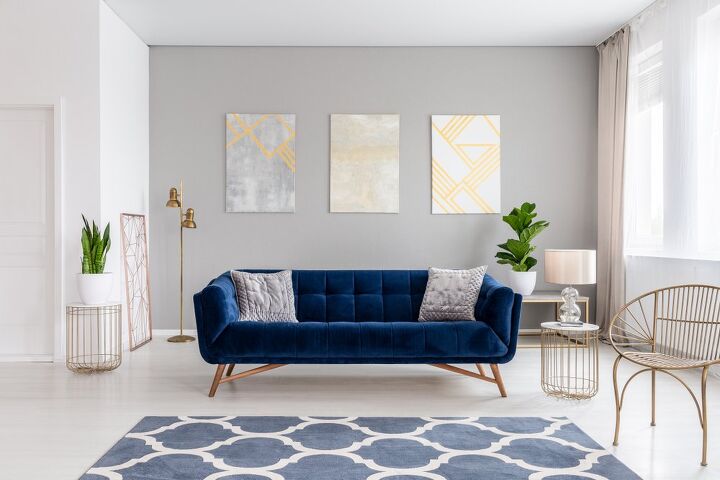
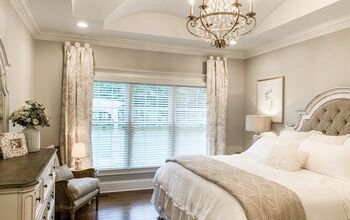
Photo via Shutterstock
How to Choose an Accent Wall in Your Home
As exciting as it is to finally put that fun color to use on your walls, it’s important to be intentional when picking your accent wall. It should be a wall that you want to stand out. Because the purpose of the wall is to draw the eyes to it, it should have symmetry; stay away from walls with a slope or varying window sizes. A foolproof choice is a solid wall that’s free of built-ins, windows, or doors. A few exceptions include walls with built-in bookcases or fireplaces—a bold pop of color on the walls surrounding these fixtures can be a great way to accent them.
When choosing a wall to accent, you should also consider your decor. Avoid walls that already have a lot going on that you're not planning to change, such as a gallery wall, window treatments, or large furnishings like a tall bookcase or floor lamp. This decor is likely making enough of a statement on its own. Instead, opt for a wall that will stay pretty empty. Some common accent walls include the wall behind a bed, behind a desk in an office, and a single, otherwise-empty wall in a living room.
Painted Accent Wall Ideas
An accent wall begs for creativity, and the paint options are endless! Find the right hue, play with patterns, try stenciling, and more! Here are some creative accent wall ideas to get you started:
Use Paint as an Illusion
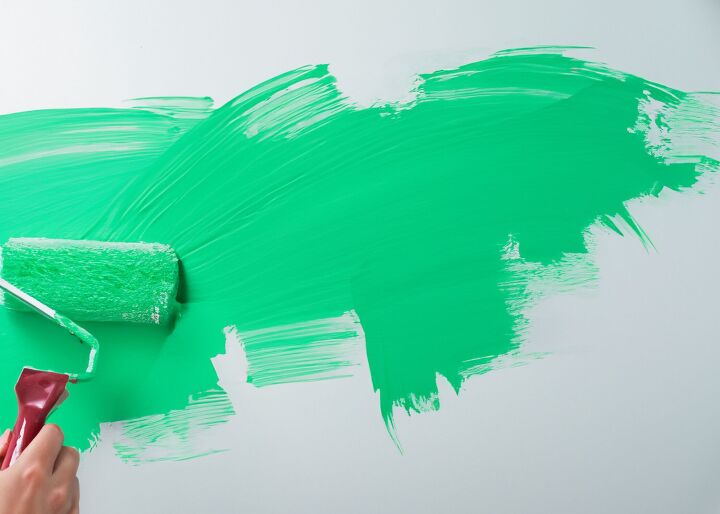
If you have a short wall you’d like to appear longer, paint it in a cool hue such as blue or green, which will brighten up the wall and make it reflective, maximizing the natural light touching it. If you have a particularly long wall, balance its length with the rest of the room by painting it a warm hue like red or orange.
Play with Patterns
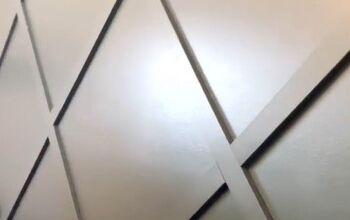
An accent wall doesn’t mean you have to stick to painting the whole wall one color. Play with patterns by painting stripes, chevrons, or by using stencils.
Make it a Mural
If you’ve got a painter’s touch, a mural is a fun way to add artistic expression to a space. Just be sure that all of the colors used for the mural pair well with the room’s decor.
Create a Wainscotting Effect
By only painting half the wall, you can make a big splash! A half-half horizontal accent wall will create a wainscoting effect without needing to break out your nail gun. Just measure the wall vertically and divide it in half. Typically the lighter paint color, usually white, goes on the bottom and the darker paint color goes on the top half of the wall. The look adds classic elegance while provoking visual interest to the space.
Paint Just the Trim
Ditch the white trim: A sure conversation starter is to create an accent wall by painting just the trim. Going for a bold color against a wall in a shade of white is visually satisfying.
How to Paint an Accent Wall
If you plan to stick to the basics and plan on painting a wall one solid color, follow these instructions for how to paint an accent wall.
Tools and Materials Needed
- Measuring tape
- Paint
- Spackle (if needed)
- Putty knife (if needed)
- Clean rags
- Soapy water
- Ladder
- Painter's tape
- Tools to remove outlet and light switch covers
- Drop cloth
- Primer
- Angled paint brushes
- Paint rollers
- Paint tray and liners
Step 1: Pick Your Wall
Choose the wall you want to paint in accordance with the tips and ideas provided above.
Step 2: Pick Your Paint
Select the color and sheen you want for the room. You may want to do some color swatches to see how the paint actually looks in your space before committing to buying a bucket of paint.
When choosing your paint, be sure to calculate how much paint you’ll need for the wall you’re painting. How much paint you’ll need will depend on how big the wall is that you're painting. A good rule of thumb is that one gallon can of paint covers up to 400 square feet — generally enough to paint a small room such as a bathroom. So, depending on the wall, you may be able to get away with a half-gallon of paint (remember that you'll want paint leftover for touch-ups!).
The paint sheen, or the glossiness of the paint finish, is also up to your choosing. Here are some general guidelines for paint sheen:
- Flat: Low sheen and is used for most low-traffic walls, as it hides many surface flaws.
- Eggshell: Easier to clean than flat paint, eggshell is a very subtle sheen typically used in halls and bedrooms.
- Satin: This sheen is soft, pearl-like, easy to clean, and great for high-traffic rooms like kitchens and bathrooms.
- Semi-gloss: A more reflective sheen that is highly durable and easiest to clean. Ideal for kitchens, bathrooms, trims, and doors.
- High-gloss: The shiniest sheen and easiest to wipe clean. Best for doors, cabinetry, decorative molding, and trim.
Step 3: Prep Your Space
Remove any artwork from the wall, as well as nails. Fill in holes with some spackle and a putty knife, and wipe or lightly sand away excess after a few minutes (make sure to follow the drying time on the spackle product you use). Move any furniture away from the wall. Wash the wall with a rag and soapy water, and then dry with a clean cloth. Finally, place a drop cloth on the ground beneath the accent wall to catch any accidental paint drips.
Step 4: Apply Painter's Tape
Apply painter’s tape to the edges of your trim and baseboards so the tape goes over them. If you prefer, protect the trim and baseboard with plastic and more. Also place painter’s tape along the edges where the wall you'll be painting meets any adjoining walls. If outlets and light switches on the wall you’re painting are removable, take them off. If they’re not, cover the faceplates with the tape.
Step 5: Prime
Primer is always recommended if you want the accent paint color to truly shine through. You especially want to prime the accent wall with at least one coat if you’re switching from a higher sheen to a lower sheen, a darker color to a lighter color, or if the wall you’re painting has any imperfections that you’re trying to cover up with paint.
Pour primer into a paint liner on a paint tray. Drag a paint roller through the primer, roll off the excess primer, and begin priming the accent wall, starting from the top of the wall down. Work in six-inch sections, using a “W'' stroke. Once you reach the bottom, roll on more primer, then fill in the “W,” to ensure the entirety of the paint is faced in the same direction. For edges that can’t be reached with the roller, use an angled paint brush to apply the primer. Let the primer dry per the product’s instructions.
Primer Isn't Perfect
Step 6: Paint
Pour your paint into a paint liner on a paint tray. Drag a roller through the paint, roll off excess, and begin painting the accent wall, starting from the top of the wall down. As you did with the primer, work in six-inch sections, using a “W'' stroke. Once you reach the bottom, roll on more paint, then fill in the “W.” For edges that can’t be reached with the roller, use an angled paint brush to apply the primer.
Once you're finished with the first coat, allow it to dry for at least an hour if not more before following with a second coat of paint. (The paint doesn’t have to be fully dry before applying a second coat.)
Step 7: Wrap Up
Remove the painter's tape once the painted wall feels dry to the touch, which should be about an hour after you're done painting. Take your time to lift the tape off the edges of your wall, pulling at a 45-degree angle.
Replace all objects you removed from the wall like light switch and outlet faceplates.
While the painted wall will be dry to the touch in just a few hours, it still needs proper time for the paint to cure. Avoid washing or rubbing furniture against the walls for two weeks.
Do you have plans to paint an accent wall? What’s your color of choice?


Frequently asked questions
Have a question about this project?