


How to Remove Veneer The Easy Way
Veneer damage is every furniture painters nightmare. Learning how to remove veneer the easy way wasn't easy at all. It took years to figure out that every piece was different and because they were different, it took different methods. Today I would like to share with you a few ways that I use to remove that pesky stuff.
The biggest challenge of removing veneer is the glue that bonds it to the wood. The older the piece, the easier it is to remove. But then again, some furniture manufacturers I swear used elephant glue.
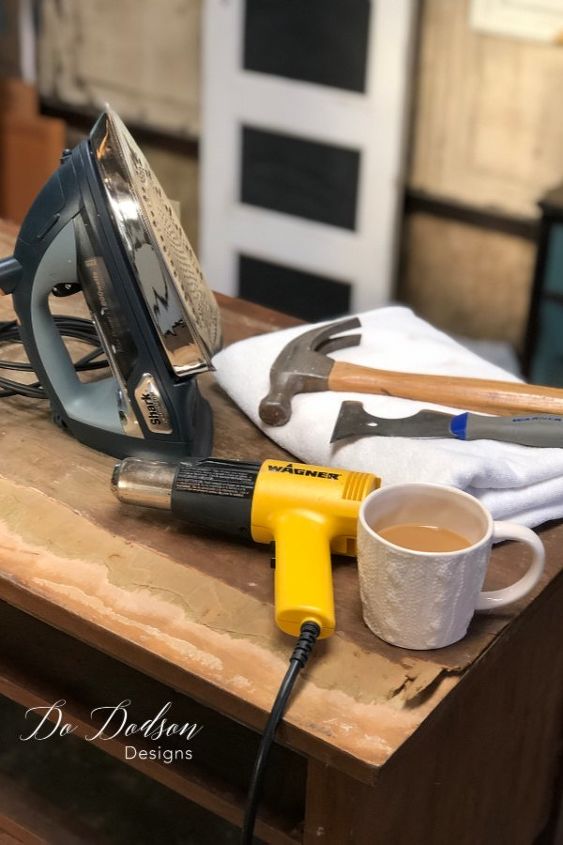
#1 First thing you will need is COFFEE, and a lot of it! Just kidding of course, but you will need your strength. You can expect your arms to be sore as well as a few blisters if you don't use gloves. I had to learn the hard way.
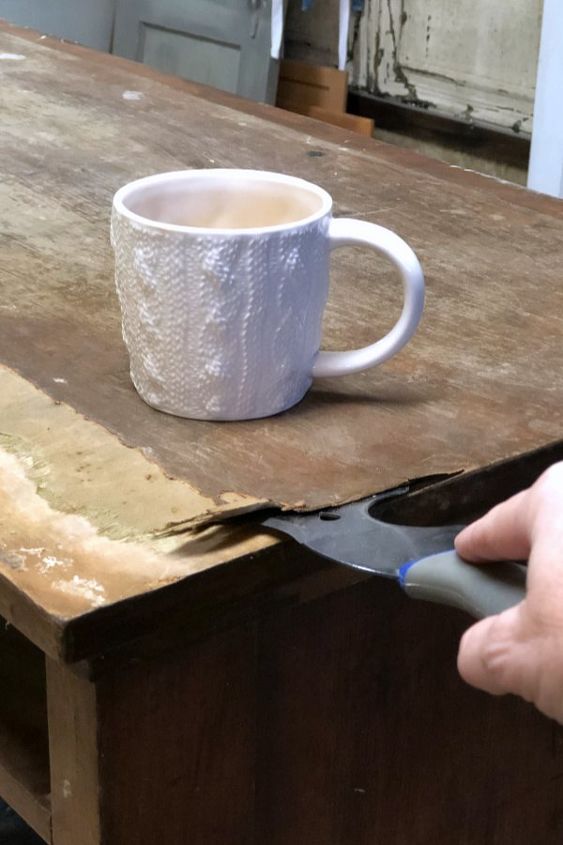
I always start off lifting the veneer at the corners. This will be the most likely areas to lift first because of exposure to rubbing, air and moisture. There have been times that the scraper was all that was needed to remove the veneer. It's a rare occurrence but it does happen.
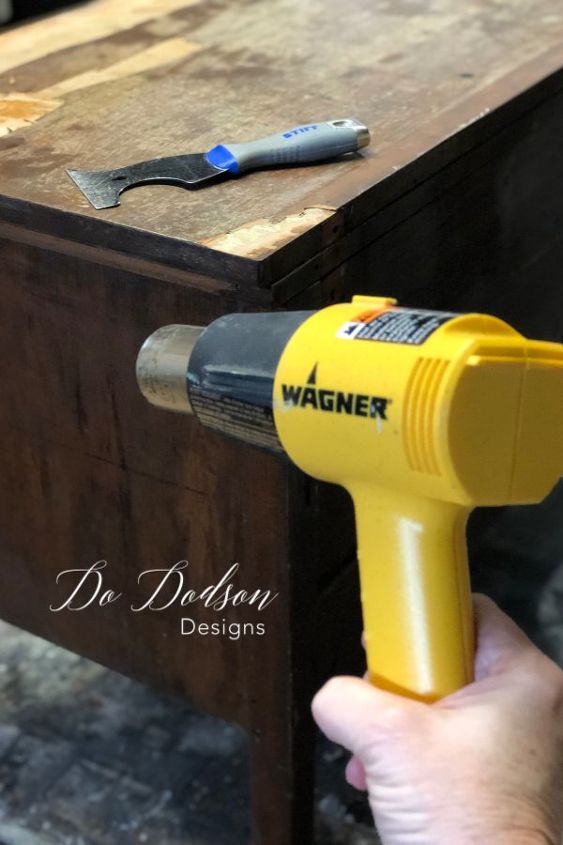
#2 Sometimes it's necessary to get more aggressive. I have found that extreme heat will cause the glue to melt and make it easier to remove the veneer. I use a heat gun while prying the veneer up with the scraper at the same time.
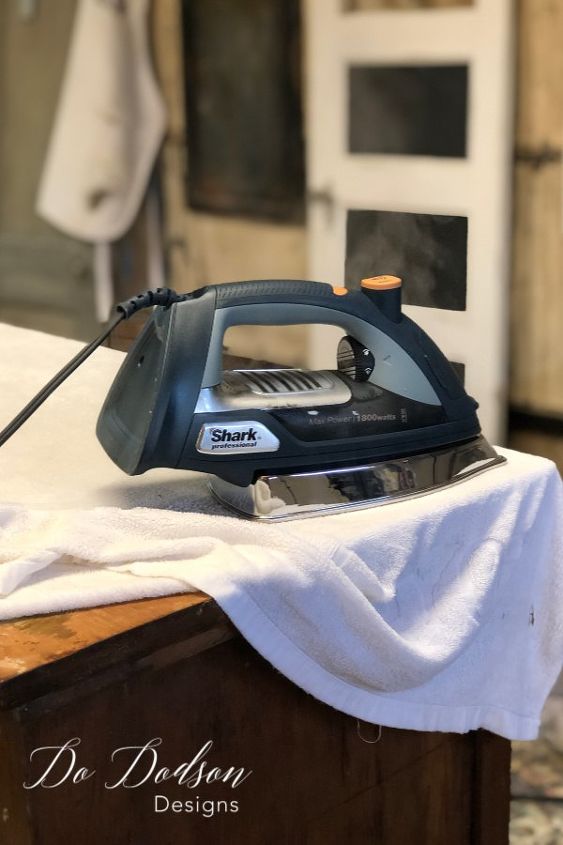
#3 If the other methods fail, I use the wet towel method. By placing a wet (saturated) towel on top of the veneer and leaving it overnight. The glue will start to break down, because most glues that were used back in the day were water based. Also I have used a steam iron on top of the wet towel to speed up this process if you don't want to wait overnight. Heat and water will help remove the most stubborn glue.
#4 Don't do this! I know it's tempting to try and just sand that sucker off, but I promise you it won't be pretty the next day when you feel like your arms are falling off. How do I know? Been there, done that!
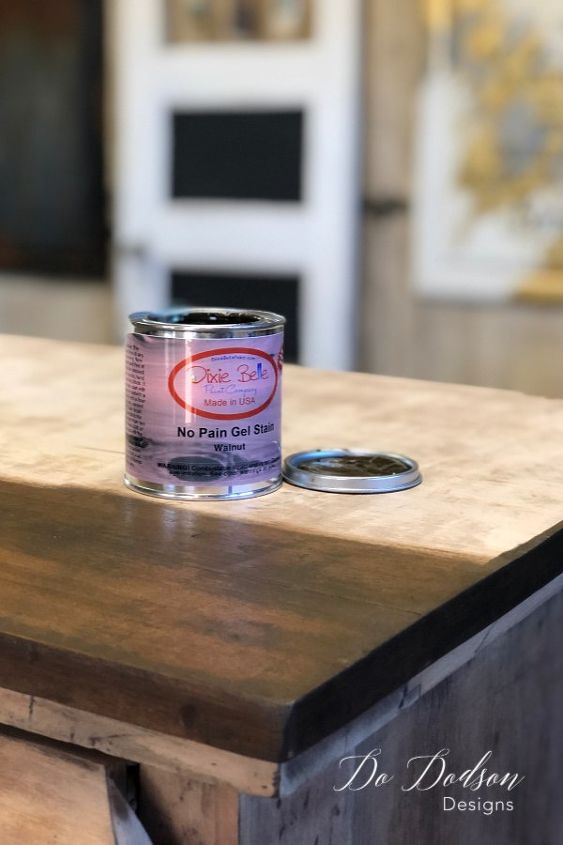
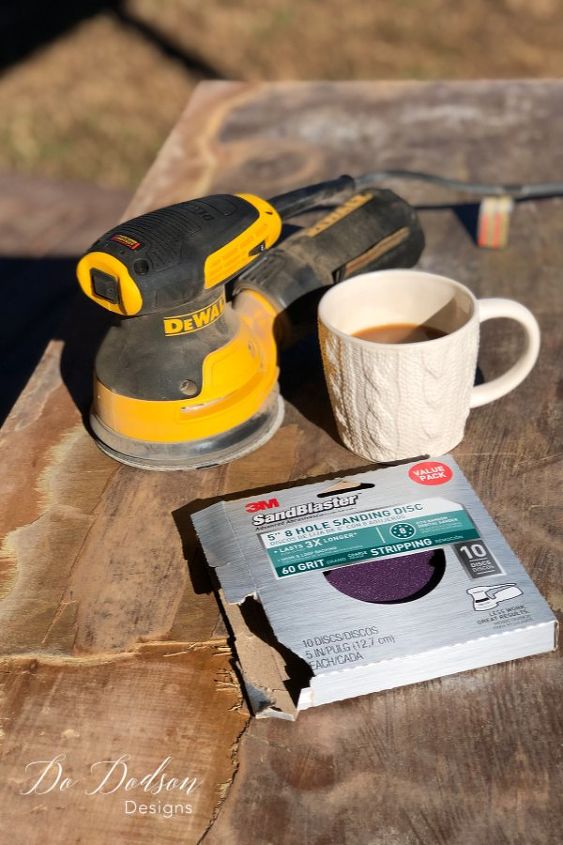
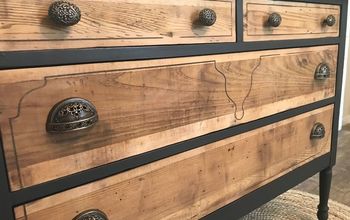
Once the veneer is removed, use an Orbital Sander to smooth out any left over glue from the surface. Most of the time it is impossible not to have some wood damage from some of the aggressive methods of veneer removal. Paint is always a great choice, but if you have great success and minimal damage to the wood, staining the wood is a great way to add beauty once again to those old antiques.
So next time you pass up that ugly peeling veneer nightmare dresser, think again. You just be surprised what you find underneath.
Happy painting!
xo, Do 
Resources for this project:
See all materials


Comments
Join the conversation
-
Great tutorial! I was just looking at my antique sewing box wondering if the crumbling veneer could be removed. Will tackle that project this afternoon!


Frequently asked questions
Have a question about this project?
This question might be unrelated, but the cabinets in manufactured homes seem to be a paper over a type of particle board. Is there a way to make them look decent again once they start rubbing or peeling off?
Is there any other way of getting the glue off besides sanding
I have, just today, attempted this procedure. Just like you said, muscles, and lots of patience are a must! Gloves I couldn’t wear as the glue makes the handle of scrapper too slippery. I was excited how easy the first layer came off, YA, FIRST LAYET!!! Ugh. The second layer is much thicker and the different ways are not working... ideas?? I’m thinking of sanding light just to smooth and paint.. ideas? Anyone???