


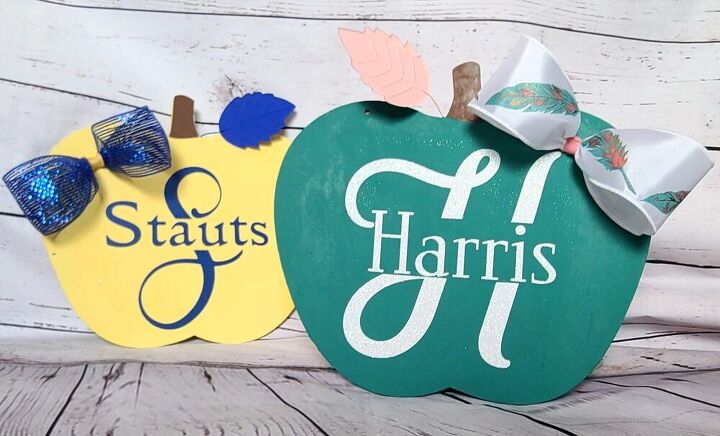
Teacher Door Hanger DIY Tutorial
I shared a tutorial for creating a split letter monogram in Cricut Design Space with you a few days ago. I was using it on a teacher door hanger for my son’s teacher. They are now finished and as promised, here’s the tutorial for them! This will also teach you how to weed and apply heat transfer vinyl (HTV) to an object if you’re a beginner on a die-cutting machine or a beginner crafter. So let’s get started!

Supplies needed for a teacher door hanger:
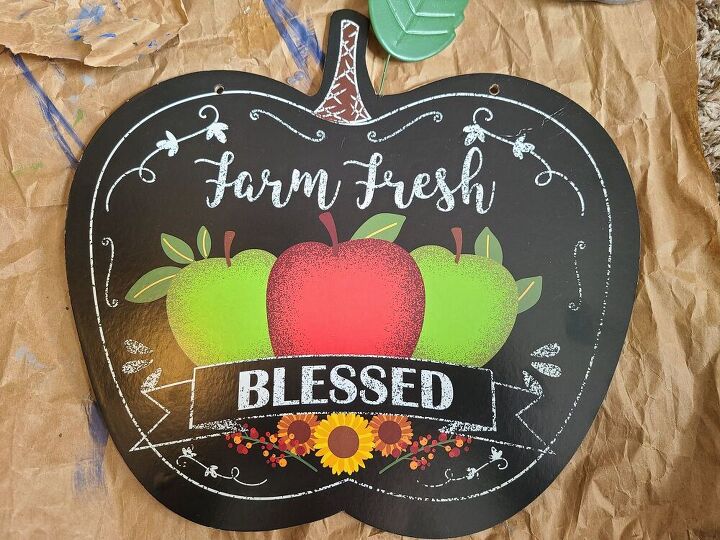
- apple shaped sign from Dollar Tree
- acrylic paint in your desired colors- brown for the stem, one for the apple (I used yellow on one & teal on another.), and one for the leaf (Optional, you can leave it green.)
- paint brushes
- HTV or regular vinyl (You can use cardstock or posters as well.)
- wax paper & iron for HTV/transfer paper for vinyl
- wired ribbon- I used 1.5″ for one, 2.5″ for the other. I just used what I had on hand.
- thin ribbon to cover pipe cleaner or floral wire on the bow
- hot glue gun & glue
- scissors
- pipe cleaner or floral wire
- 12×12 piece of cardstock (optional to cover the back of the sign)
Paint the Apple Teacher Door Hanger
Paint the Apple Section
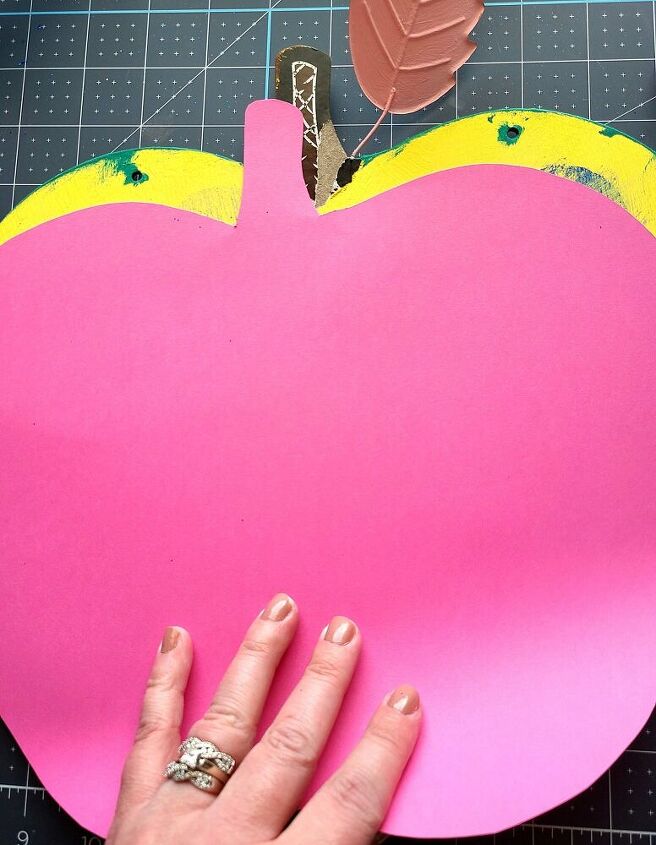
On one of the signs I used the school colors, blue and gold (yellow), and the other I painted teal and pink. I was going to make both of them in school colors, but when I went to the supply drop off and meet the teacher day, I saw his other teacher’s room was being decorated in cute, bright colors like, teal, pink, yellow, white, etc. So I decided to go with teal and pink for hers. I said all that to say that on your signs you are not limited in the colors you use. You can use the school colors, the teachers favorite colors, to match the theme in her classroom, or you can just go with the traditional red with green leaf.
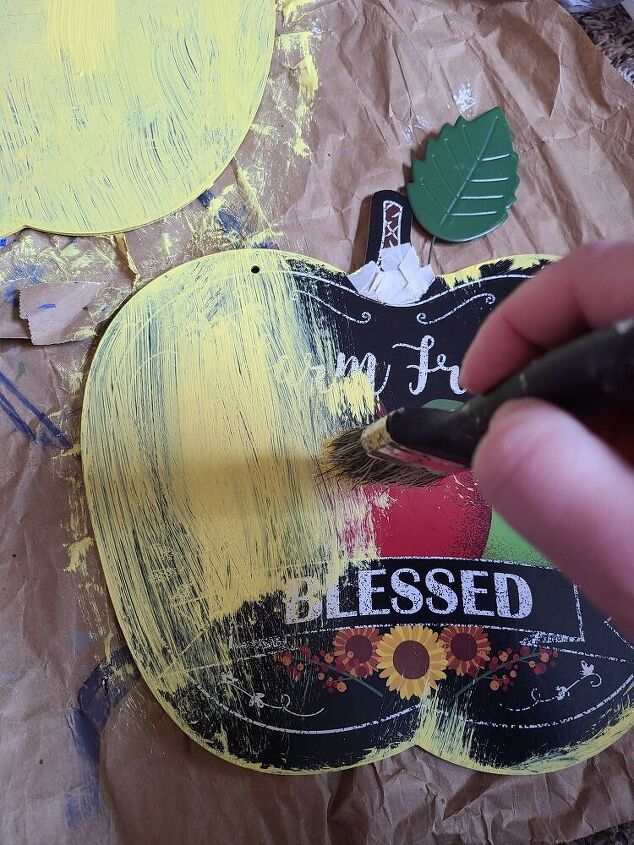
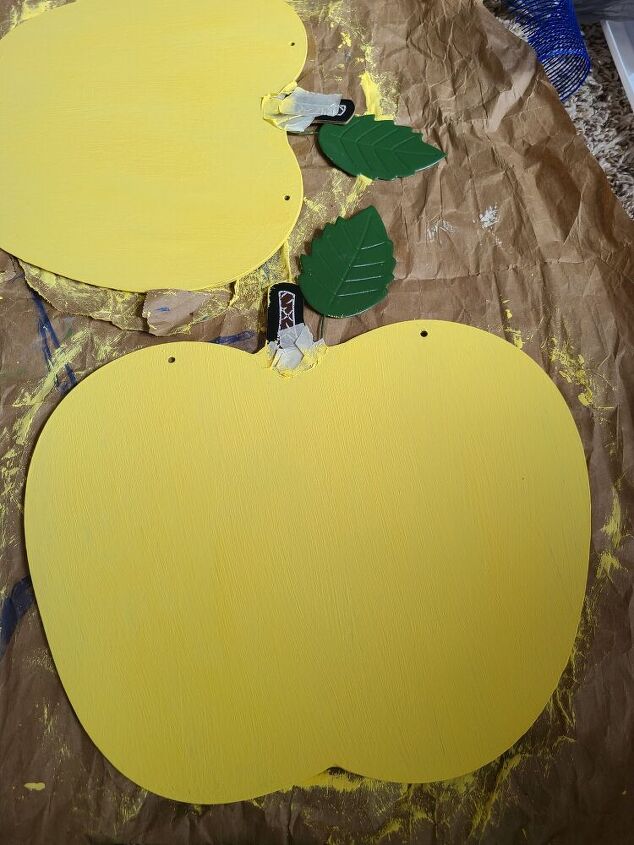
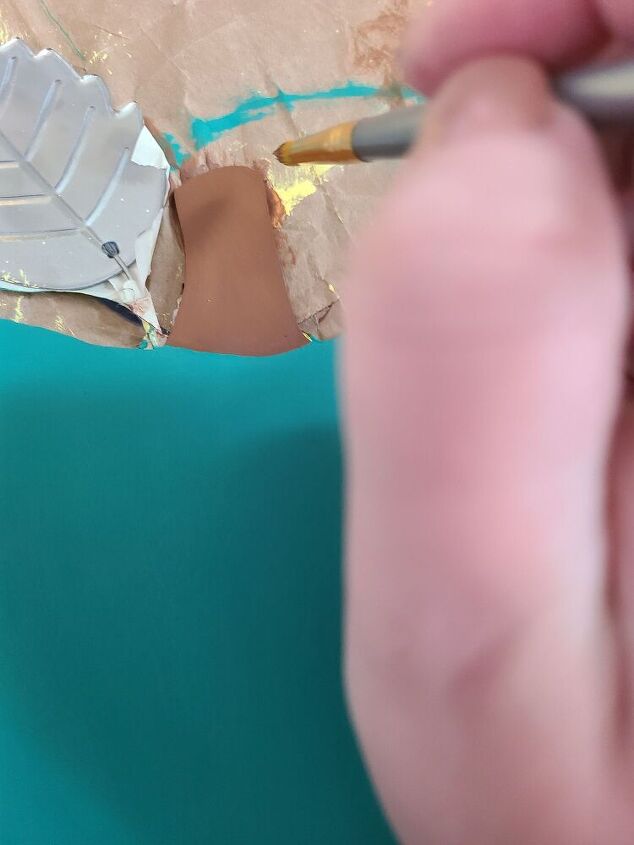
First of all, paint the apple sign. Paint the plain back side of the sign! I had a mental lapse of some kind because I painted the front of one of my signs! What the heck Niki?! I’ve upcycled tons of Dollar Tree signs, and I’ve never done that. The worst part is that I ran out of paint, so I had to stick with it. It covered the black, but I think the one on which I painted the plain back side looks better.
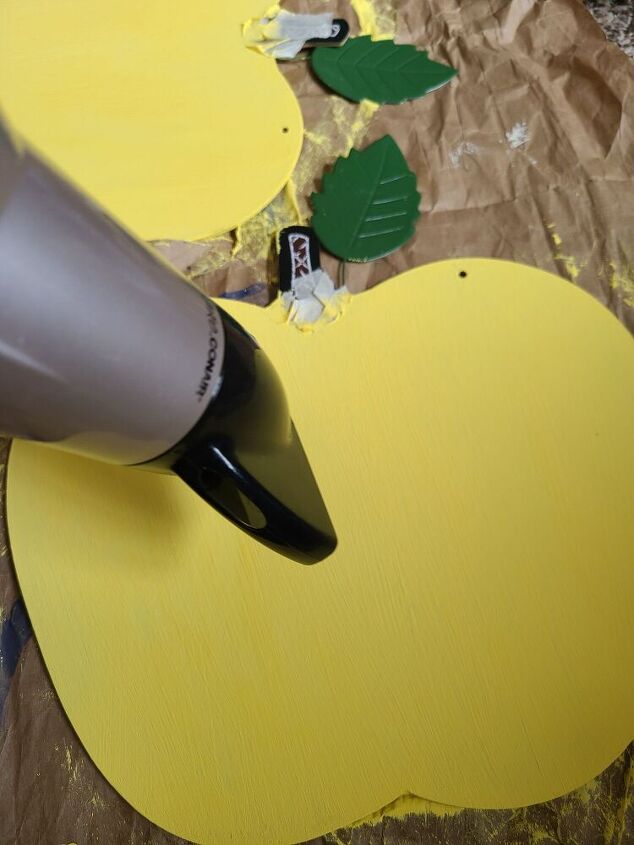
You can see in the picture below that I used masking tape so the yellow or teal paint wouldn’t get on it. Don’t do that! It ripped part of the sign, and I had to sand it down, repaint, and it was just a mess. I didn’t use it on the other sign (when I painted the back teal), and it looks fine. I had to do three coats on the yellow, but only one on the teal. If you need to get done with your project quickly, use a blow dryer to dry the paint between coats.
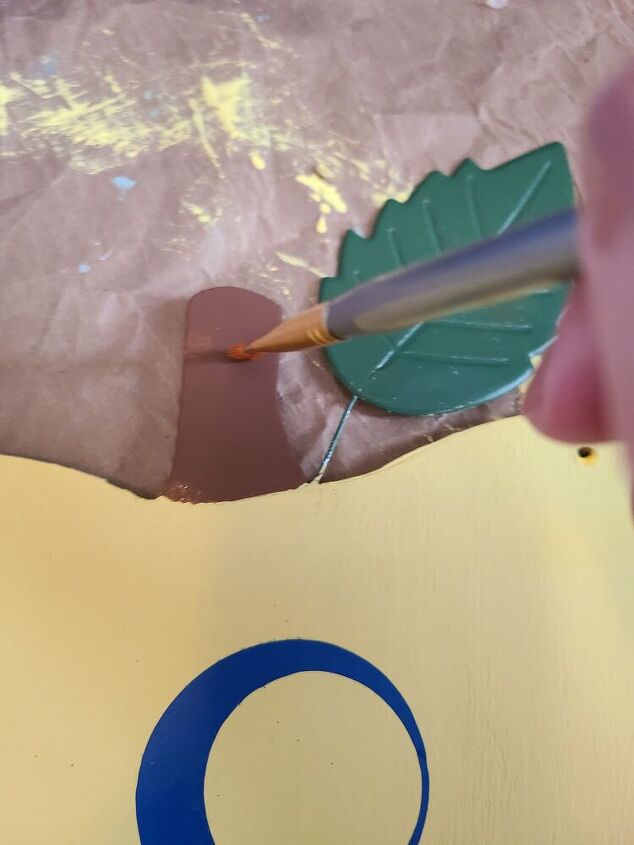
Paint the Stem & Leaf
When that is dry, it’s time to paint the stem. I used nutmeg brown acrylic paint on my teacher door hanger stems. I just free handed the edge with a small angled paint brush. Again you can use the blow dryer if you’re in a hurry. I used two coats.
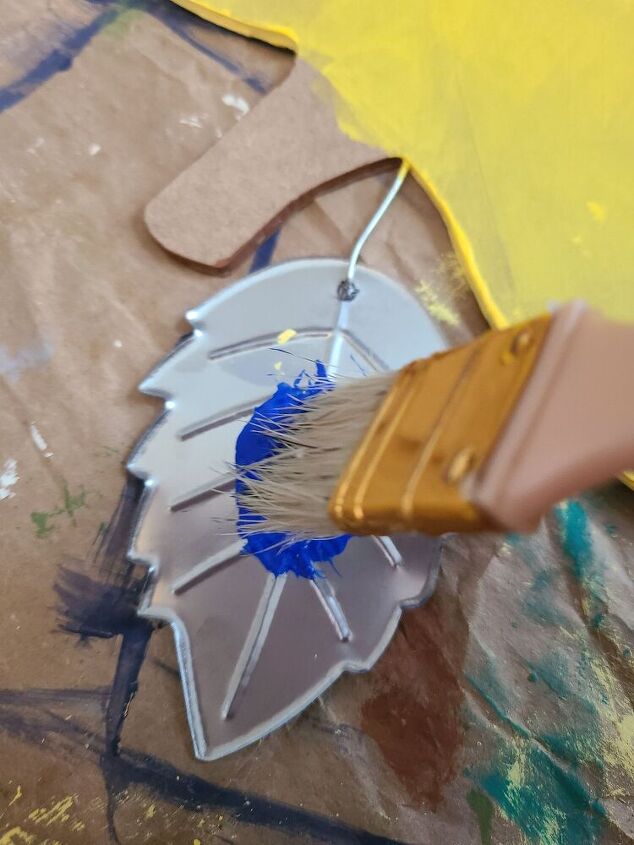
At first I wasn’t sure if I wanted to paint the leaf or not, so I painted the back, the silver side, and left the front side green. It is attached with a metal wire, so they can choose to spin it to the green or the other color. I painted one blue and on the other apple pink with two coats. It is up to you whether you paint the leaf or not. If you go with a traditional apple, don’t paint it.
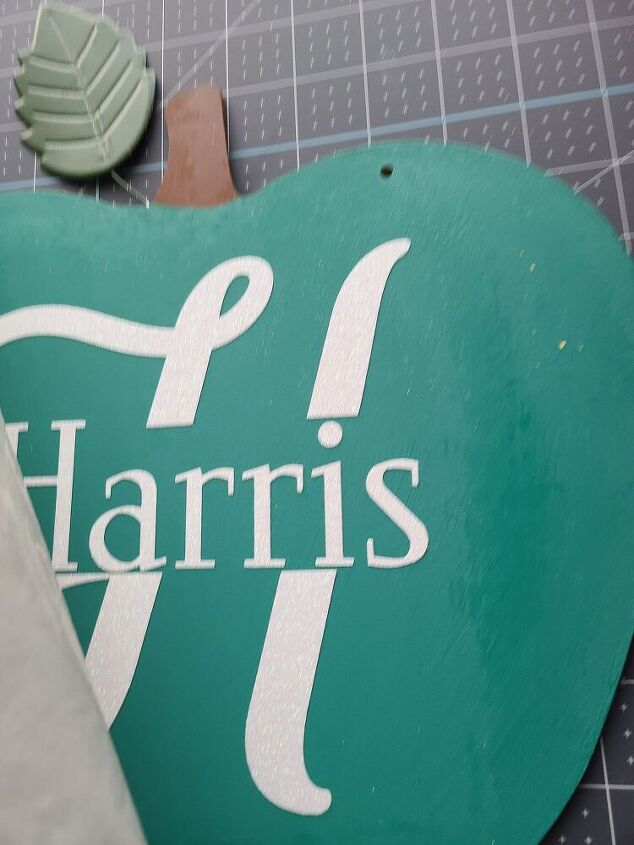
Cut & Apply Split Letter Monogram to the Teacher Door Hanger
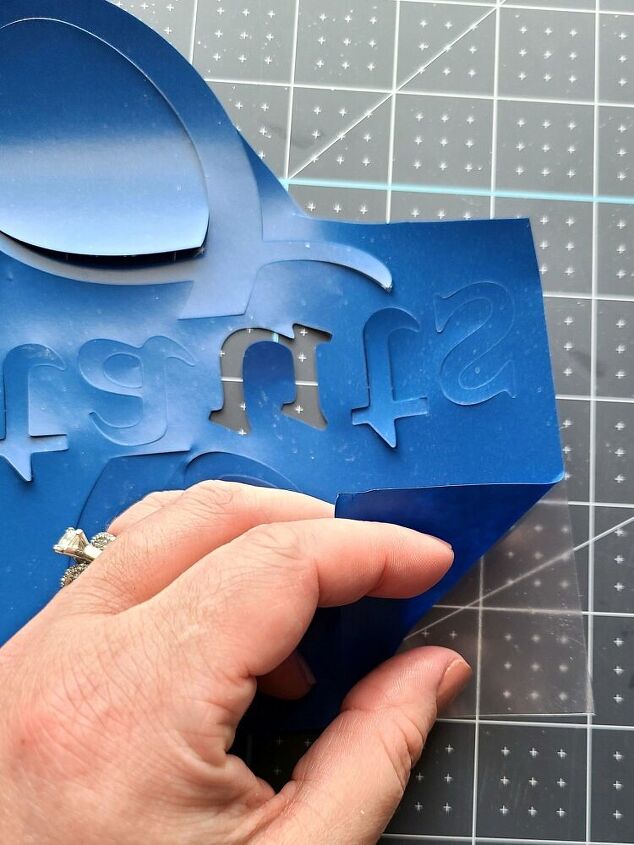
If you haven’t made and cut your monogram already, do that. Don’t know how to create a split letter monogram? Head to this post to design and cut the image. Then remove the HTV, vinyl, or other medium used to make the monogram from the cutting mat.
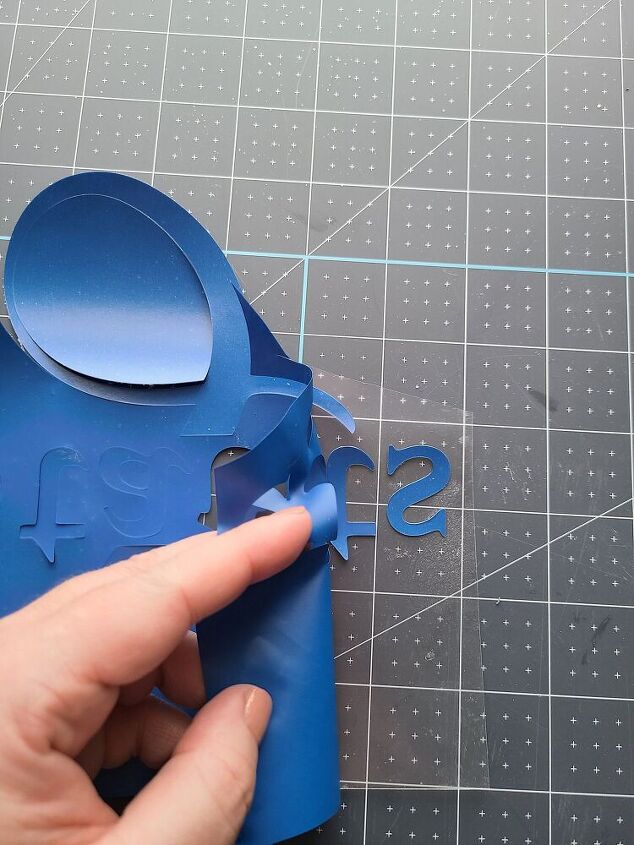
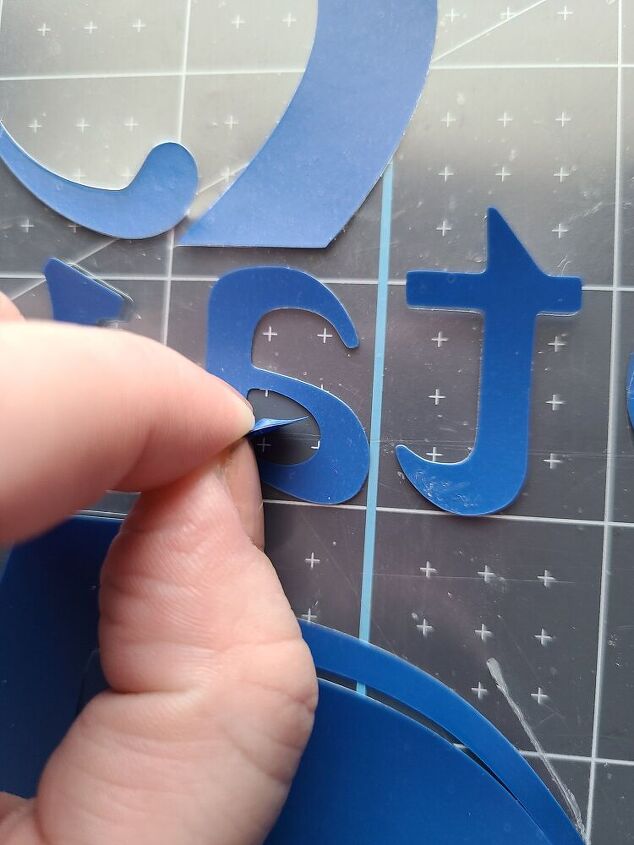
Weed Monogram
To begin weeding, lift up a part of the vinyl that isn’t part of the design using your fingernail or other thin-tipped item. They sell Cricut tools for this, but I have a kit used for making things out of polymer clay that works perfectly that I only paid like $4 for. Once you have that piece of vinyl lifted, carefully pull it away from the backing and design and throw it away. Next lift up and remove any excess vinyl that is in the middle of the design or letters like “a” or “o.” Peel it away from the backing and throw it away as well.
Iron Monogram on the Teacher Door Hanger
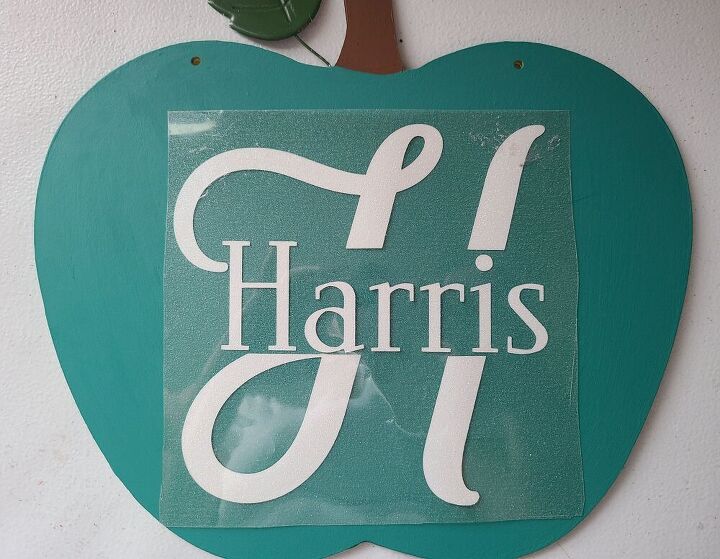
Once everything is weeded, and you are left with only the design you want to use, it’s time to apply it to the sign. If you are using HTV, place it sticky side down on the middle of the apple. Don’t worry, if it’s not centered on the first shot, you can lift it up and move it. When you have it where you want you will use the iron to adhere it to the sign.

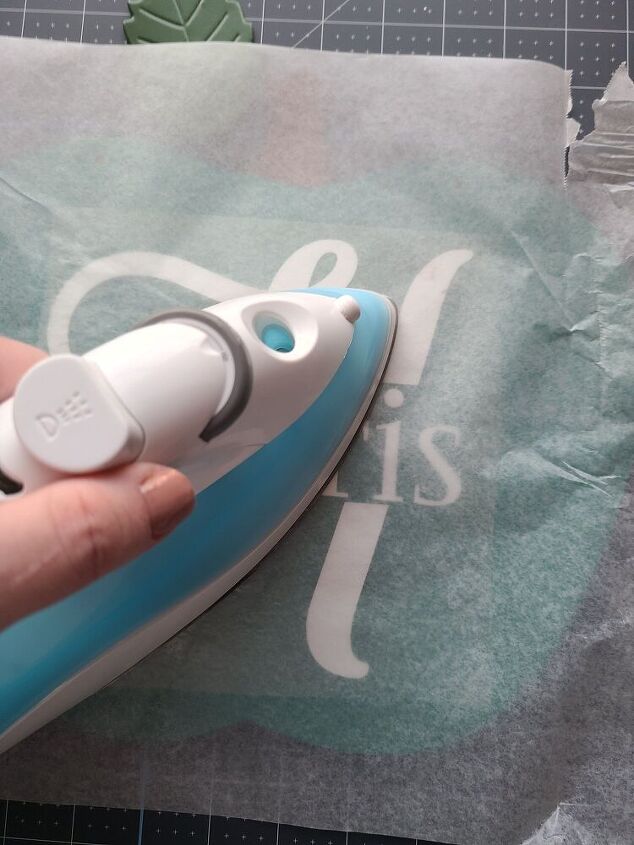
Turn the iron to the cotton setting or if you have number settings on yours, turn it to about 7 or 8. Keep in mind that all irons are different, so pay attention to the backing on the design as you’re ironing to make sure it isn’t melting as you go, or that the wax paper isn’t turning brown. Place the sign on a flat, sturdy surface where you can firmly press down your iron without breaking something.
Cut a piece of wax paper off of the roll that is large enough to cover the entire design that you are ironing on. Lay it on top of the design and begin to iron it to transfer it to the teacher door hanger. Press down with your iron on top of the wax paper and HTV and iron over each part for about 45 seconds. That’s not a total of 45 seconds, but making sure that each part gets 45 seconds of heat and pressure.
Check Design & Remove Backing
Once you’ve ironed over the HTV, remove the wax paper and carefully lift up a piece of the backing. If the monogram is attached to the teacher door hanger, go ahead and slowly lift up the rest. If a part is not firmly on the sign, put the backing back down and the wax paper back on and give that section another 10 to 20 seconds of ironing. Check it again and if it’s on, remove the backing completely.
Optional- Cover the Back with Cardstock
Since I flipped one of the apples over and painted the back (correctly) teal, I had the front side still painted yellow. I had also tested to see if I wanted to add some embellishments in paint like blue polka dots on the yellow paint. Then of course as you paint the edges of the teacher door hanger, some paint will get on the back (the original front). So I decided to cover the back of the hanger with cardstock. Get a 12×12 piece and trace the apple on it. Cut it out, then glue it with regular or hot glue. It just gives it a finished look.
Add a Bow to the Teacher Door Hanger
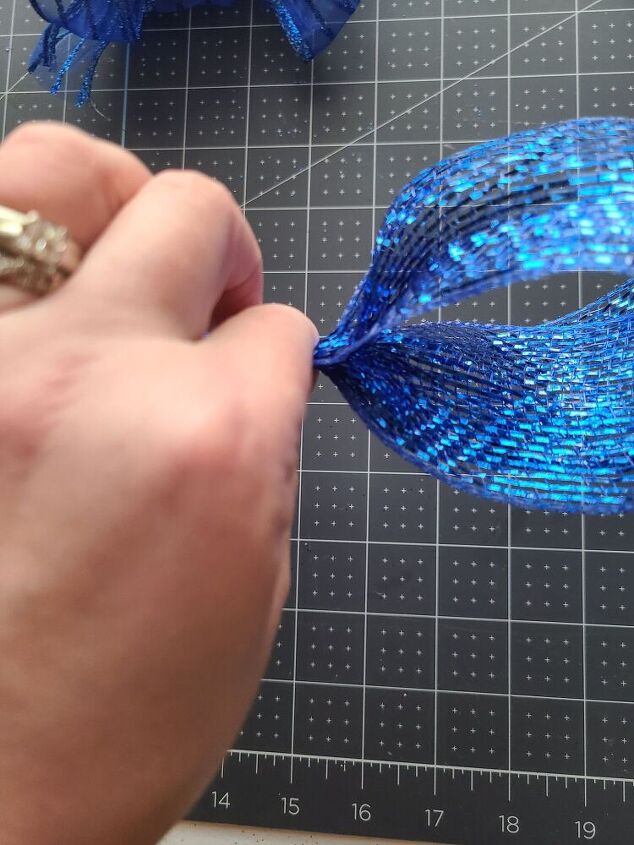
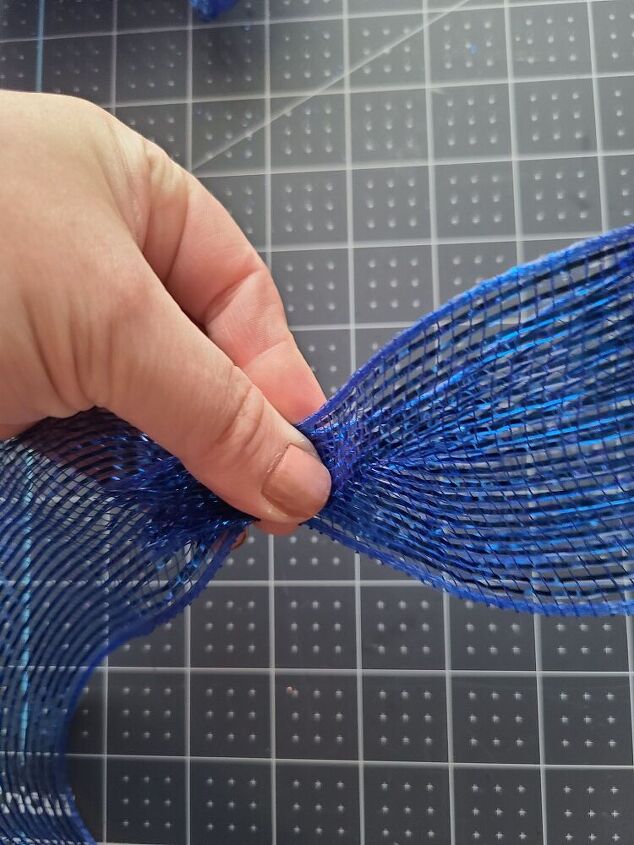
Make a Two-Loop Bow
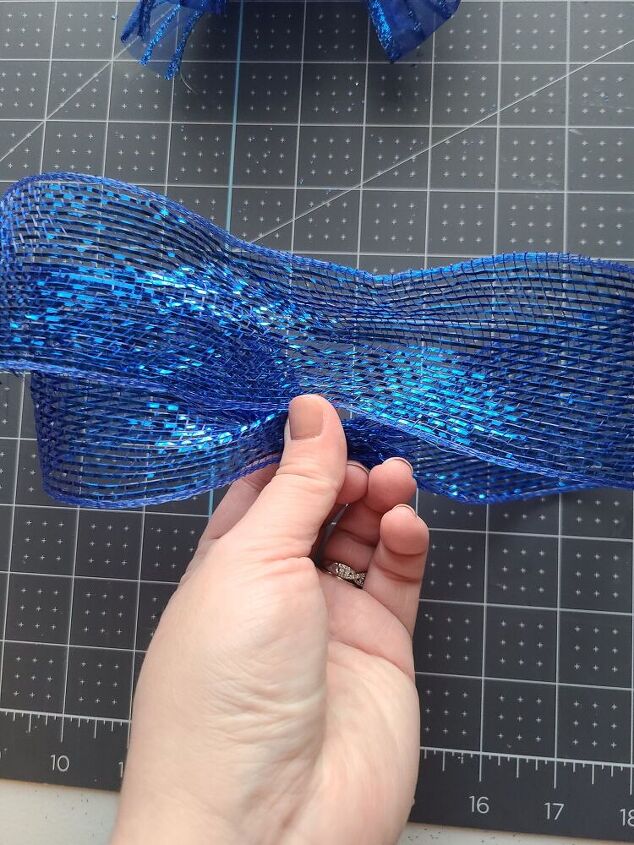
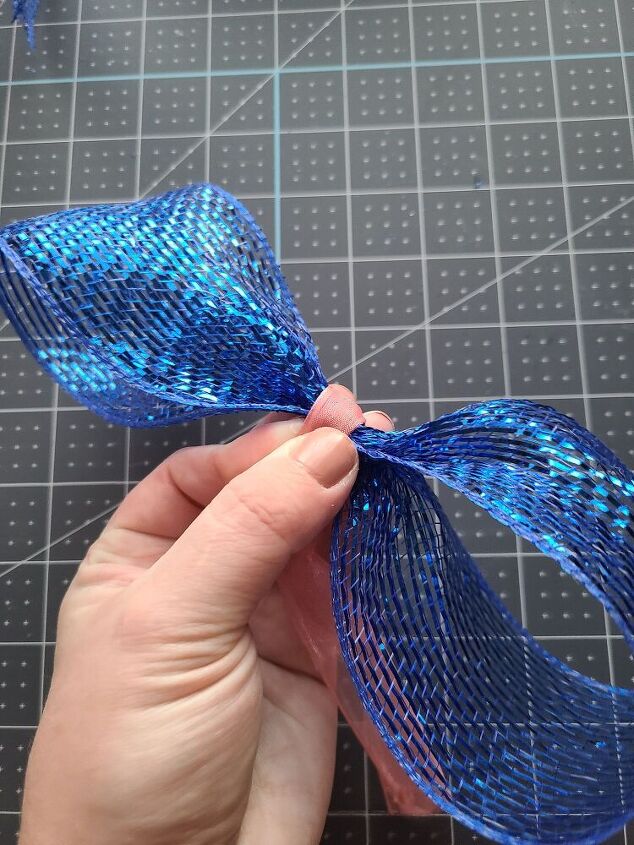
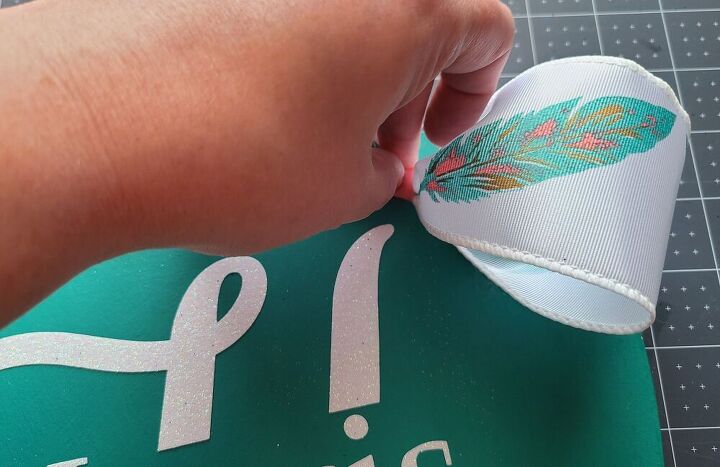
I made a simple two loop bow for each teacher door hanger. You will simply pinch a piece of your ribbon between your thumb and forefinger to start the bow. Make a loop by bringing the ribbon back around to the first pinch. That will give you the first loop. Bring the ribbon back out and around to create the second loop. Use a pipe cleaner or floral wire to hold the bow together. You will now have the base of your bow.
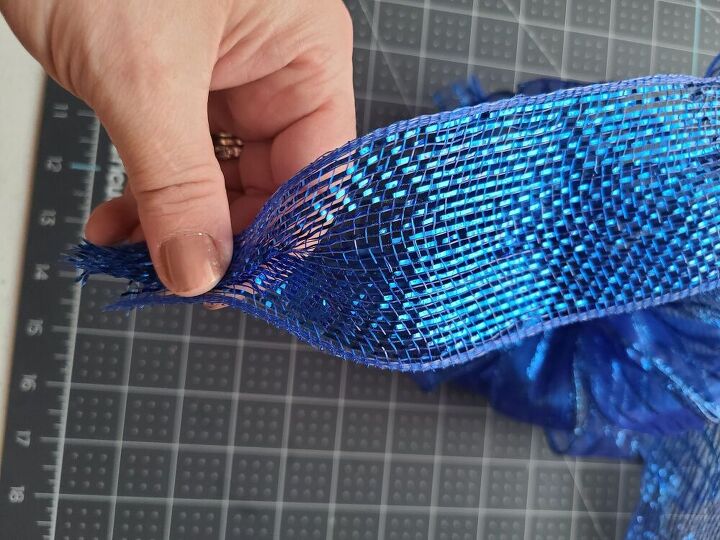
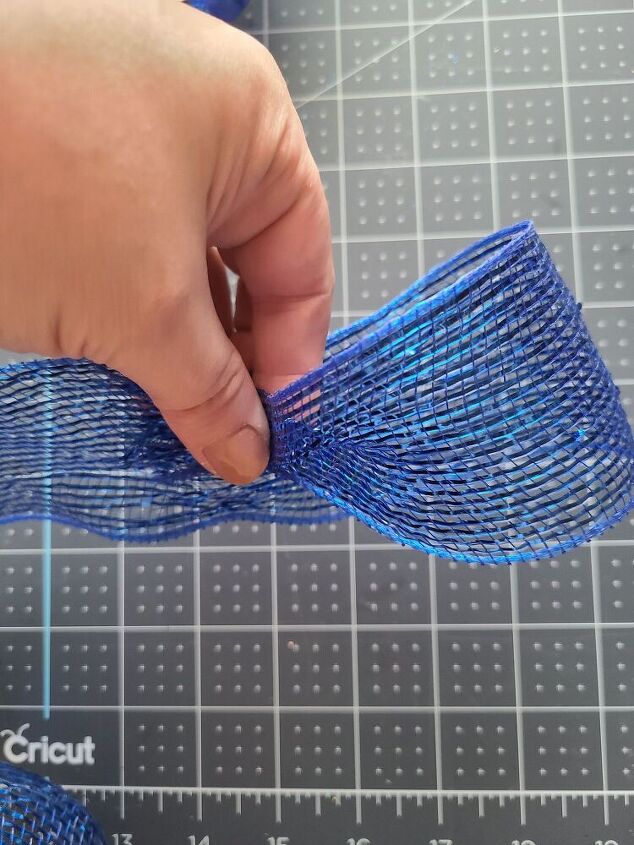
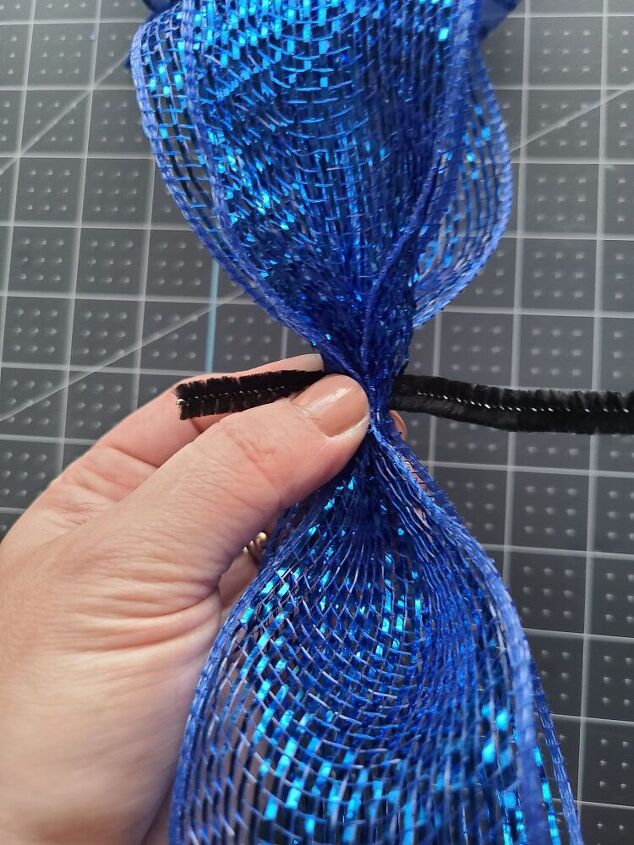
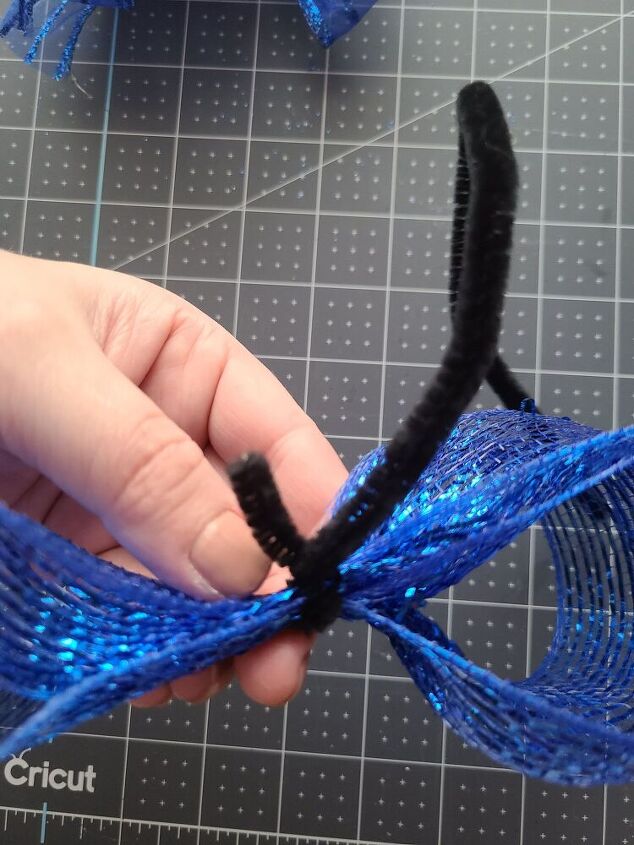
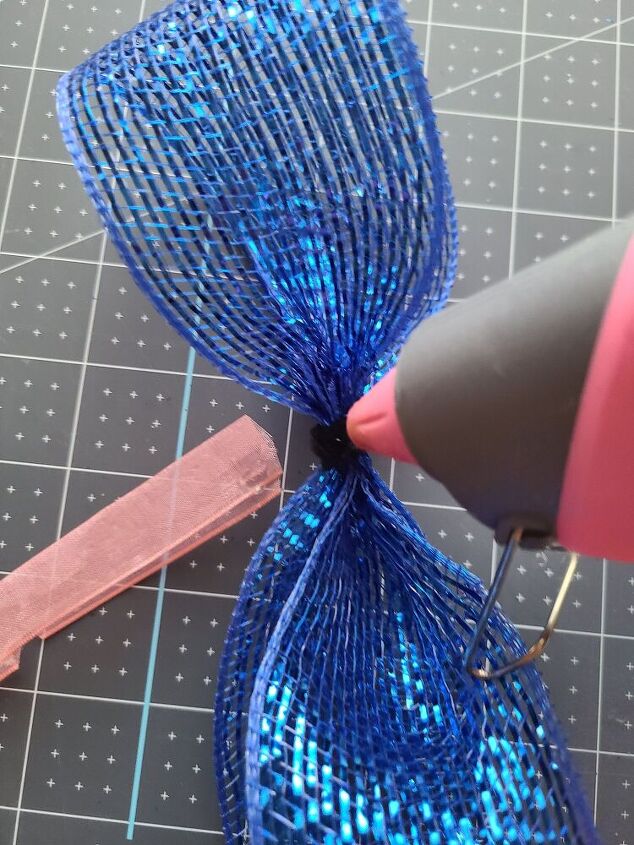
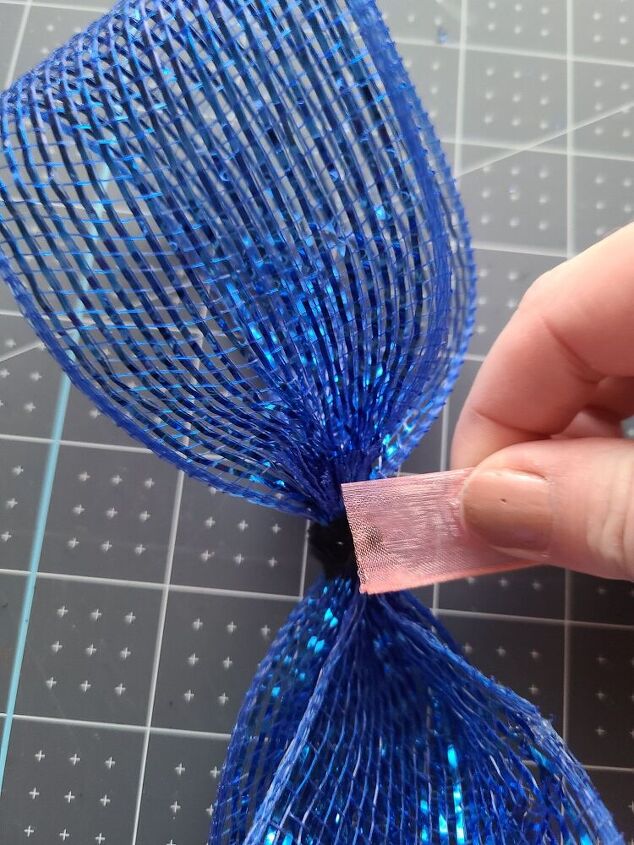
Now you will use ribbon to cover the pipe cleaner used to hold it together. On one hanger I used a 1″ ribbon tri-folded and on the other I used a 1/2″ yellow ribbon because that’s what I had that matched each bow and hanger. You can use a 5/8″ or any other ribbon that you can use to wrap over the pipe cleaner. Place a dot of hot glue on the back of the bow on the pipe cleaner, put one end of the wrapping ribbon on it, wrap the ribbon around the bow, then hot glue the other end of the ribbon on the pipe cleaner as well.
Glue the Bow to the Teacher Door Hanger
There are two places you can add your bow. You can run a piece of twine or thin ribbon through the holes the sign was originally hung from, and have it hang that way. In that case, you will add hot glue to the back of the bow, and place it on the top of the twine.
The second place to hang the bow is on the apple. This is the way that I chose to design my sign. Put a dot of hot glue on the back of the bow and place it at an angle on the side of the sign opposite the leaf. The bow will cover one of the holes on the sign. Then you can angle the leaf down on the other side to cover the other hole.
Add a Way to Hang the Sign
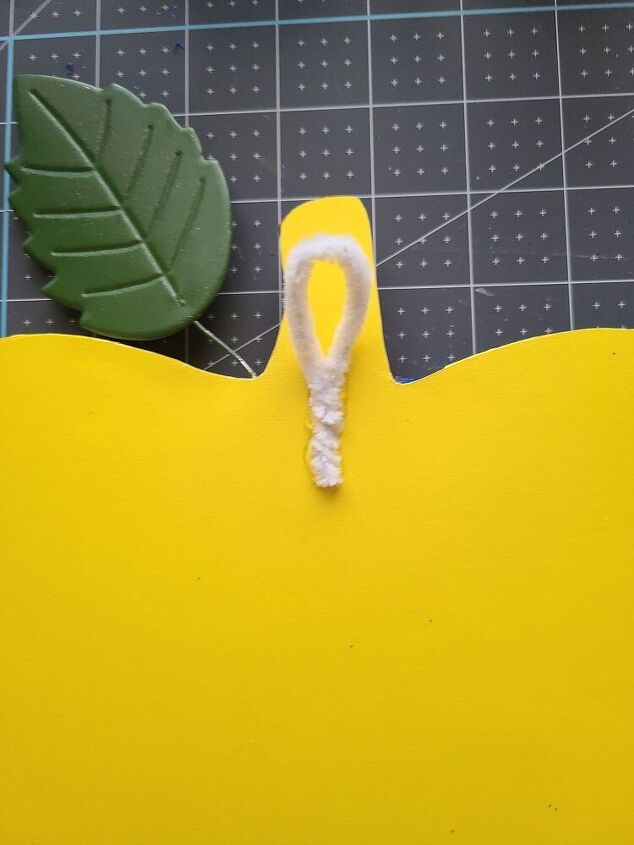
Finally you will need to add a way for your child’s teacher to hang their sign. Cut a 3″ piece of pipe cleaner to create a hanger. Bend it so that the two ends are together and twist it into a loop. Add hot glue on the twisted section and place it on the back upper part of the apple, the loop extending into the stem just a tiny bit. Place it just a little lower that what you see in the picture below. I had to pull this one off and move it down. You can see that I added yellow cardstock to the back of this hanger.
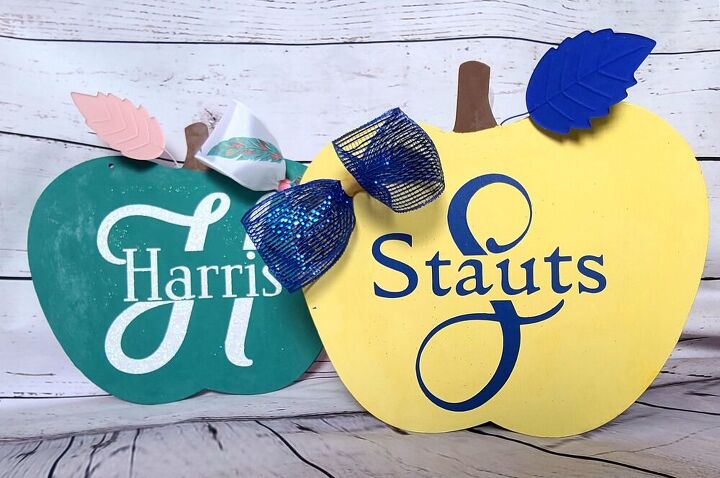
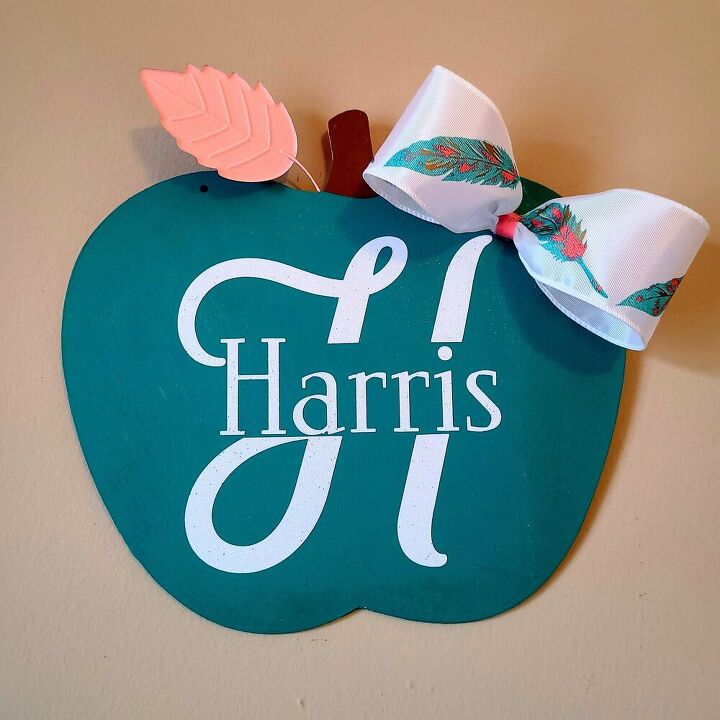
Your Sign is Complete!
You are now finished with your teacher door hanger. I just love how they turned out! I think my son’s teachers will like them, and I’m sure yours will too! Here are a few pictures of how my signs turned out.

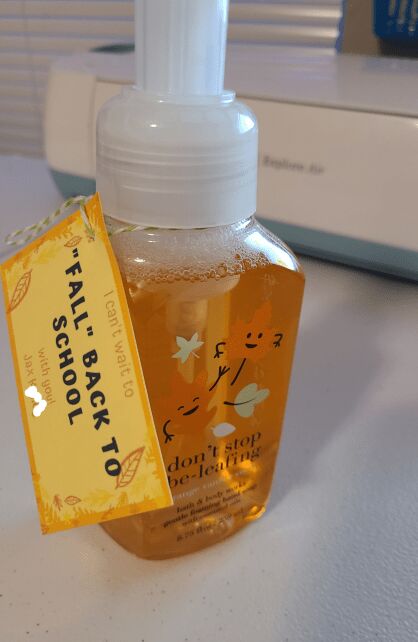
If you are giving this as a gift for a teacher, you will probably like this free printable gift tag and school supply gift basket idea as well. The printable is so cute! This post also contains a free printable gift tag that you can put on a bottle of hand soap. I bought one from Bath & Body Works that had the adorable kiddie drawings and a fall, back to school type theme. I aged a galvanized metal flower pot, farmhouse style, and created a teacher’s gift with it. There is a free printable to go in it as well.


I would love for you to tag me on social media when you make your own door hangers. Use the buttons below to follow me on social media. I’ve really just started to try to use it for my site, so please give me a like and a follow, and let me know when you do in the comments or on whatever platform you use. I would love to follow back. Make sure to pin this post to come back to when you are ready to make your sign! Enter your email address below so you won’t miss a post!
If you’re one of my blogger friends, make sure you submit your family friendly posts to our link parties, Happiness is Homemade, You’re the Star Blog Hop, and Traffic Jam Weekend. Not a blogger? Make sure you check out those posts to find tons of great ideas and inspiration for things like wreaths, DIYs, crafts, home and seasonal decor DIYs and ideas, family tips and ideas, recipes, fashion, gardening, Dollar Store projects and much more!
You’re the Star Blog Hop

How to Make a Bow for a Wreath

Burlap Wreath Tutorial
Reversible Dollar Tree Pumpkins Tutorial
DIY Fall Centerpiece from the Dollar Tree
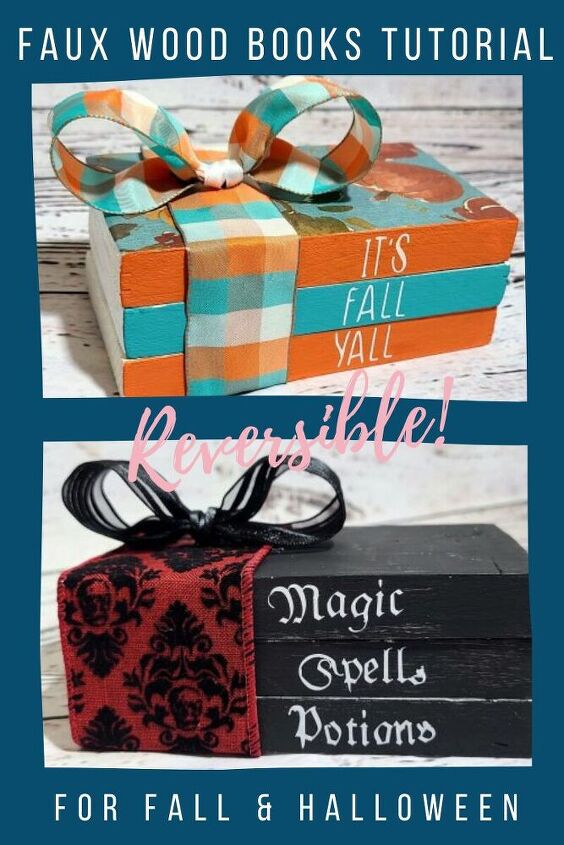
Reversible Faux Books Tutorial
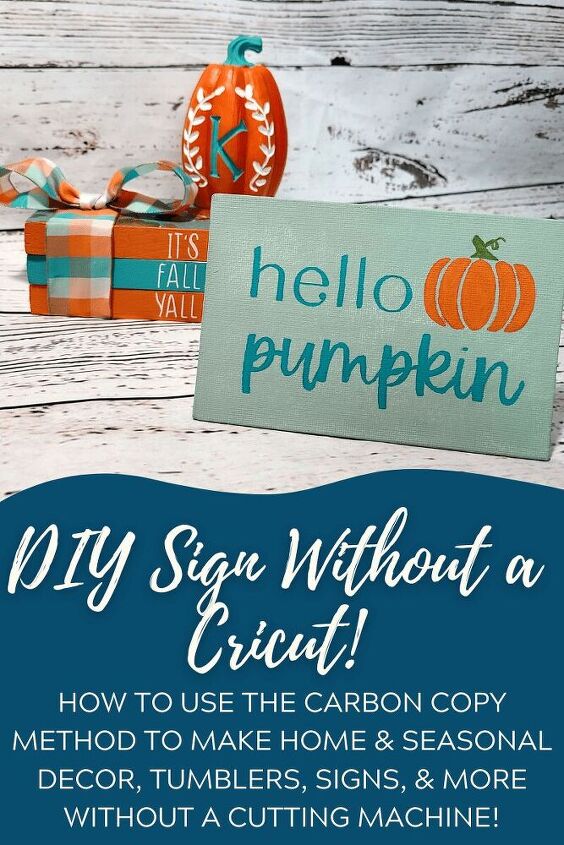
DIY Sign without a Cricut!


Frequently asked questions
Have a question about this project?