


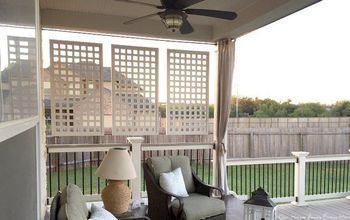
DIY Wood Privacy Screen

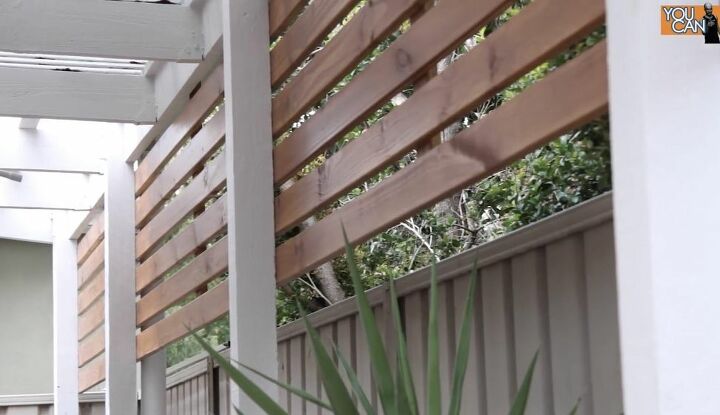
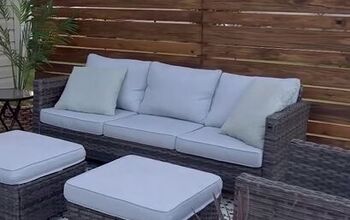
In the area we live in, backyards are very small and are commonly quite close to the neighbors. Even though my yard is enclosed by a fence, I wanted a privacy screen to further separate my backyard space from my neighbor’s house that is very close to mine on the other side. This wood slat screen was the perfect way to add a bit more privacy to my yard, and the contrast of the warm wood with the metal adds a lot of style at the same time. This was a relatively simple and inexpensive DIY project to complete in a weekend to beautify and improve my outdoor living area.
You Will Need:
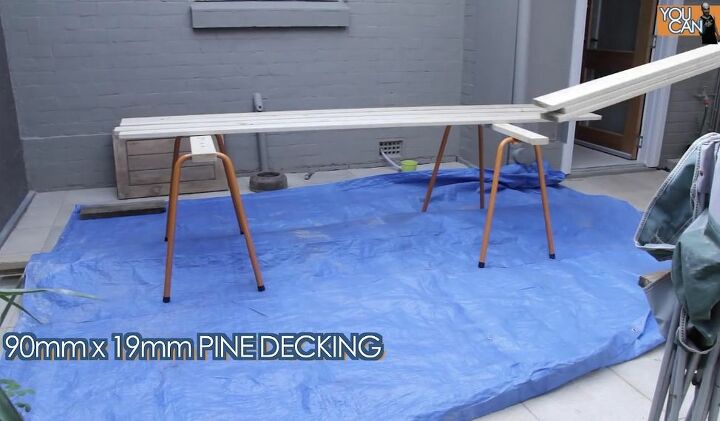
- Pine decking
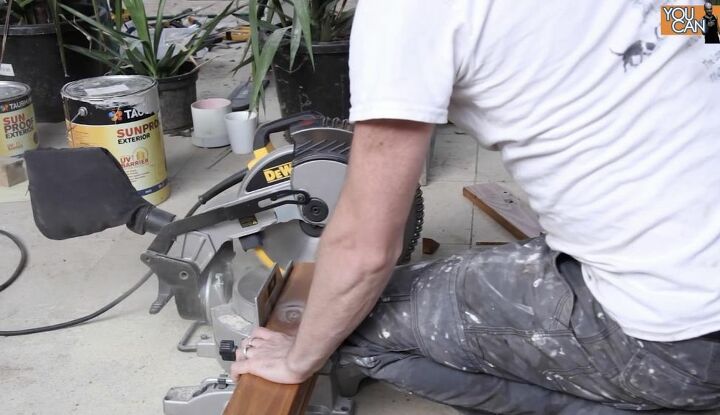
- Miter saw
- Wood stain
- White paint
- Drill
- Screw
- Sawhorses
- Paintbrushes

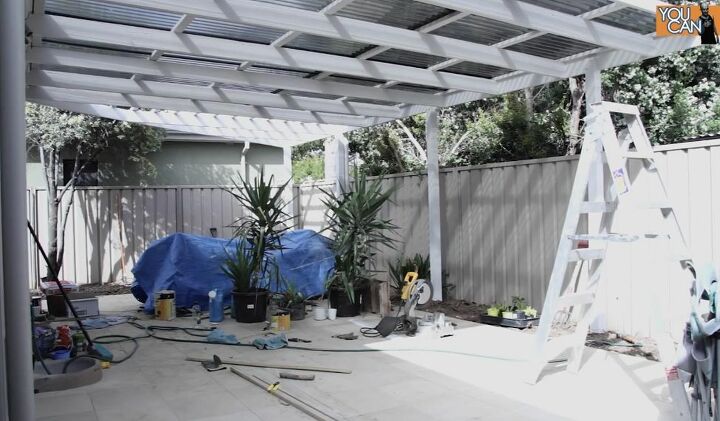
Gather Materials
I set up my work area with the tools I would need and gathered the wood that I would be cutting to complete my project. I staged sawhorses, wood, saws, clamps, my ladder and all of the other materials to build the privacy screen.
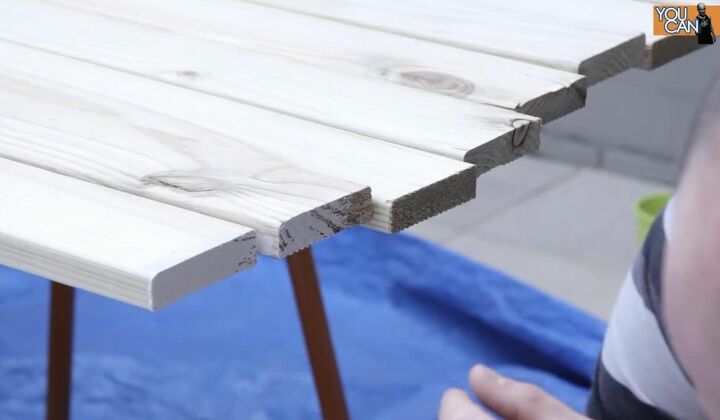
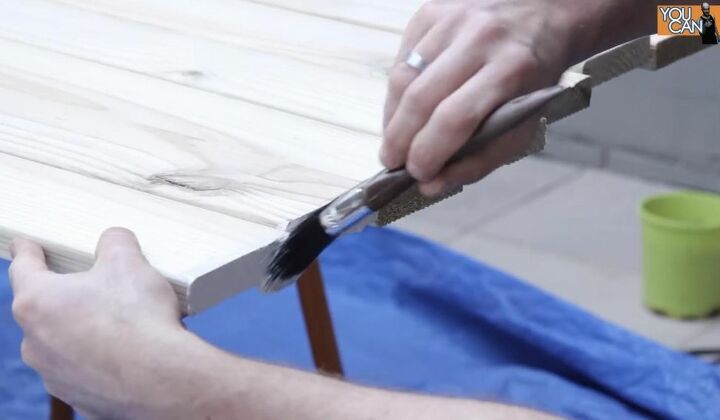
Seal End Grain
I painted the end grain of my pine decking boards with white paint to seal and make the wood last longer. Even though the wood is pressure treated, the paint will protect it and make it last even longer.
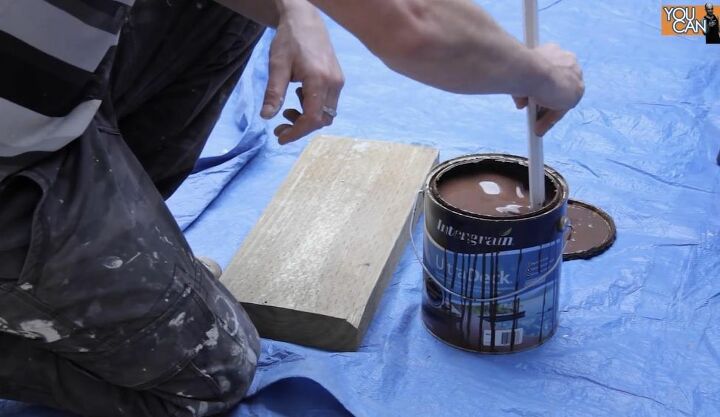
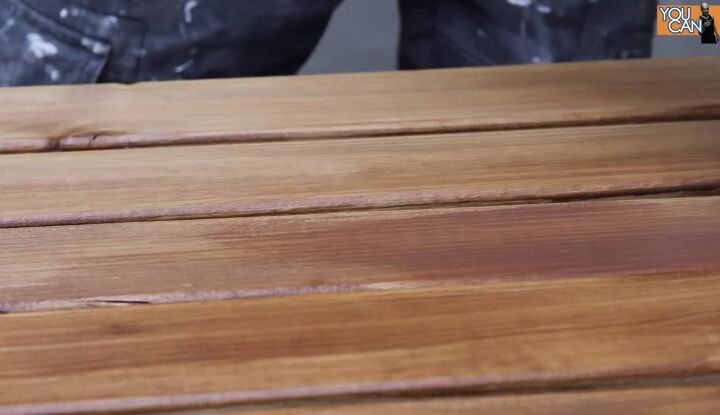
Stain Decking Boards
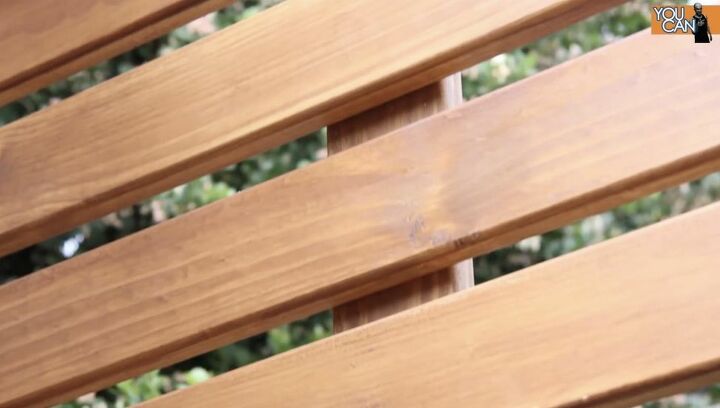
I applied several coats of stain to the boards in order to cover the green tint from the pressure-treating and then applied a clear coat over the top. As I painted it on, the stain finish became darker and richer.
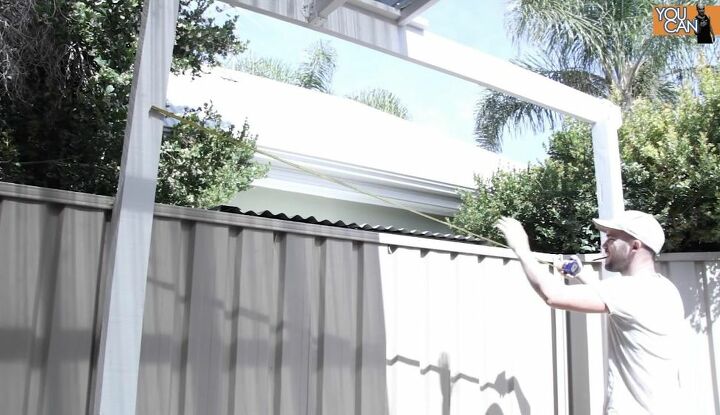
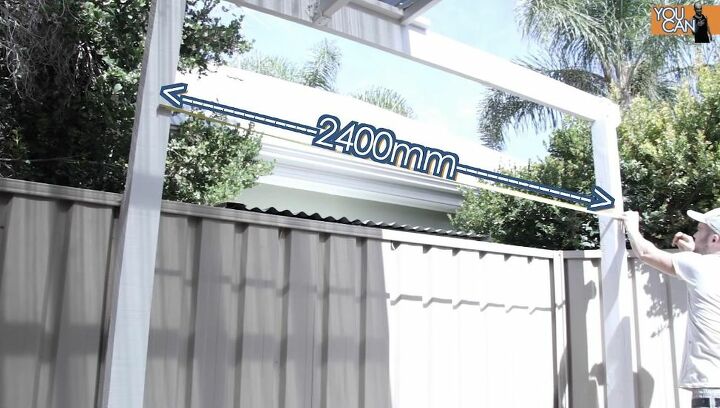
Measure Opening for Slats
I measured the distance between the posts on my pergola, from the center of one post to the center of the other post to determine the length to cut my boards. Measure the opening in the space you want to attach your decking between and make your cuts accordingly.
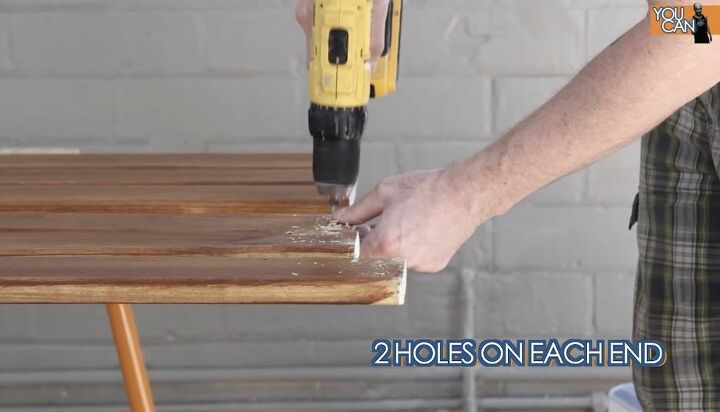
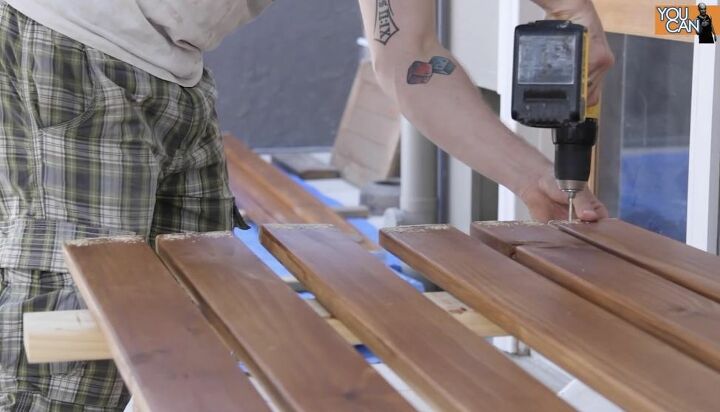
Pre-drill Holes in Boards
To attach the decking boards to the posts, I wanted to use screws and so I pre-drilled holes into the timber to make sure it would not split as the screws went through it. I used a square and measured 20mm in from each edge. I pre-drilled two holes on each end of the boards for the screws I would attach the boards to the posts with.
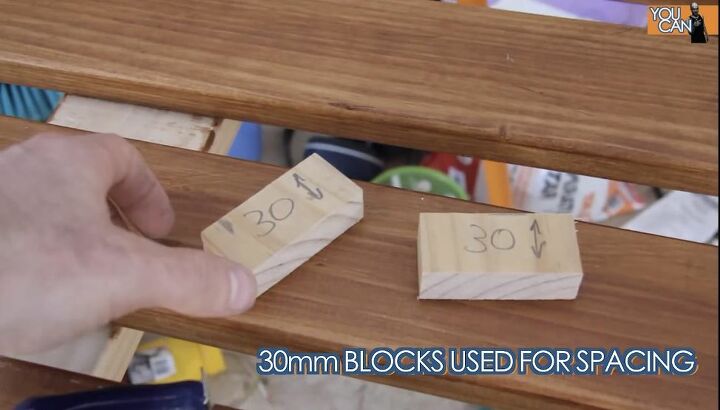
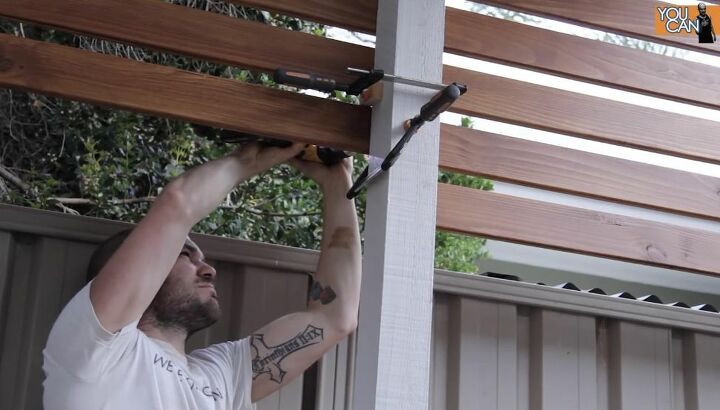
Cut Spacer Blocks
To make sure that I accurately spaced the boards as I was hanging them, I cut some 30mm blocks of wood for spacers between the decking boards. Decide how much space you want to allow between your slats and cut your spacers to size.
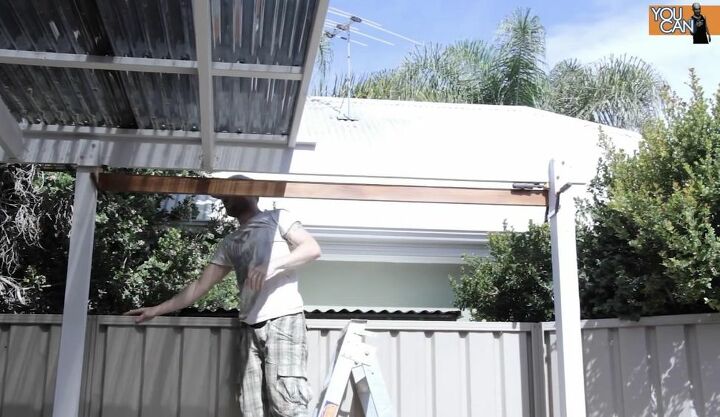
Attach Decking Boards to the Pergola
I chose to start hanging my boards from the top down because I knew that the top board needed to be just below the joist and that the bottom board could end up anywhere. I attached the boards with a drill and screws into my predrilled holes. As I went along, I got into a groove with my boards of measure, cut, pre-drill, and hang. I cut the ends to size and then at the end of each section I applied white paint to the cut ends. Use quick clamps if you have them available to you to make this step easier and less tedious.

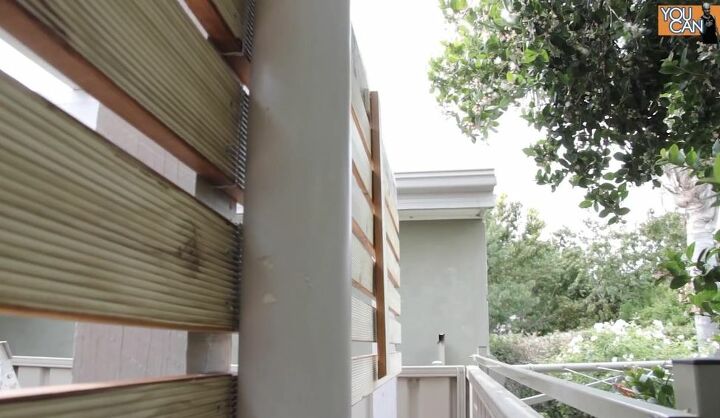
Attach Vertical Slats to the Back of Screen
I attached a vertical board through the center of the back of each set of slats and then painted the back of the screen facing the neighbors so that it was a nicer view for them from their yard. The vertical piece added a bit more support and rigidity to the privacy screen structure and the paint gave a finished appearance to the project from the outside looking in. I chose to paint the boards, but you may want to stain both sides of yours for a matching finish from both views.
I am so happy with the design appeal and function of the stylish privacy screen and love how it added privacy without making the space feel closed in or darker. The wood slats bring warmth to the backyard and pergola area while making the space feel polished and complete. Slat wood privacy screens can make a huge difference in the atmosphere of a small backyard that is very close to a neighbor. This would be perfect for climbing flowers or plants to grow to reach and envelop for an even more private appearance!
Have you built DIY privacy screens for your backyard patio area or included wood slats in your pergola design? Share your best ideas for backyard privacy or find inspiration for ways to beautify your outdoor living space on Hometalk!
DIY Home Security Ideas


Comments
Join the conversation
-
Wow. I couldn’t do this if I tried, but I’m inspired. Very nice craftsmanship. Beautiful design. Steve is the cook (My hero) and I do the yard. I might try. lol
Annie
-
I LOVE THIS! What a beautiful privacy screen. The concept, materials and design are spot on. Great mixture of textured materials. Thank you for sharing this with all of us. (By the way, I love the sound of rain on the roof! And, I like the idea of hanging solar lights from the slats.)


Frequently asked questions
Have a question about this project?
What is the roof made of? I assumed it was corrugated steel, but even if it's some manufactured sheeting, I wonder how noisy the rain is? How do you weather proof it from rust or heat? Does this turn the backyard into an oven once the roof absorbs the subtropical heat in Queensland?
This is a wonderful, inspiring project! Thanks for sharing!
What color and brand of your stains? It looks really good.
I too would like to know the color and brand of stain used please