Faux Wood Front Door

by
Annelisse
(IC: homeowner)
3 Materials
$29
2 Hours
Easy
Our front door was 20+ years old and had seen its share of different colors of paint colors as well as dents.
My first attempt at removing all the layers of paint to get down to a reasonable, workable surface was an epic fail. My hand sander removed areas of paint down to the bare steel and in other places would not get through the top layer. Dealing with rust from under an old kick plate was going to cause problems as well. The door was not worth going to the trouble of removing it and using chemical strippers.
”My only alternative” was to purchase a new door and start from scratch. Walking through Home Depot I got an idea... my thought was this would only be a temporary solution until I could purchase a new door, but it looked so great I love it and repeated the process on my back door as well!
I picked up 13 pieces of vinyl laminate self adhesive floor planks. Some stores will allow you to purchase as many planks as you would like, others require you to purchase the case. Loews allows per piece purchase, so I bought them there as a full box contains 40 planks. I only required 13 to cover my door.
I did not take any before photos... no idea this project would turn out so well. Suffice it to say it was a peeling, rusted, half sanded/stripped red hot mess. Both doors were steel, raised (6) panel doors.
I used a razor knife to cut the 6 inch x 36 inch pieces to fit my door. Measure and use a utility knife or blade to score (4-5 times) the vinyl planks can then be bent to snap on the score line. Very easy to cut.
I then applied locktite adhesive to each piece before placing on door. (The adhesive backing is meant to hold the vinyl planks to the floor, the adhesive is not strong enough to hold the planks vertically.). I used a putty knife (as a spatula) to spread the adhesive evenly. No lumps or bumps from the caulk gun. Using the spatula to even the adhesive worked great.
The adhesive I used dries very fast... great because you don’t need clamps, just hold for a second or two, smooth with your hands and straight on to the next.
I liked it so much, I even covered my entrance door from inside the garage as well as the nasty, painted and chipped builder steps. I still need to stain and attach the stair caps (you can see the glue 🤪) and attach the plate that goes around the handle. I wanted to show the door in a different laminate plank color and brand looks/works just as well.
- I wont lie... cutting those circles was the least fun part, but not too bad because you don’t have to be perfect... thanks to the wonder of cover plates! 👍🏼
The vinyl is waterproof. I have a storm door on my front door to protect it from harsh winter weather and storms. I have no doubt I can change to the screen on this door and it will hold up just fine. If you don’t have a storm/screen door I would suggest using an adhesive meant for outdoor use. Ask at your hardware store which would work for outdoor applications.
This is the adhesive I used. I highly recommend it. It is fast drying (perfect for vertical applications) and it is water soluble. If you get glue on the front of the planks, you can wipe off. If it has dried, use a scrubby sponge and warm water to remove glue on planks or between planks that may ooze out.
Perfect product for this application.
Total cost per door: $1.09 per plank (13 per door). $14
Adhesive: 3 per door @ $4.59 each $15
Total cost per door $29 (far less than the new door at $129, which would need to be installed, painted or finished)
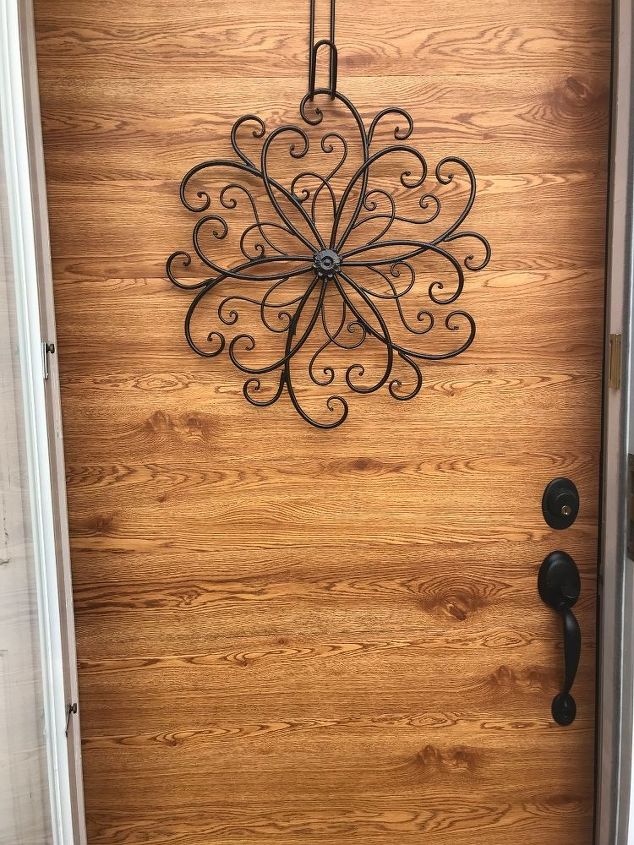
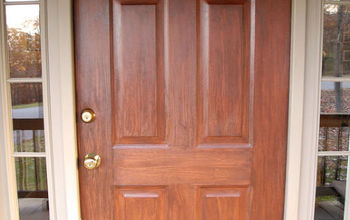
My $29 “Wood” front door. My neighbor (a carpenter/trimmer for a construction company) came over to check out my wood front door. He actually thought it was real wood UP CLOSE! The only thing that gave my “faux” away to the carpenter was when he looked at the side edge and saw the thickness was virtually nothing! 😉
Enjoyed the project?
Resources for this project:

A putty knife or spreader and a cutting blade. I used a utility knife.
Any price and availability information displayed on [relevant Amazon Site(s), as applicable] at the time of purchase will apply to the purchase of this product.
Hometalk may collect a small share of sales from the links on this page.More info
Published June 19th, 2018 3:52 AM
Comments
Join the conversation
4 of 6 comments
-
 Pinksuit2
on Sep 15, 2018
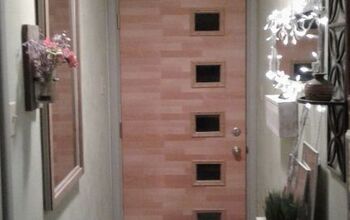
This looks incredible soooo we did it too! We chose a maple peel and stick vinyl plank which we bought on line from Walmart. We applied it horizontally for a mid century modern vibe on our recently installed steel entrance door. We did use Loctite PowerGrab to provide further adhesive to the peel and stick tiles. Thanks for inspiring us!
- See 1 previous
-
-












Frequently asked questions
Have a question about this project?
Would the same method be good to use on a garage door? I live in the desert and my front door and garage door face the West. Thank you.
Would the same method be good to use on a garage door? I live in the desert and my front door and garage door face the West. Thank you.
How long did it last before peeling?