


Updating a Front Door

Our house was built in 1968 and still has the original wood front door. When we first moved in, there were several layers of paint on it. We had it "dipped" by a company, where we physically took the door off and to them and they dipped it in paint stripper to remove the paint! When we got it back, it was stripped down to bare wood. After that, we stained and sealed it.
Fast forward a few years and our old door developed a few cracks. We initially thought to replace the door, but after looking at the price tags, we decided to try to make this door work a little longer. I tackled the front of the door about a year ago, but now I was ready to tackle the inside. Here is what I did!
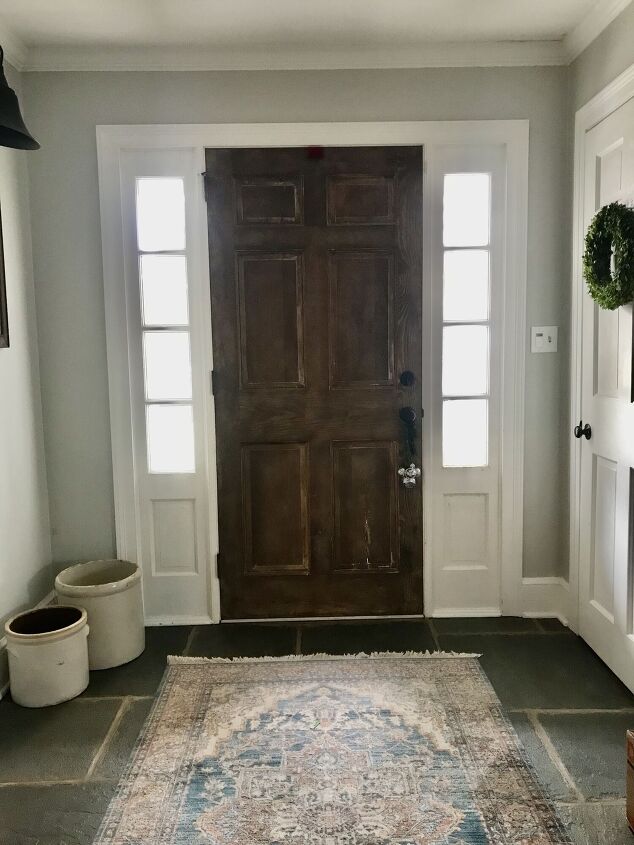
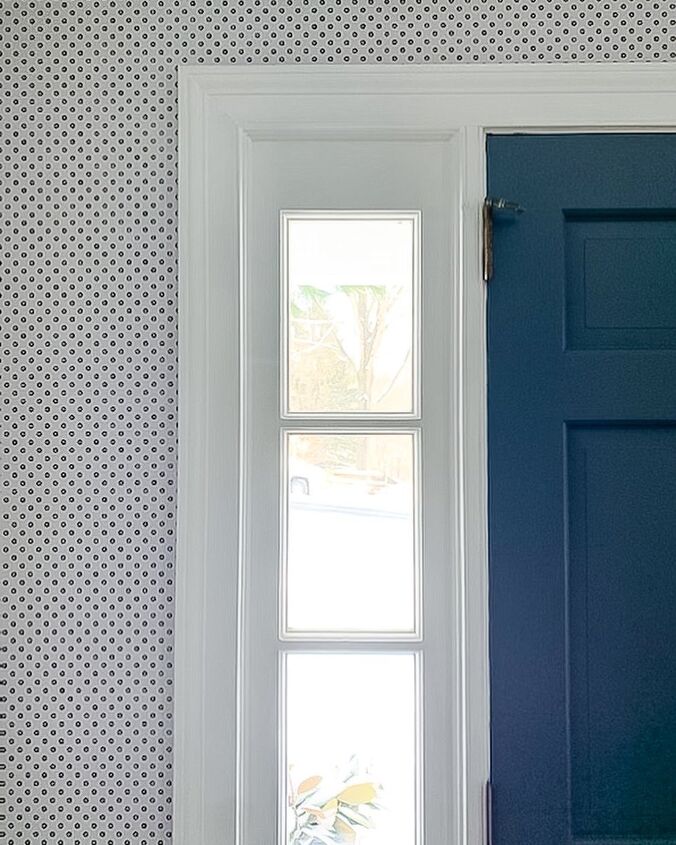
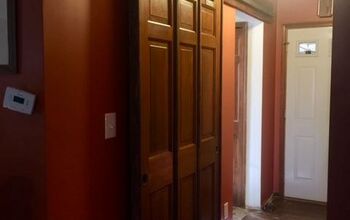
This is what the inside of the front door looked like prior to painting.
Best door painting kit!
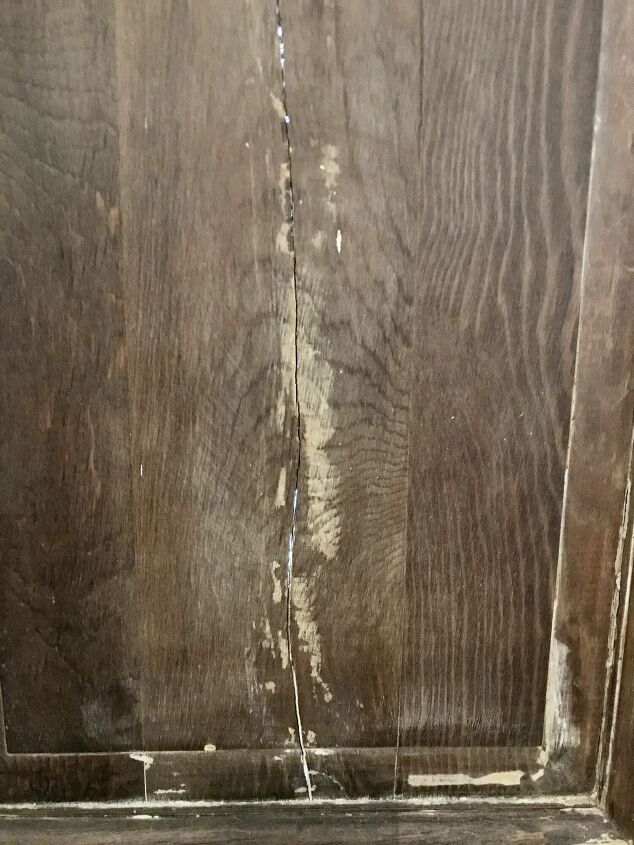
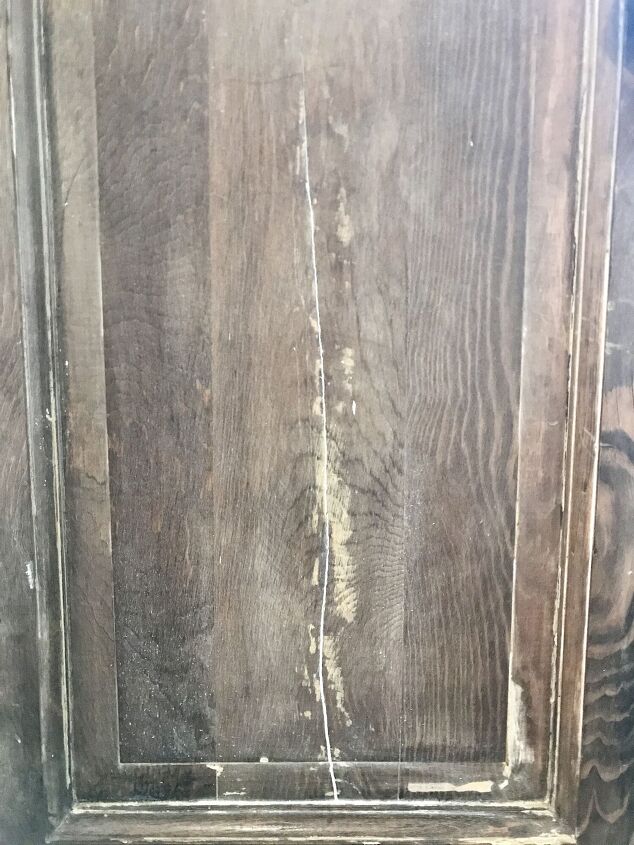
Here is an up close view of the crack in the lower right portion of the door. Yes, that is the light of day peeking through!
I used a non-shrinking caulk to fill the crack.
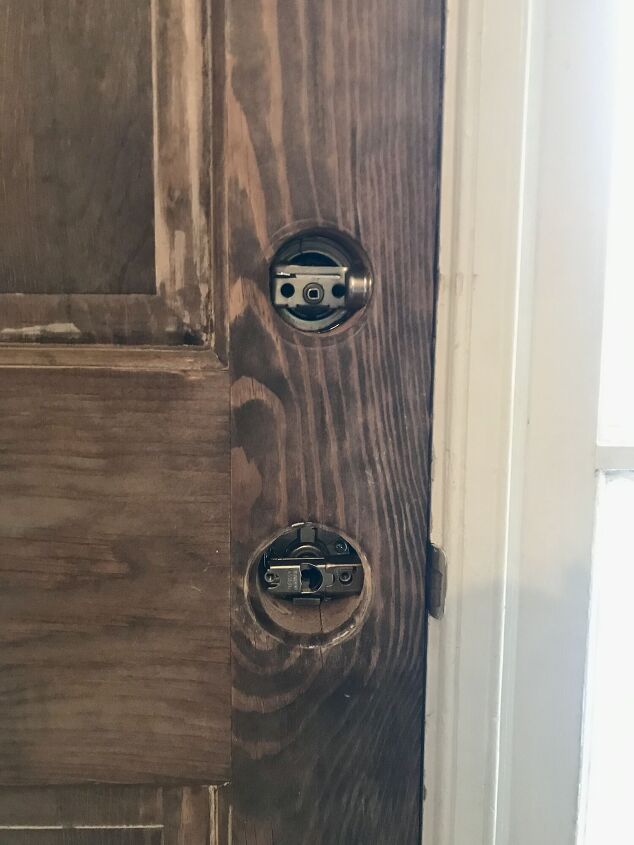
Removed the door handles for easier painting. You could leave them on, but it is much easier in my opinion to paint without them on. You will also be able to have a continuous line of paint instead of stopping to go around the knobs.
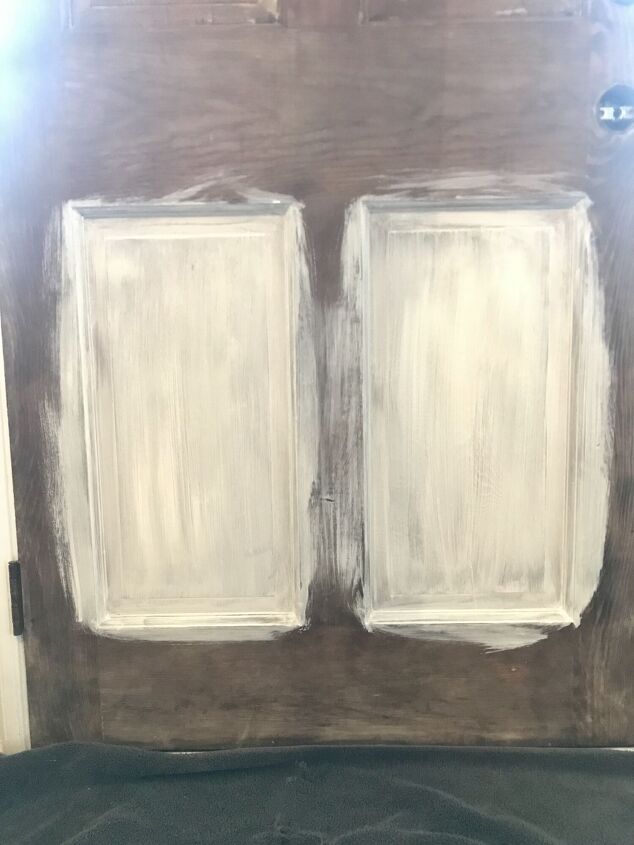
The caulk dries rather quickly, so now we are ready to prime. I always start with the inside squares of the door first. Work slowly and watch for drips in the corners! You want to get them while the paint is still wet. I used Zinsser Bin Primer for this application.
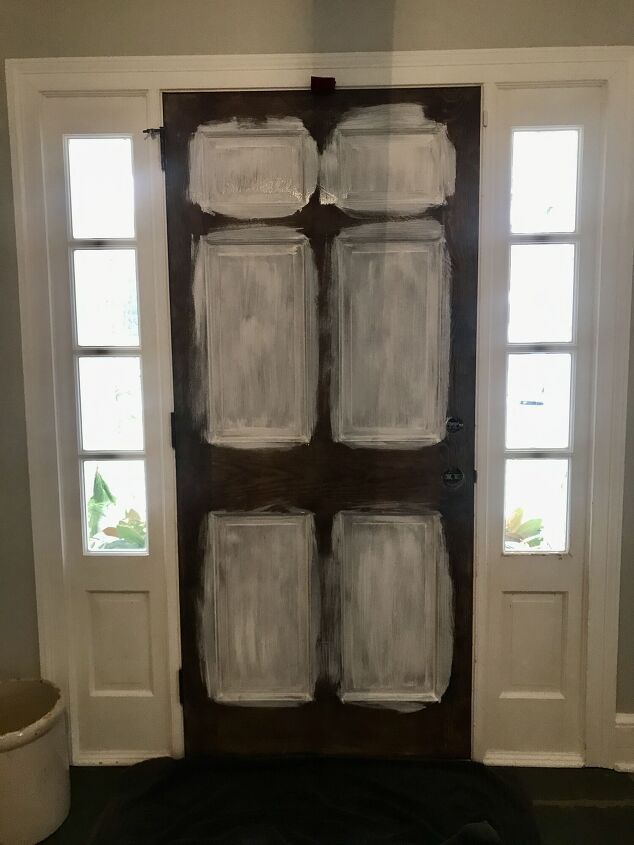
All the inside squares are done! Next I painted the surrounding areas.
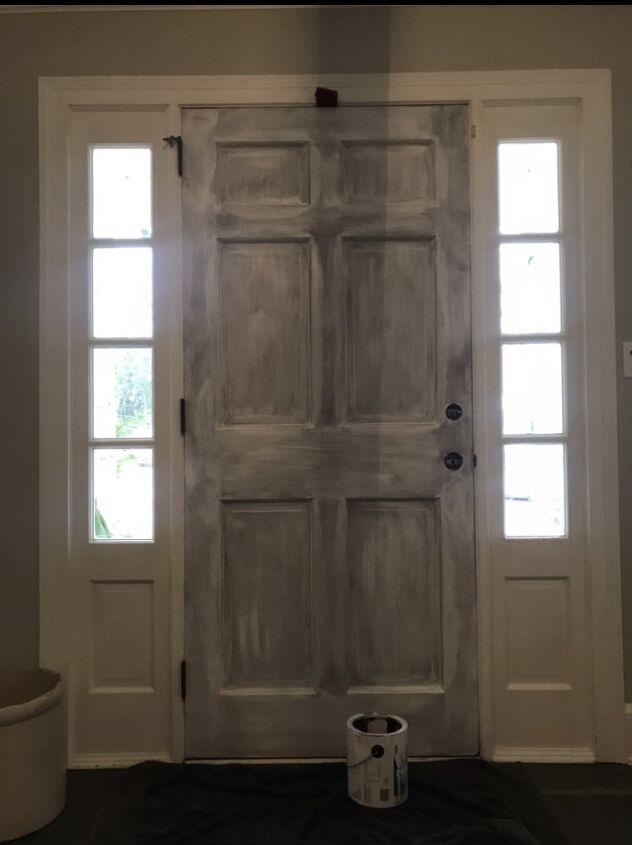
Here is the door all primed. This is the point where you are questioning why you decided to paint the door because it looks awful, but trust the process!
Once the primer is dry (about 2 hours), I painted the door with Benjamin Moore Advance paint. I repeated the steps for paint as I did with the primer.
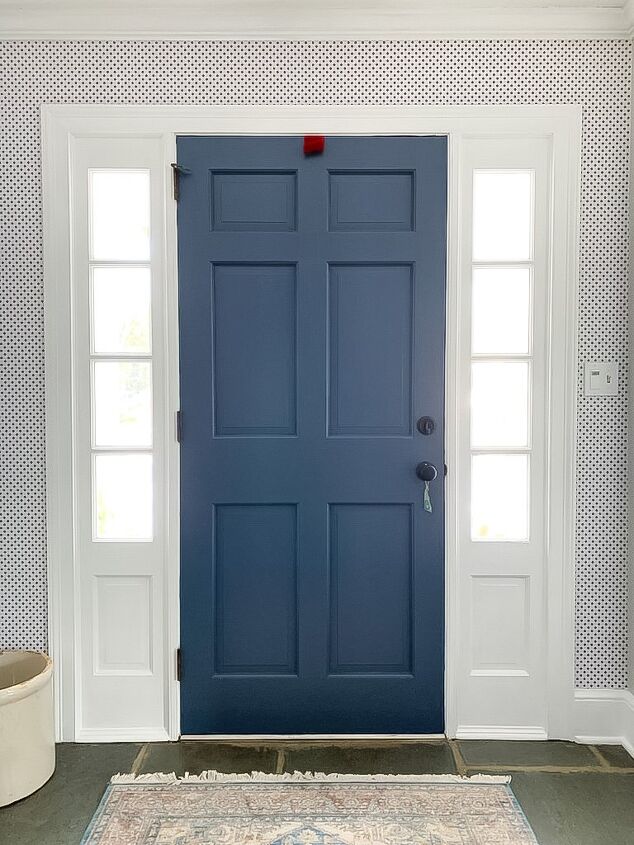
Here it is all painted! I added some peel and stick wallpaper around the door while I was at it! I think the little touch makes that little nook pop!
The wallpaper I used is Tempaper Ditsy Floral in black. You can find it here:
https://amzn.to/35CmmmL
It was super easy to do and I used less than 1 roll to do that little area.
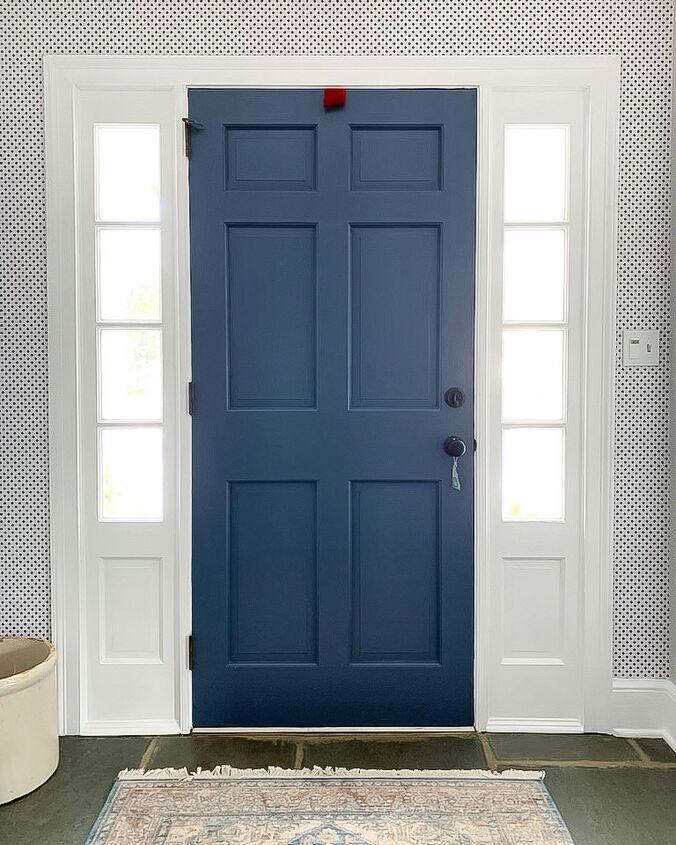
What a difference! This little area is bright and fun now! And a little warmer with that crack fixed ;)
Another example how a little paint (and some peel and stick wallpaper) can completely transform a small space. Go for it!
Resources for this project:
See all materials


Comments
Join the conversation
-
Beautiful job.
-
Gorgeous...great job!!


Frequently asked questions
Have a question about this project?
Did you paint the street side of the door blue as well??
At first I thought what's wrong with the door?...But wow! It's beautiful .What color blue did you use?
What is the white material hanging from around the interior door knob❓ It’s in every picture and I can’t figure out what it is. Thank you