


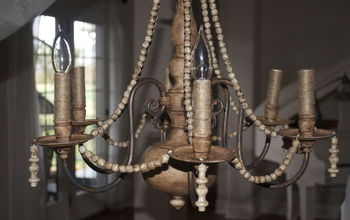
Chandelier Makeover

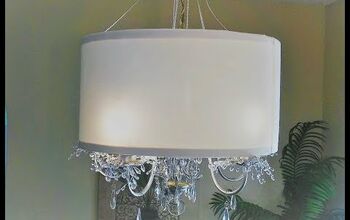
I’m all 😍 anytime I see a bohemian chandelier with wood beads! Then I’m struck by some of the price tags, because duh, champagne taste without the want to pay the champagne dollar. And that is how a DIY idea is born. Look how gorgeous the inspiration chandelier is!
Before kids I used to frequent garage sales and flea markets, resulting in a slight hoarding tendency. But it’s paid off because I have up cycled many pieces from those days, including this old brass plated chandelier.
The power of paint to transform anything, is the easiest and least expensive way to make a change.
Here’s what you need:
•2 cans Rustoleum Painters Touch 2x •Ultra Cover paint and primer Flat Black
•80 grit sandpaper
•1/8 Metal drill bit
•Twine
•Wooden beads in multiple sizes
•Super glue
Handy husband or electrician or YouTube video of how to install a chandelier.
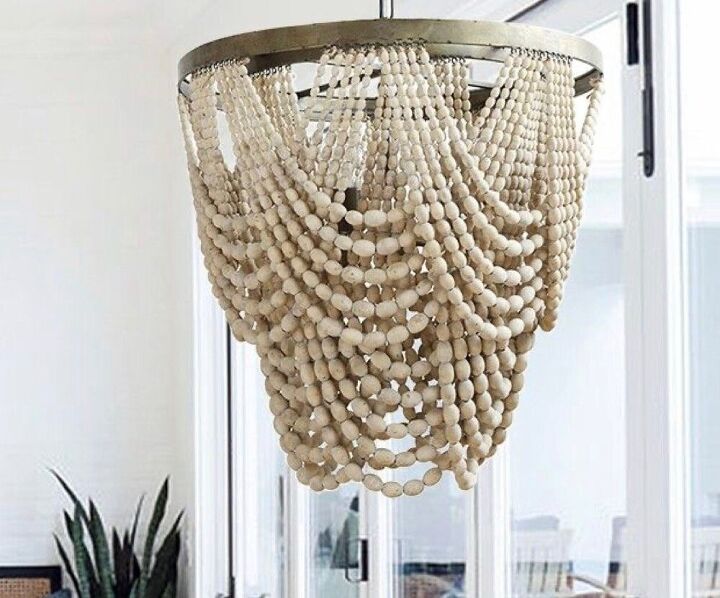
Inspiration
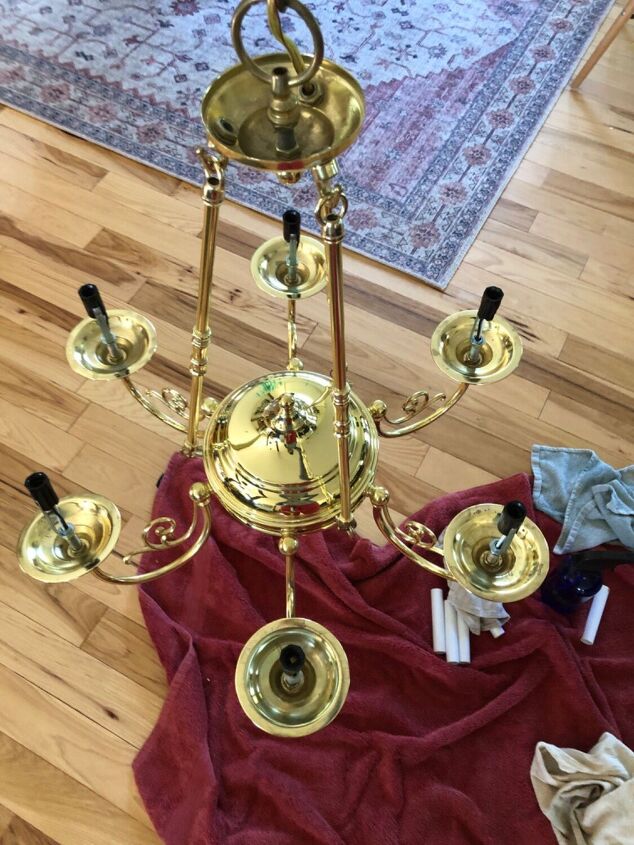
Before

Step One
Step 1:
Decide where you want to string your beads on the chandelier. I chose to string mine between each light. (Yellow lines in the second picture) Drill two holes on each side of the light plate. (Red dots in the second picture)
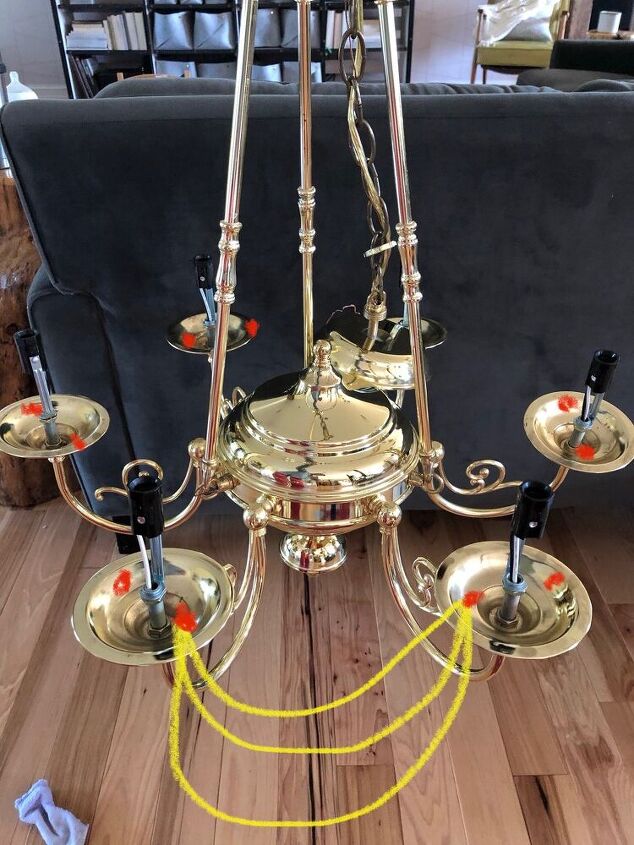
Step One
Step Two and Three
Step 2:
Sand the holes to get off any extra metal from drilling. Then scuff up the rest of the chandelier with your sandpaper. Don't skip this step otherwise your paint won’t adhere well to the metal.
Once you’re done sanding, clean the entire chandelier with rubbing alcohol. This dissolves any oils and dust, ensuring you have better paint adhesion. Now it’s time to paint!
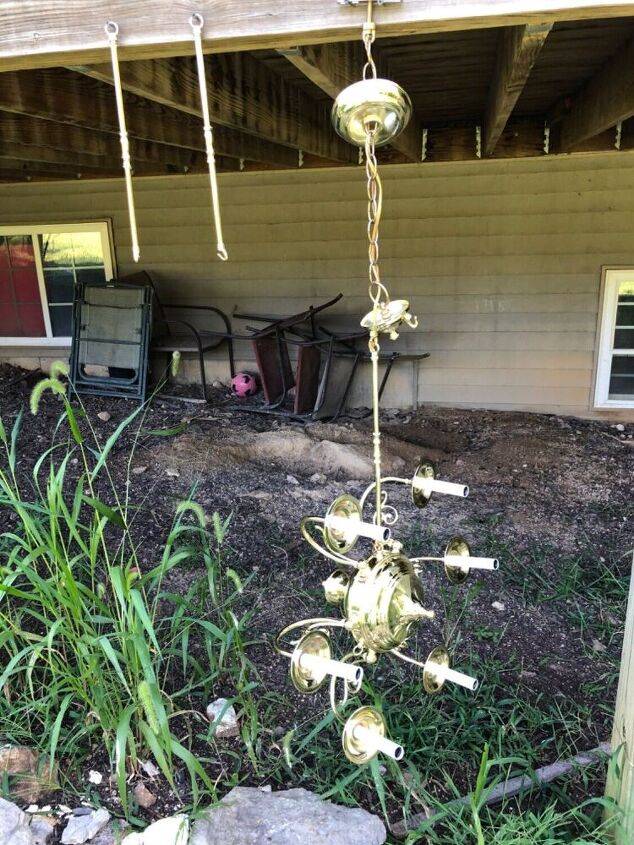
Step 3:
I have found the easiest way to paint objects like this is to hang them. I hung mine up under our deck. Follow the directions on the can, light even coats allowing the paint to dry in between. It’s hard to be patient, but you will use less paint and avoid drips.
Step Four
Step Four
Step 4:
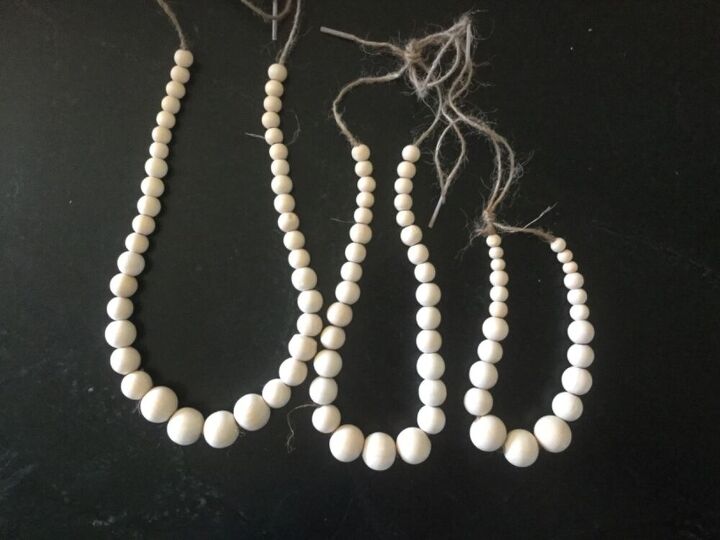
String the beads. Decide what pattern you would like. The number of beads determines this for me. I wish I had bought more beads. I will likely add more beads in the future.
Cut your twine long enough to have extra on each end. Tape both ends of the twine to avoid unraveling and start stringing your beads. I have three strings per each section. Once I had three string done I then tied them together.
Step Five
Step 5:
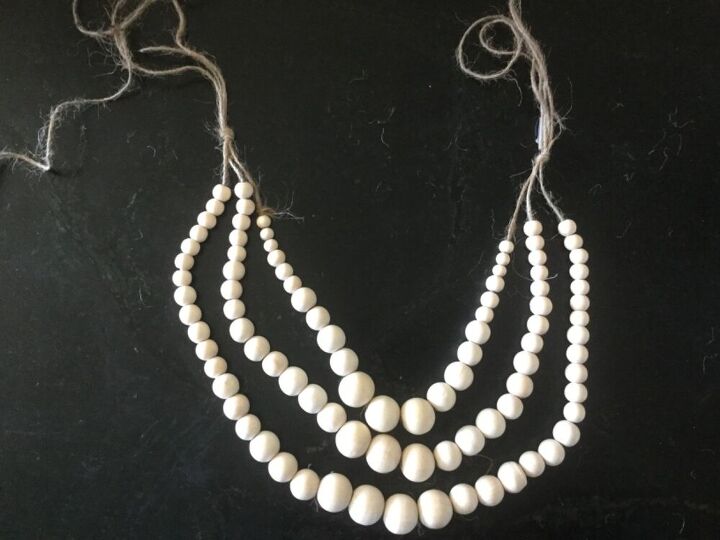
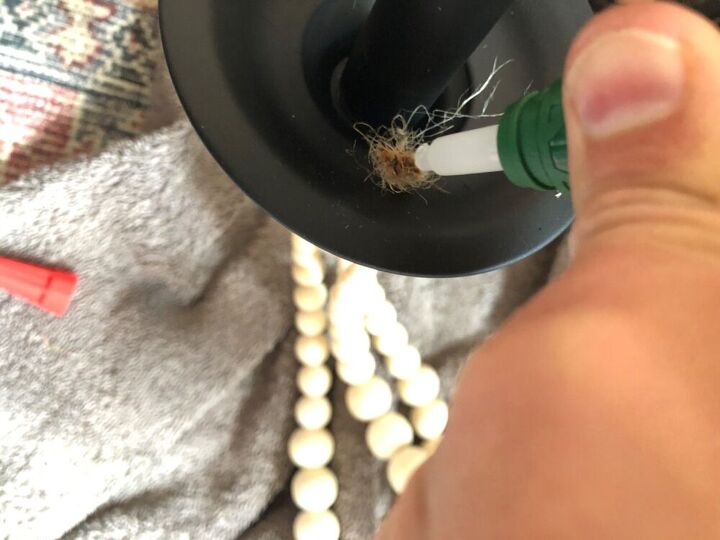
Install the string of beads to the chandelier. Un-tie the strings and thread each one individually through the holes you drilled in the chandelier. Once all three strings are strung and you have them hanging at the height you want, tie a knot to keep them all together. Repeat this until all your beads are strung on your chandelier. Use your super glue to secure the knots.
Once all knots have glue, the chandelier is ready to be installed. Make sure the power to the light is off before installing.

Chandelier Installed

Resources for this project:
See all materials


Comments
Join the conversation
-
Love it. But, imo, a cool room coordination would be to have the drapery hardware black too.
-
Hi Alissa, your chandelier came out beautifully. I love that you painted the body black. Did you think to find black or even light tan shades for the lights. I have a black crystal chandelier and I bought black shades for it and they just finish the look. if that is your daughters room even pink shades to compliment her bed might work, you can paint the shades with a pink dye if you can't find the pink ones. Thank you for sharing your project.


Frequently asked questions
Have a question about this project?
I liked it but it just doesn't go in my home.
Have you ever done any with crystals or some type of bling?