


How to Make an Amazing Vintage Style Laundry Hamper

I had been searching for a vintage laundry hamper for the longest time! Everything that I saw in the store was just too pricey and that’s when I decided to take the plunge and make my own. I had an idea in my head of what I wanted for the end result and I just got stuck in. If you love vintage home decor and you’re up for a good DIY, this tutorial is for you! Follow my easy, step by step guide and learn how to make an amazing vintage laundry hamper.
Tools and Materials:
- Wood round
- Power sander
- Wood stainer
- Foam brush
- King-sized pillowcase
- Galvanized wire mesh
- Wire cutters
- Staple gun
- Plier
- Drill
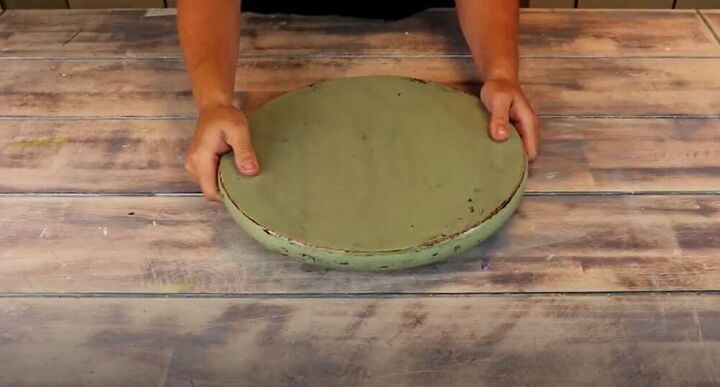
To start off, I used this round piece of wood. I actually repurposed this piece from an old stool. If you don’t have a piece like this lying around, you can use a pinewood round which can be picked up at almost all home improvement stores.
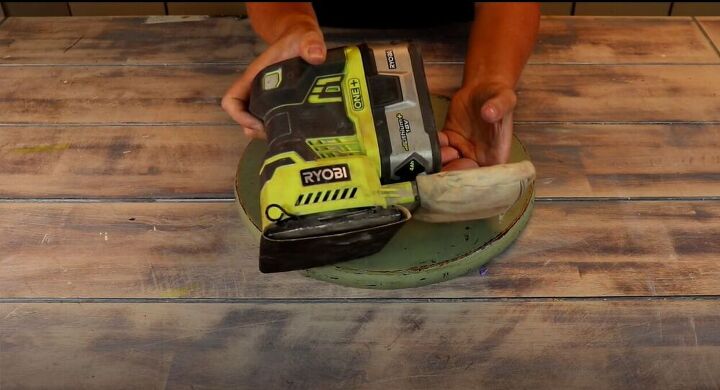
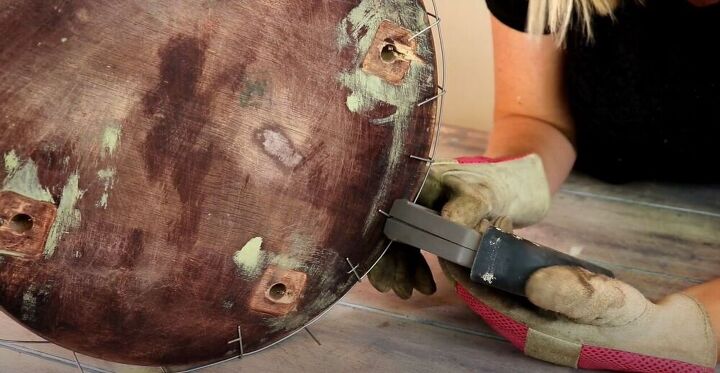
If you are using a piece of wood that has been painted, it’s really important to sand it down. I used my power sander with eighty grit sandpaper to sand my piece down to the bare wood. A great tip is to remove any staples or nails that may be in the wood before you start sanding. Sand down the sides of the round because this part will be exposed in your new laundry hamper.
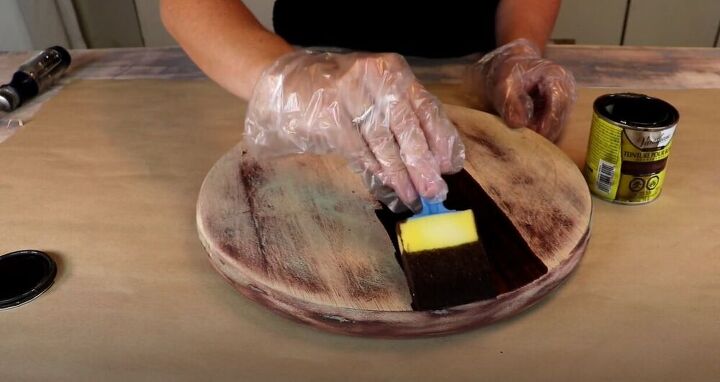
For this next step, use a foam brush and gently brush the wood with a wood stainer. Any time I use a wood stainer I have a little trick which makes sure I get the true wood color perfect. Before you open the stainer, turn it upside down and let it sit for about ten minutes. This will move the color pigments throughout the tin and give you that beautiful, rich wood color which I just adore!
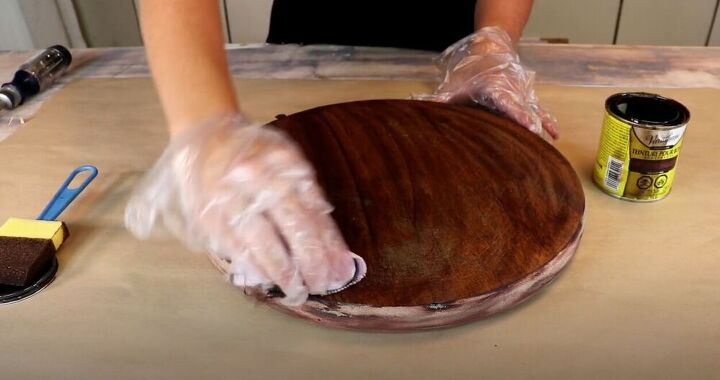
Using a lint-free cloth, wipe down your stain. If you want a darker wood look, paint two coats of the wood stain rather than one. I decided to paint one coat because I like the color it left for this piece of my hamper. Make sure to paint the stain onto the edges of the wood round as well and wipe it down after. Set the piece aside to dry once you have finished with it.
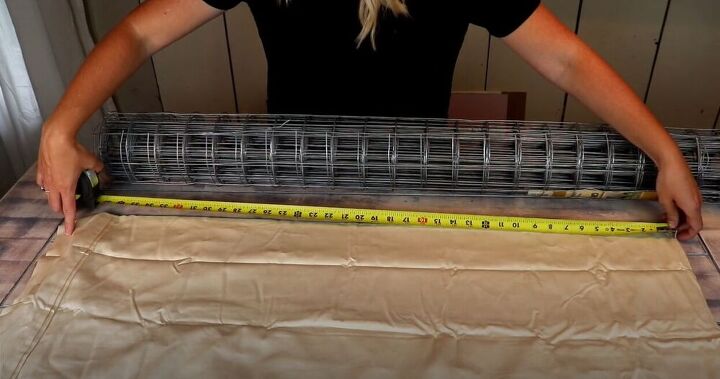
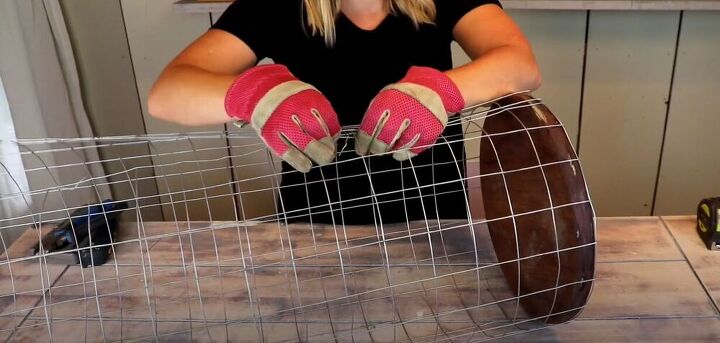
For this next step, you will need galvanized wire mesh and a king-sized pillowcase. Measure the wire mesh by the length of your pillowcase but make sure not to include the fold of the pillowcase. I chose to use this beautiful cream color because I think it fits perfectly with the vintage theme but you can choose any color that you like!
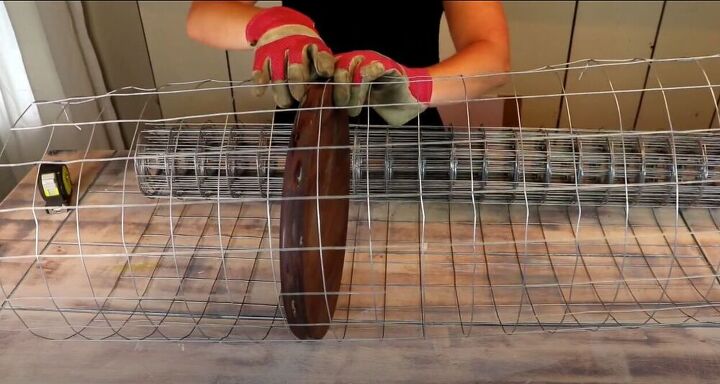
Now that you know the length, wrap the wire around your dry, wood round to get a measurement for the width. I suggest using gloves for this step so that you don’t cut yourself on the wire.
To start cutting the wire to the size of the wood round, I used a pair of wire cutters. You can also use tin snips for this step. Cut as close to the measured edge as possible.
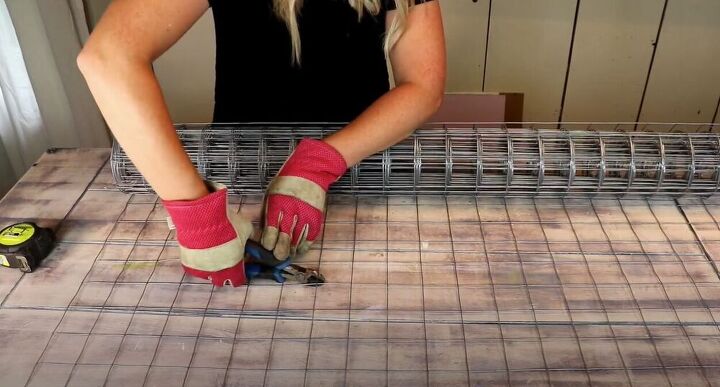
Use your wire cutters to cut the height of the hamper according to the pillowcase measurements you made earlier. Rather than cutting at the edge of the wire, leave a little bit more of the mesh so that there will be enough to wrap under the base of the hamper later on. It’s always better to cut more than less because you can always go back and trim the wire.
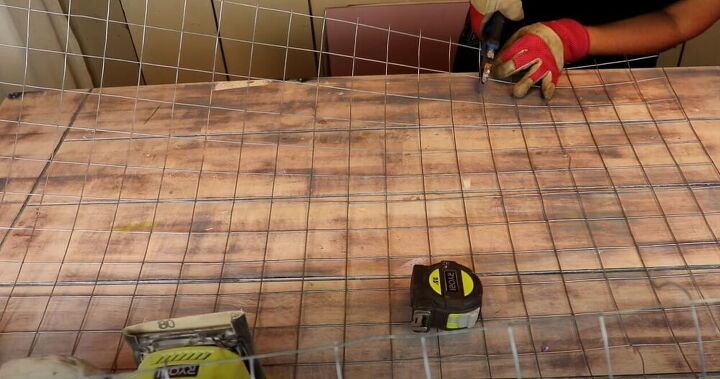
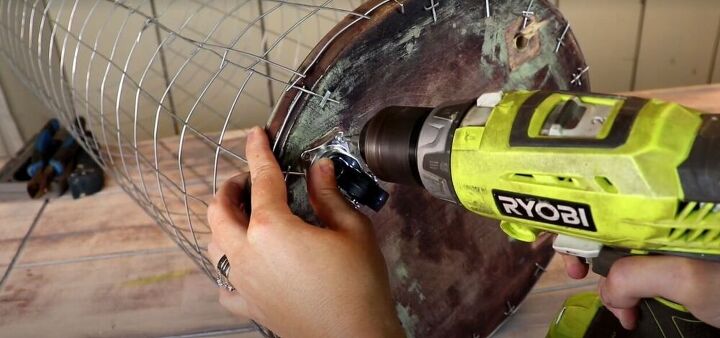
Finally, we can start to see this hamper come together! Hold your wood round in place and fold the cut pieces of wire under the base. Using a staple gun, staple the wire into the wood base to keep things secure and in place. Continue this process until the wire is safely wrapped around your base.
Now that your base is secure it’s time to attach the wire at the opening where they meet. Use the cut pieces of wire and wrap them around each other to close off your almost ready hamper.
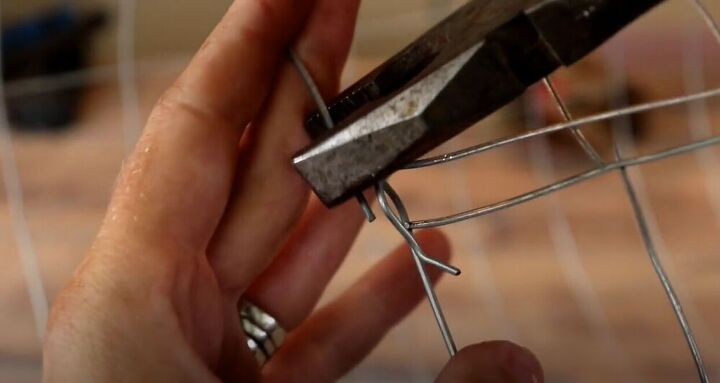
Use a plier to crimp the edges as an extra measure to just make sure that your basket won’t come apart. I always like to make sure that my DIY work is durable and long-lasting!
I absolutely love the idea of a portable laundry hamper! I knew it would make doing laundry just that much easier. Using a drill, attach four wheels to the base of your hamper.
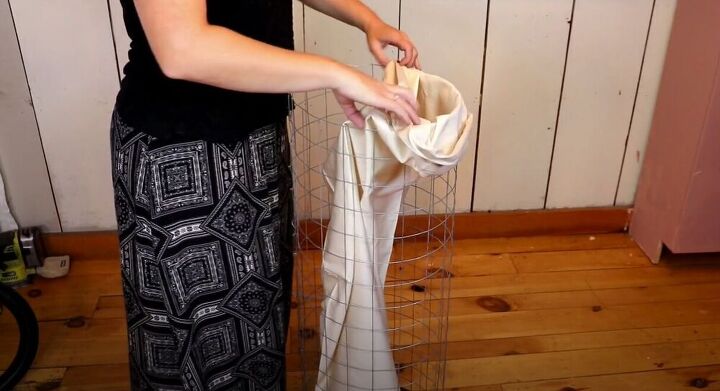
With your wheels attached it’s time to stand up your new hamper! Insert your pillowcase and fold the top over the wire. There you have it! If you don’t have a pillowcase long enough to use, you can always buy a laundry bag to put inside the hamper.
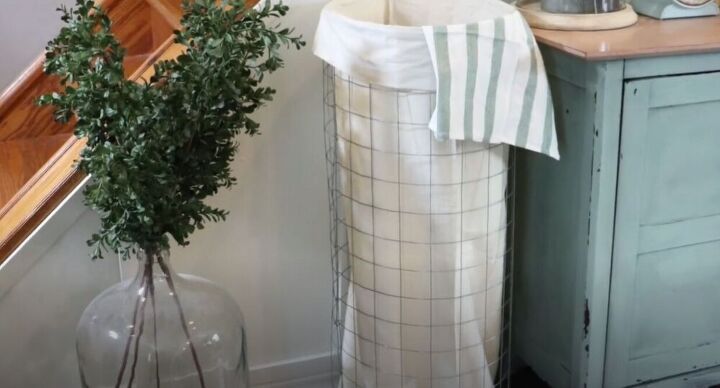
I am absolutely in love with this new vintage laundry hamper! It fits perfectly in my space! Where would you put this in your home? Let me know in the comments below!
Resources for this project:
See all materials


Comments
Join the conversation
-
Another quick way to make one of these is to use the square tomato cage. Attach a square wood to the bottom and the cage is already made 👍️
-
Really? Some people just love to argue just look at the picture go to tractor supply and buy it what is the difference . You see what it looks like .
I was thinking how it would work in the kitchen as garbage can use the cloth then put the garbage bag over it not sure if it would work I need a tall narrow can to fit in a narrow area . Beautiful job my fixtures are black so probably try to paint it black .


Frequently asked questions
Have a question about this project?
What did you put on the very bottom to finish it? I was wondering if it would scratch the floor?
How about using a tomato cage for the wire part?.?.?
I think this is not chicken wire. Isn't it livestock fencing?