


DIY Backyard Makeover Before and After
When we bought our house, it came with a huge backyard deck in a sea of grass with one large fir tree and a few sad brown bushes. We spent the first 8 years redoing the inside and planting a vegetable garden and borders in the backyard before it was time to tackle the deck area - which had by that time become a dangerous, rotting mess (wet Oregon + wood = tons of maintenance or rot). We spent 8 months tearing out the deck and creating four garden "rooms" (dining, gazebo, entry, herb garden) in it's place using basic DIY skills and paying cash along the way.
Completed 2 years ago, the backyard makeover remains one of the best things we’ve done to our house! We use it during the warmer months almost every day and it's our view throughout the whole year, so it was a good use of our time and money, to say the least.
Completed 2 years ago, the backyard makeover remains one of the best things we’ve done to our house! We use it during the warmer months almost every day and it's our view throughout the whole year, so it was a good use of our time and money, to say the least.
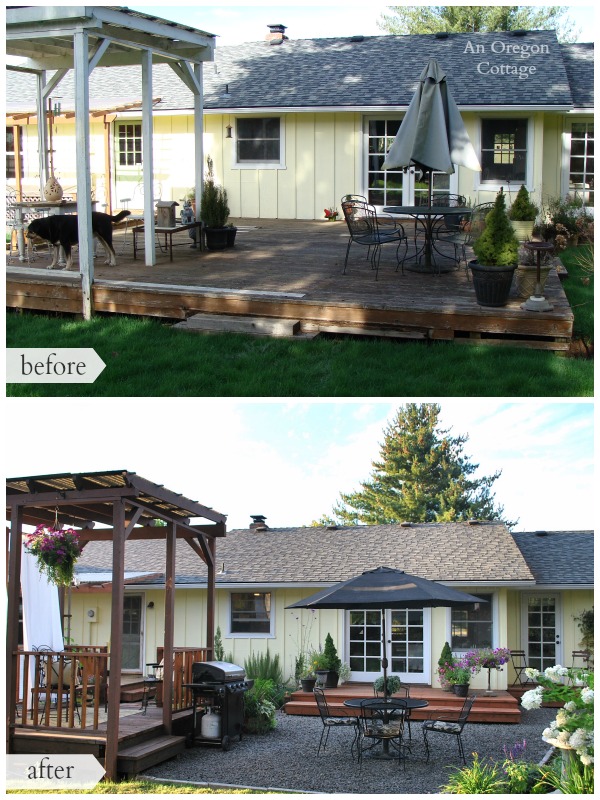
The before picture above is the deck right when we started work tearing it out. We were able to reuse some of the beams and the support posts near the French doors that became the entry deck, as well as keep the flooring for the odd corner structure that we turned into a gazebo.
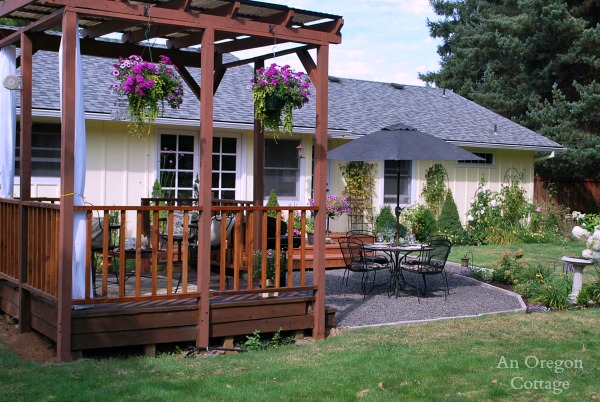
In order to make the structure more gazebo-like, we trimmed the corrugated plastic roofing back and angled the 2x4s supporting it to look more like an arbor. Then we added rails all around, except for two spaces that became entries with the addition of steps. Decorated with curtains, hanging plants, and outdoor chandelier and rug, it's one of our favorite hang-out spaces!
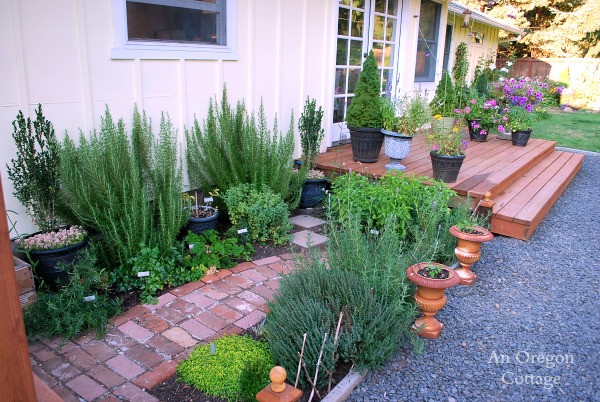
Next to the entry deck, within easy reach is a small herb garden that was high on the wish list. I love having herbs right outside the door for cooking and they do much better for me here than in the pots I had to use previously.
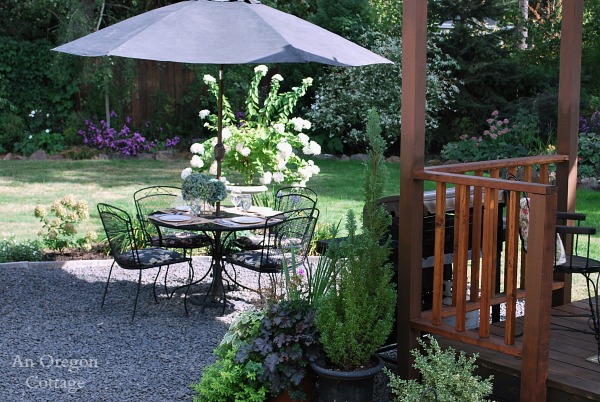
We used simple and inexpensive no-fines cut gravel to create a dining patio and the walkways connecting the outdoor 'rooms' to each other and to the house. The gravel is super easy to lay and it actually has a nice cooling effect in the summer, with it's light-absorbing gray color. (Oh, and the chairs and table are not tippy at all - something I wondered about)
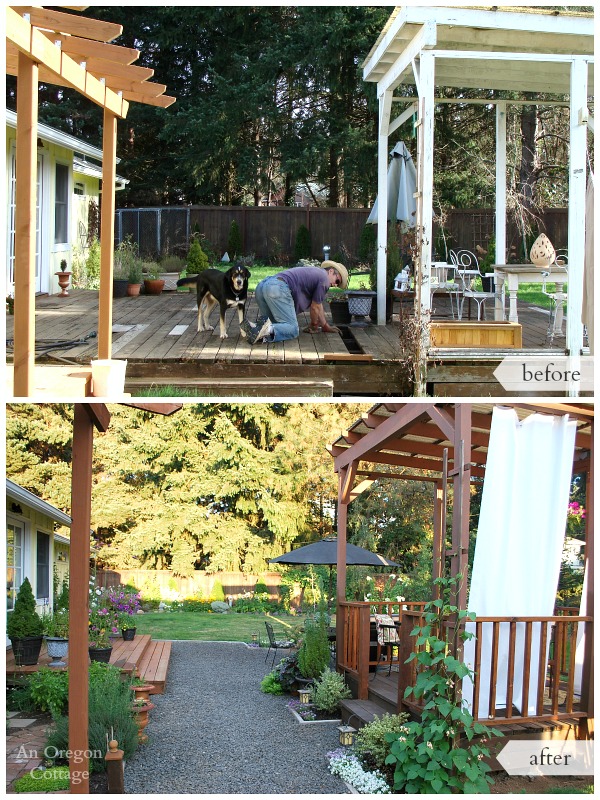
We're very proud of how it all turned out - how it looks, how great it's been for entertaining, that we did it ourselves (with a little help from a few friends and family!), and that we didn't go into debt for it!

Want more details about this and other DIY projects? Check out my blog post!
Comments
Join the conversation
2 of 28 comments
-
Absolutely beautiful!
-
Beautiful!


Frequently asked questions
Have a question about this project?
Thank you for sharing. Were the bricks difficult to put down?
Looks nice but what keeps the patio chairs from sinking into the gravel when you sit on them? I tried something similar and either one side or one leg would sink pretty much like on a beach