


DIY Rope Picture Hanger
I'm in a Monthly DIY Challenge group and this months challenge was coming up with a fun way to use ROPE. So I decided to make a picture hanger. This was one of the easiest projects I've ever done,and it was completed in about an hour. Including dry time for the Modge Podge.
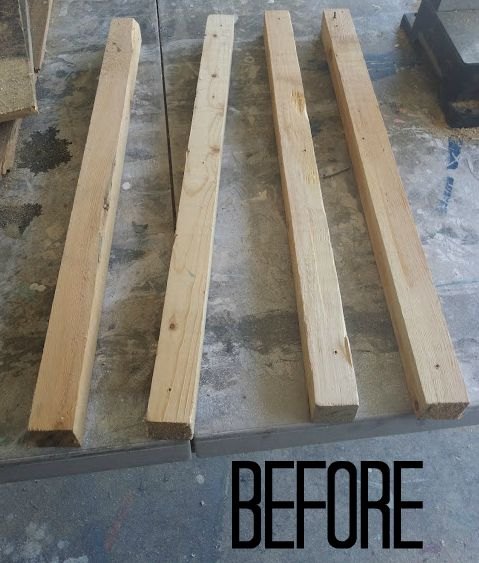
I had these 1"x1" s already laying in the garage they are perfect for the frame.
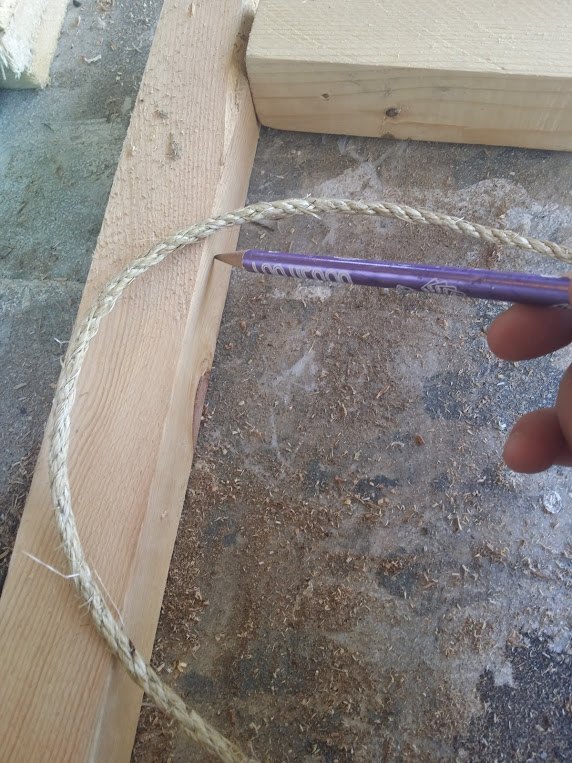
After laying them out in a square. I then marked where i wanted my rope to go.
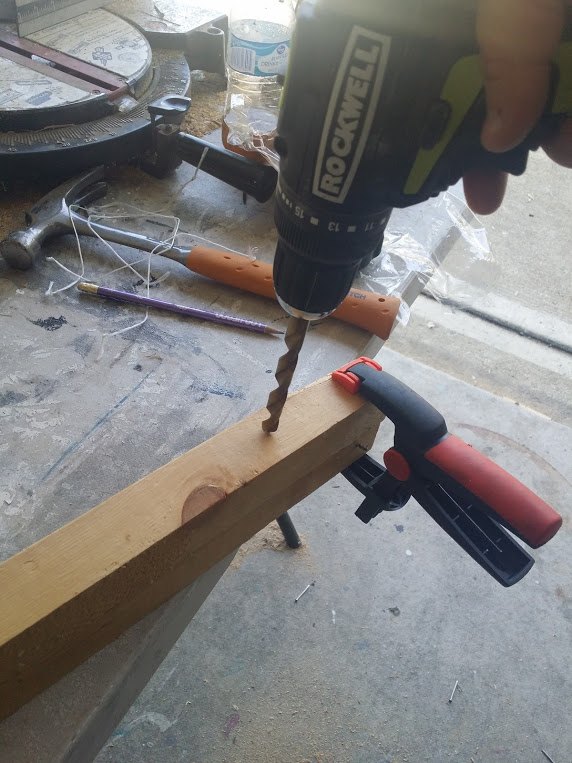
After one side was marked I stacked both sides together, clamped them together, and drilled them at the same time. This helped make sure the holes would line up exactly.
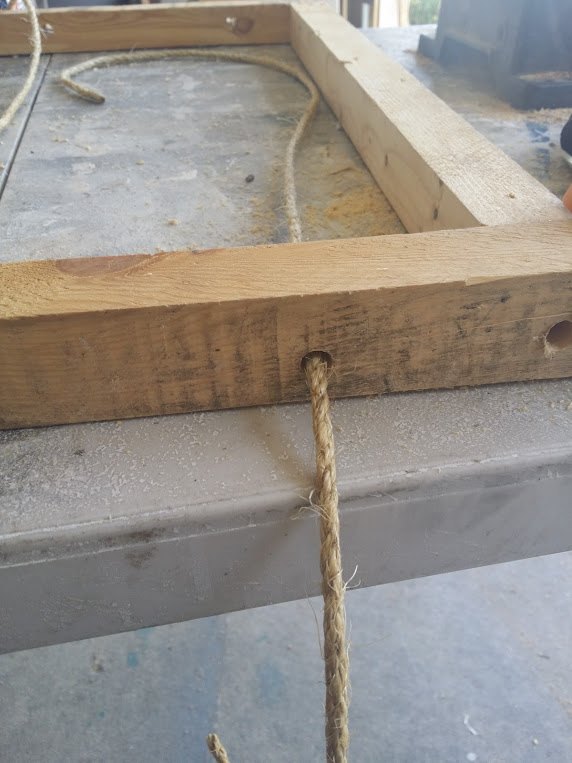
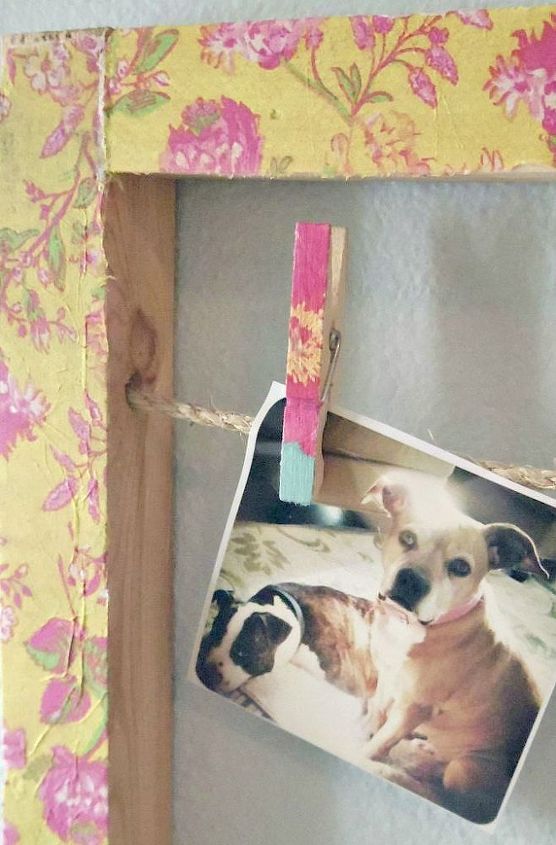
When all four pieces were connected I measured and cut the rope. I then pulled it through the holes and tied a simple knot. SO EASY.
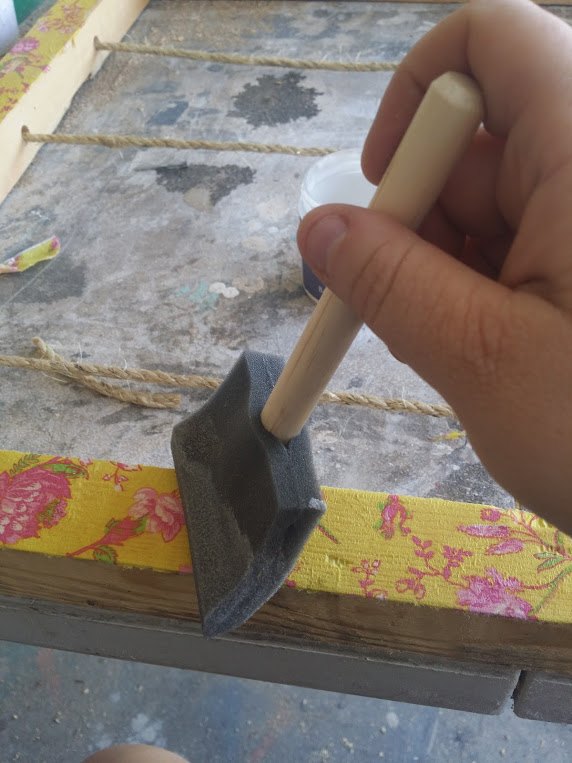
I then applied decorative napkins to the clothespins and the frame.
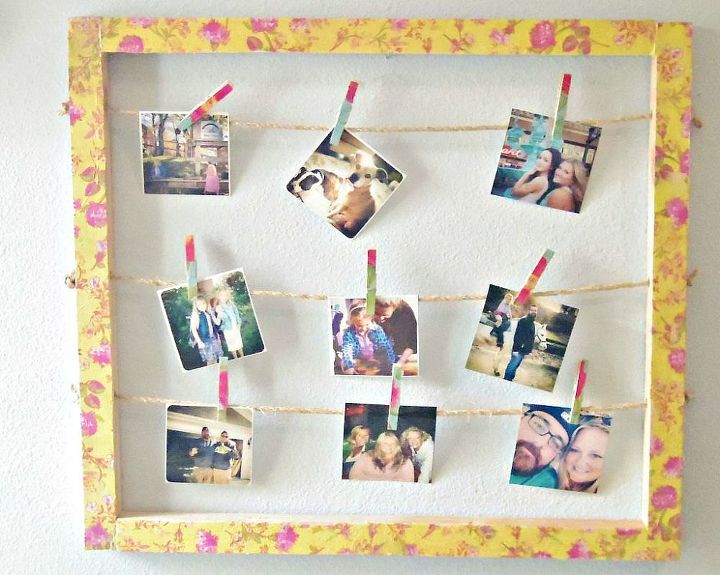
Pretty cool Right? I love how it turned out. It was really easy,fast,and cheap. My favorite kinds of projects LOL.

Want more details about this and other DIY projects? Check out my blog post!
Comments
Join the conversation
4 comments
-
Oh my goodness I love this! Such a great gift idea too.
-
OH I love it! That's adorable!


Frequently asked questions
Have a question about this project?