


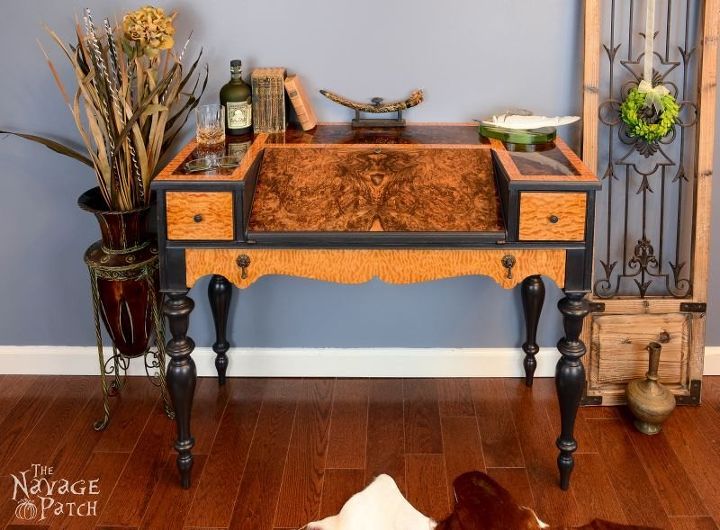
Vintage Desk Makeover Using Exotic Wood Veneer & Chalk Paint
2 Materials
Advanced
Using exotic wood veneer and chalk paint, I turn a vintage yawner of a desk into a sleek stunner in black, blond and brown.
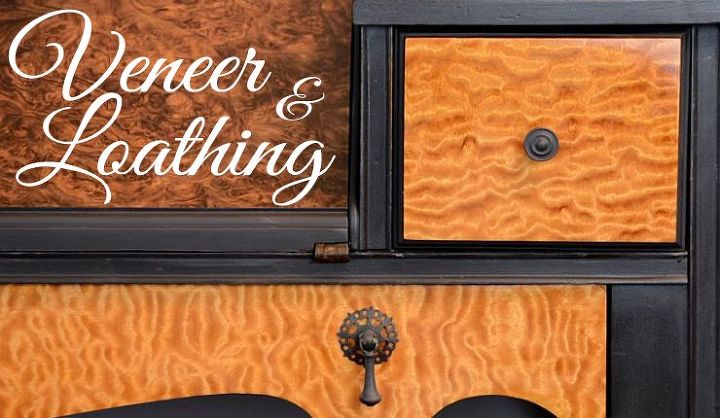
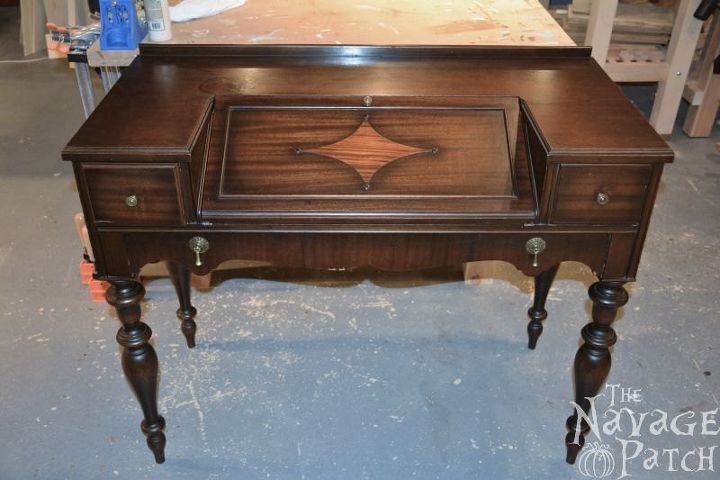
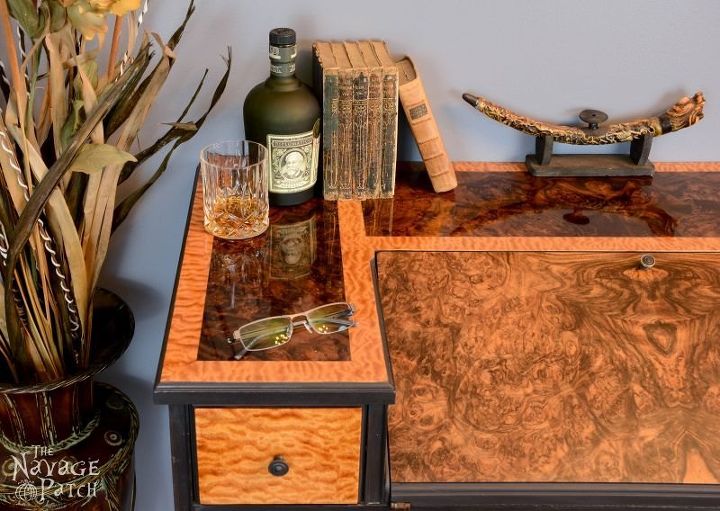
My wife and I found this desk made by Grand Rapids Chair Co. at an antique shop this past summer. It was more than we usually like to pay (free or a few dollars), but it had great potential. The veneer was peeling and it was pretty scratched up. My plan was to remove all the old veneer from the desktop, the drawer faces and the sides, then re-veneer the top and the faces with walnut burl and cedar bosse, then paint the sides, legs and trim.
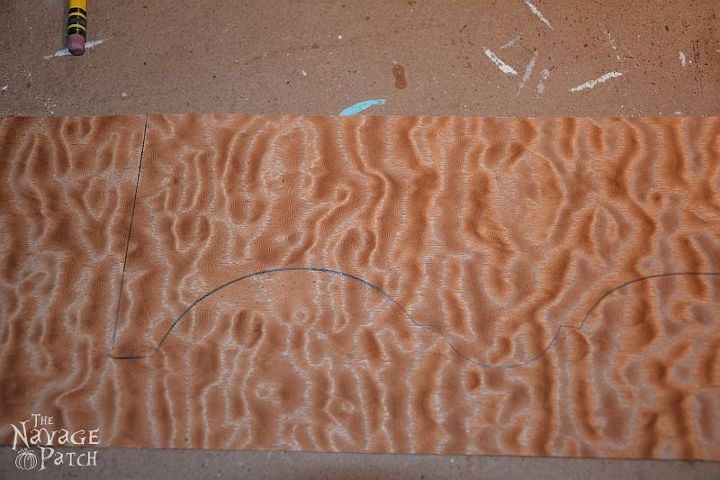
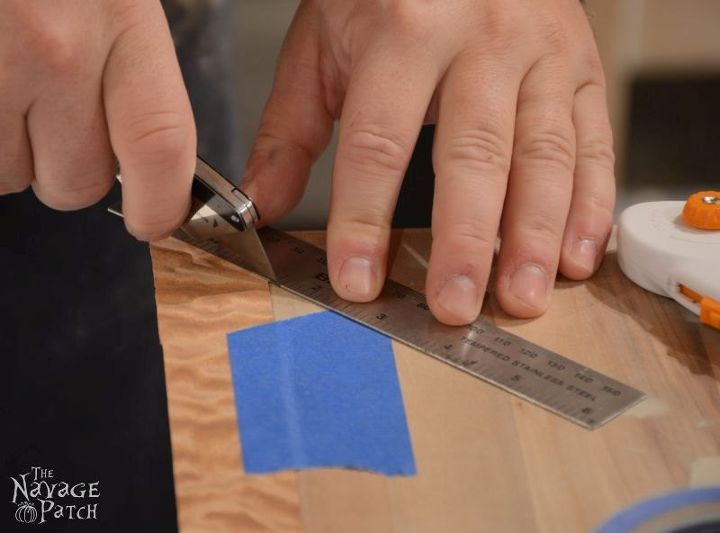
Since I'd never worked with veneer before, I decided to start small and work larger. I stripped and sanded the drawer faces, cut the veneer slightly over-sized and glued it on.
I followed the same procedure that I did for the smaller drawers.
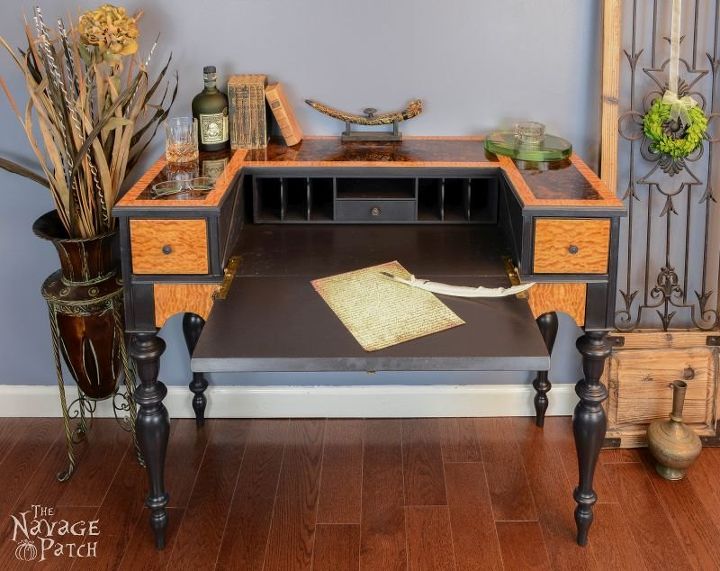
Due to picture limitations on Hometalk, I'll skip the pull-down desk drawer.
-------------------------------------------------------------------- -----------------------------------
--------------------------------------------------------------------------------------------------------
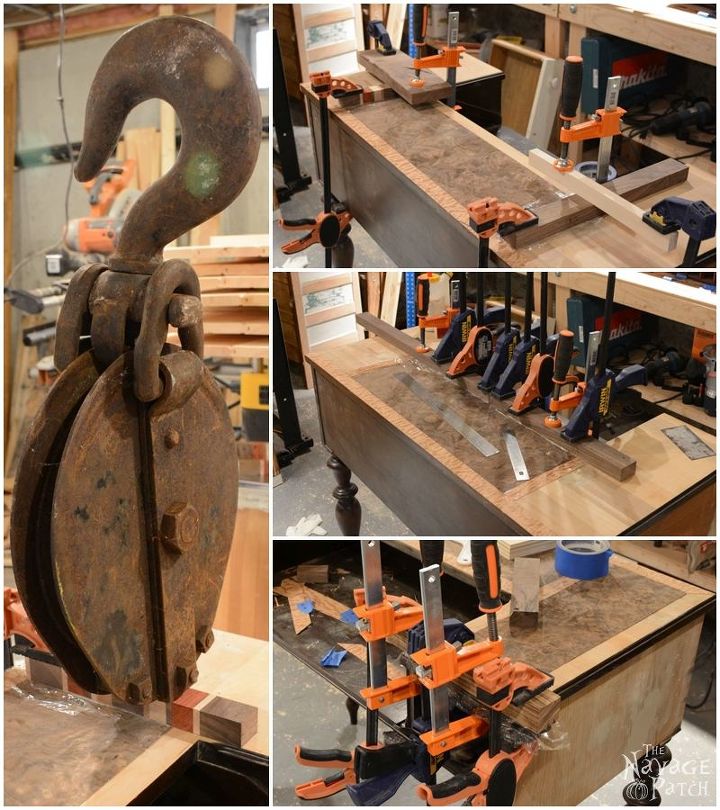
Next I started work on the desktop. This was the hardest, as it combined two types of veneer arranged in a pattern. I cut the pieces in place. This part took a long time!
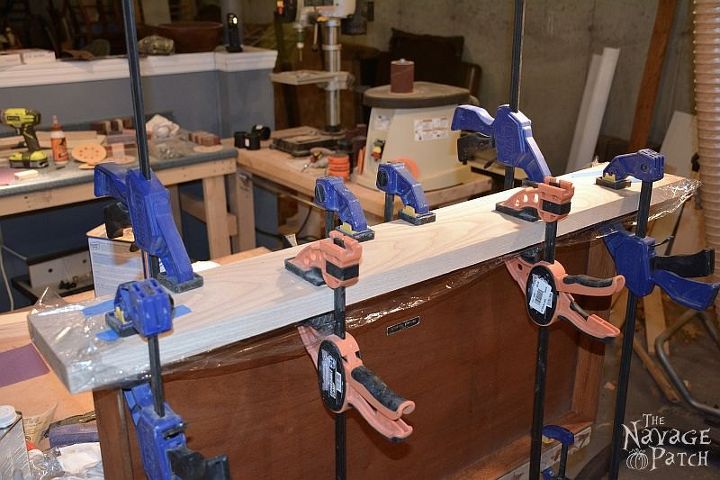
Eventually I got everything cut and fit and ready for gluing. It is important to clamp or weight down the veneer as much as possible. Pros and others who know what the heck they are doing use vacuum presses and other fancy ways of gluing veneer. I used clamps and heavy hunks of iron.
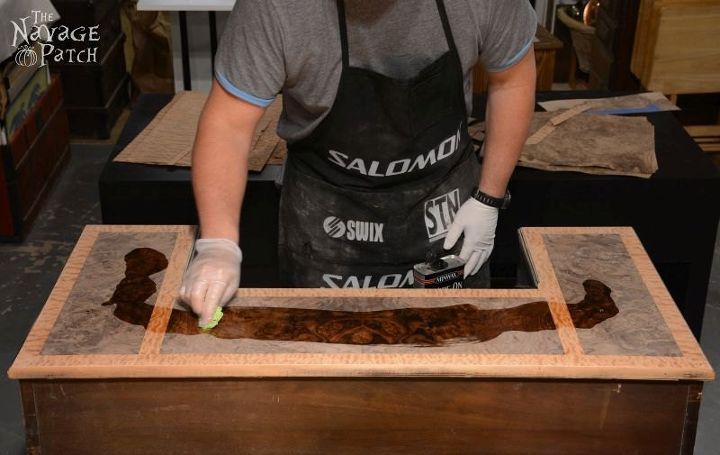
When all the veneer was glued and sanded, I sealed the grain. Should I have done this? Who knows! I make this stuff up as I go.
Another quick sanding, and it was time to finish the top.
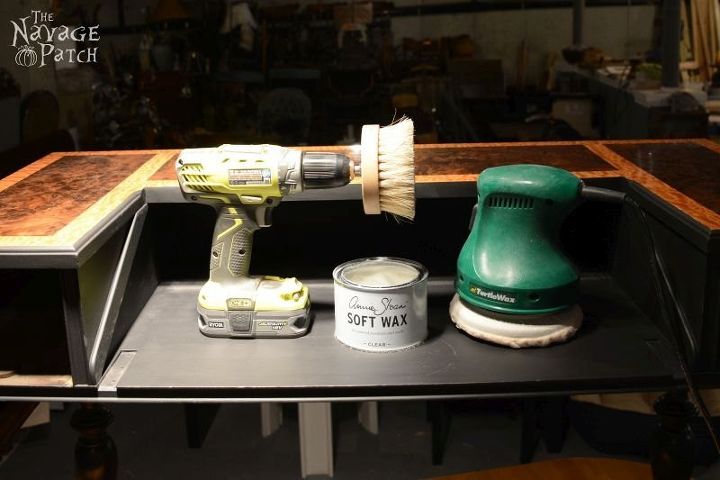
When all was finished to my liking, I moved on to painting for the legs and inside the desk. I chose black, as it would contrast beautifully with the cedar and walnut. After painting, I waxed all the painted surfaces.
The final step was to reassemble the desk.
Check out our blog, link below, for many more pictures and descriptions.
--Greg

Want more details about this and other DIY projects? Check out my blog post!
Comments
Join the conversation
2 of 409 comments
-
This is fantastic. Beautiful job.
-
Absolutely beautiful! Gives me hope that I can re-veneer my old claw-foot walnut dining table! Wish you lived in Texas!


Frequently asked questions
Have a question about this project?
Where can you buy different types of veneer?
How difficult is it to remove veneer? I've never tried it cause I envision patches of it that I can't remove.
Your desk is lovely.
That is a sexy piece of furniture. You did an incredible job