Trade up Your Thermostat and Slash Your Heating and Cooling Bill

Wet & Forget
by Wet & Forget
Installing a programmable thermostat is one of the quickest, easiest ways to reduce your home energy use and save money. All you need are some basic tools and about 20 minutes, and you’ll be on your way to smaller heating and cooling bills! This step-by-step guide with photos and video has everything you need to know to install your new thermostat and start saving.


Why Switch Thermostats?


If you don’t already have a programmable thermostat, this is definitely a worthwhile investment. According to Consumer Reports, a programmable thermostat can save the average family about $180 a year. When you consider the fact that you can buy a basic programmable thermostat for as little as $20 or so, and that it takes about 20 minutes and very little effort to install one, this is probably one of the easiest home improvement decisions you’ll make.


What you Need:


You only need a few basic tools to get this job done. They are:


2 medium-sized screwdrivers (1 standard and 1 Phillips-head, because you don’t know in advance which one you will need).


An electric drill.


A level (possibly; many thermostats have an internal level, which makes this tool unnecessary).


Needle-nose pliers (optional).


A pencil.


The Process:


As you would do before starting work on anything electrical, your first step is to cut off the power to your thermostat. You can do this by shutting off the power switch on your heater or, to be on the safe side, going to your home’s breaker box and turning off the power to the heating and cooling system. Now you’re ready to get started!


Here are the steps:


Carefully pop the cover off of your old thermostat. If you think your thermostat may be 20 years old or more, be extra careful with this step. Some older thermostats contain glass vials of mercury, a hazardous heavy metal (see photo below). If your thermostat contains mercury, be very careful not to break the vial.
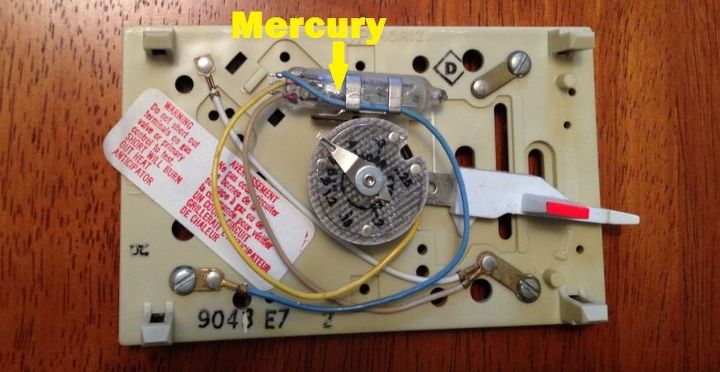
Un-screw the old thermostat from its sub-base, and loosen the wires that are connected to the sub-base.


Remove the old thermostat’s sub-base (see photo below).
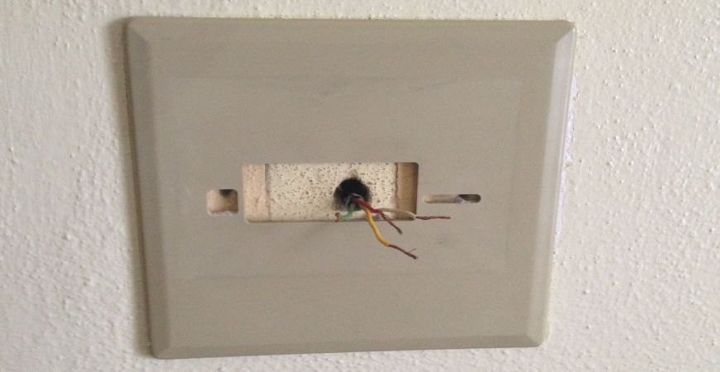
Check the instructions with your thermostat for the wiring schematics. It will list different types of heating systems (e.g. gas, heating and A.C.; electric, just heat, etc.). Find your type of system, and check the corresponding chart for how to label your wires. How many wires your thermostat has depends on the type of system you have. Your new thermostat should include little tags for labeling the wires.


Position the new thermostat’s sub-base on the wall, and pull the wires through the hole in the sub-base. Check that the sub-base is level, mark the drill holes with the pencil, and drill the holes.


Attach the new sub-base to the wall, and follow the instruction manual to insert the wires into their proper color-coded terminals (see photo below).
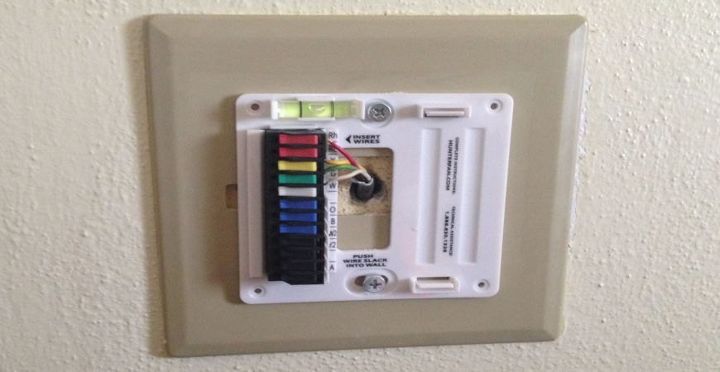
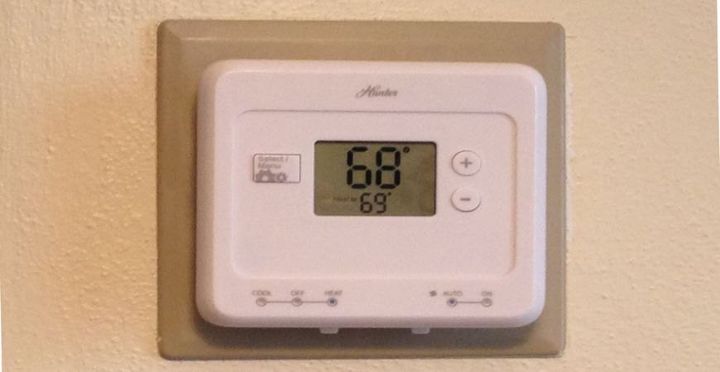
Insert the batteries if there are any, and snap on the new cover.


Turn the power back on.


Program your new thermostat, and start saving money!
u’d like an extra visual, here’s a video demonstration from This old House.


Note: It’s dangerous to dispose of mercury in household trash, and it’s also illegal in most states. If your old thermostat contains mercury, check with your state or county government to find out what you need to do to dispose of it safely and legally. Here is the resource for New York residents.


Enjoy your savings! And save elbow grease this spring cleaning season with Wet & Forget!
Frequently asked questions
Have a question about this project?
Comments
Join the conversation
Next