Garden Globes
After seeing so many posts on diy garden globes, I just had to try it. I started searching for old bowling balls but all I found were priced too high. Then little by little, it all came together and and I now have six garden globes that I just love. Hope you do too.
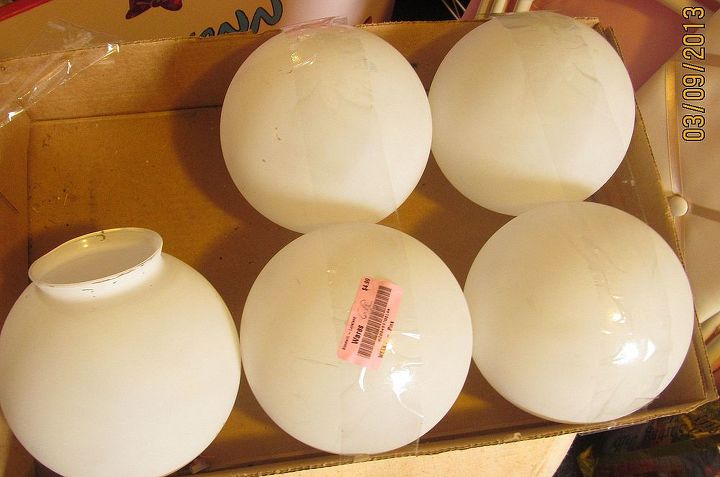
I found these lighting globes at the Goodwill for half off.
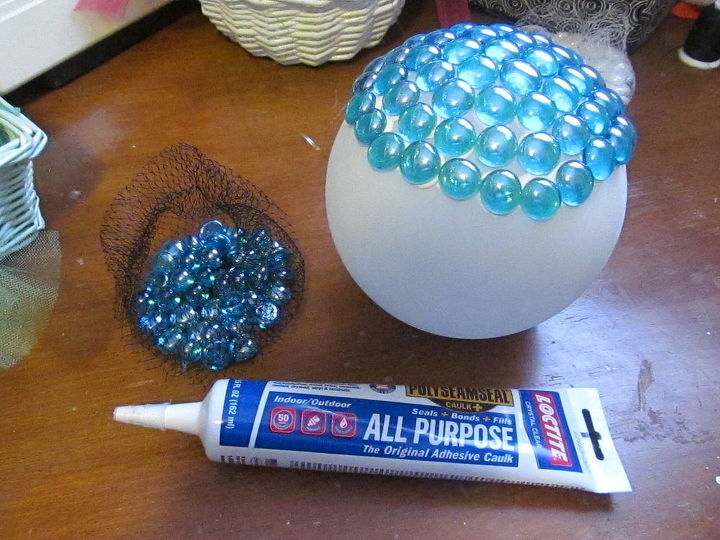
I started applying glass flat sided marbles(Dollar Tree) with this adhesive but they started sliding and I got impatient, so I went to hot glue. Worked great and no slipping.
Stones from Dollar Tree and a few engraved stones left over from my daughter's wedding.
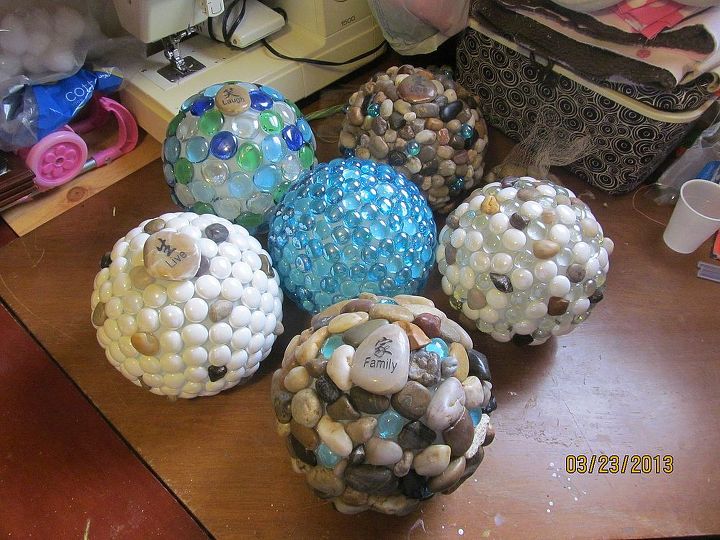
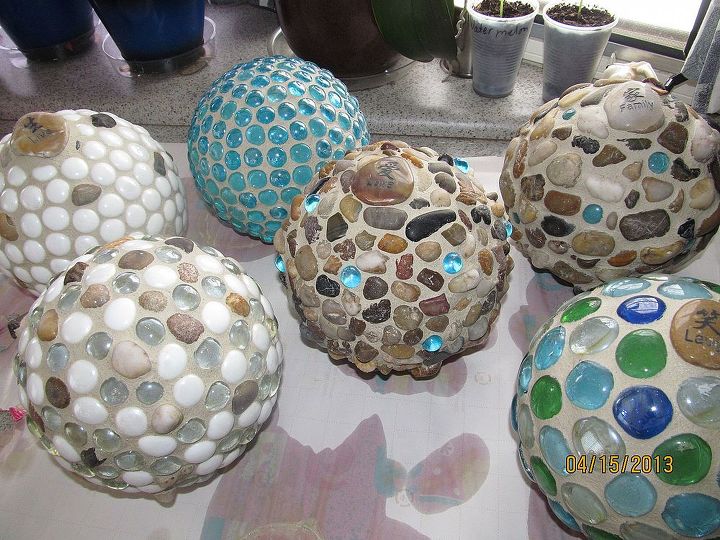
Fast forward, six different globes.
After a few weeks of researching and shopping for the cheapest and best choice of grout, I found a bag for $2 at the Habitat Restore. Messy job for indoors but snow outside made me do it in a large tub on my kitchen table.
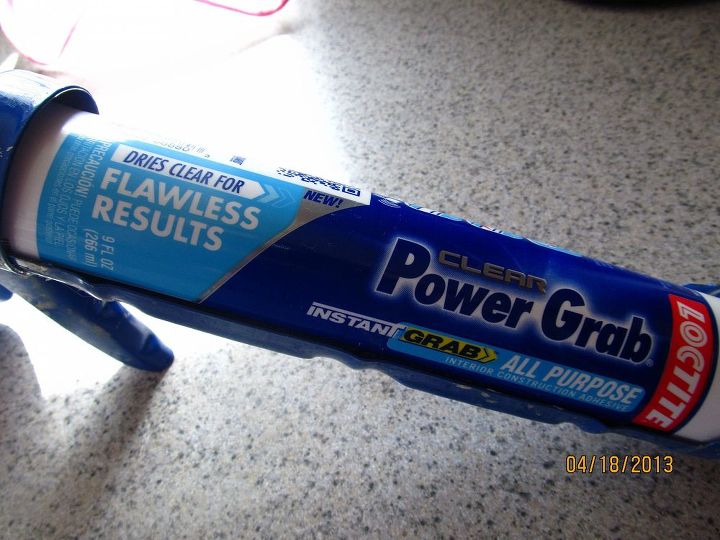
This is the adhesive I used (always on hand, great stuff) to put a base on my globes since they are open on the bottom.I has silicone so it will be water tight. I wanted to make them as outdoor friendly as possible.
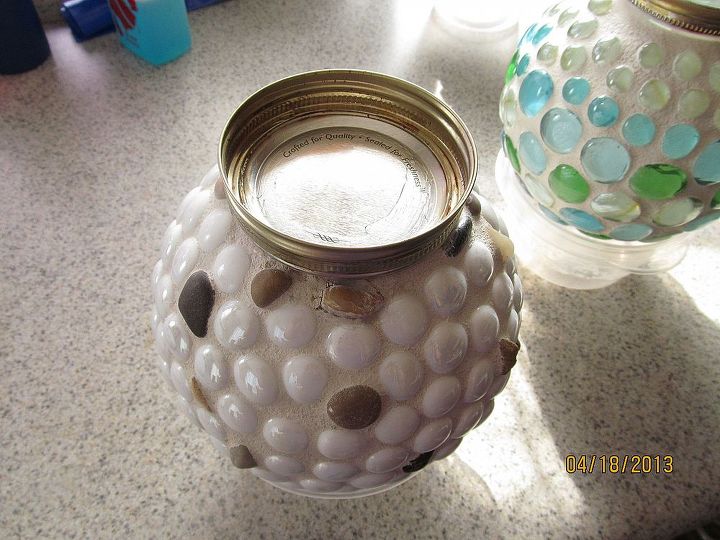
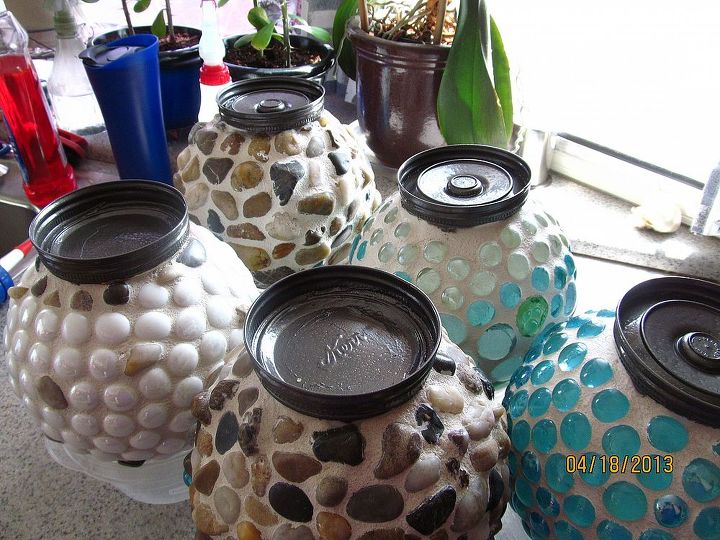
Again, being the cheap-skate I am, I found lg. mason jar lids at the Habitat Restore. They fit over the opening perfectly. I used plenty of adhesive around the ring and inside the ring sealing it completely.
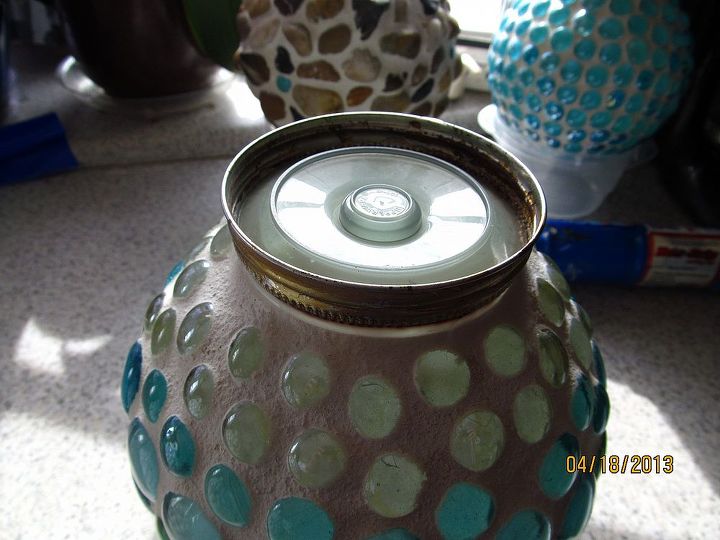
Some only had the ring so I used some bottom pieces from old Tupperware parfait glasses.
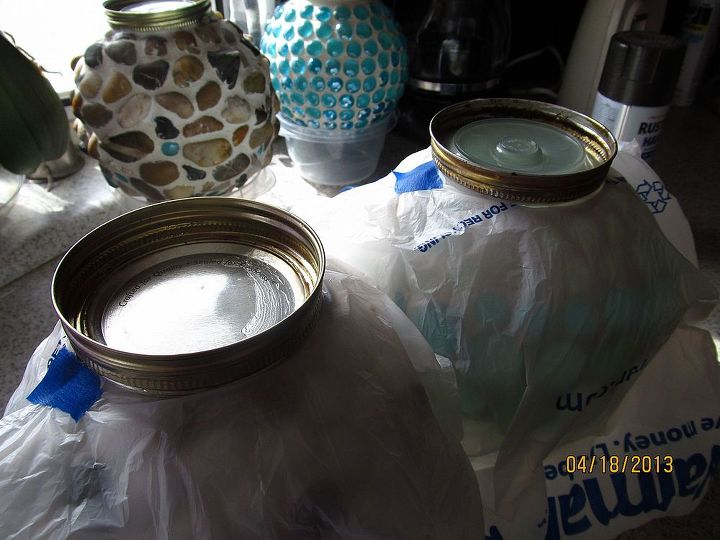
After letting the bases dry over night(resting on plastic bowls,in the background), time for a paint job. To protect the globes, I cut circles in the bottom of grocery bags and taped them tight around the globes.
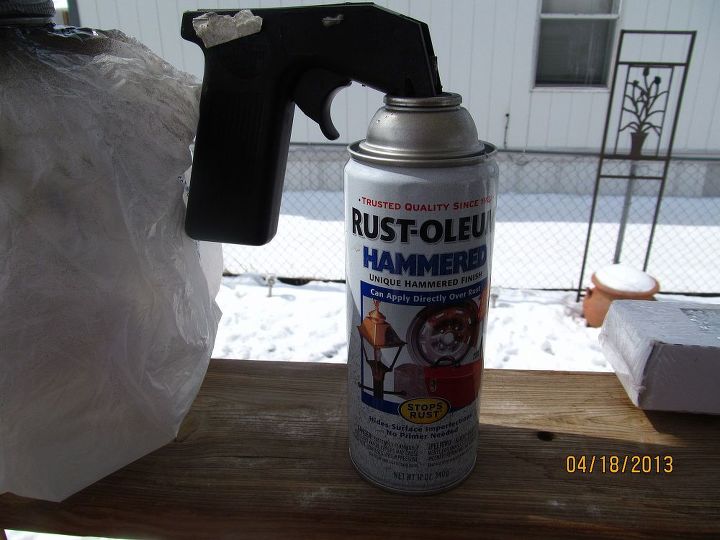
I had just enough left over paint from other projects to do the bases.
It was a bit colder outside than the paint recommends, but it dried fast.
Finished drying inside.
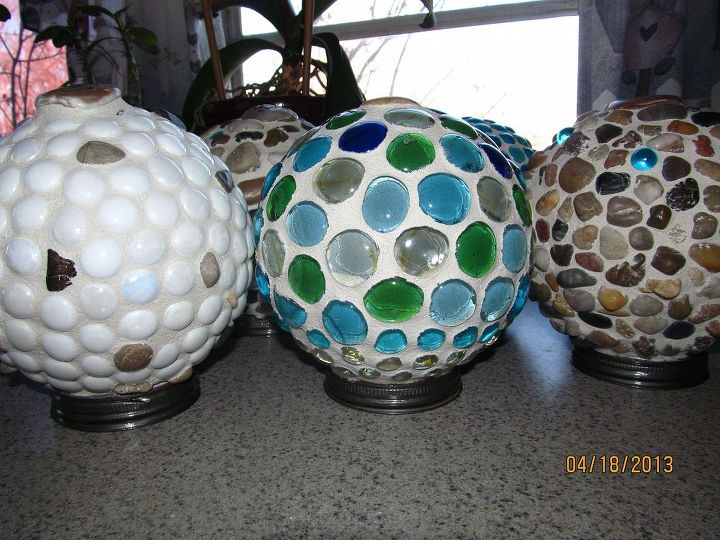
Now they sit upright and are water tight and weather protected. I think they are so cute.
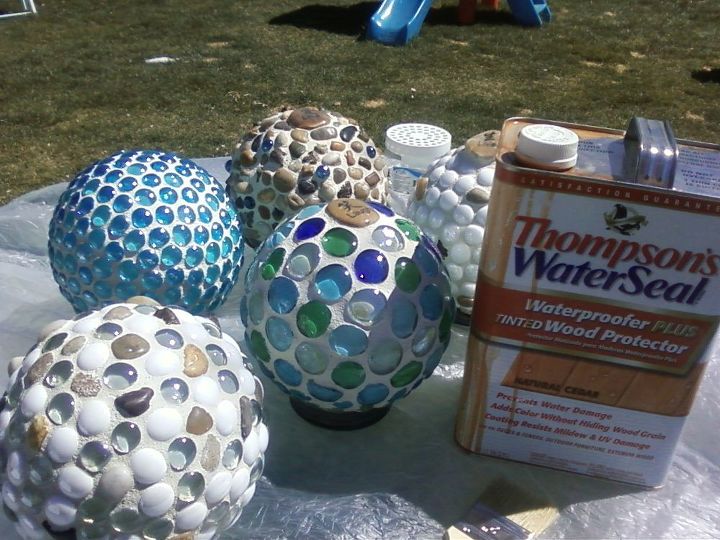
After about 2 1/2 weeks and countless inches of snow, I can finally get outside to seal the grout. I used Thompsons water seal (had cedar colored on hand).
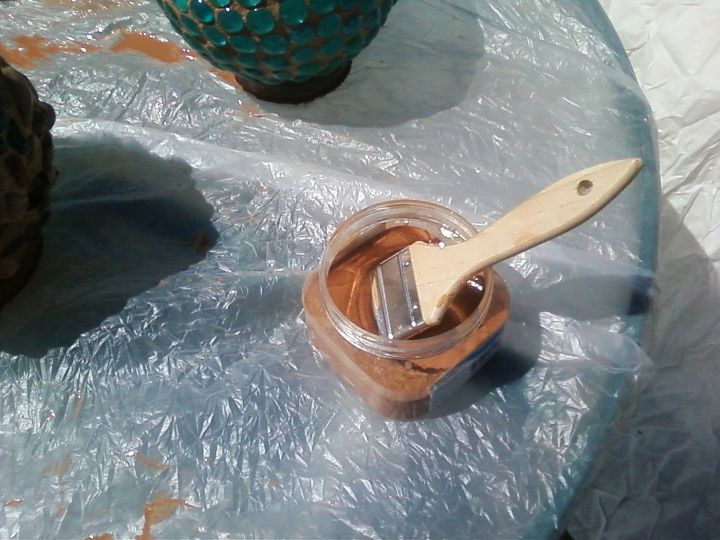
I poured some in a plastic container and used a cheat chip brush to slather it on. Make sure you cover your table, this is messy.
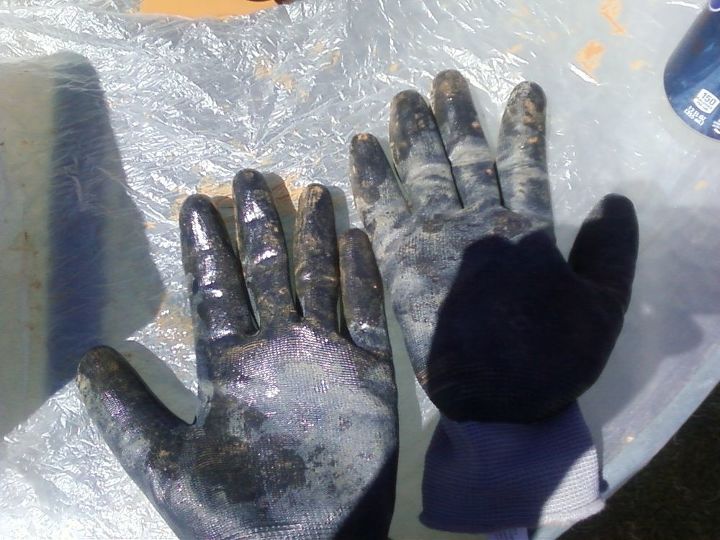
And wear gloves.
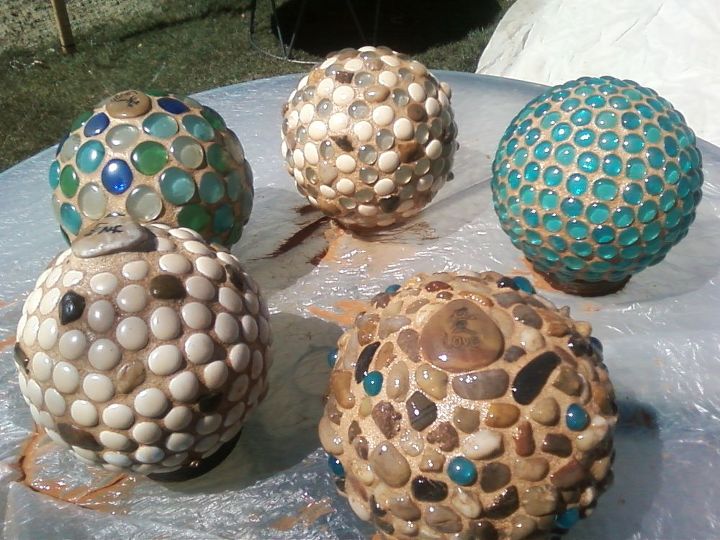
Don't worry about the cloudy way the marbles look. Let them dry for a couple hours and wipe off the stones and marbles with an old cloth.
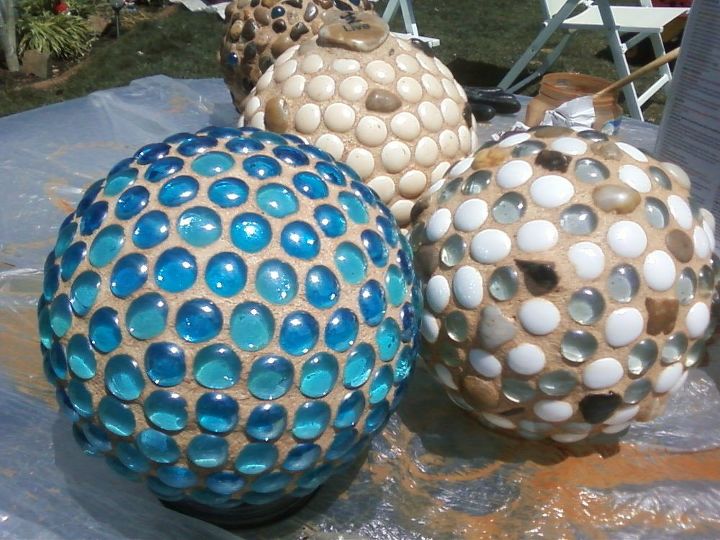
After a bit of elbow grease, they shine like new.
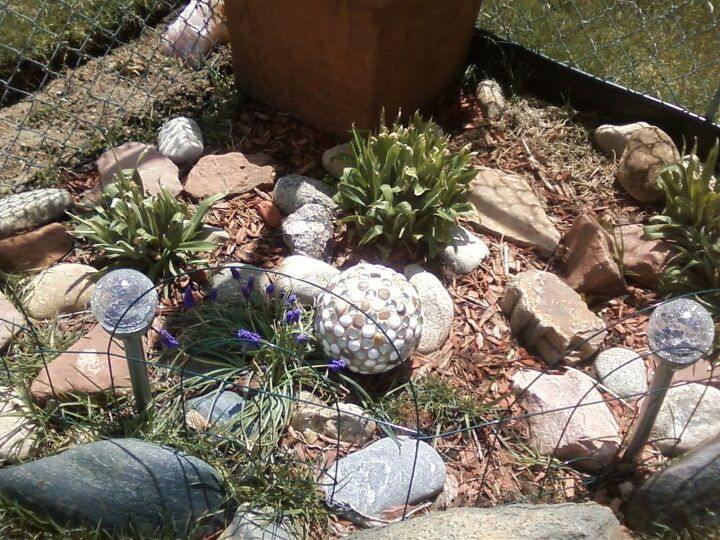
Now, find the perfect place for them in the garden.
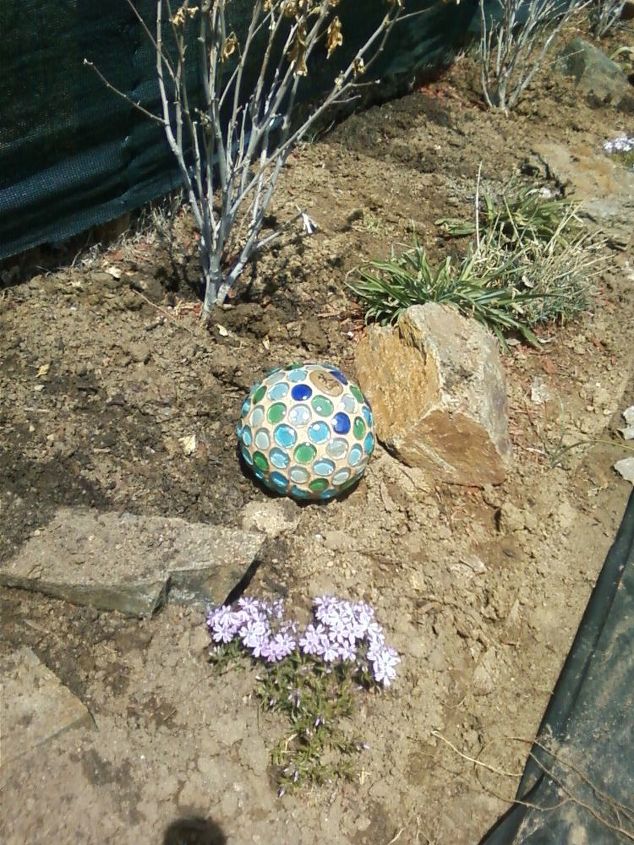
Now if only my gardens recoup from the long, cold winter we've had. Happy Spring, everyone.
Top Hometalk Projects
Popular Project Book
Join the conversation
2 of 366 comments
- Yvonne Rougeauon Oct 24, 2020
Yes!!!
- Deb Schroederon Dec 2, 2020
Super clever and beautifully done! Thank you for the great idea and instructions. 🤗
Your comment...
Have a question about this project?
I tried to pin the step by step instructions for garden globes but had to pin each picture one at a time. Suggestions
@Cleo Douglass when you pin each picture, it saves a link to the page with all the instructions, so no need to pin each photo.
Just curious if you need adhere bases before painting them. Couldn't I paint them prior? I love this idea and can't wait to make them! Thank you very much for posting!
Hi Vickie! I'm Jessica from SFG Media Group. We'd love to feature this project in an article as it's fantastic. Would you give us permission to use the photos to put together an article? The article will be shown on DIY websites of our company. We'd definitely credit you in them. Please let me know. Thanks! - Jessica
Wow! I would be honored to have you share my project. I had a lot of fun making these globes and still have them in my yard. Please let me know where I can see your publication. Thank you so much.
I don't see them displayed in her garden bed ... I must be blind as a bat !
After the picture of Thompson's water seal, I see a link, all in blue capital letters, that say SEE 5 MORE PHOTOS... Click the link. The last 2 pictures show her succulent garden and a wintertime view -mostly bare ground and a small leafless bush, each of which shows a garden globe.
If you can't see that, you may have pop ups blocked. In that case, look for an infinitesimally small message, either just under the address bar or in a tiny box to the top right of your screen.
If you can't find either of those, check your internet browser (Internet Explorer, Firefox, etc.) for settings that will block or allow pop ups.
For me personally, and for your learning abilities, please don't label yourself an ignoramous. At my school, we encourage our students to say, "I don't know that yet." Each of you is an expert on some, or many, subjects, about which I don't know anything yet, but I'm going to try to learn everything I can to help me in life.
😊😘
So you need to use grout? Or could you skip this step? I'm really new at projects and dumb when it comes to this stuff. I really like how these turned out
what size lid caps did you use?
Hi, so do you glue the stones on first, then put grout in between the stones?, or put grout on the globes, then place the stones in the grout?
When you are tiling a wall or counter or making a stone walkway, the stones go on first and then the grout. I imagine it is the same process.
She says at the beginning. Read through all the directions before starting your project.
Can u use plastic round bowls from Mardi gra the ones that drinks in them i pick up a lot of different size cups down here in new Orleans I got a bunch of big beer bottles do u have any idea how to fix them up
Do you have to use grout.
No I never use grout,I usually like what ever the globe is made of. Mostly it is a white globe. So ...if you put battery operated lights in it, it glows. ,I don’t like grout because it gets dirty.
These are really cute but I read through the tutorial and can't find when or how you grouted them or what you year-olds the full tutorial is somewhere else?
As I replied above..you don’t need to bother with grout. I never do,it gets dirty.
I am pretty new at Hometalk. how can I obtain the instructions of this DIY ?
Look great!! What grout was used? Or recommend? Thanks
Any all
weather grout would work. In fact, most all in existence would work. You’re in luck.
Also learned my lesson, hot glue gun projects do not work in NC sun.
This is why you use grout. Unfortunately you didn't show us how you did it.
Questioning why you didn't paint the bottoms before attaching them?
Questioning if you know how grout works. Also, although I don’t know the author, I will answer the “why didn’t you” question as well. As with any project, you live and learn. Some of these comments🤦🏻♀️
I LOVE THOSE!
Did the Cedar Color look good? I imagine that it would match really well with the globe covered with rocks.
I'm looking forward to making these beautiful globes~ a fun, easy & creative project!
Thanks for sharing!
Did you see the photo of the completed ones that you clicked on to get here? They’re lovely.
Here ya go, love.
Why didn't you show us the finished product ? Would love to see it !
Um...she did
She did. The photo you clicked to get here is the finished product. The first photo in the lineup.
She did
Adorable idea! I have two of these old globes in my closet that I am absolutely going to do this. One question for you. Did you put yours on stands or did you place them on the ground? Just wondering if stands what size stand and where you found them? Thanks for sharing your project!
Looks like they are placed on the ground. I think I would go to a thrift store and get a few quart or larger used mason jars and fill them with sand, the sand will give weight to the base. Different sized jars will make them heights and you could group them.
Peggy that is a Brilliant Idea! Thank you for chiming in. You have my wheels turning with all kinds of ideas now. Merry Christmas!
Hi I love your project. I have two large globes from old ceiling fans. I understand most of your instructions. But you didn't say what you used to grout with. Is it concrete or regular grout tiles? Your results are awesome.
The finished project would be nice to see. Can you post a picture of that please.
She did. They are there plus first picture!
I want to try these. My garden needs to be brightened up. Will have to check the thrift store on my next visit to see what I can find. Was it necessary to use the grout ??
Yes, grout is necessary, otherwise you will have large spaces between the stones which will not look finished. You can make the grout any color you want and seal it with clear not colored water sealer. Have fun.
I am definately going to try this! Did you find anything for bases? I read somewhere that a person used large vases glued to a large plate or some clay pots glued together and painted! Still, thank you for sharing! I have bad arthritis but want to create a beautiful flower garden and you definately got the ideas flowing!