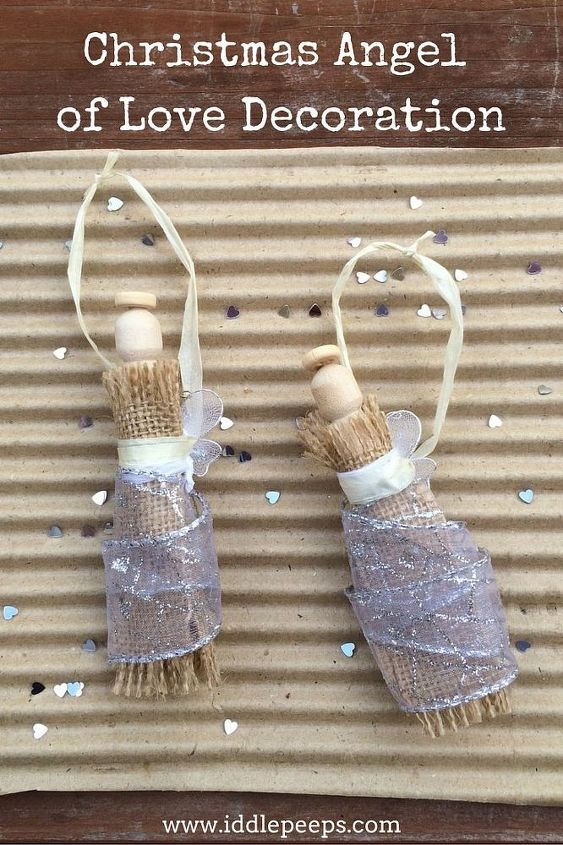
"Angel of Love" Decoration

Iddle Peeps
by Iddle Peeps
The Christmas Angel just oozes festivity and magical beauty for our family.
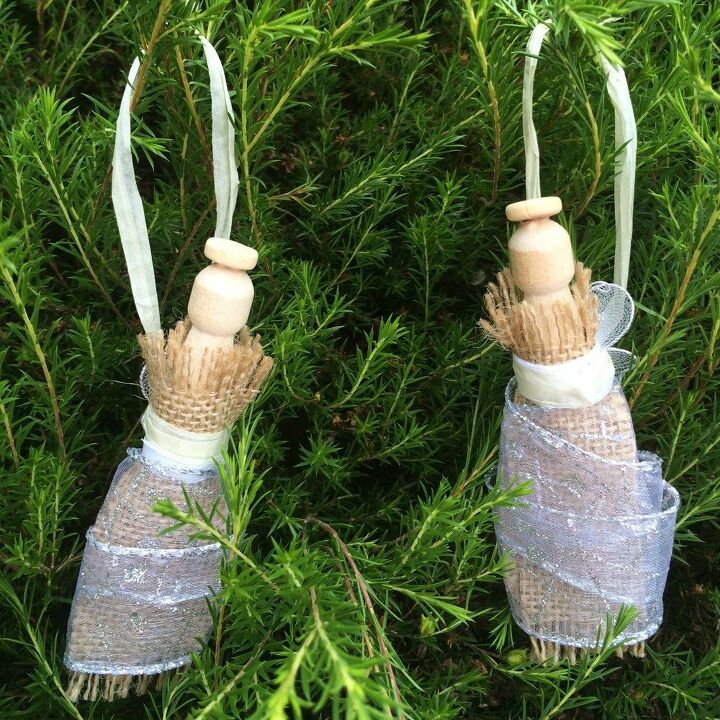
Every year, when we’ve completed the Christmas tree decorating, the Christmas Angel is always the last (and the most special) decoration to go up… generally whilst we all stare in wonder at the pretty flashing lights and my husband nurses his wounds from the Christmas lights (*and mutters about how we should pack them up differently this year)…


So it got us thinking… why don’t we make some angels to go elsewhere on the tree, or that can be used for decorating the table?! Why not, indeed!


Sensory, imaginative and combining a large portion of fine motor skills- your children’s age will determine this craft and its detail. My son is two and he helped by passing me what I needed when I asked for them and he also did some expert holding, measuring and plenty of appreciative oohing and aahing- which every respectable Christmas Angel designer requires!
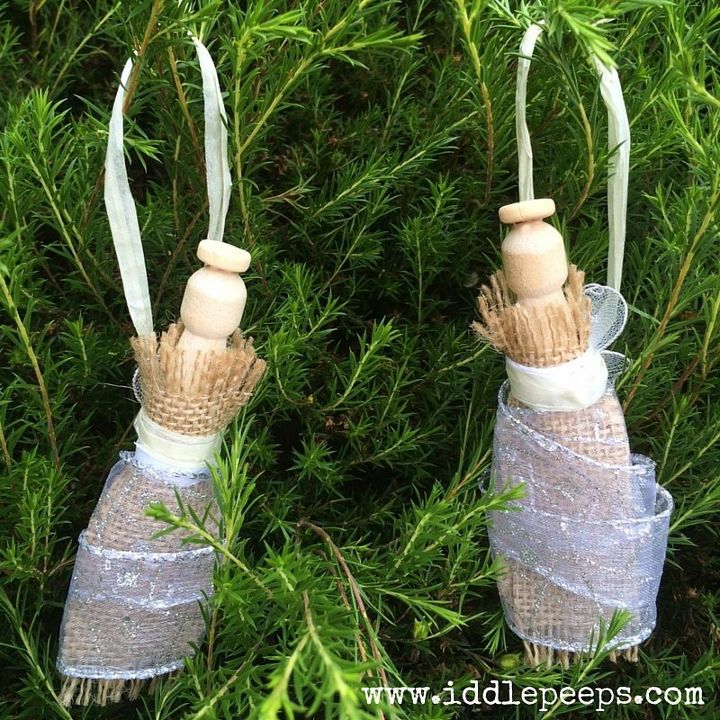
What’s been done here is just a guide. Any fabric can be used and to simplify things, the “torso” of the peg can be painted, with then just a small amount of fabric used as a skirt. For larger Christmas Angel wings, you could cut up some card and decorate this, before attaching this to the back of the peg by bunching the wing bases and securing them by wrapping string or raffia around the edges and tying a knot at the belt-line. Your little ones could even make replicas of themselves… using pieces of wool for hair and coloured fabric/painting the peg for clothes.
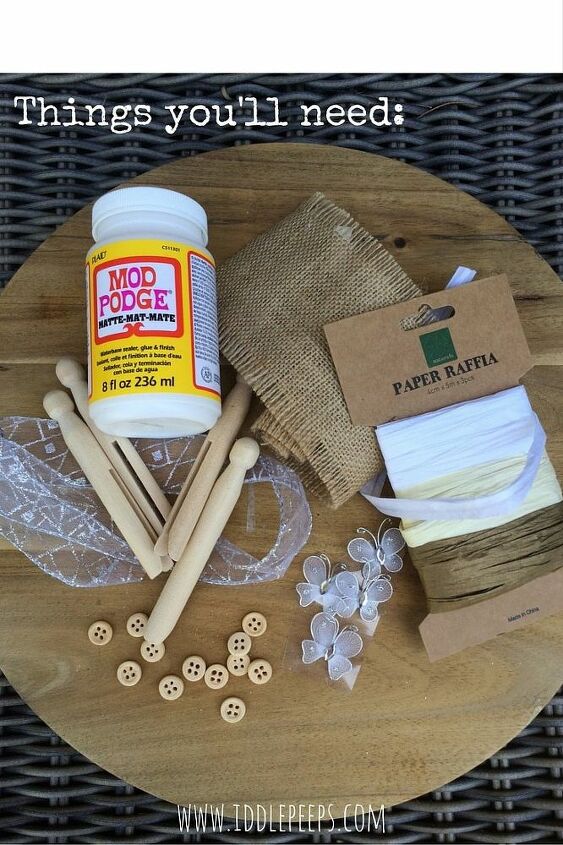
TO MAKE THE CHRISTMAS ANGEL OF LOVE DECORATION, YOU’LL NEED:


Wooden pegs (one per Angel)


Some hessian cloth or burlap fabric


Glittery broad ribbon for the dress


Craft glue


Buttons for the halo


Raffia for hanging


Sticky butterflies for wings


METHOD:


Wrap a piece of hessian/burlap loosely around the full “body ” length of the peg to get an idea of how fabric is needed and using your finger as a guide, cut along this length.


Cut this piece in half, and position half at the back of the peg, and half at the front (this is so that the base can fan out a little at the bottom, to represent a dress)


Using a piece of raffia, secure these pieces of fabric by tying a knot around the “waist” section


Wrap the piece of glittery broad ribbon loosely a few times around the burlap/hessian skirt and use your finger as a guide of where to trim


Use a spot of craft glue to secure each end of the broad ribbon, whilst you wrap the peg


Set gently aside to dry, and place a spot of glue on the “head” of the peg before adding a button, to represent the halo


After about 15 minutes, gently attach the sticky butterfly wings to the back of the Angel


Take a long piece of raffia and wrap this over the other piece that was used to secure the burlap/hessian. Wrap over the wings in the middle, to secure them to the angel and use the remainder of the string as a loop for hanging
Iddle Peeps
Want more details about this and other DIY projects? Check out my blog post!
Go
Frequently asked questions
Have a question about this project?
Comments
Join the conversation
Next