


Picture Perfect Wooden Frame Jewelry Organizer
2 Materials
2 Hours
Easy
Last summer I ran across two really nice, wide picture frames (free!), and I immediately had an idea to upcycle them as jewelry organizers for my teenage nieces. This is also an easy gift idea for Mother's Day, Christmas, or a birthday.
With some chicken wire (more technically, it's called hardware cloth), simple hardware, a dowel rod and knobs, you can create a beautiful jewelry holder for your favorite fashionista in no time!
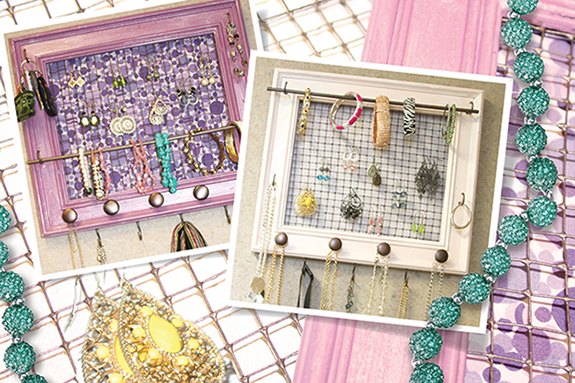
Salvage a picture frame then customize your paint and fabric choices for a truly unique look!
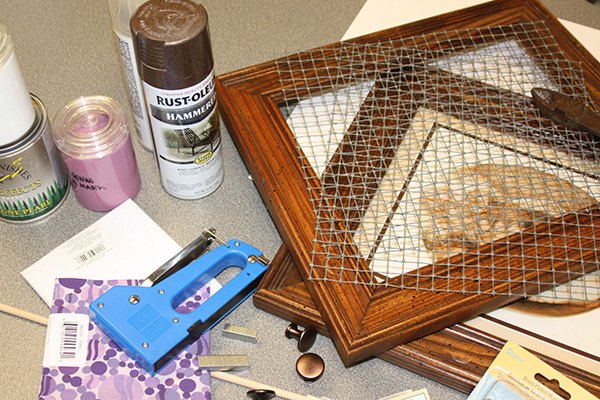
STEP 1 - Gather materials.
You'll need a frame, some wire, a dowel rod, cup hooks, paint, staple gun, fabric, picture hanger. (See blog for complete list.)
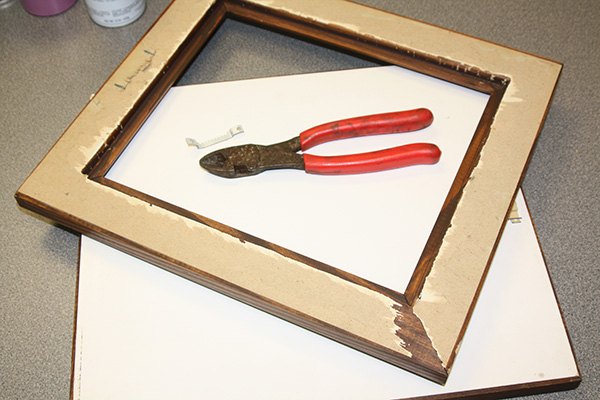
STEP 2 - Remove old photo and glass from the frame.
Save the backerboard for Step 4. (Can purchase heavy matboard in the framing section if necessary.)

STEP 3 - Cut and paint.
Cut the hardware cloth to fit the inside of your frame. Cut the dowel rod with a small handsaw the width of your frame. Then spray paint the wire, cup hooks and dowel a coordinating color. (I matched to the knobs I found on clearance at Woodcraft, using RustOleum Hammered Brown spray paint.)
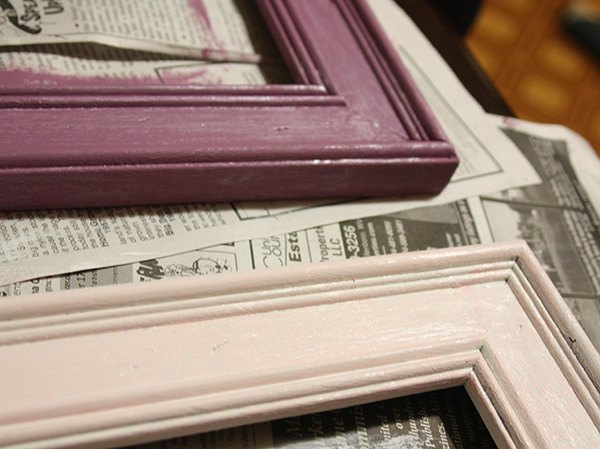
Lightly sand and paint the frame. I used the new Black Dog Salvage Furniture Paint with a shimmer of General Finishes Pearl Effects in Champagne. Add a coat of Guard Dog Satin Topcoat as a protective finish.
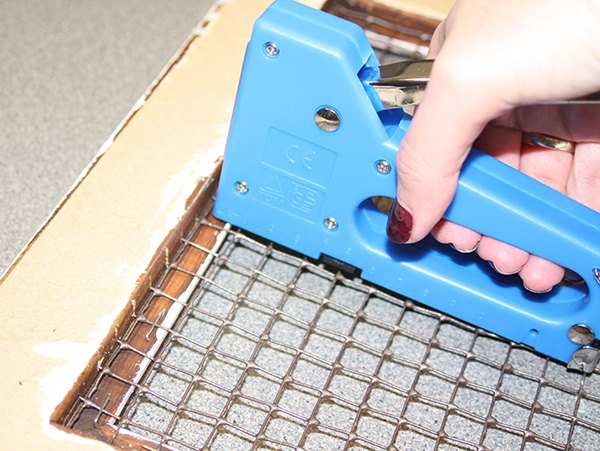
STEP 4 - Back of frame.
Attach wire to the inside back of the frame using a staple gun. I discovered that these types of wire really aren't straight but that adds to the whimsy of these organizers!
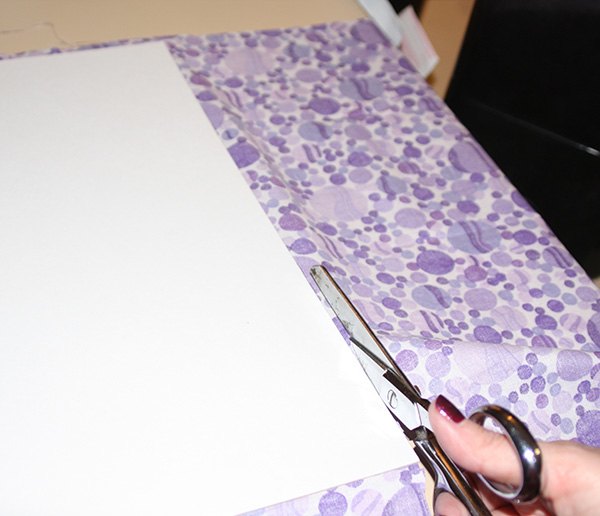
Attach your fabric of choice to the back of the heavy cardboard using repositionable spray adhesive. I used Krylon Easy-Tack. You could also cover your board with scrapbook paper, wallpaper or contact paper. Cut off excess with sharp scissors.
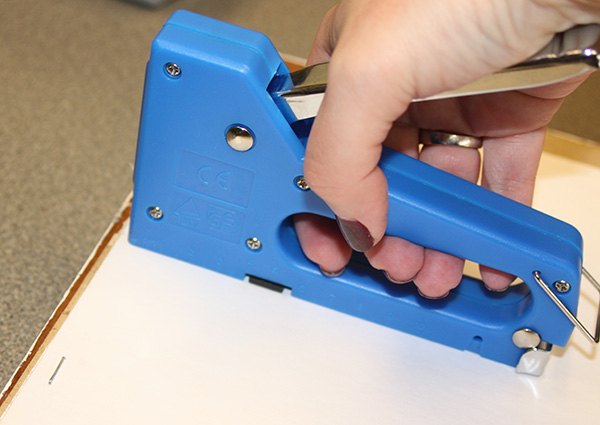
Staple the covered cardboard to the back outside edge of the frame with the "right" side facing the wire. You'll want to attach it to the outside edge like this to allow space for earrings to hang between the wire and the back. Attach picture hanger.

STEP 5 - Hardware and knobs.
Space out the knobs on the bottom edges of the frame, marking where you want them. Drill a hole for each, then screw the knobs in, tightening by hand.
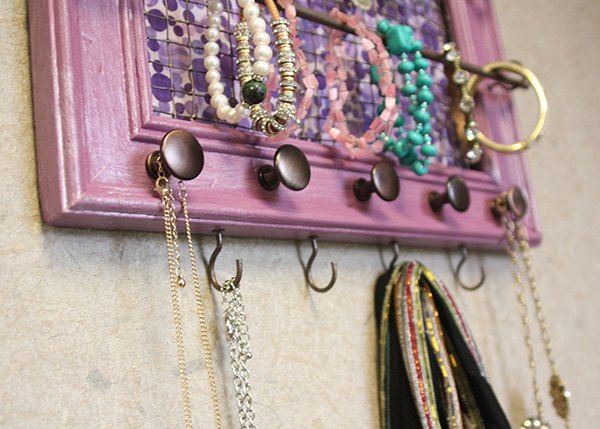
I added cup hooks to the sides and along the bottom edge of the frame, spacing them between the knobs. This makes a nice place for more necklaces, scarves or lanyards.
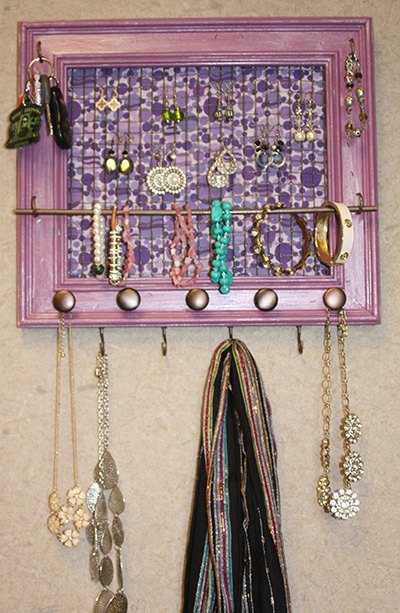
The dowel rod rests on two cup hooks. That's a great spot for bracelets, rings, hairbands, and watches. Load it up with bling and ENJOY!

Want more details about this and other DIY projects? Check out my blog post!
Comments
Join the conversation
4 of 74 comments
-
Love it. Great idea! Love the mauve one!! Thanks!!
-
Love the entire project…perfect…I think I am going to try and find some coated hooks for my scarves…metal hooks have a tendency to tear material… other than that your project is fantastic 😁👏


Frequently asked questions
Have a question about this project?
How would you hang/attach stud earrings?