


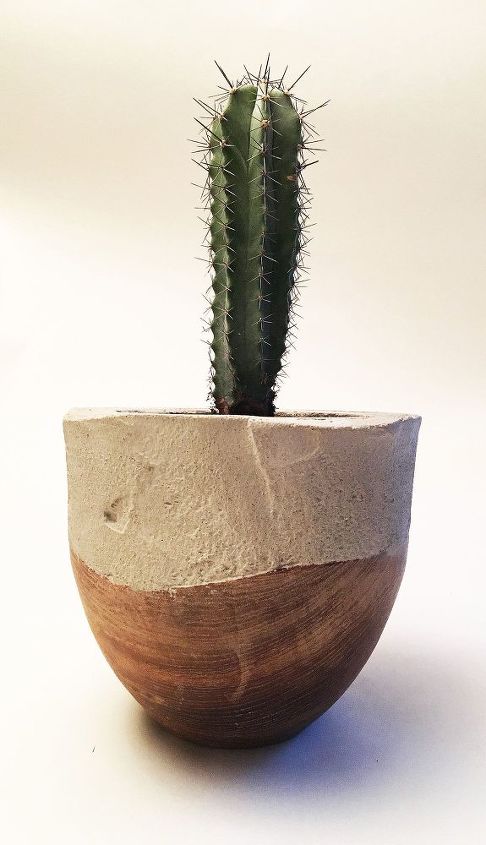
Cement Planter

3 Materials
$11
4 Hours
Medium
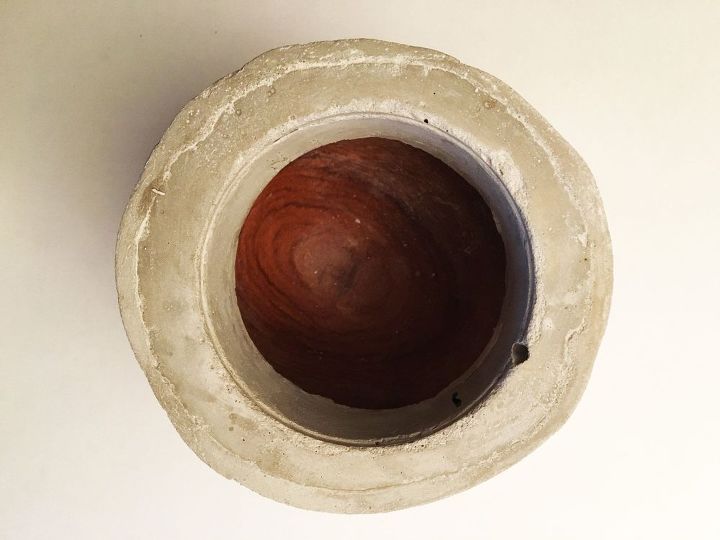
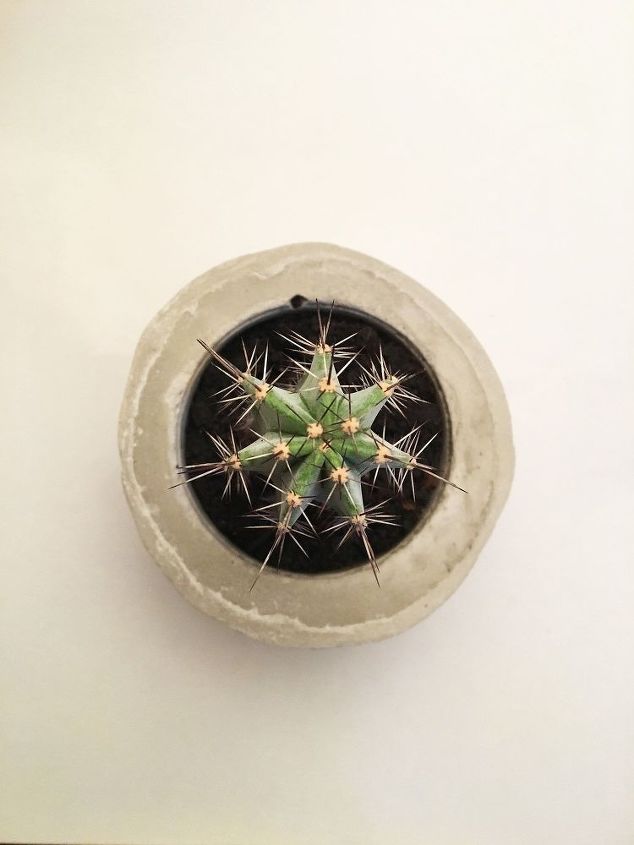
Take an old wooden bowl and add some cement and a cactus and voila! You have a lovely new planter!
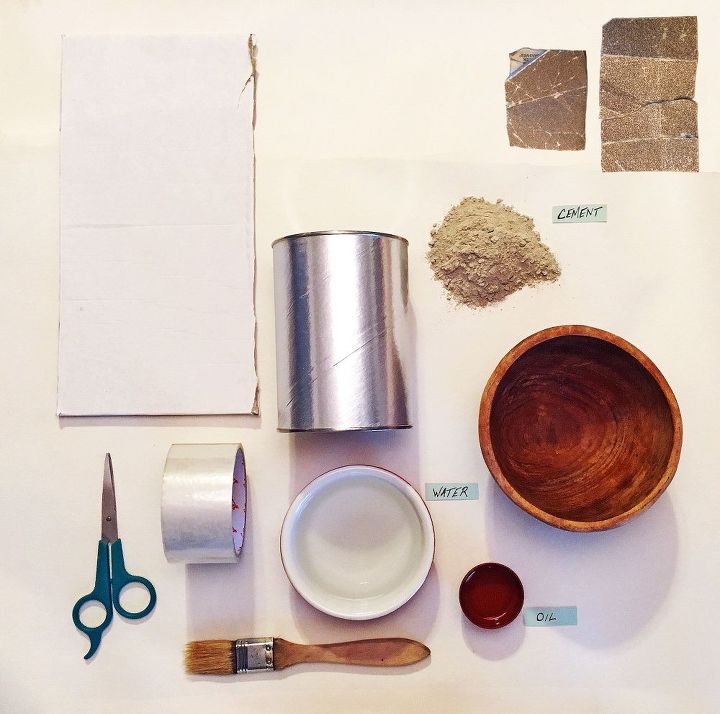
MATERIALS:
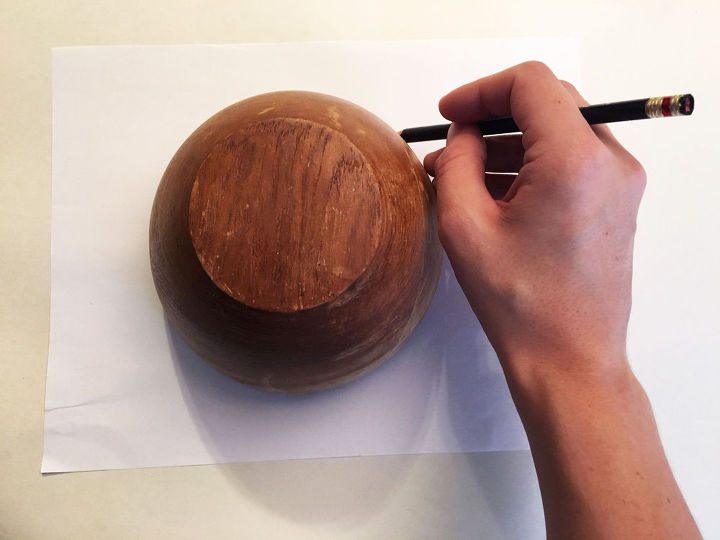
STEP 1: Trace the lip of the bowl on a piece of paper

STEP 2: If using cardboard, (as pictured) mold it into the circular shape and tape the edges together to create a circular shape. Grease the sides of the molds that will touch cement and place them within one another leaving space to pour the cement into and place them on top of a plastic plate.
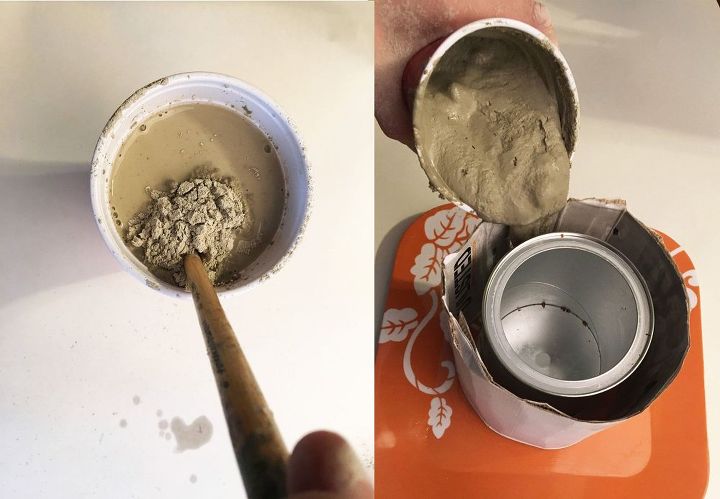
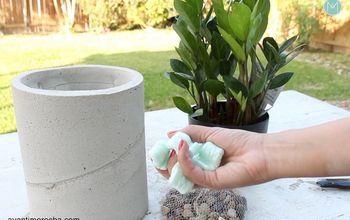
STEP 3: Mix the cement and water according to the instructions on the cement box. (I mixed mine in a disposable plastic cup) Pour the cement in between the molds so that it is dispersed evenly. Set aside and allow to set. (See instructions on the cement box for setting times)
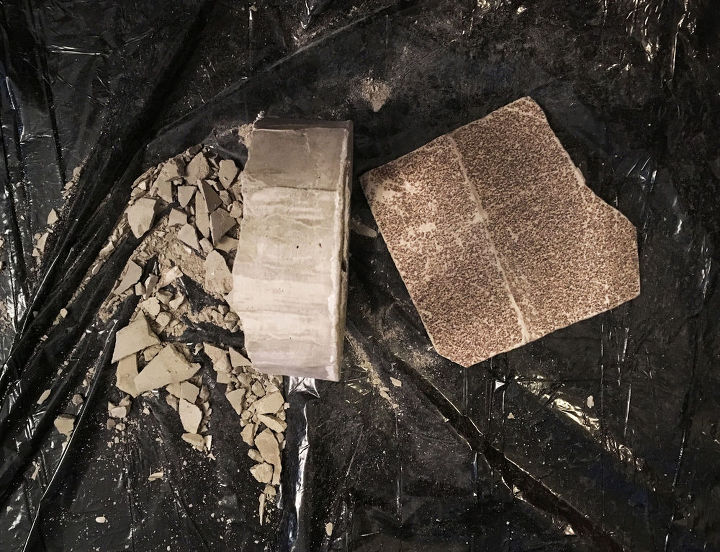
STEP 4: Once the cement has set remove the molds and sand down any sharp edges.
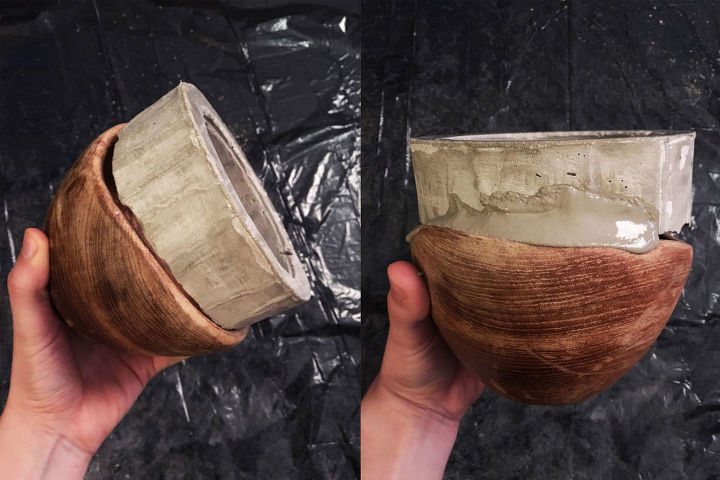
STEP 5: Set the cement circle on the bowl and mix another batch of cement to seal the two pieces together. Allow the cement to sit and begin to set for about 30-45 seconds. This will help the cement to be more moldable. Spread the cement in all the crevices.
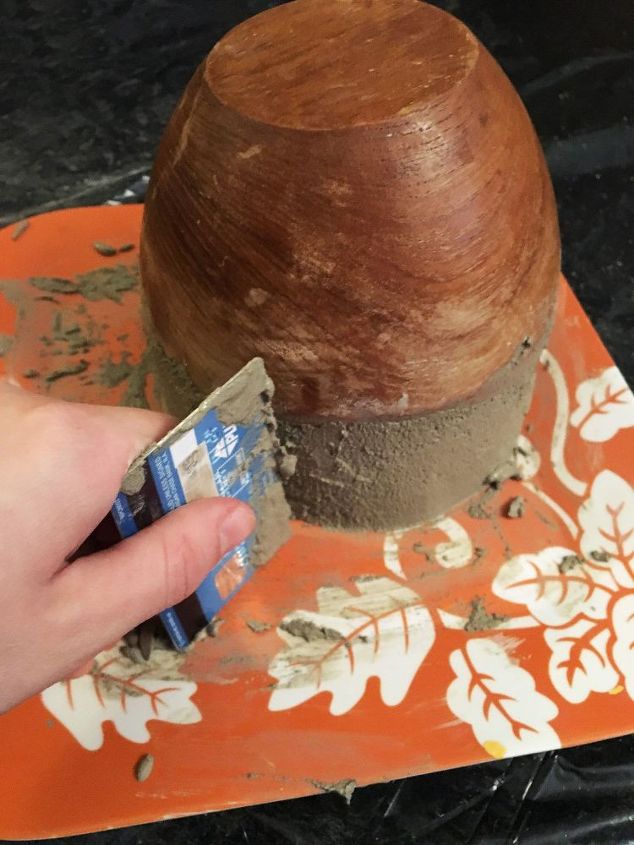
STEP 6: Scrape the sides of the bowl with a credit card or piece of plastic to help smooth out any lumps of cement. Allow the cement to set.
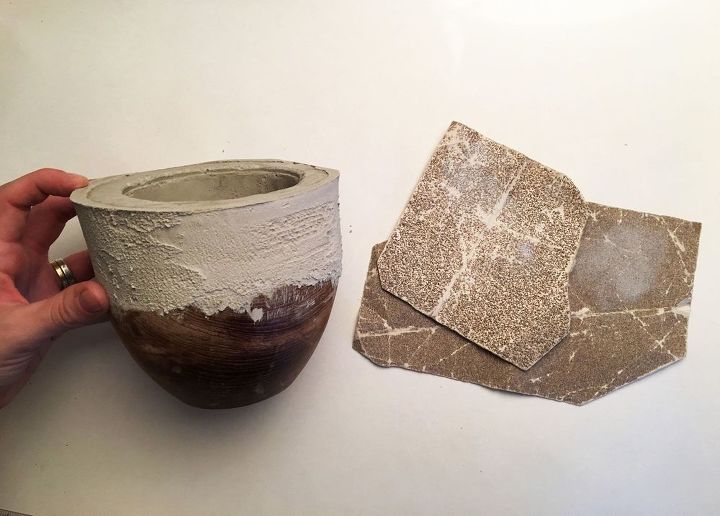
STEP 7: Once the cement has set sand down the sides to create a smooth surface.
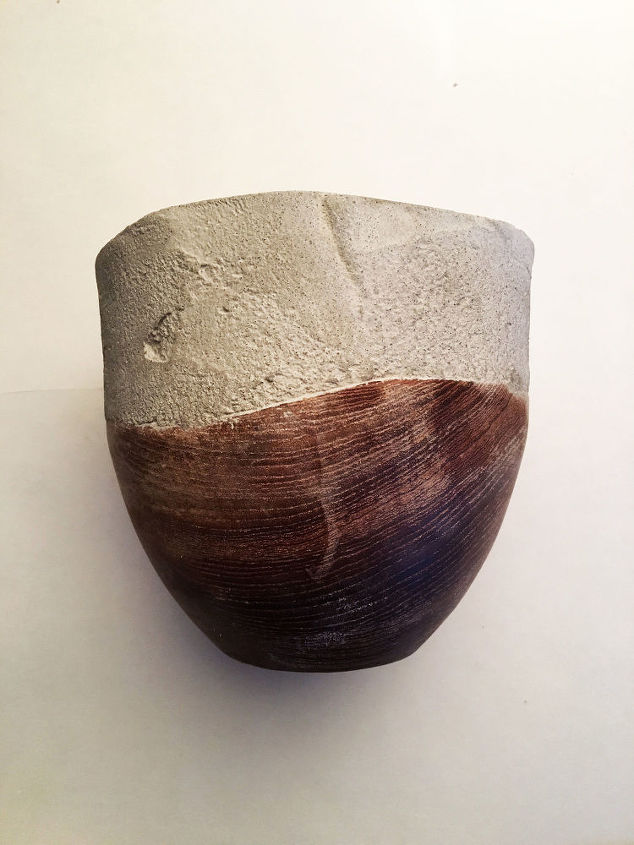
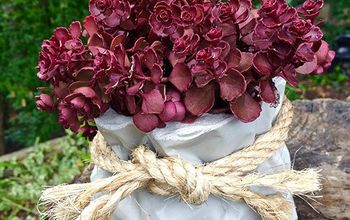
STEP 8: Now you are ready to plant!


Any price and availability information displayed on [relevant Amazon Site(s), as applicable] at the time of purchase will apply to the purchase of this product.
Hometalk may collect a small share of sales from the links on this page.More info
Comments
Join the conversation
2 of 38 comments
-
Fabulous idea!!! I can see adding some embellishments such as colored stones to the cement or even tinting the cement various colors... I absolutely love this!! Very clever, stylish, can be personalized, and above all it gets more plants growing!! Thank you for sharing this!

-
Love this have wanted to work in cement projects for long time....this would be good place to start the learning curve process....would like get into making molds out of hunks of Styrofoam and make large projects eventually..big planters..or art pieces for my yard and to sell also..This would be good way to start and get familiar with the processes..Thank you very cute piece...lover the wood and cement look together...debb


Frequently asked questions
Have a question about this project?
I love this idea, but I'm wondering if you may have experimented with larger bowls? I'm interested in trying this project, but I'm thinking about making an outside planter that will hold a mixture of plants, etc.