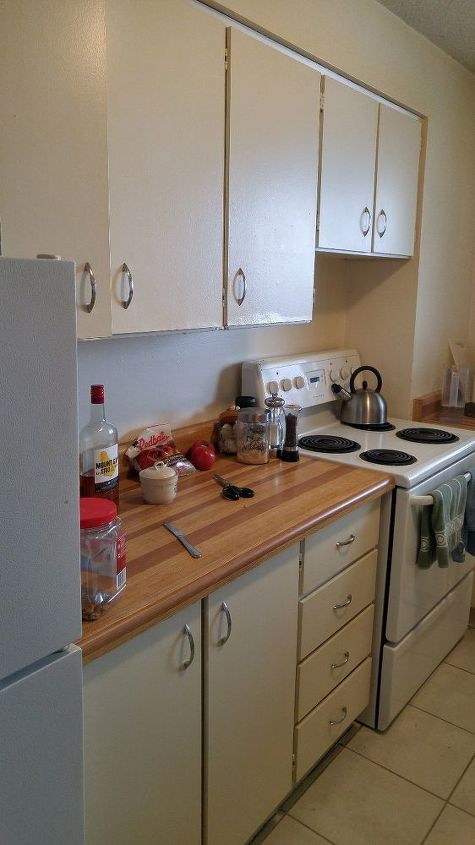
My Kitchen Updo - How I Marbled the Counter Tops With Paint!

Janis.greener
by Janis.greener
$80
2 Days
Medium
I had grown to hate my kitchen in our rental apartment. After 11 years it was time for a change. This is how I marbled the counter tops!
I did write my landlord for permission and they contributed by doing some repairs and painted the ceiling! I have had lots of questions about the counter tops so I thought I would share how I did them!
Preparation:


1. Degrease the counter-tops first with a commercial degreaser or a natural one you make yourself. Personally I like vinegar and baking soda.


2. Wash well to remove any residue from the degreasing process.


3. Sand the surface of the laminate to remove the sheen and give the primer something to "bite" into.


4. Wipe the counters with a damp cloth to remove sanding dust and dry thoroughly.
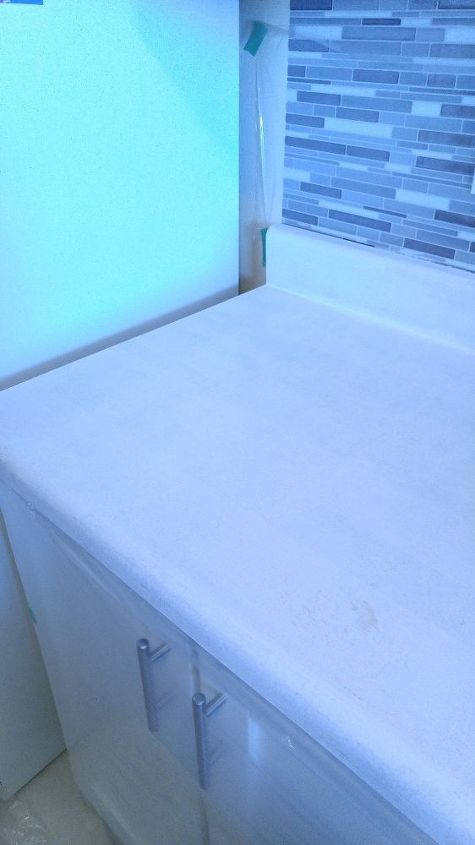
5. Prime the countertop. I used a white waterborne alkyd primer from Dulux. Follow the product instructions for drying time.
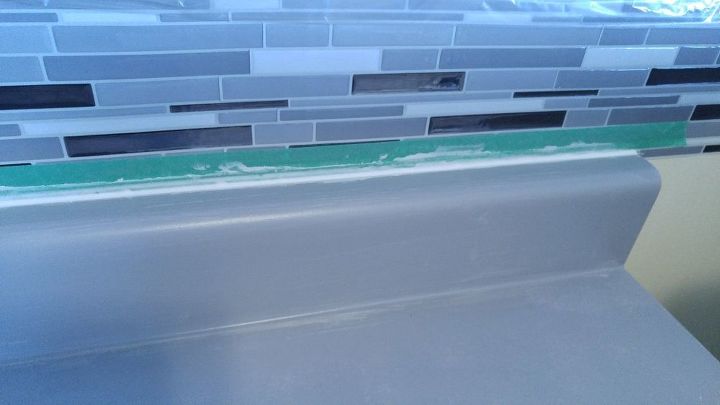
6. Paint the base colour and allow it to dry. Follow the product instructions for drying time. I used a medium grey colour as my base. Again I used a waterborne alkyd paint from Dulux.
Now for the fun part! The Marbling!


1. I did a fair bit of research online before tackling the faux marble.


I googled grey marble and saved images of the marble look I was going for.


2. I watched several videos on technique.


i. This is the technique I used to lay down white and grey paint in irregular stripes on the diagonal across the surface of the countertop. https://youtu.be/nJ-KbCI1t68 I used a 2"wide brush, flipping it, turning it as I laid down each colour.


ii. I used a large ( 8"x5") slightly dampened sea sponge to feather the colours together again in an irregular pattern and following the diagonal patterns.


iii. Move the sponge in different directions by turning so that you don't end up with a repeating sponge pattern .If you Use a smaller sea sponge to get into the corner between the counter surface and the upright back section.


iv. I actually used a spray bottle of water as well to keep the paint wet while I continued to work. Only use water sparingly!
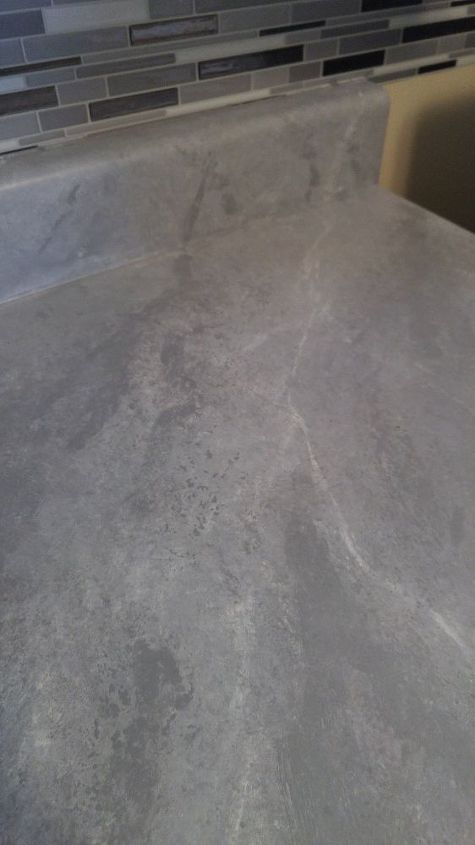
v. To add the veining, I used a fine longer bristle paint brush and followed the same principals as the video shows using a feather. Twist and twirl the paint brush while creating the veins. I added white veins in the whiter areas and fewer dark veins in the darker areas Join some of the veins together on the opposite diagonal direction of the original veins. I found this video helpful for the veining technique: https://youtu.be/grIVDUdMUZQ


vi. I do not own a softening brush so just used my sponge to soften the veins.


vii. Note: do not overwork the two colours of paint otherwise you will just blend too much. Also you will get bits of sea sponge dropping off onto the surface, just pick them out.


viii. Let what you have done dry. Step back and look at it to see if there are any areas that you want to add more white or grey to. To do this I took my dampened sea sponge and ran the 2" brush with some paint onto the surface of the sponge. Then I dabbed the sponge where I wanted the colour. Rinse the sponge, wring well and went back to soften the freshly painted blotches. At this point, if you need to add more veins do so and soften!


ix. Once you are happy let it dry thoroughly! If you have any bumps you can sand the surface lightly with a 180 grit or higher sand paper.
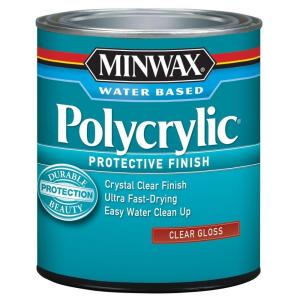
x. I then applied a polyacrylic sealer with a brush. I used semi-gloss but you could use satin as well. Lay down a thin layer but wet enough to cover. It will self-level. Don't over-brush or you will see the brush marks. I tried a high density foam roller but it created bubbles which you do not want. I did two coats of the sealer. The sealer is a semi-opaque white but dries crystal clear and will not yellow. Once dry, If you do end up with brush marks, go over that area with another coat of sealer wet enough to self- level. Once dry this area just blends right in with the rest of the surface.
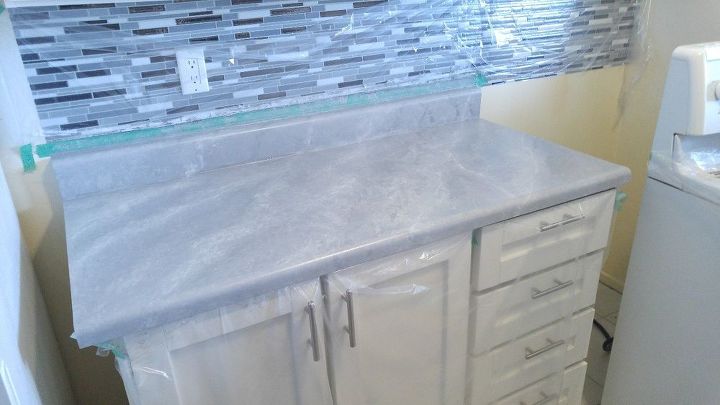
This is the finished counter!
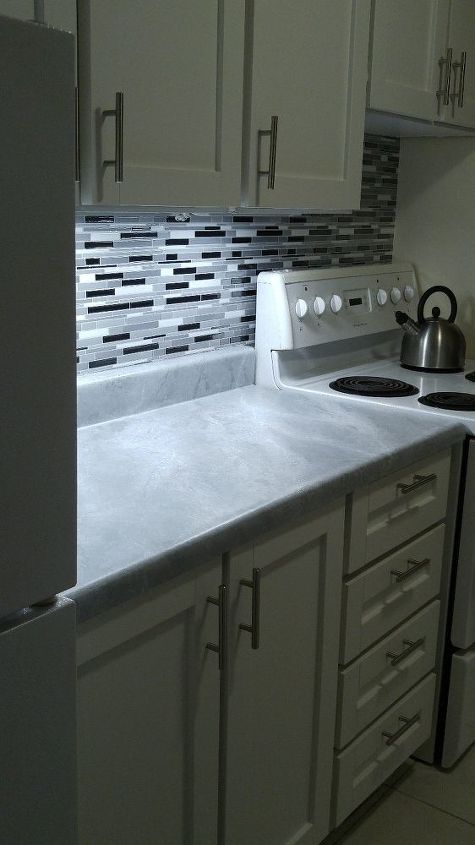
I added some under cabinet lighting and love how it looks!
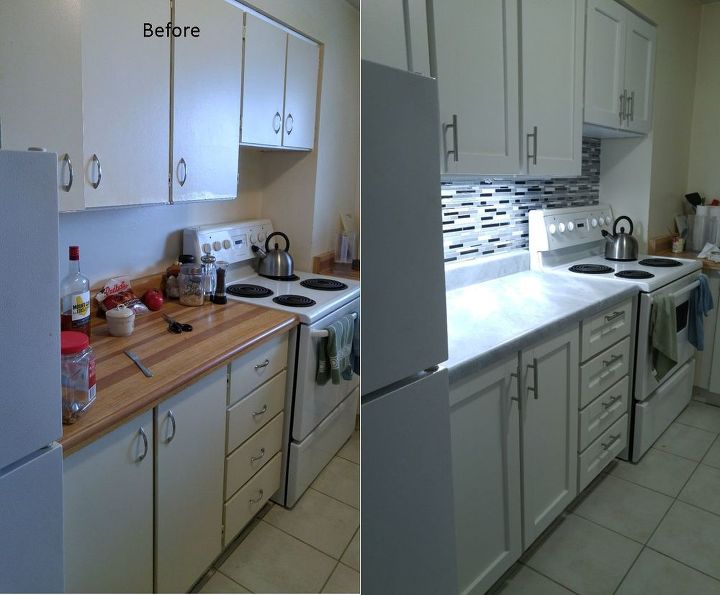

Now I have a beautiful semi-gloss surface that is a joy to wipe down. The cloth just slips across the surface. No water marks when dry, I love it!
Before and after!


As you can see the counter redo is a part of the kitchen redo. For the full kitchen redo go to: Rental Apartment Kitchen Updo! here: http://www.hometalk.com/diy/kitchen-dining/rental-apartment-kitchen-updo--17912650


If you plan on doing yours - get advise from your local paint store. I had a friend in the business so got product advise and a great discount on the paint and primer! We should all be so lucky!
Frequently asked questions
Have a question about this project?
3 of 12 questions
  • Diane in KS Diane in KS on Jul 12, 2016
    Very nice. I would like to know where you bought the box valance over the window and also the matching rug?
  • Charsie Bohanon Charsie Bohanon on Aug 16, 2016
    Will this work on Formica?
  • Jane Harrison Gamble Jane Harrison Gamble on Apr 15, 2018

    My countertops look exactly like the original ones you hated but more worn and I also HATE. Did you remove your sink or is it possible to do this with sink intact? My sink and stove are set into counter.

Comments
Join the conversation
2 of 73 comments
Next