


Vintage Garden Furniture Makeover

by
Carole
7 Materials
I bought a 1950's set of timber and iron garden furniture in a very dilapidated state about 3 months ago. This is not my first makeover of this style of furniture. it looked like it badly needed some TLC so here is what I did.
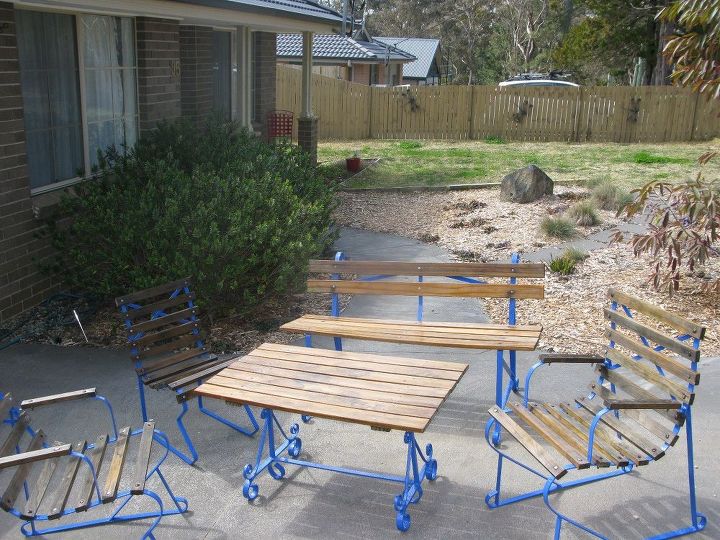
After Photo
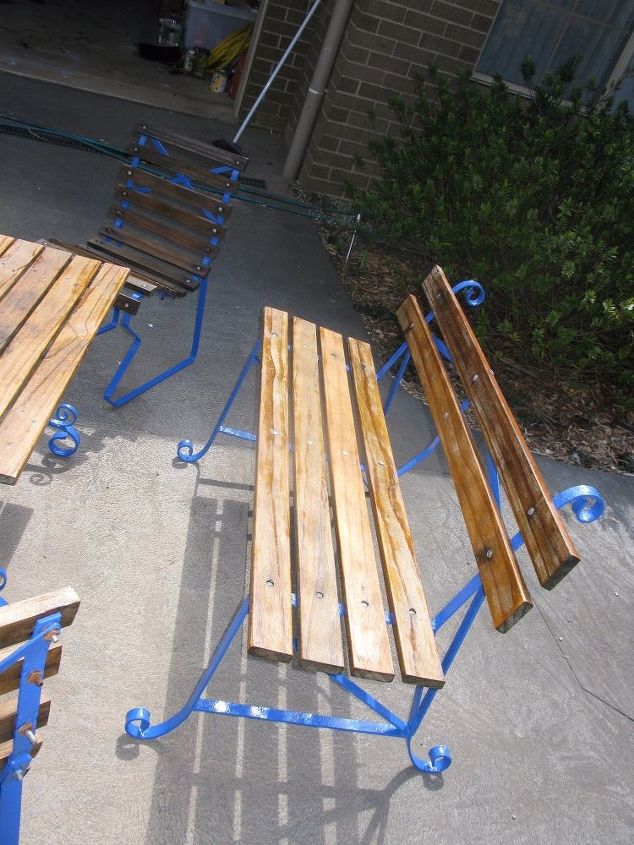
First, I removed the timber slats. It was not easy as the thread on some of the bolts was stripped and the bolt and nut would turn at the same time and not unscrew, either that or some of the bolts were just completely seized and would not budge. I managed to get them all out and used bolt cutters where necessary. Once all the timber was off I stripped the old paint from the frames using Citristrip paint stripper and a paint scraper. Got off as much as I could and then washed the frames in a degreasing agent (I used Sugar Soap). Then a good rinse with the hose. For the timber, I used an oxygenated bleach to clean green algae off the timber and a kitchen scrubby. Don't rub too hard or you will shred the wet timber.
I left the timber to dry out for a couple of days before applying two coats of a timber decking oil to bring the wood to life again. The frames were then painted with a rust converter (I used Feronite). The converter takes care of the rust so that the primer and paint will adhere and prevents further rust and corrosion. It takes 24 hours for the converter to do its thing before you can progress to priming. If the weather is cold or humid, it may take longer. Ensure it is fully dry before progressing to the next step. The Feronite converter turns the metal blue/black. If you can still see any rust, you should touch up those bits with the converter.
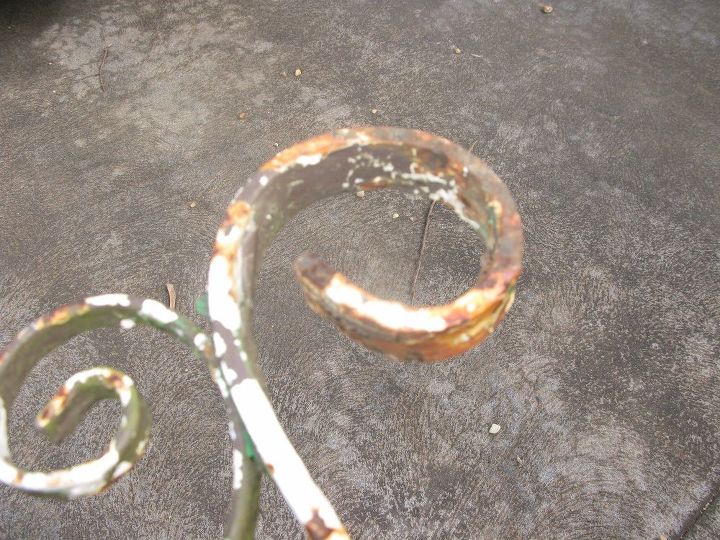
This is part of the table frame prior to paint removal and rust converter etc. You can see layers of paint and surface rust. This all needs to be taken care of before you can prime or paint. The whole set had frames that looked much like this.
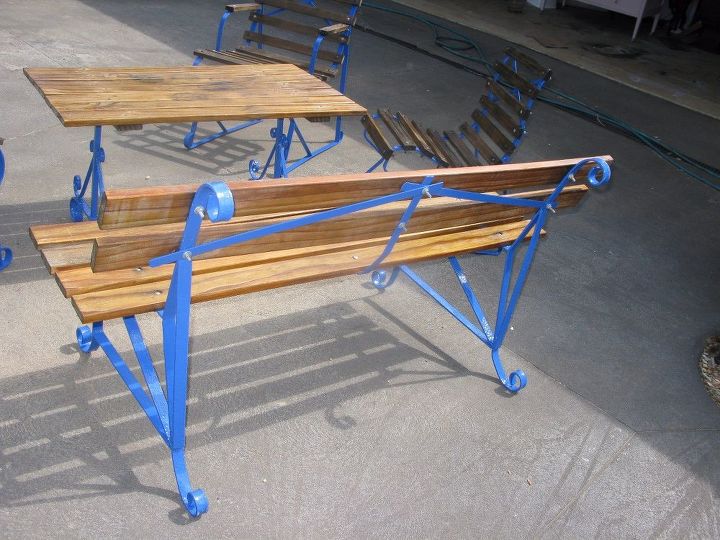
The next step for the frames was to use a rust proof primer. I used Killrust Heavy Duty primer for metal/rust. Painted it onto the frames and it is a khaki green colour. Took a couple days for it to completely dry before I could paint the topcoat. The top coat is Killrust Ultra Blue. Painted on with a brush. You will see the back of this bench has two steel supports that run from the mid back of the bench to the sides and one that runs from the centre of the bench to the underside and attaches to the seat slats underneath the seat. This adds stability to the bench. When I bought the bench these part were missing. I purchased some steel flats about 2 metres long from hardware store and cut them to size, drilled holes for the bolts and the centre one had to be bent to follow the contours of the seat. I used an angle grinder (could also use a hacksaw but slower) to cut through the steel and a drill with metal specific drill bit to make the bolt holes. Then this got primed and painted too.
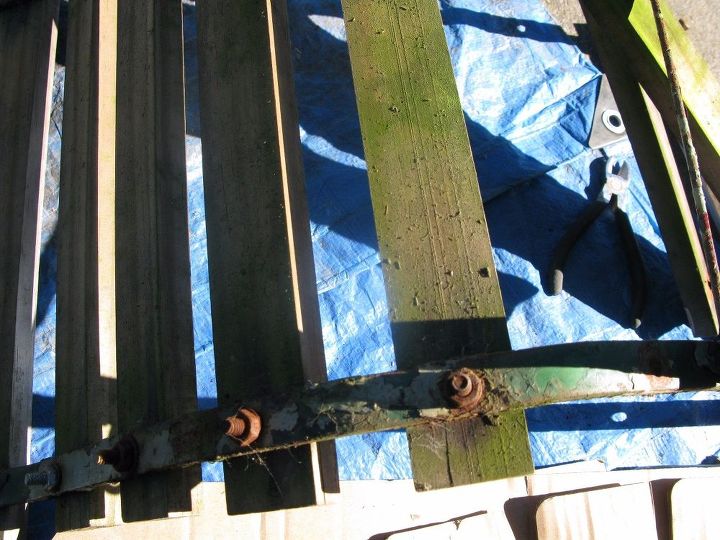
This close up shot of the underneath of one of the little chairs shows the state not only of the frames, but the nuts and bolts and the green algae that was growing under the timber slats.
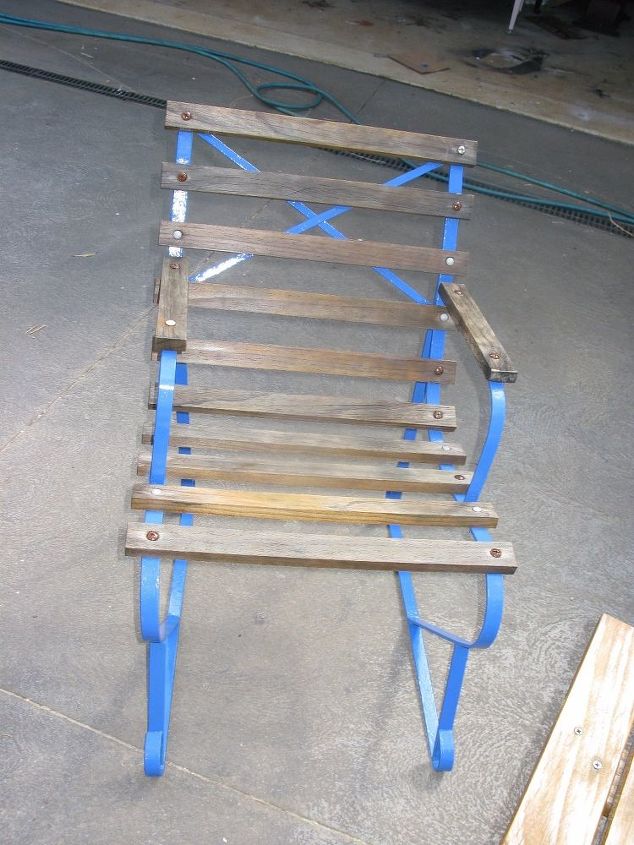
Once the decking oil was dry and the paint on the frames had dried, I used a spanner to re-assemble the bench. I put new galvanised nuts and bolts and washers on where necessary but was largely able to use the old nuts and bolts. Tightened them all off once it was all assembled. The first photo shows the end results. All five pieces, one table, one two seater bench, two chairs with arms and one chair without arms. A long process with many steps but it looks so much better than it did and the bench is now rock solid and does not sway when you sit on it.
Comments
Join the conversation
2 of 7 comments
-
This looks great. Enjoy!
-
A lot of work, but worth saving. Love the color. Great Job!


Frequently asked questions
Have a question about this project?