


DIY Staircase Remodel
1 Week
Medium
If you would like the full detailed post with more pictures please visit
Ginger & The Huth
http://gingerandthehuth.com/2016/10/diy-staircase-remodel/
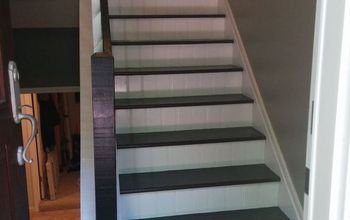
As we slowly transformed our house by replacing upstairs and downstairs floors we eventually came to a point where the carpeted stairs were a huge eyesore and had to go. We had replaced the upstairs with wood and wanted to use the same flooring on the stairs.
So, here’s the before picture. It’s messy, don’t judge ;-)
Ginger & The Huth
http://gingerandthehuth.com/2016/10/diy-staircase-remodel/
As we slowly transformed our house by replacing upstairs and downstairs floors we eventually came to a point where the carpeted stairs were a huge eyesore and had to go. We had replaced the upstairs with wood and wanted to use the same flooring on the stairs.
So, here’s the before picture. It’s messy, don’t judge ;-)
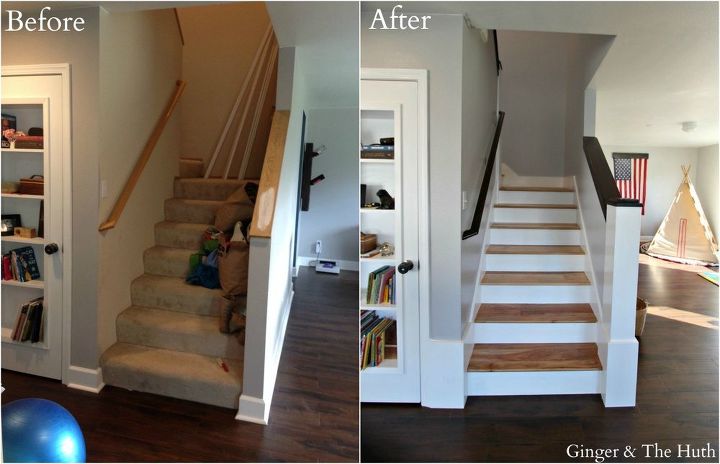
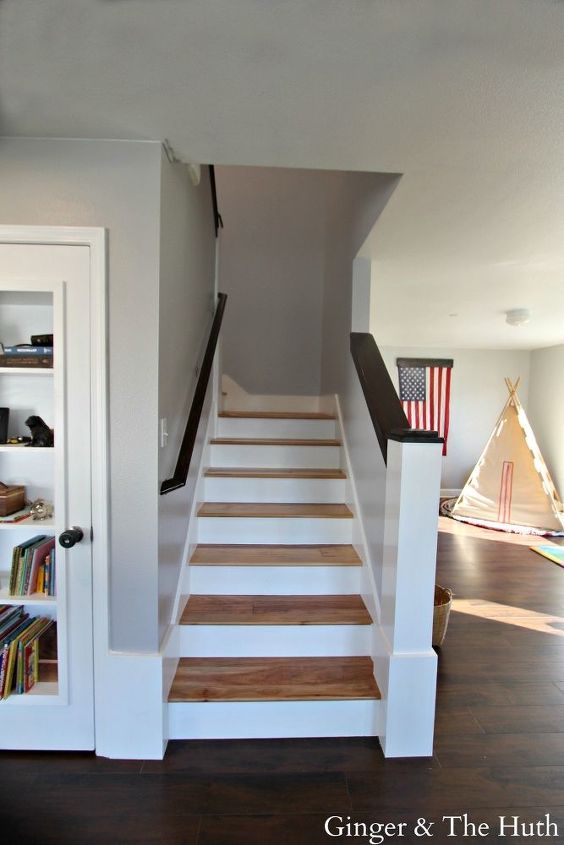
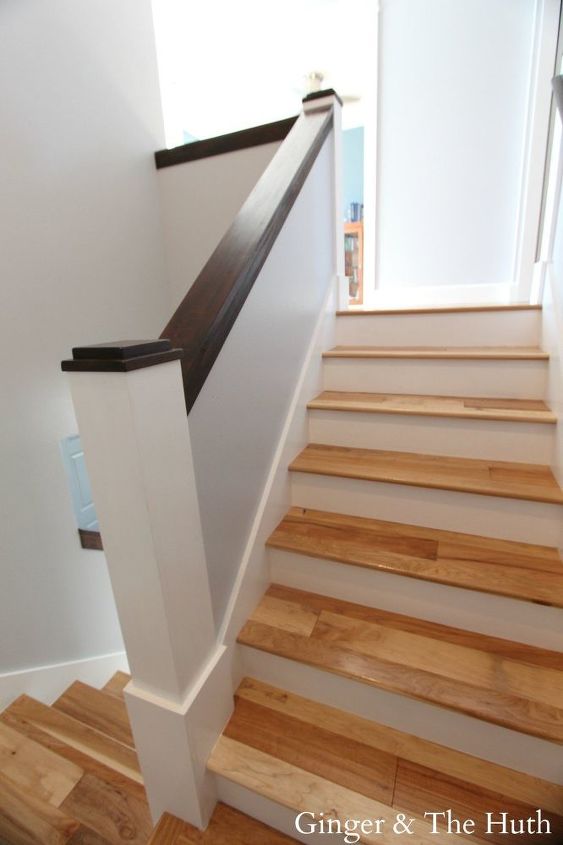
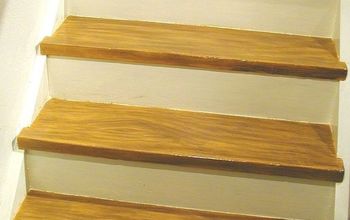
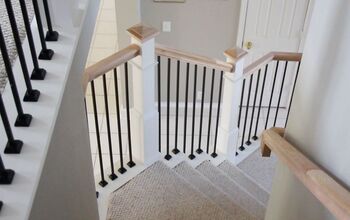
Going into this project we weren't sure if mis-matching the downstairs dark floors with the light upstairs floors was a terrible mistake. But we went ahead with it and used 3/4″ Handscraped Hickory from lumber liquidators. For the other parts of the stairs we wanted white risers, white stair skirt, and a dark walnut handrail. We were hoping the walnut handrail and banister would help tie the dark floors into everything.
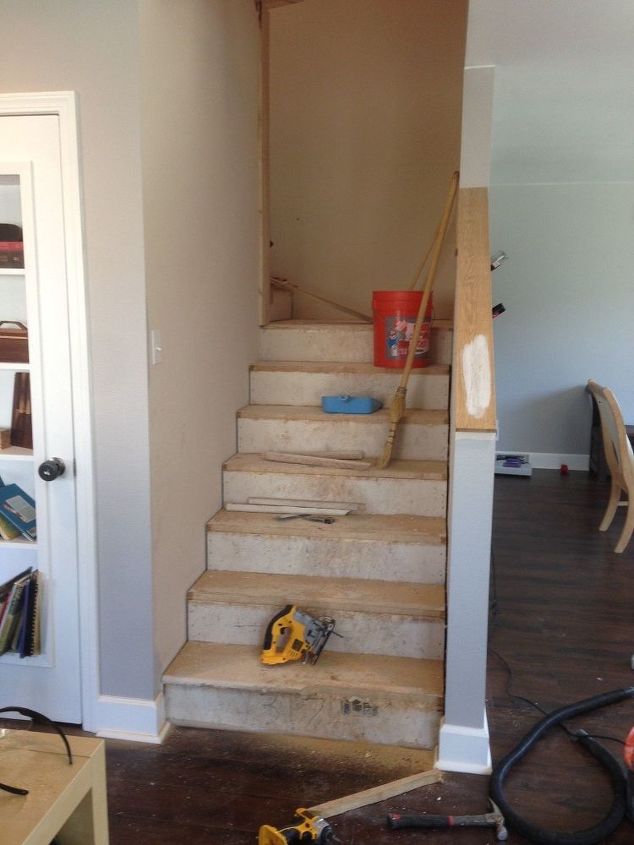
After ripping out the carpet and removing all the carpet tac and staples, we used a combination of our circular/jig saws to chop off the chipboard bullnose.
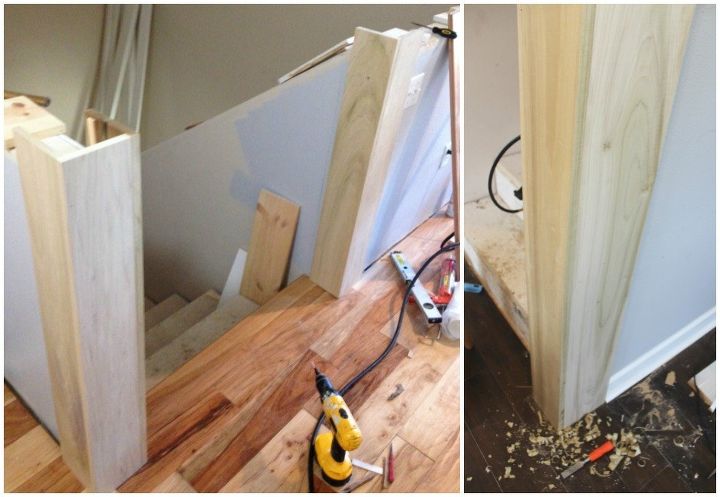
Next up I started my faux newel post. It was pretty simple, I just wrapped 1×10 poplar boards around each corner. I made the top and bottom of the stairs approximately 55" from the floor. While the landing newell post is different heights depending on which stair you measure it from.
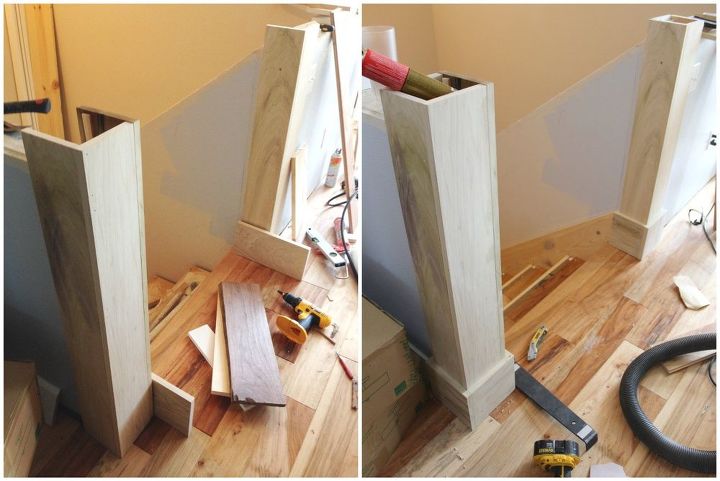
For the baseboards on the top newel posts I wrapped 1x10 around the bottom. For the middle/bottom the baseboards range in size in order to run a clean line from stair skirt to baseboards.
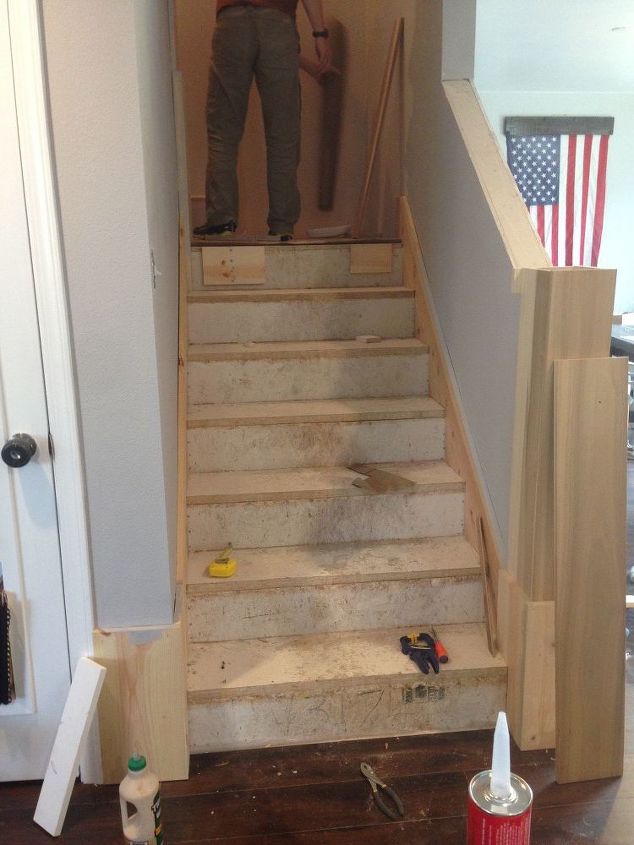
Next up we cut the stair skirt. We followed THIS and found it to be very helpful. That being said, this was the hardest part of this project. We cut four stair skirts for this remodel and they all turned out decent.

Once the newel posts, stair skirt, and landing trim were all in place we divided and conquered. After putting down vapor barrier I installed the stair risers (we used pine wood), puttied nail holes, sanded, and painted as fast as I could while my husband started installing the floor. He did the back pieces of the stairs first and waited to do the bullnose so I could get paint on the stair risers/skirt. I wanted to avoid having to paint around bullnose as much as possible.
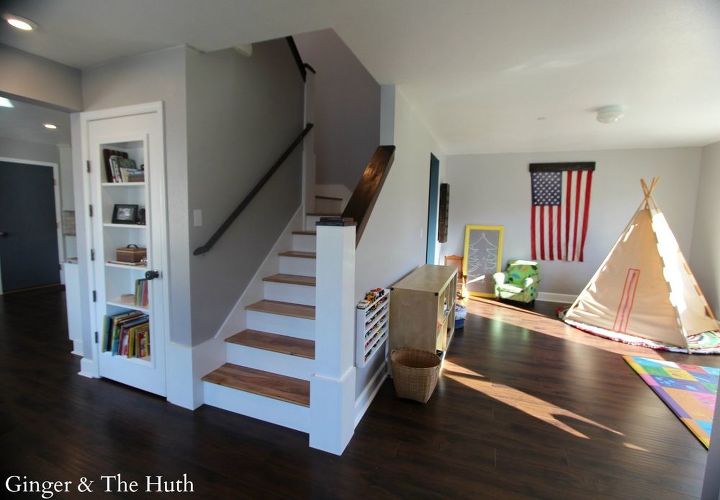
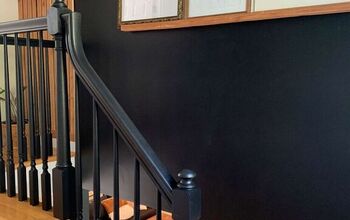
I didn't get any good pictures of the banister/railing re-do. We ended up sanding down the hand rails and staining them dark walnut. For the banisters and the top of the newel posts we used real walnut and it turned out beautifully! The top part of the banister is about 3/4″ thick while the sides are closer to 1/4″. We kept the tops of the newell posts small, and rounded the edges with a router.

This is one DIY I would do over and over again! It was totally worth all the hardwork!

Want more details about this and other DIY projects? Check out my blog post!
Comments
Join the conversation
2 of 66 comments
-
AWESOME JOB, I LOVE IT, IT LOOKS GREAT!!
-
OMG! I would love to try this. We've had the same carpet in the upper bedrooms and stairs for 14 years and they look it. Also the stairs leading to the basement and the basement floor are old carpet. I've wanted to rip it all out but have been afraid of making the floors worse. After looking at this maybe I'll try a little at a time and see what happens.


Frequently asked questions
Have a question about this project?
What does bullnose me?
where do you buy the bull nose and the price?
Several years ago a carpenter rebuilt our stairs and we had someone come out and put carpet on them. We took to carpet off and removed all the staples etc. on one side of the stairs there is about 1/2" gap on each stair, everything else looks really good and clean, but I don't know what to do about the gap. Can you give me any advice? Thanks