


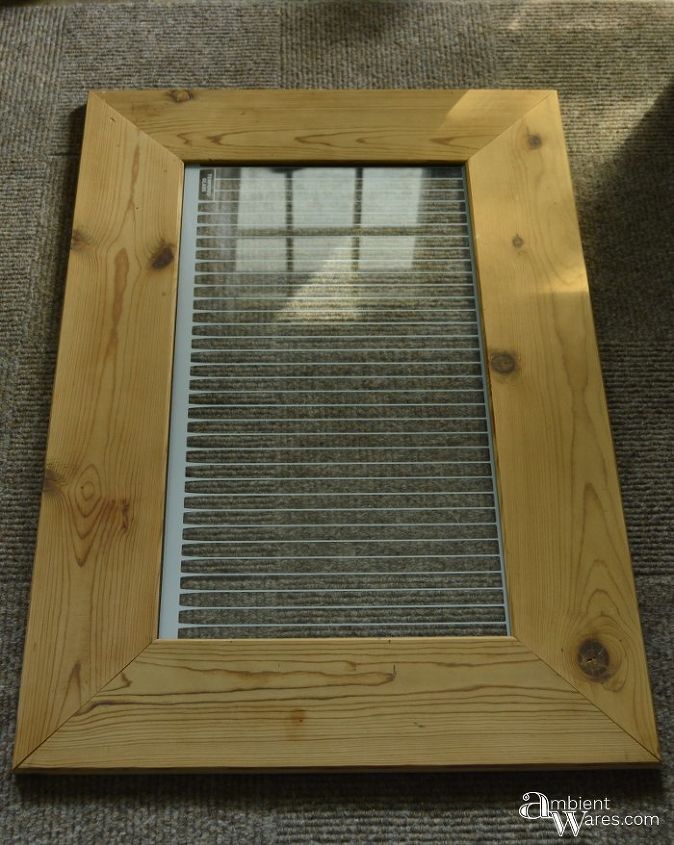
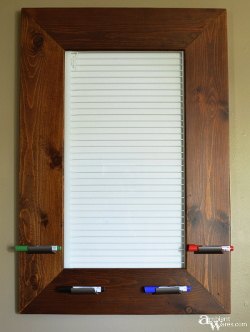
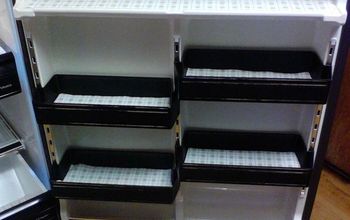
Old Refrigerator Shelf To Dry Erase Board
22 Materials
Medium
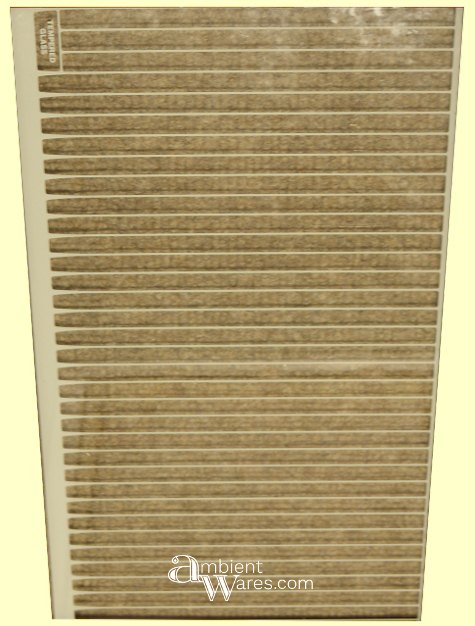
I found this old refrigerator shelf at my dad's shop and knew almost immediately what I wanted to do with it. A dry erase board organizer. Best part about it...it has at least 31 lines meaning it has the potential of being a monthly organizer.
From the start I envisioned it framed but, allowing us to see through the glass meaning the frame wouldn’t have a back. Or at least not a permanent one.
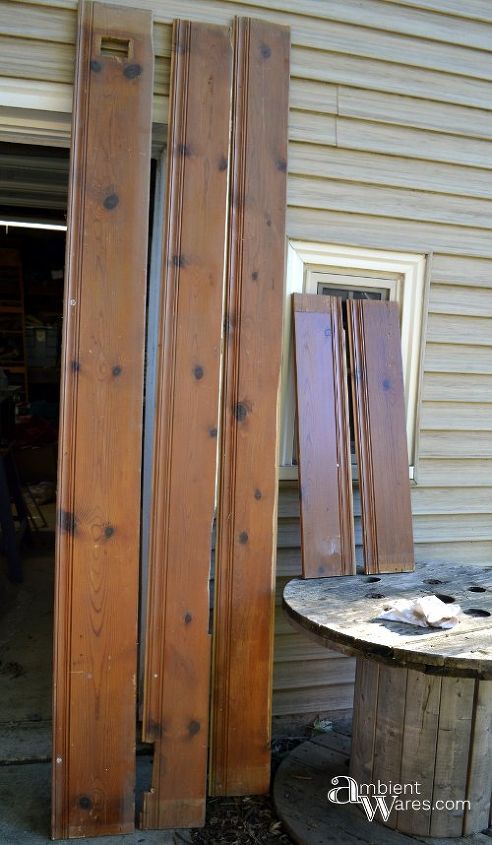
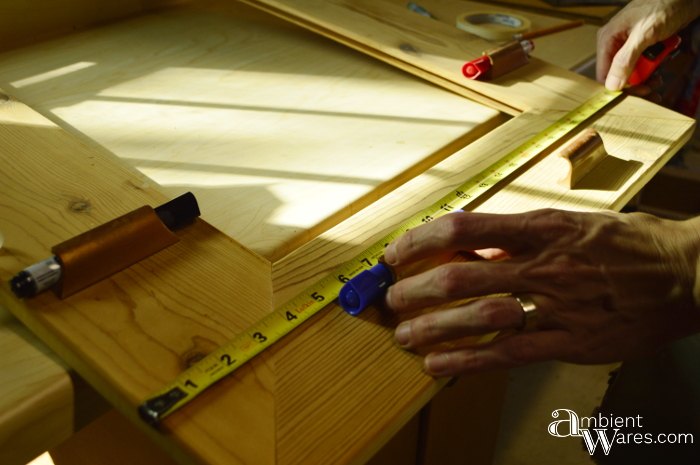
Each piece was in pretty bad shape. I was afraid we wouldn't have enough. We had to be very careful in looking over the pieces and precise with the measurements we’d need for each side of the frame.
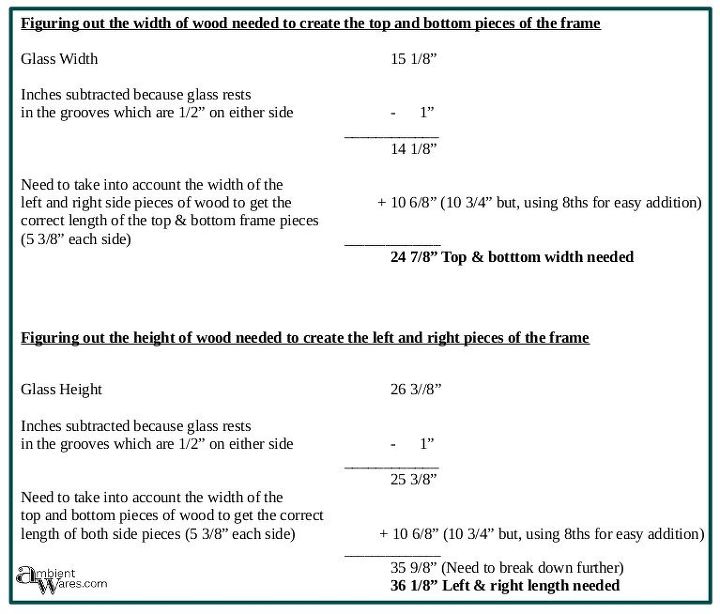
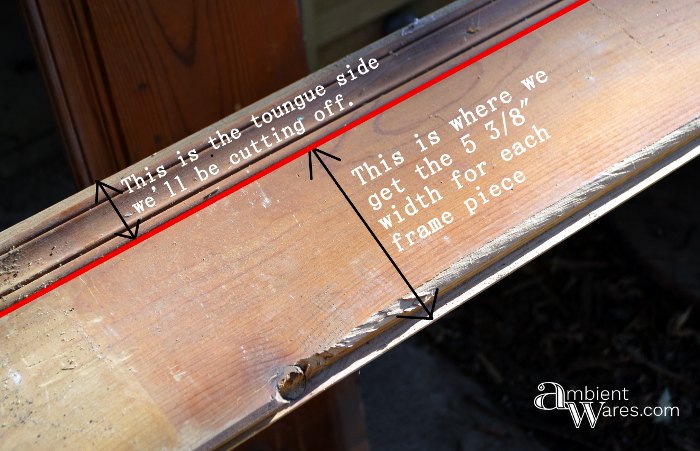
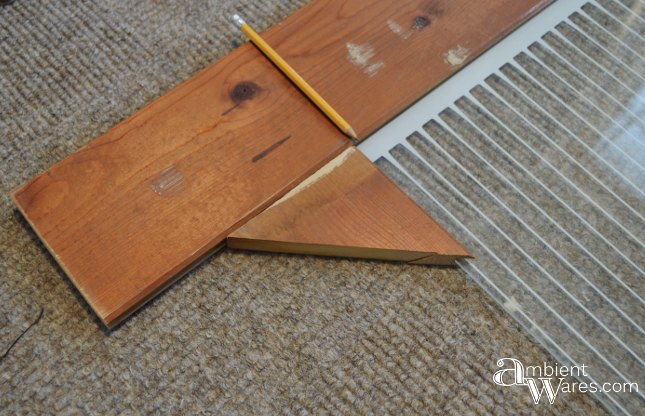
We first cut the pieces of each frame piece slightly longer than what we needed making sure we didn’t waste any of the most pristine pieces. Then we cut off the tongue side with the band saw (table saw would be easier, but we don’t have one yet).
After we shaved off the tongue side, we measured and marked the 45° angle and cut with the miter saw. The only bad thing is that our miter saw didn’t cut the entire length and we had to finish it off with the band saw. If we had a compound miter saw, it wouldn’t have been a problem.
After cutting angles on one top piece and one side piece, we did a test fit.

When we tried to match up the outer corner, the inner corner (where the glass is) did not match up and vice versa. It’s very minimal in difference but, we wanted the inner corner to be what matched and we could always sand down the outer corners later to even it all up.
Once all the angles were cut, we used a Kreg Jig Mini to drill holes and to temporarily place the screws.
We took the boards apart, sanded them down then did a second test fit just to make sure.
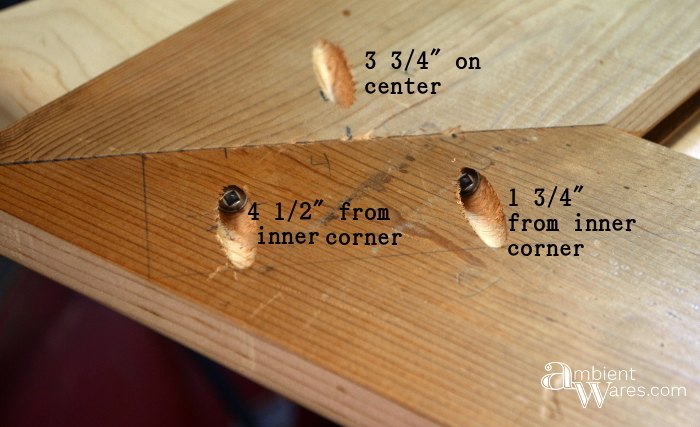
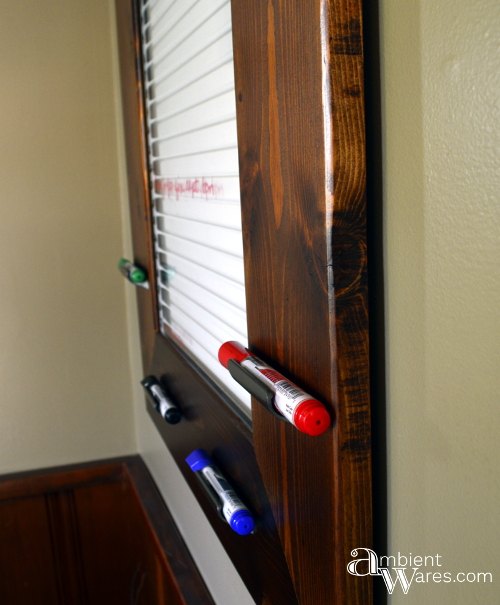
We needed something to hold the dry erase markers and I found some old hardware I had on hand. We flipped them "upside down", measured everything out and drilled the holes needed.

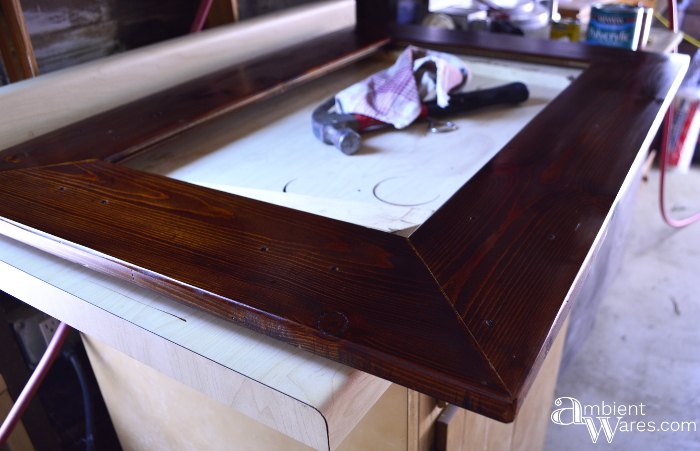
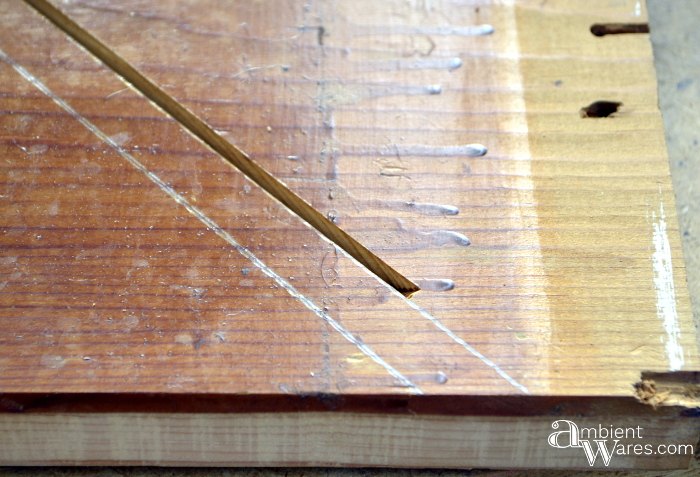
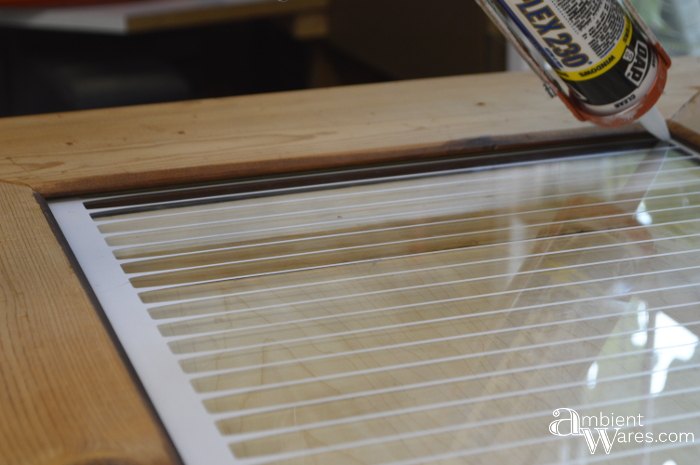
After the staining and sealing were complete and dry (we did not stain the back), we used a clear caulk to hold the glass in place. It was slightly more narrow than the groove so it would wobble back and forth within. The caulk prevents it from bouncing around.
Once the caulk dried, we installed a couple of heavy duty hangers we had on hand and installed the marker holders.

Want more details about this and other DIY projects? Check out my blog post!
Comments
Join the conversation
2 of 31 comments
-
we have done this in school, but i just drew the lines with permanent marker, then the erasable ones on top this worked great on those little side windows beside the main doors to your classroom middle school teacher
-
I worked in a factory that produced this glass shelf.


Frequently asked questions
Have a question about this project?