


Etched Glass Captured Snowman Ornament

by
Cindi McGee
15 Materials
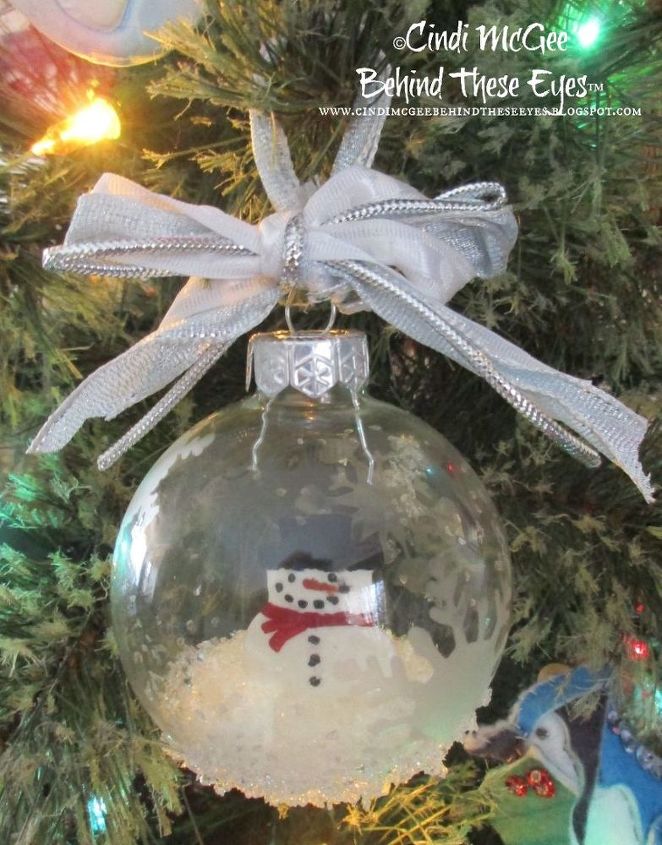
Frosty is tucked safe inside his glass globe ready to weather the next storm! The flexibility of Makin's Clay® after drying makes it the perfect medium for creating objects that need to fit inside a small space like the opening on these glass ornaments!
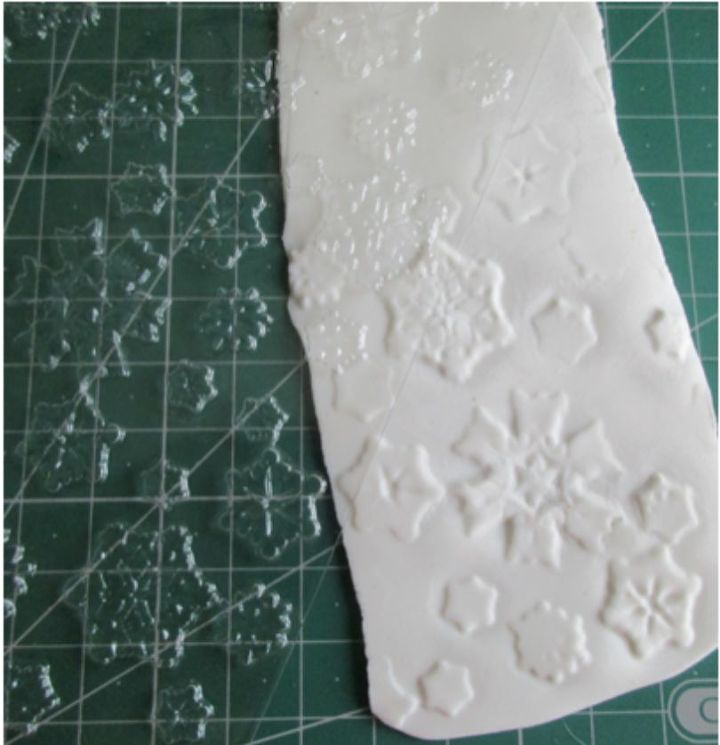
Roll white Makin's Clay® to about 1/8" thick. Place snowflake texture sheet over rolled clay and press to transfer texture.
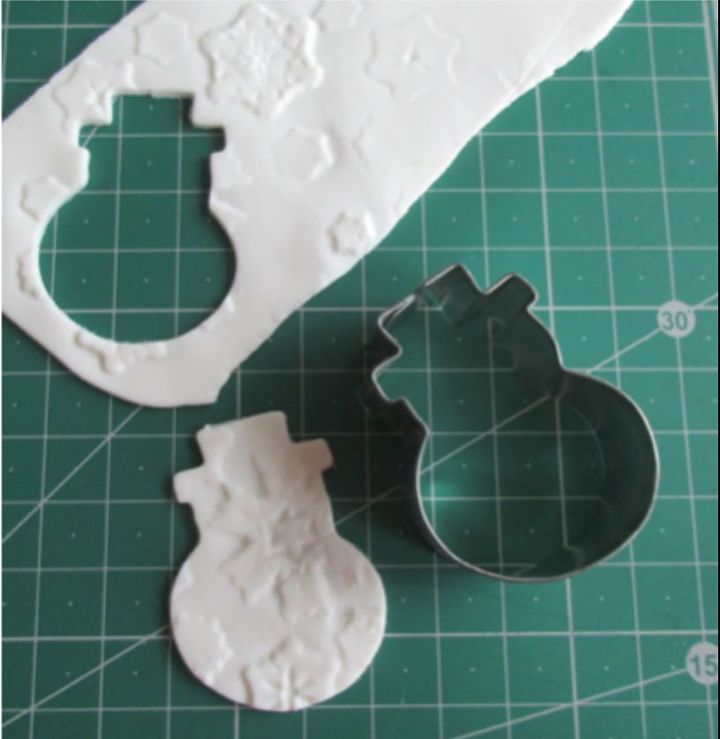
Use largest size snowman cutter to cut snowman from textured clay.
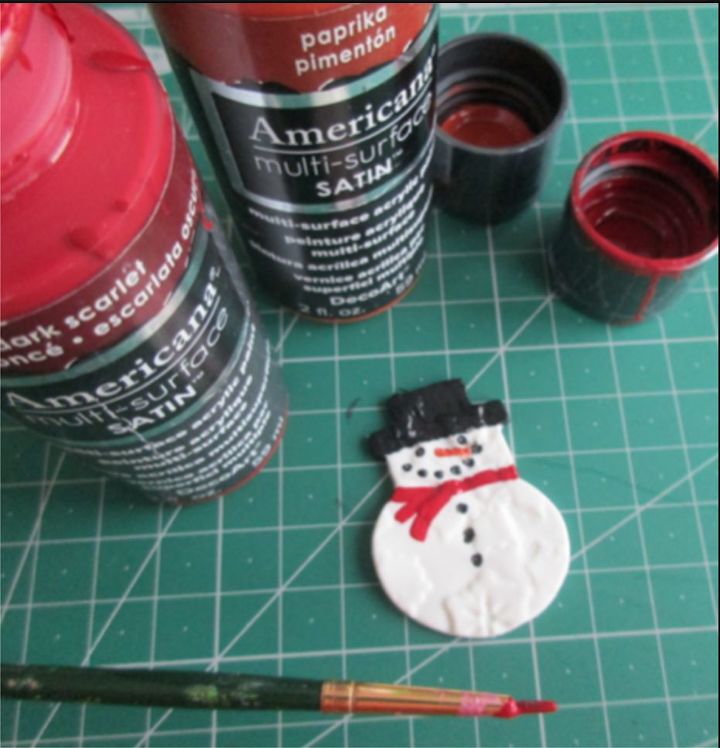
Use DecoArt® Americana® Multi-Surface Satin™ paints to add hat scarf, buttons, eyes, nose and mouth to snowman. Let dry 24 hours.
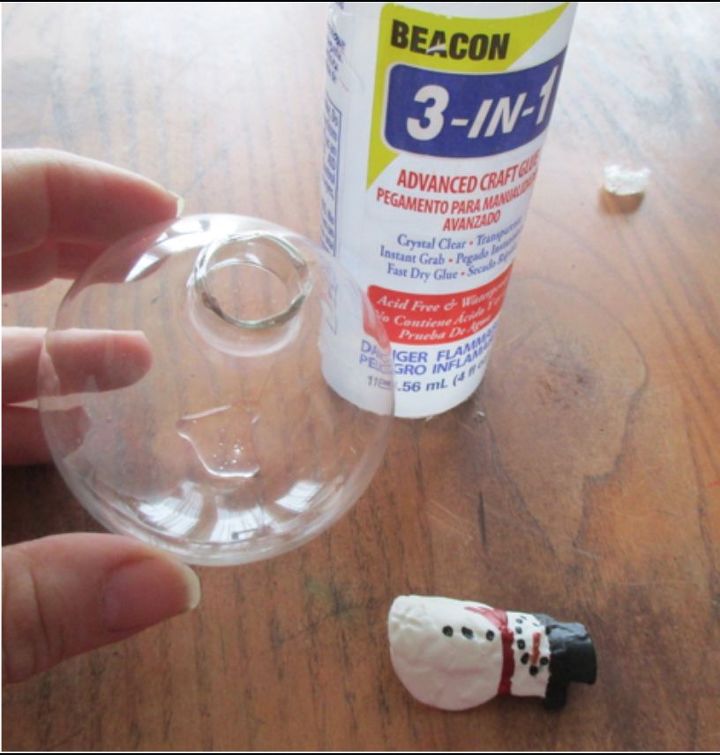
Add a small amount of Beacon™ 3-in-1 Adhesive to the bottom of the inside or the ornament.

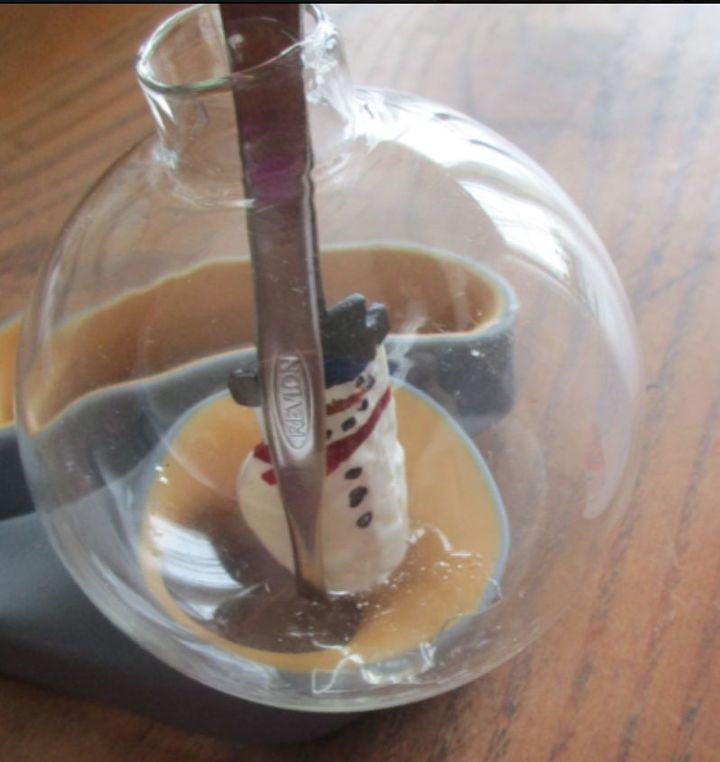
Makin’s Clay® remains lightweight and flexible after drying so it’s easy to bend your snowman to make him fit inside the ornament. The slightly curved shape after he is set in place adds to the dimensional feel of the finished ornament.
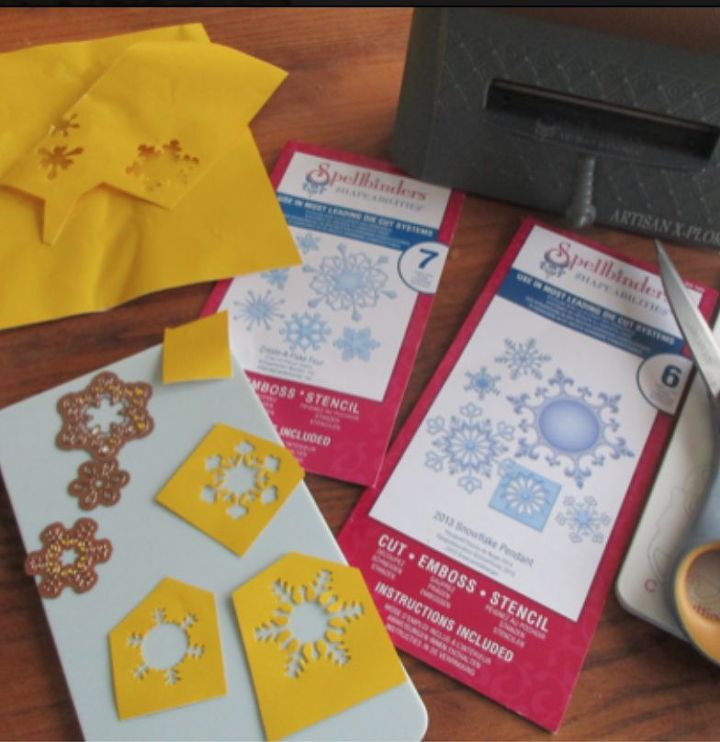
Use Spellbinders™ Artisan X-Plorer™ and snowflake dies to
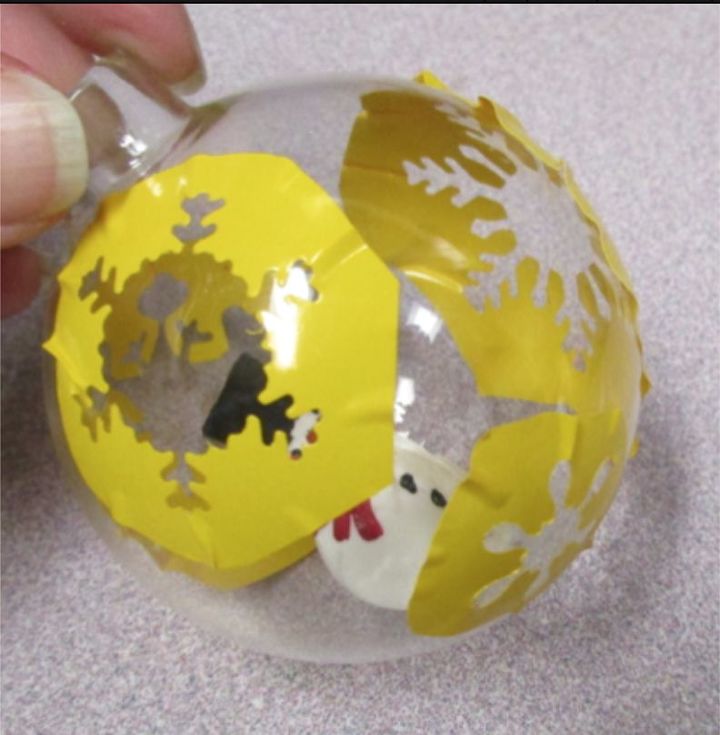
Place snowflake “stencils” onto glass ball.
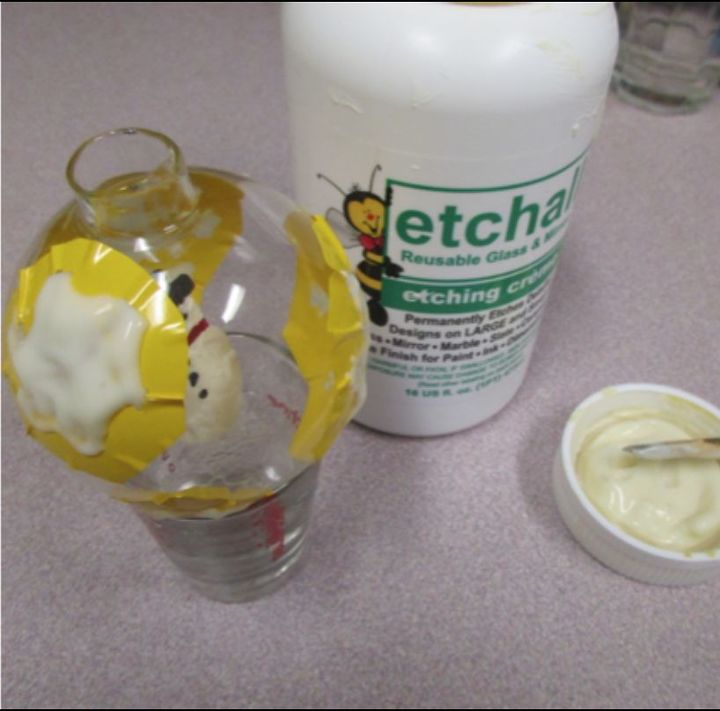
Apply etchall® creme to snowflakes with small brush. Let set 15 minutes. Return creme to bottle (it's reusable) and carefully wash ornament to remove remaining creme. Remove Etchmask.
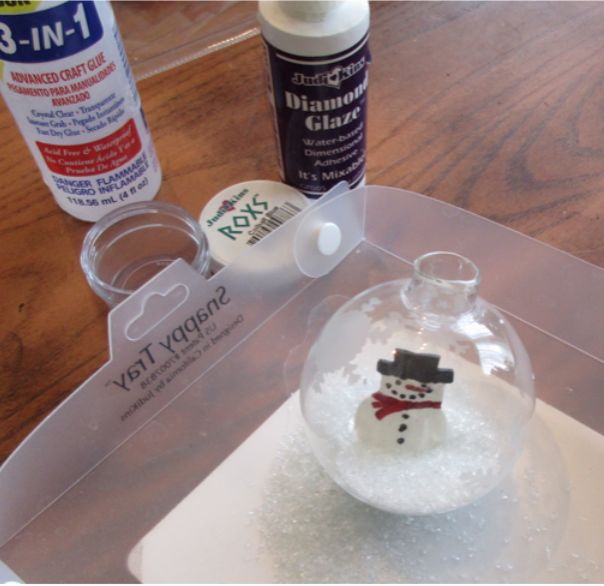
Pour Roxs™ into Snappy Tray™, Pour about 1/4” inside ornament so snowman is sitting in a snow pile.

Apply Diamond Glaze™ to bottom of ornament, dip into clear glass Roxs. Let dry.
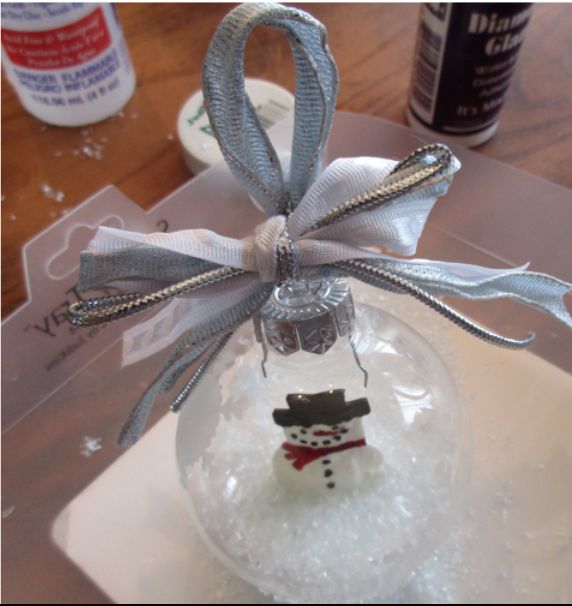
Add ribbon hanger and bow to top of ornament.
Want more details about this and other DIY projects? Check out my blog post!
Comments
Join the conversation
3 of 45 comments
-
Thank you! :)
-
Very cute!


Frequently asked questions
Have a question about this project?