


Industrial Style Wall Sconces

11 Materials
Hey!
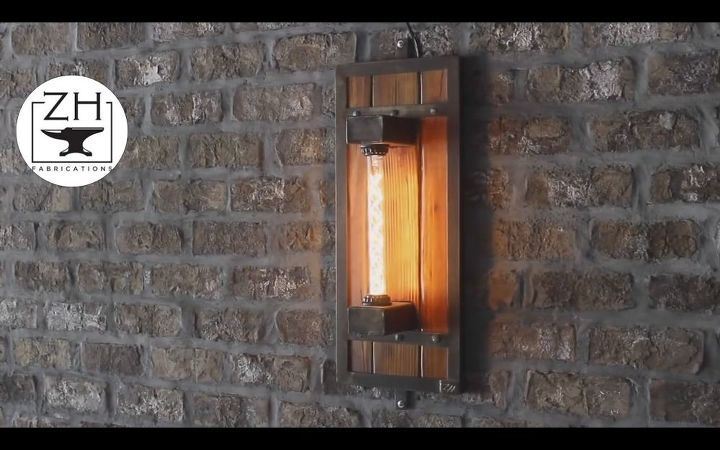
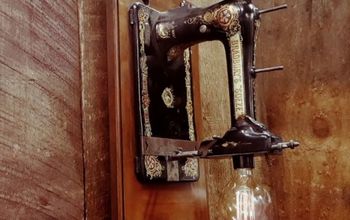
I was recently commissioned by a local brewery(Escape Brewing) to design and produce some wall lighting for their new expansion. I decided to go with an industrial theme with some medieval styling cues
This was hands down one of my personal favorite builds as it required so many disciplines: metal fabrication, woodworking, blacksmithing, and some simple electrical work.
Since I'm limited to only 15 images, some of the detail in the video isn't included in the images. If you are curious about the Wine barrel chandeliers I made for the same brewery or any of my other work, please feel free to check out & subscribe to my DIY YouTube channel "ZH Fabrications" : https://www.youtube.com/channel/UCDdZMJDDpyvI9WJyY7IZP7w
Thank you!
{
"id": "3661278",
"alt": "",
"title": "",
"video_link": "https://www.youtube.com/embed/SVlEo82O5-c",
"youtube_video_id": "SVlEo82O5-c"
}
{
"width": 634,
"height": 357,
"showRelated": true
}
Here is the video, this is going to provide the most detailed & entertaining way to see the process.

The first step was to cut out the frame. I used a DeWalt cold saw for this. I truly believe this to be the most deafening tool one can own!
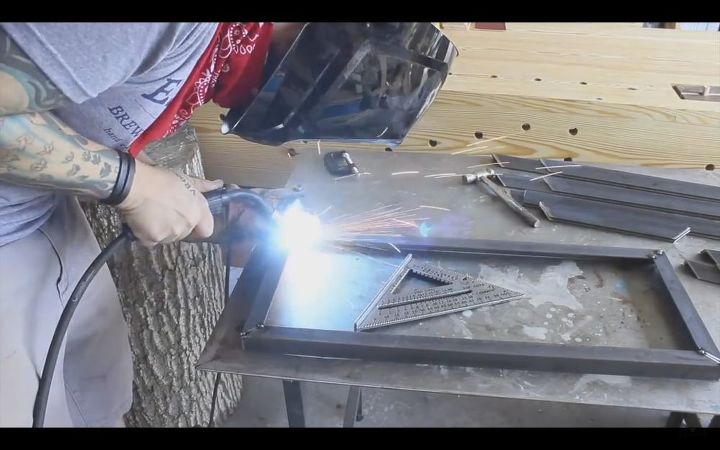
With the pieces for the frame cut, the next step was to weld the frame together.
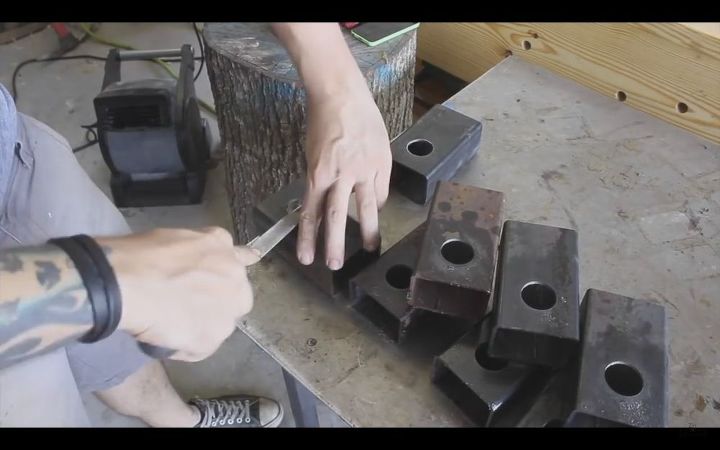
After cutting out some 2x3 square tubing(Cold saw again), I'm de-burring the holes I drilled which will later accept the bulb.
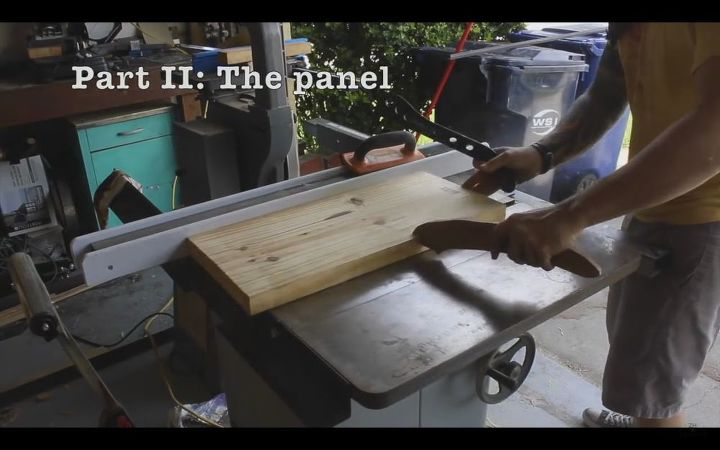
The next step was to cut out the panel, which will set inside the frame. I'm cutting a piece of 2x12 Southern Yellow Pine.
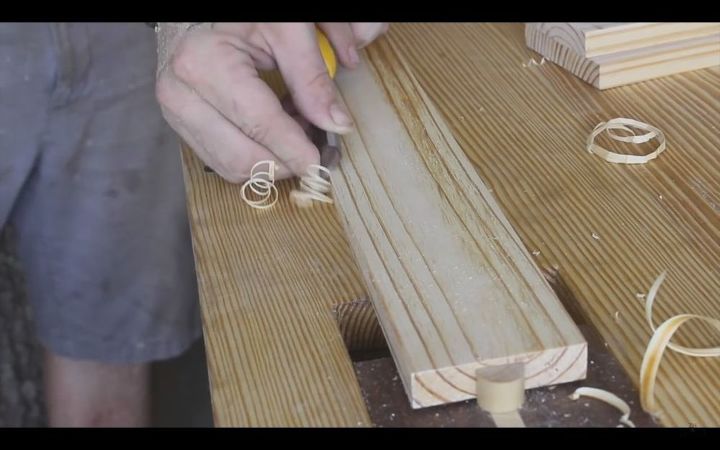
With the panels cut, I'm chamfering the edges so there will be a visible & rustic joint when the panels are glued together--without this the panel would resemble laminated plywood.
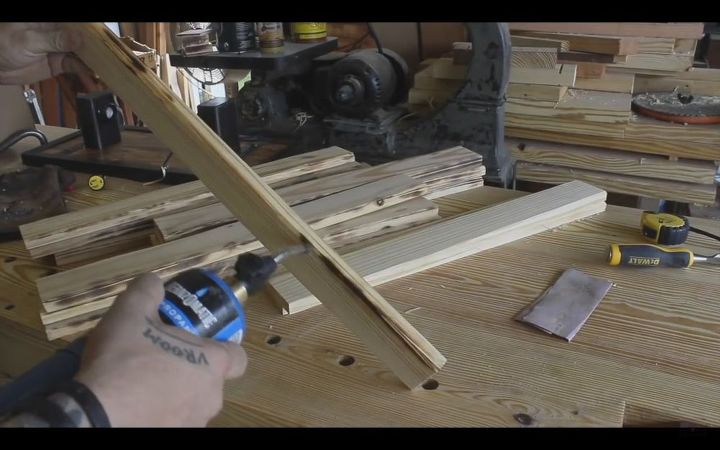
I also torched the chamfer to heighten the contrast one the piece is assembled and stained.
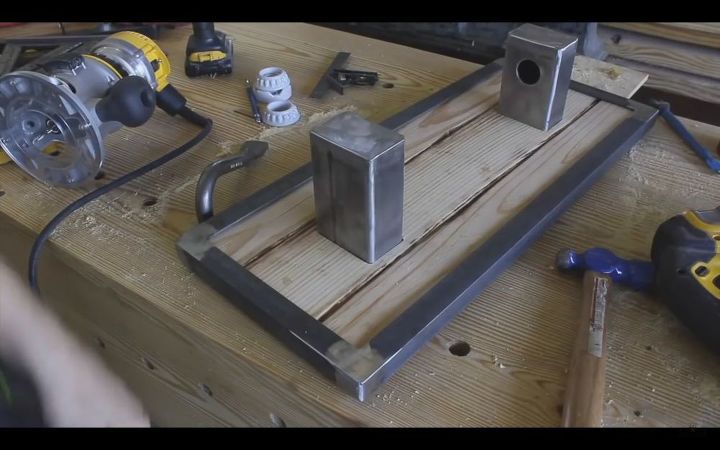
With the panel glued up, and routed for the socket frame--this is the mockup assembly
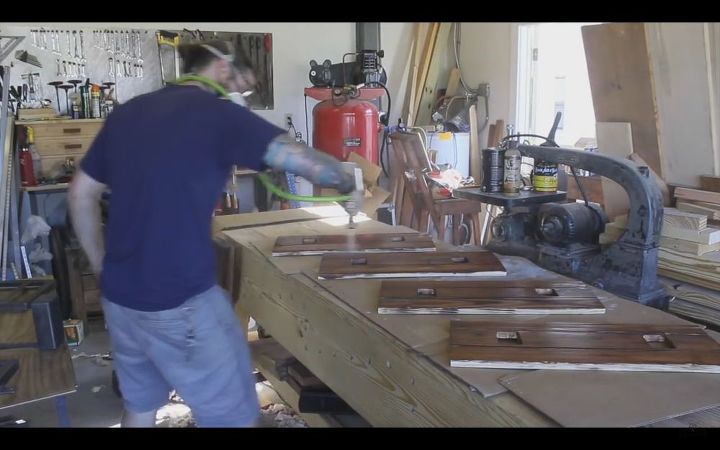
I stained the panels using a dark walnut in the chamfers and a slightly lighter color for the entire panel. Here I'm spraying a water based polyurethane clear coat.
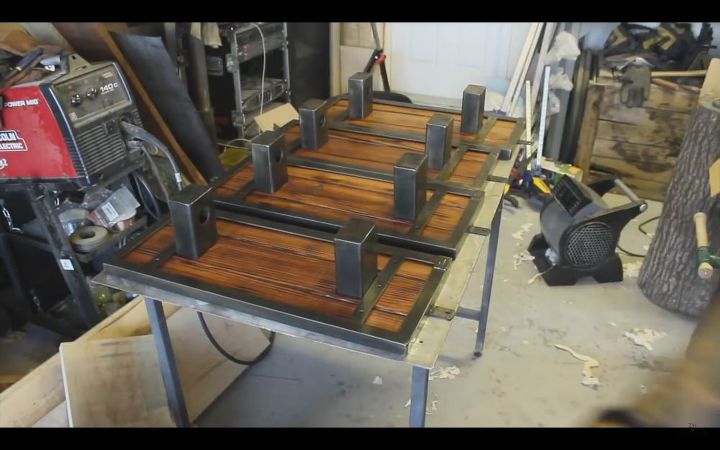
Getting closer, this is the final mock-up with the blackened metal patina, and stained & clear coated panels.
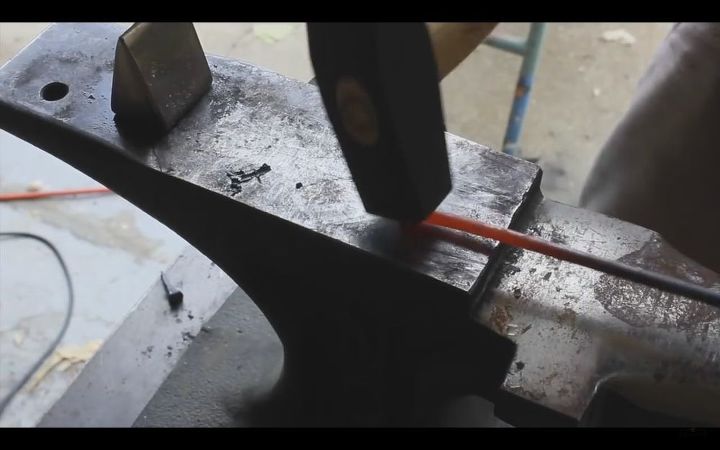
For the final medieval touch, I really wanted to use some hand forged nails--so I made a bunch of them! This was a lot of work, but it was also a fun process, and beating red hot steel always makes you feel awesome.
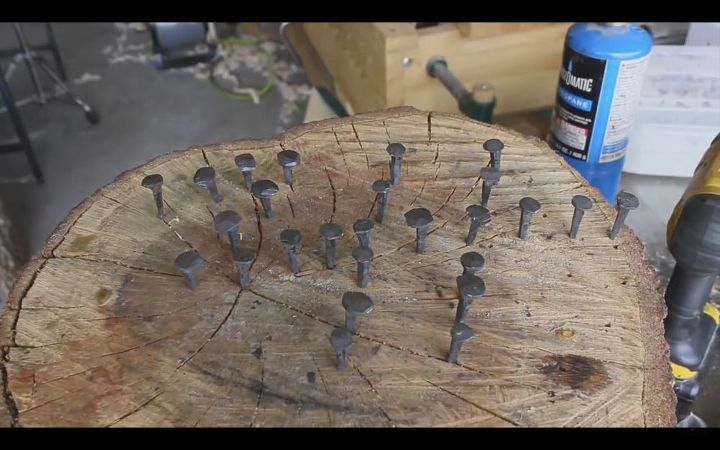
Nails!
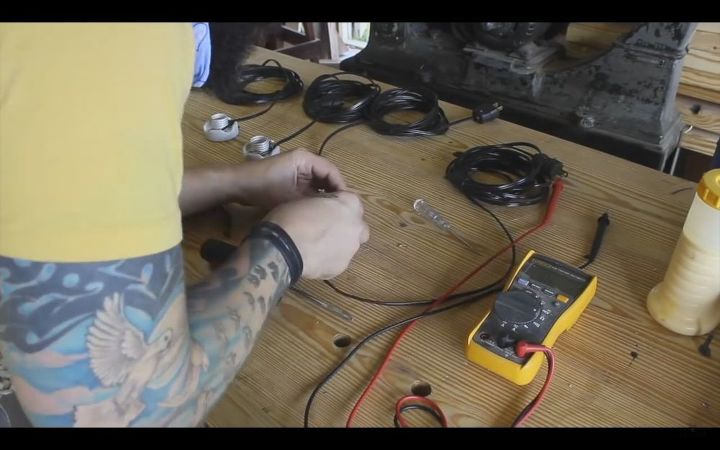
The next step was wiring these things up!
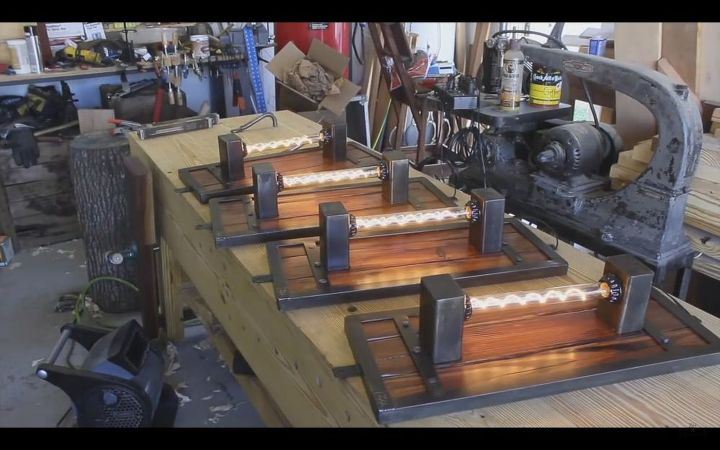
It's alive!
And the last step was to celebrate the instal with a free victory beer!
Resources for this project:
See all materials


Any price and availability information displayed on [relevant Amazon Site(s), as applicable] at the time of purchase will apply to the purchase of this product.
Hometalk may collect a small share of sales from the links on this page.More info
Comments
Join the conversation
2 of 61 comments
-
👍️
-
You do absolutely fabulous work! The love of each craft - metal working, foundry, woodworking, and the rest is shown in your work. Thank you for sharing.


Frequently asked questions
Have a question about this project?