


Furniture Makeover Video
4 Materials
This free garage sale leftover got quite the transformation. I documented the whole process and put together a video so you can see what went into this project. Watch the video below! You can see all the after photos here.
{
"id": "3767622",
"alt": "",
"title": "",
"video_link": "https://www.youtube.com/embed/GazcD34TGjM",
"youtube_video_id": "GazcD34TGjM"
}
{
"width": 634,
"height": 357,
"showRelated": true
}
The proper prep and quality products result in professional looking finishes. No chalk paint here! I prepped the laminate and plastic drawer front by sanding, cleaning with a TSP wash, filling any holes and dings, and then priming with a oil-based primer that acts as a bond coat and also stops any bleed through.
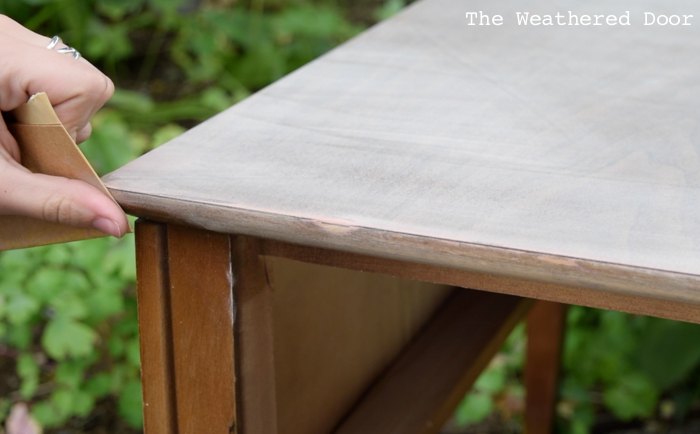
Sanding helps to give the paint and primer something to grab and hold onto. 150 grit is what I used for this project. Between coats I used 220 and 320 grit sandpaper.
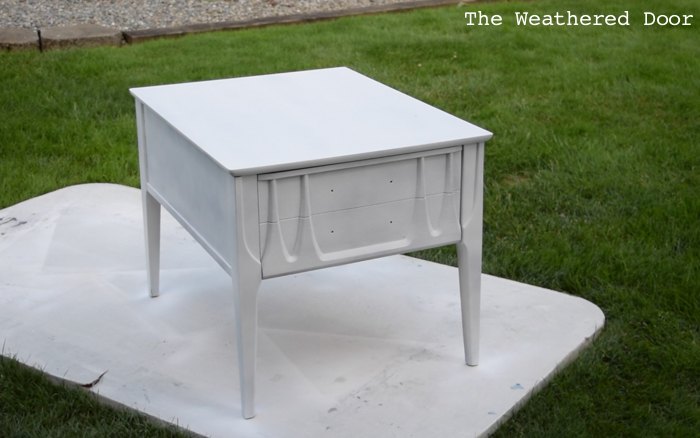
To get the best possible finish I applied the acrylic paint (I custom mixed the teal color) with a Husky HVLP spray gun. 2 coats of paint gave plenty of coverage and then I used a satin topcoat to seal the piece, give it a nice sheen, and protect it for years to come. Now this free garage sale table looks fabulous! The brass hardware was stripped and polish. All the grime is now gone and the brass stands off against the teal green paint.

Want more details about this and other DIY projects? Check out my blog post!
Comments
Join the conversation
1 comment
-
Looks amazing! Love the color! The effort you put in to do it right definitely shows.


Frequently asked questions
Have a question about this project?