


Patio Hutch

by
Lori Cohen
9 Materials
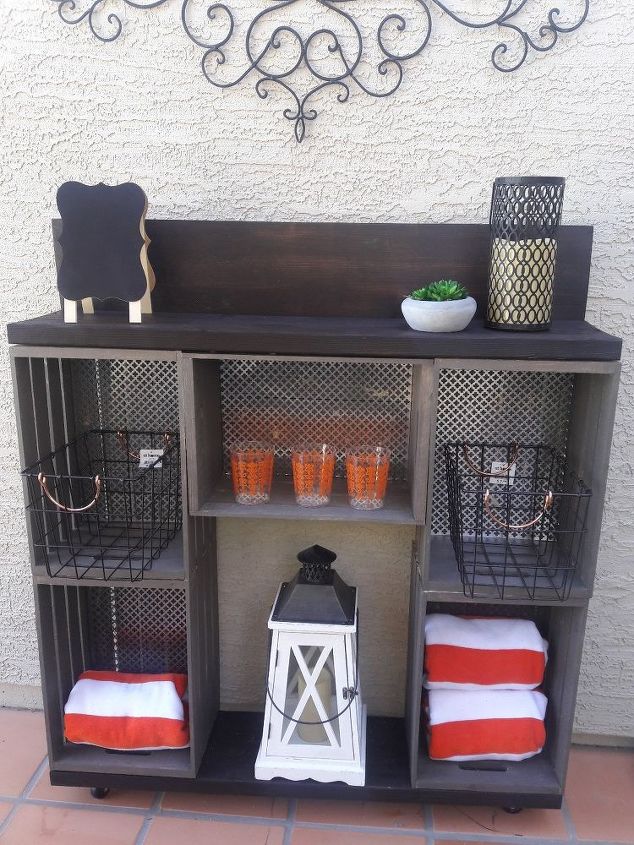
I wanted a hutch on my patio but didn't have the money. I've always loved the crates from Michael's so I decided to put everything together and create this Hutch. Great to hold my pool towels as well as serve drinks on! Best part it was right under $100!
- Paint or stain the crates.
- Stain the top, bottom, and backsplash.
- Screw the wheels into the bottom plank.
- Glue two crates to the lower piece of wood.
- Glue and attach two additional crate on top of the crates attached to the lower plank.
- Add glue to both sides of the remaining crate and place in between the two horizontal crates.
- Clamp all sides so the glue dries and adheres.
- Glue the top sides of the crates and place the plank on top. Clamp as well
- Cut metal sheets to fit in the back side of the crates
- Add glue to the crate backs and place the Metal Sheets firmly over the back.
- Attach the backsplash with five screws into the top plank.
- Reinforce the lower crates in the inside back Corners with screws. Repeat the same with the upper crates into the top plank
- Yay!That's it!
Comments
Join the conversation
3 comments
-
Inspired! Beautiful!
-
Great idea! Looks really nice.


Frequently asked questions
Have a question about this project?