


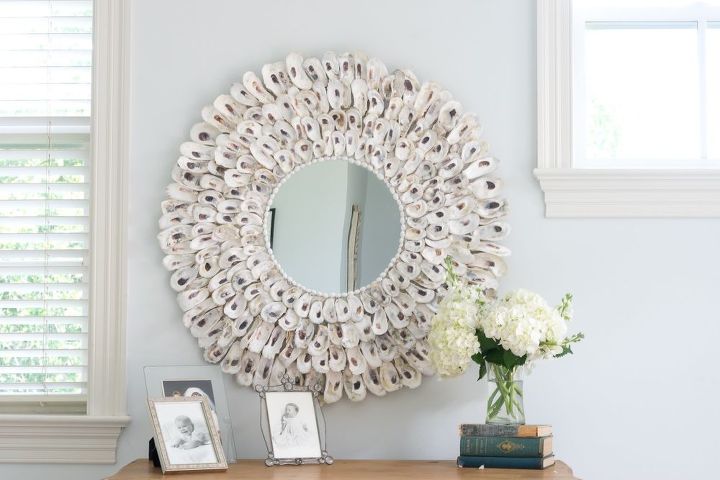
How to Make an Oyster Shell Mirror
4 Materials
$30
6 Hours
Easy
For several years I’ve been hankering for an Oyster Shell Mirror. I’ve seen them at various stores, but could never justify the hefty price tag.
Since I had many bushels of oysters from a past project sitting in my garage, the seed (or pearl?) was planted that I could make one myself.
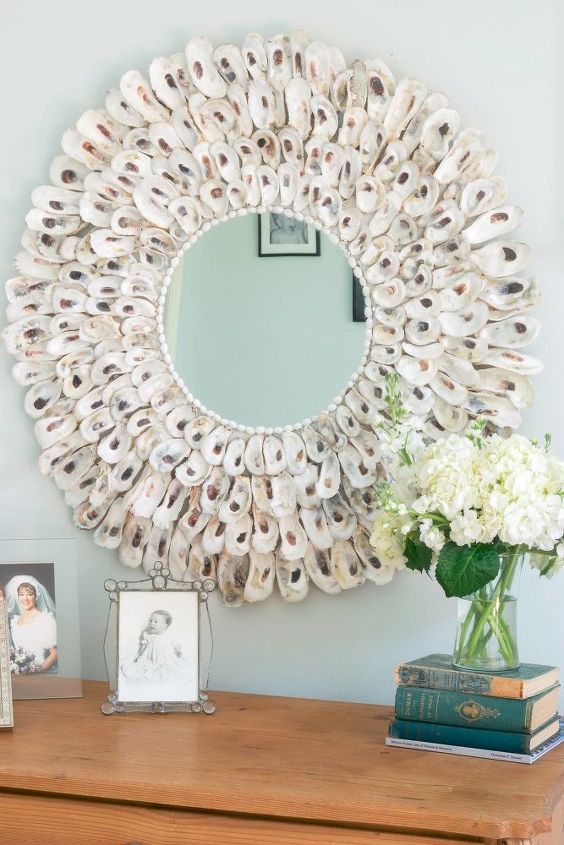
And I also had the round piece of wood with a mirror in the middle. With those two critical oyster shell mirror ‘ingredients’ sitting in my home, it was just a matter of taking the time to put 2 and 2 together.
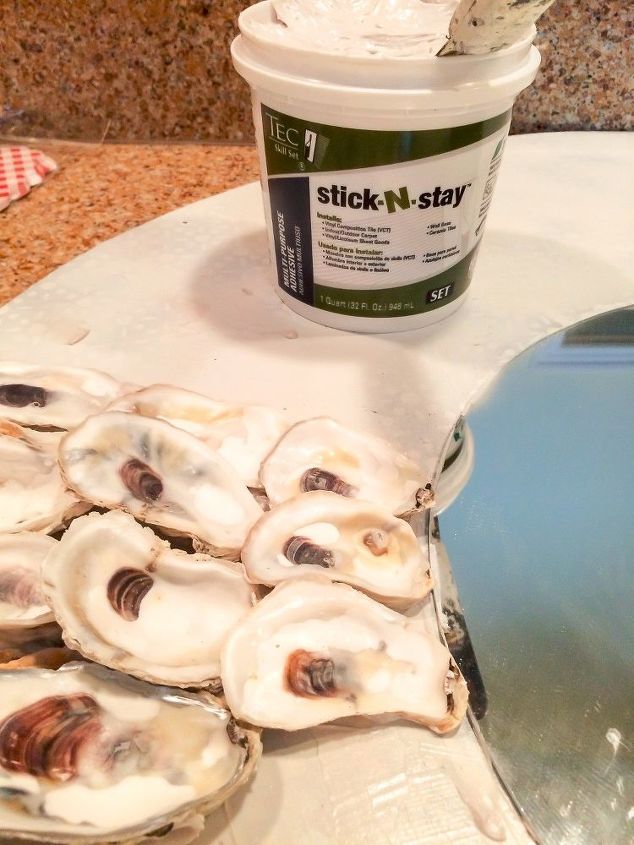
I started this project months ago, but it just wasn’t coming together for me. I was using E6000 glue which I find useful for most things, but it just wasn’t ideal for this project. I needed something that was tacky and stiff enough to hold the shells in place while I moved them to where I wanted and that was also easy to apply. After going through 2 tubes of E6000 on only 1/4 of the mirror, I knew I needed to find a different adhesive.
And while I was noodling adhesives, this mirror with a few oyster shells glued around it lay in the garage, dodging cars and bikes and a teenage boy on his way to the spare fridge. Shockingly, it refused to break…which was a constant reminder to me that Kismet wanted me to figure it out.
I initially thought of plaster of paris, but was afraid that would add weight that I didn’t really want on something that was going to hang on the wall.
So I took trip to my hardware store and met my new BFF Larry. We weighed all sorts of options and finally settled upon a quart of TEC Stick and Stay which is primarily used in flooring. It was easy to apply and after 24-48 hours, my oyster shells stayed in place. (That being said, make sure your surface isn’t slick at all…I had some places that had metallic paint that just didn’t have enough ‘tooth’ for the adhesive to grip to. I sanded those areas after I realized why the adhesive just wasn’t gripping there. You can see what I’m talking about in the video below.)
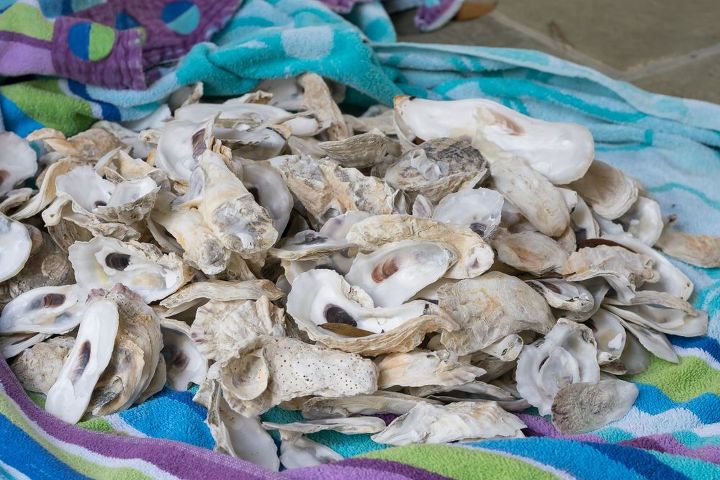
In terms of where to find oyster shells, you can surely buy them online…but, if you’re willing to work just a wee bit, you might be able to get them for free. If you have a fish market or restaurant that sells shucked oysters, call to see if you can collect the shells. Our fish markets have piles outside their back door that they are more than willing to let me pick through.
What I Used for a 36″ Oyster Shell Mirror
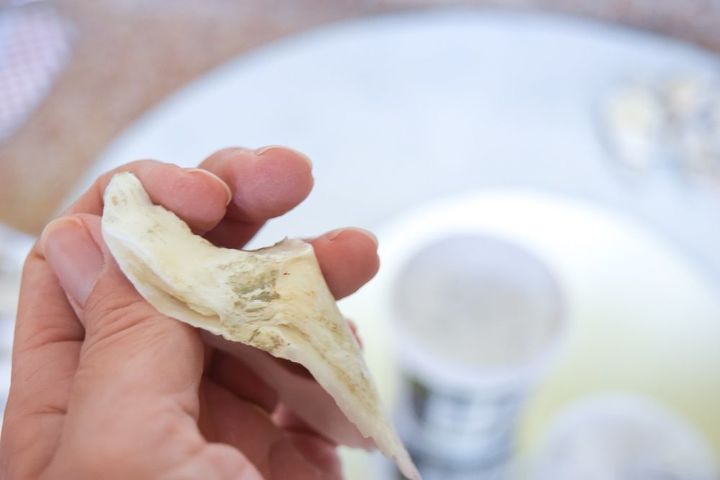
- 40 pounds of cleaned oyster shells. I soaked them in bleach water and then scrubbed any yuck off. I then let them dry in the sun for a couple of days.( The cost I indicated for this project reflects that I didn't have to pay for the oysters)
- You'll only use about 20 pounds, but that should give you more than enough to pick through for the right sizes/shapes.
- Plywood in the shape you want
- Heavy duty Picture Hangers
- Mirror in the size and shape you want
- TEC Stick n Stay, 1 quart is all I needed for this project and I have about 1/3 of the quart remaining. You can find it in the flooring department of your hardware store. This stuff made the project so very easy and easily accomplished in a morning...granted, I started at 6 a.m
Small trowel
I put a good glob of the Stick n Stay on the parts of the oyster shell that would be touching the board or other shells.
How I Made My Oyster Shell Mirror
Make sure your wood is clean and primed. I had some leftover silver paint on parts of mine and the adhesive really didn't want to stick there. I had to go back in and sand that part after the oysters still weren't sticking several days later.
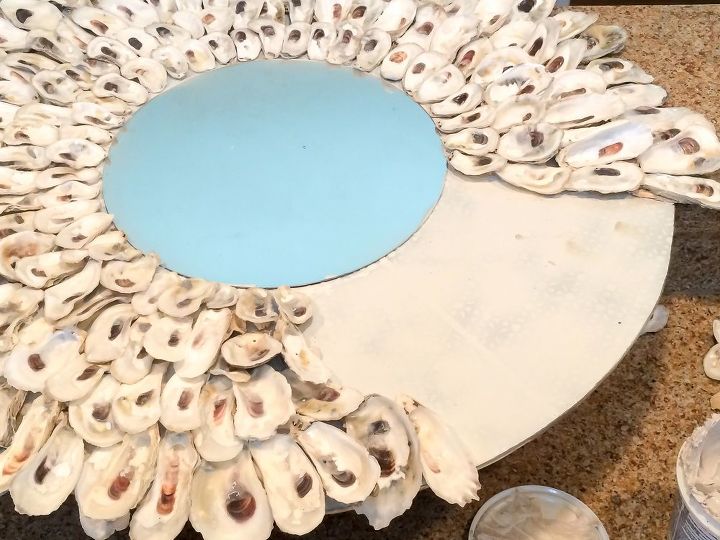
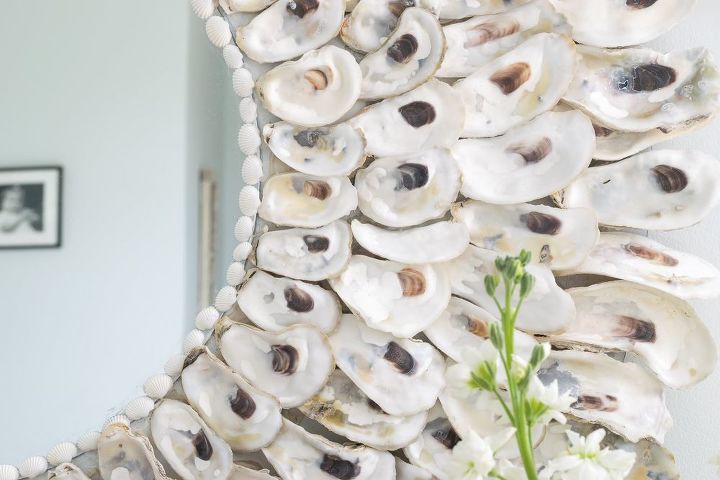
Placing the oysters on the mirror is best likened to putting a puzzle together. I wanted them to get bigger in size as I went out from the middle, but not all oyster shells 'layer' with each other well. This is why it's a good thing to have more than you need so that you can pick and chose the ones that work best.
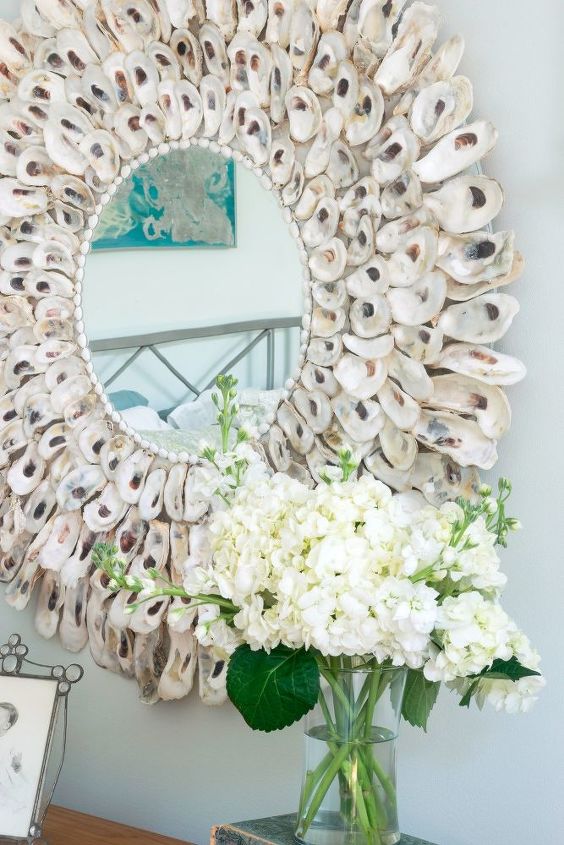
When all the oysters were in place, I glued 'tiny white cup shells' (yup, that's the name) along the edge of the mirror to finish it off.
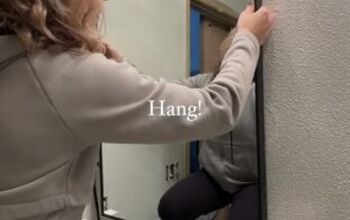
I used heavy duty picture hangers, both on the back of the mirror and on the wall.
I LOVE THIS MIRROR!!!! It really turned out so much better than I had hoped and was really easy to make.
Truly, it's all about the glue.
This quick video shows the process I used
{
"id": "3896678",
"alt": "",
"title": "",
"video_link": "https://www.youtube.com/embed/PUMalHAk7Uo",
"youtube_video_id": "PUMalHAk7Uo"
}
{
"width": 634,
"height": 357,
"showRelated": true
}

Want more details about this and other DIY projects? Check out my blog post!
Comments
Join the conversation
2 of 70 comments
-
thanks
-
I've never seen oyster shells used. This turned out beautifully. Congrats on a good job.


Frequently asked questions
Have a question about this project?
What size is the mirror you used and what is the overall size with the oyster shells? Thank you. It’s beautiful. I collected oyster shells last year at padre island Tx. Now I know what to do with them
What color are oyster shells originally?
do you think that I could use a good round primed canvas instead of a board