


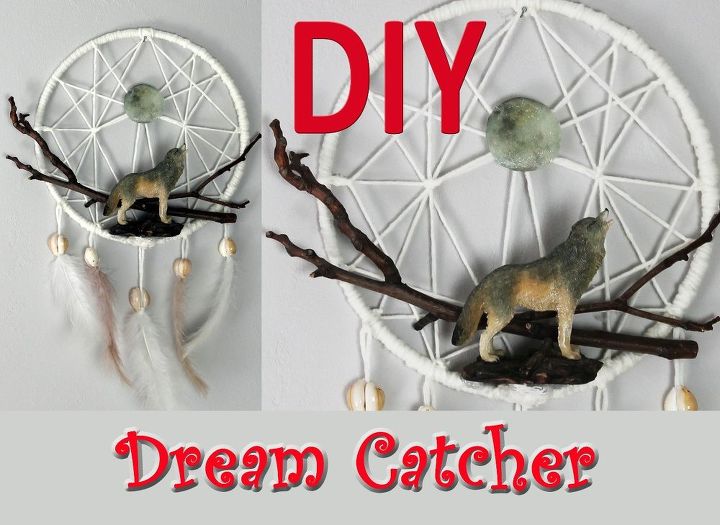
DIY Dream Catcher With Wolf

by
MondbergTV
10 Materials
$10
45 Minutes
Easy
Easy and inexpensive dream catcher with motives that also kids could make. A great home decor or a present. Cute wall decor. Flowers or other motives instead of the wolf and the twigs can be used.
{
"id": "4119656",
"alt": "",
"title": "",
"video_link": "https://www.youtube.com/embed/3CDGOWQ95TA",
"youtube_video_id": "3CDGOWQ95TA"
}
{
"width": 634,
"height": 357,
"showRelated": true
}
Here is my video with all instructions. I highly recommend watching it in addition to reading the steps that are listed next.
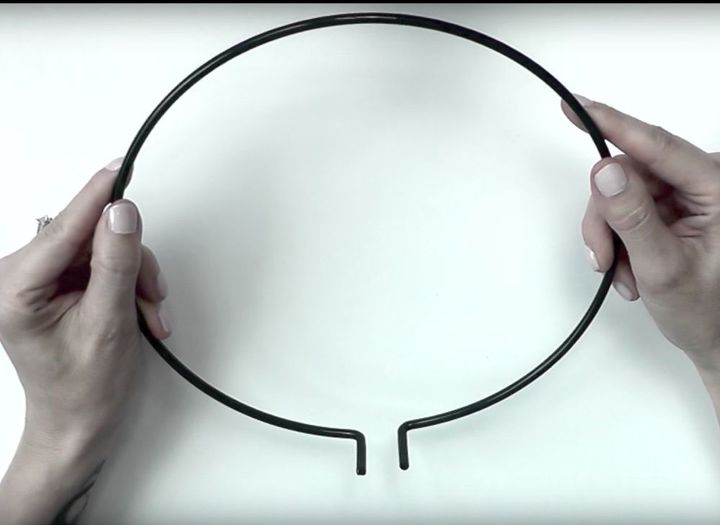
I used a metal ring for my dream catcher that was open in the middle and had two ends sticking to the front. I found it in a garden supplies store. You can always use a regular metal ring instead. The weird ends are not necessary. This ring was nice for placing my wolf, though, as my wolf figure was quite heavy.
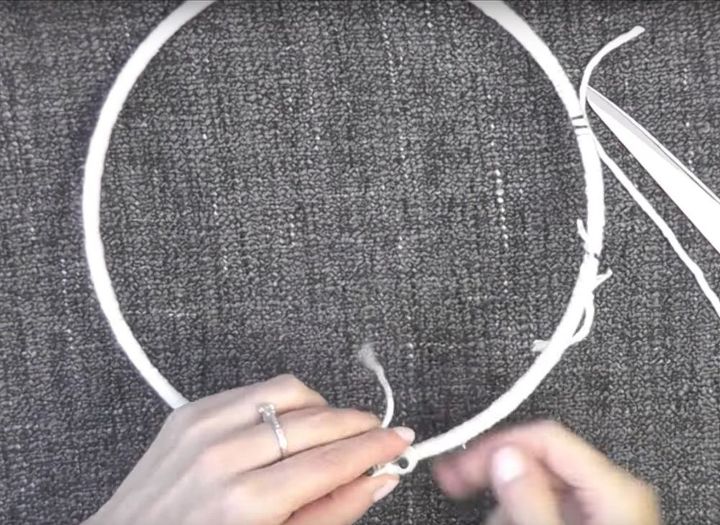
As a first step, I wrapped the metal ring including the two weird ends into a cotton cord. You could use strips of fabric instead of a cord. That would be a great way of using up some leftover fabric from other projects.
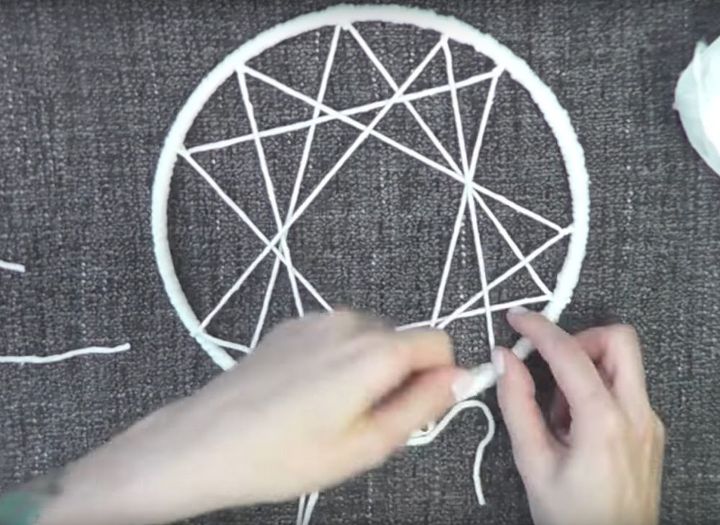
Once that was done and the whole ring was wrapped in the cord, I started making shapes with the cord by tying it to several places on the ring and on other places. I tried a few things and tied the cord where I liked it the best. There is no right or wrong – just do what you personally find pretty.
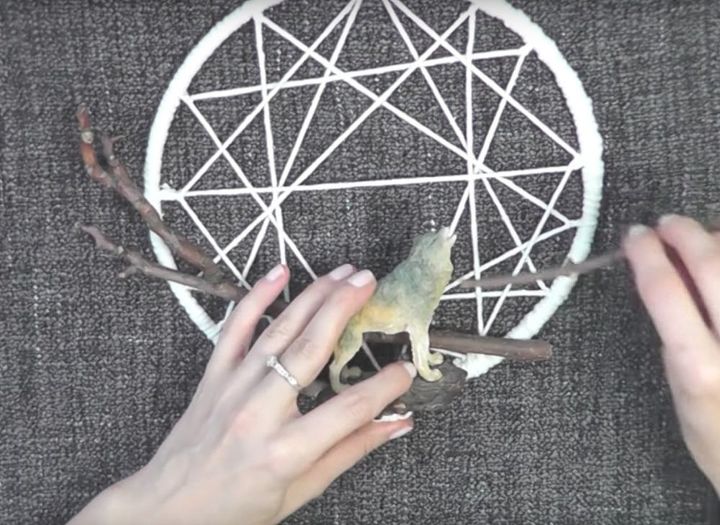
Then, I placed two dry twigs and a wolf figure to the bottom part of my ring and glued all in place with hot glue. You could use, for example, flowers instead of the wolf and twigs if you are not into the whole wolf theme. Then it would be a nice piece in shabby chic style. I might be a bit obsessed with wolfs, though, so I went with it. OK, I admit: I AM obsessed with wolves - but that is a whole another story 
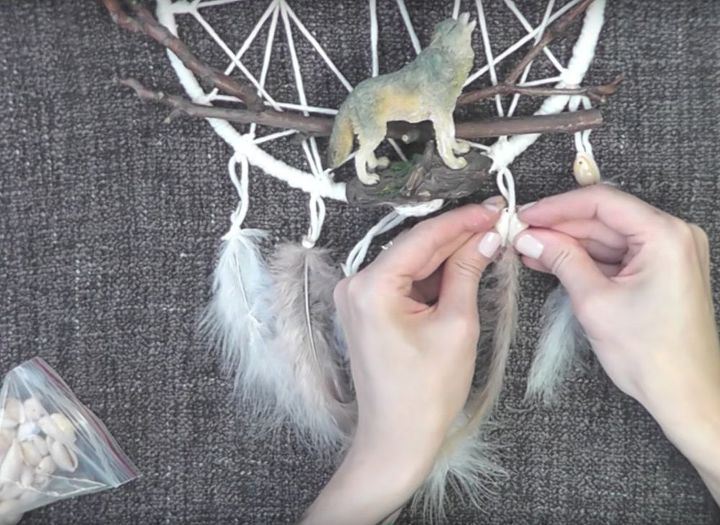
As a next step, I attached a few more pieces of the cord to the bottom section of the dream catcher. I glued feathers to the ends of the loose cord pieces and then I also glued seashells to the ends of the feather as a cover. The seashells made the ends heavier so that all would hang straighter. You could use wooden pearls or plastic pearls instead of the seashells.
Ideally, use only feathers you’ll find somewhere outside in a park or a wood. Such feathers were lost naturally by happy animals that are living free without cruelty.
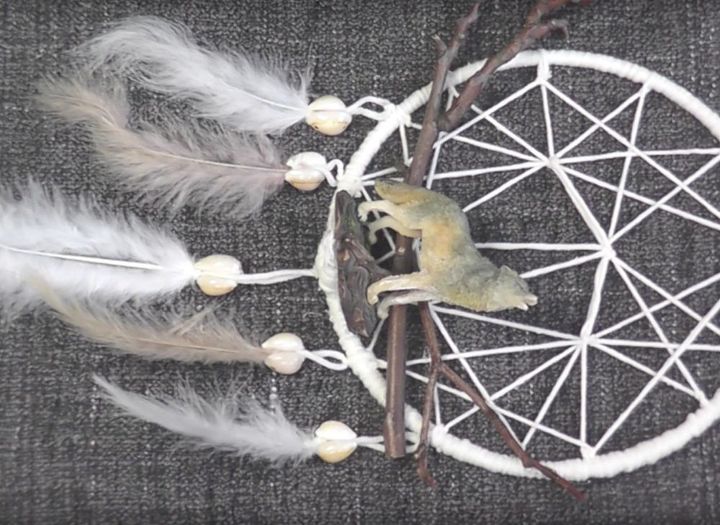
Then my dream catcher looked like this so far. I liked it, but I thought there should be moon for my wolf to howl at. So I made one additional piece for my dream catcher.

I made my moon with transfer potch and a printed picture of a full moon. I printed out a photo of a full moon and then covered it with the potch. I proceeded according to the instructions on the transfer potch I was using – it was by FIMO. But there are enough other brands if you can't get FIMO and some might be even less expensive.
Once the moon was done, I gave it a few coats of nail polish with glitters. The nail polish is not necessary and might even long term damage the potch, but I thought it looked great. I can always replace it later.
You can also simply cut out a round piece of cardboard and glue a photo of a moon to it instead if you don’t fancy buying transfer potch just for this project. Or, glue only a picture of a moon on your dream catcher if the photo is on a rather thicker paper. Whatever is easier for you. No need to spend extra money when you can do it for less and easier.
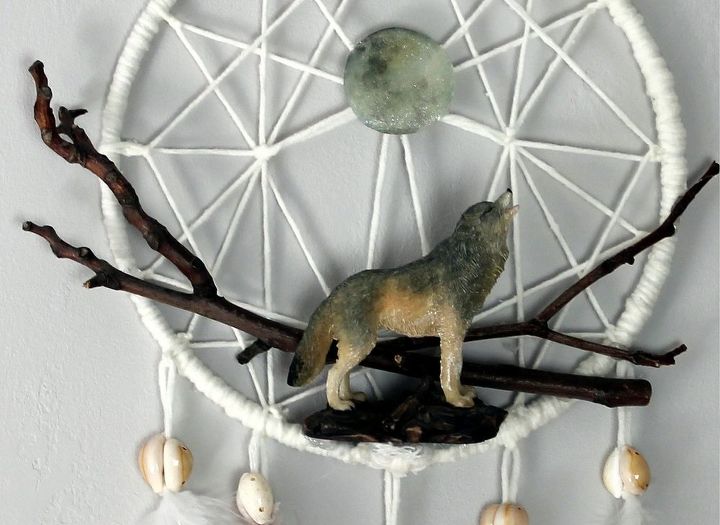
As a last step, I glued my moon in place with hot glue and then my dream catcher was done!
Don’t forget to subscribe to my YouTube channel MondbergTV for more creative videos. I upload once a week. There are many sewing tutorials, home décor ideas, up-cycling projects, DIY accessories and more. Every year, I create a few Halloween costumes and post tutorials early enough, so that anyone has enough time to create them.


Frequently asked questions
Have a question about this project?