


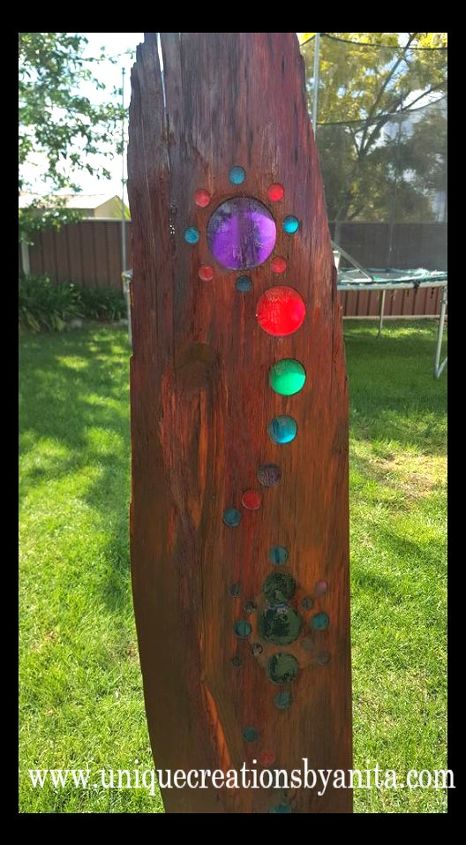
Wooden Suncatcher
2 Materials
$20
4 Hours
Easy
I saw this wood lying at my sister’s house and wanted to see what I could make out of it, and wooden suncatcher came to mind.
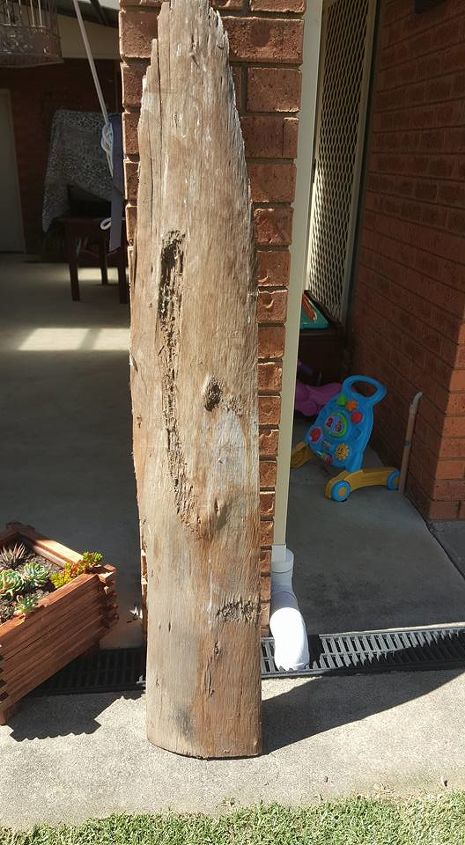
The wood had been siting out in the elements for years so the top layer was in bad shape. I started by sanding the top layer and any loose bits off with 80 grit sandpaper.

I used a cedar stain; I love the red colour it becomes after the varnish is applied.
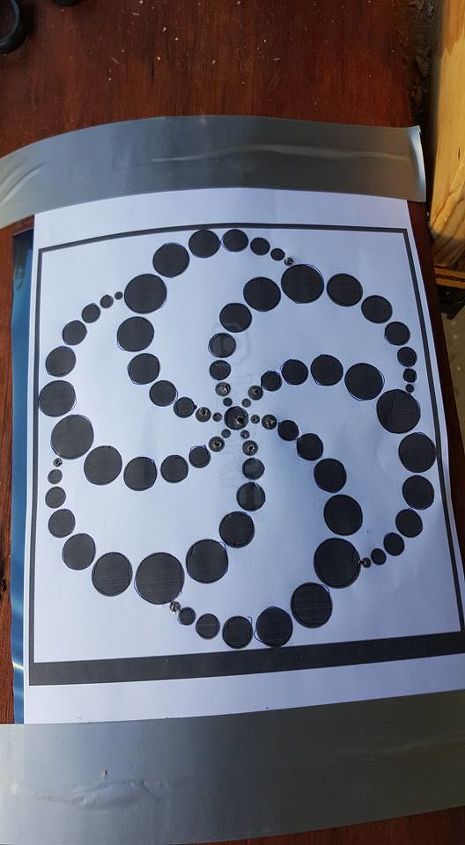
I went with a circle design so it would be easy to cut out. This was the design I found on Google, but I must say from the off it was a bit small, but because I had started I had to finish it.
I printed off the design and used carbon paper to transfer the design over to the wood.
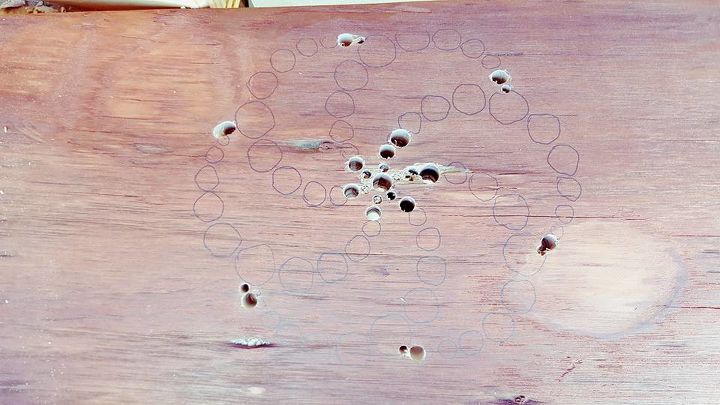
Once I started cutting out the holes, I could see this design was the wrong one for this project. It was too small and the holes started to blend into each other, so would recommend the larger holes and truth be told they look better too.
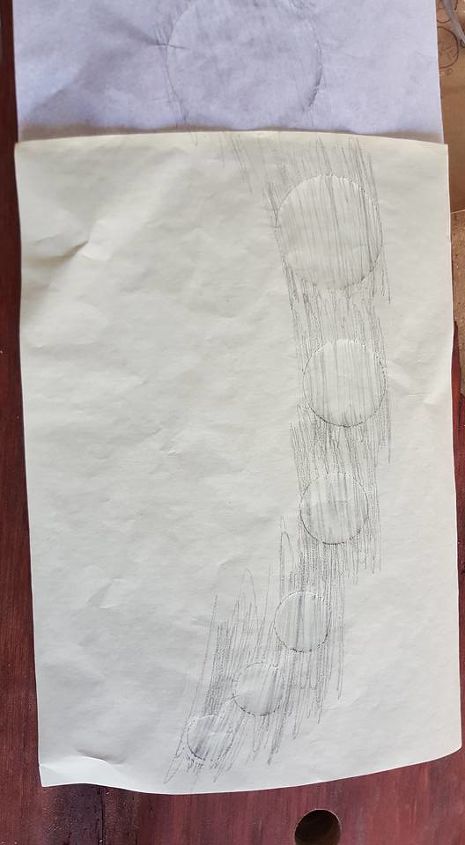
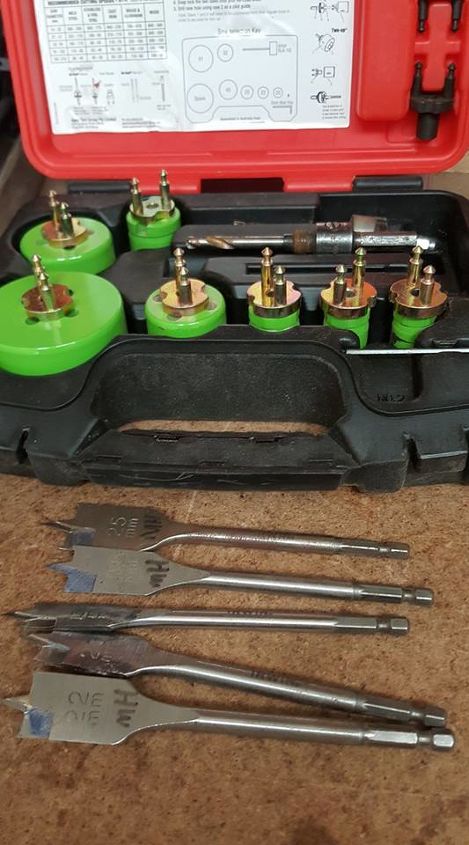
I used a set of spade bits and hole saws to cut out my design which was very simple. Once my first design was cut out I used paper and a pencil to copy the spacing to duplicate the design at the bottom. I lay the paper in position and put the hole saw over the paper and hit it was a hammer to mark the hole position.
Once all my holes were cut out it was time to add the epoxy resin. I would have been happy to leave this project here, it look great in my garden. But I wanted it to be a suncatcher.
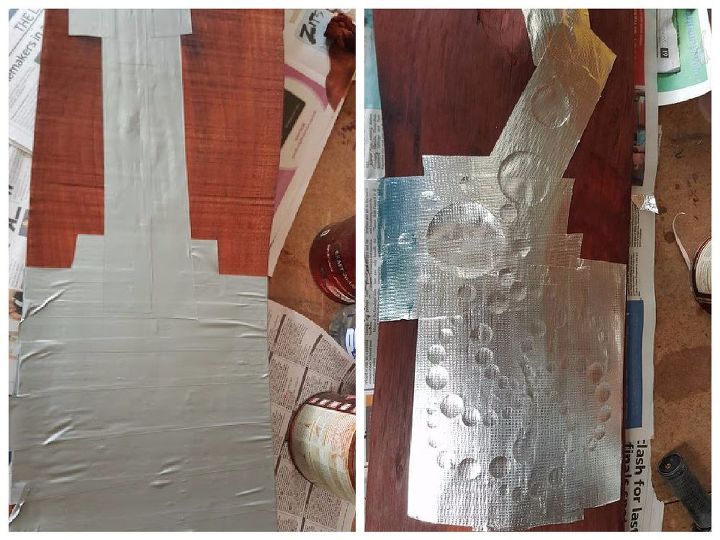
I had read on other posts that used epoxy resin, that you can use duct tape to seal up the holes to hold the epoxy resin in, and used a hairdryer to make the tape adhesive attach more. I did try this and sad to say it did not work for me. All my resin leaked out between the tape. I found this tape on the right in my husbands tool box but not sure what it is but it worked perfect to keep the resin in. (So if anyone knows what it is please let me know, Only says PPC)
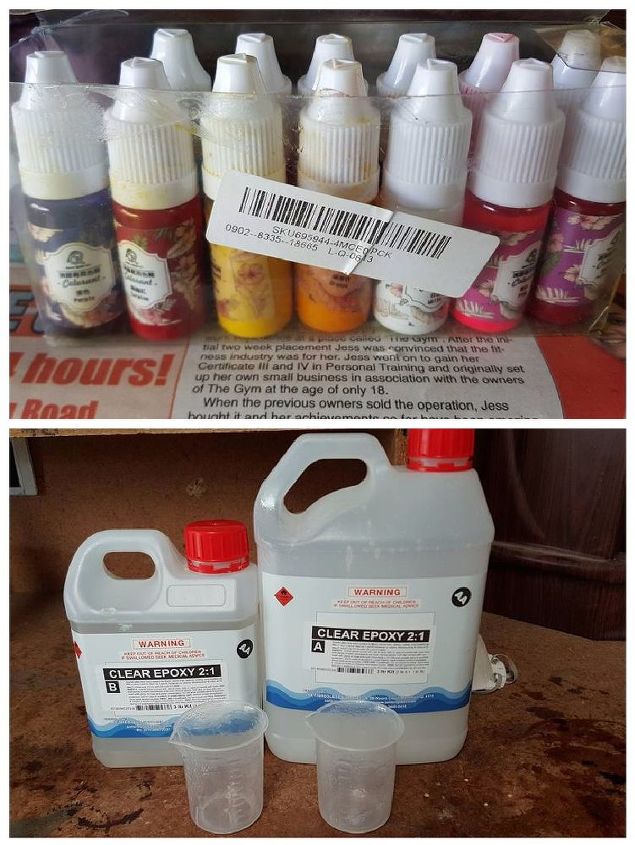
I used 2:1 epoxy resin and some colour pigments to add some colour to the epoxy. I mixed one 500ml batch; it is easier than trying to mix lots of smaller ones. Then I split the resin up into small tubs and added a few drops of colour and poured it straight into the holes.
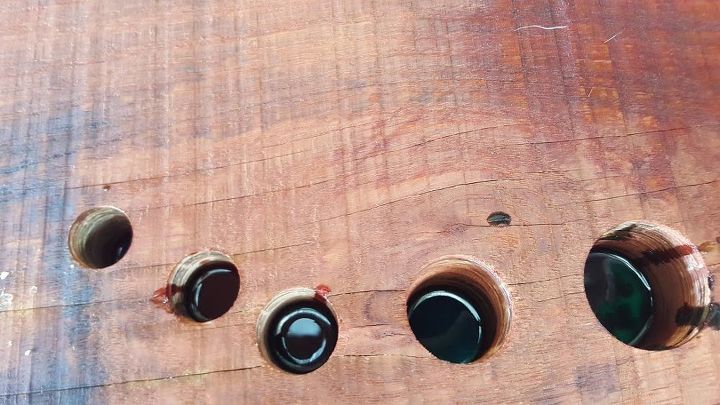
What I learnt with this, is that less is more, only pour a thin layer. The light shines through better. I left it to stand for 24 hours until hard.
After 24 hours I removed the tape and added 2 coats of outdoor Varnish. To stand the suncatcher up, I used posts that I had previously used to support a baby tree and used U clips to attach them to the wood.
Now all I have to do is find a nice sunny place to put it. It is very difficult for me to put a cost on this project because the wood was free and I had all the materials left over from other projects. and it took me 4 hours to make excluding drying time. to see more images of this project

Want more details about this and other DIY projects? Check out my blog post!
Comments
Join the conversation
2 of 78 comments
-
This is beautiful...very nicely done! Loving it! 🤪
-
Love it! Imagine how beautiful it would be to hang above an outdoor table with all the colors streaming thru.


Frequently asked questions
Have a question about this project?
Ooooo. That is beautiful would you sell them? I would buy two.
Could you not use colored glass pieces (dollar store) and just glue them in with e6000?
If the picture looks as I think it does, the aluminum tape is HVAC tape. ducting tape. My husband and all the time. He even dressed up as the tin man using this.
Thw suncatcher is lovely. You mentioned less is better...did you not fill the hole completely? If you didn't, but for other projects did need to, would you do it in one go or layers?