


DIY Napkin Folding

by
Zest it Up
1 Material
30 Minutes
Easy
I think that one of the easiest ways to look extra thoughtful when you set a table is to do a napkin fold. Not only can it be fun to do some napkin origami to impress your friends, but it really brings the bar high in making an ordinary table setting extra special. Napkins are one element of the dining table that can bring color, texture, and also be eclectic. Whether it’s different color schemes, prints and patterns or fold- napkins are quite zesty. Today I am going to show you some simple folds that are great to have up your sleeve, especially as the holidays approach!!
Photo Cred: Anya McInroy

The Stacked Square
This fold is by far the most simple and easiest. What this look is really about is having a bread and butter or salad plate that you need to incorporate. I love the layering look when it comes to clothes (which is probably why I love fall) so why not bring that to your plate? Layer the dinner plate with the napkin and smaller plate to have a stacked presentation of color.
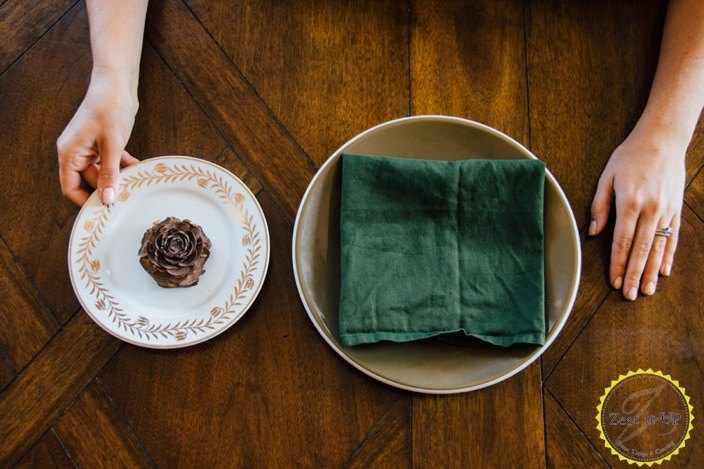
Fold your square and time to stack!
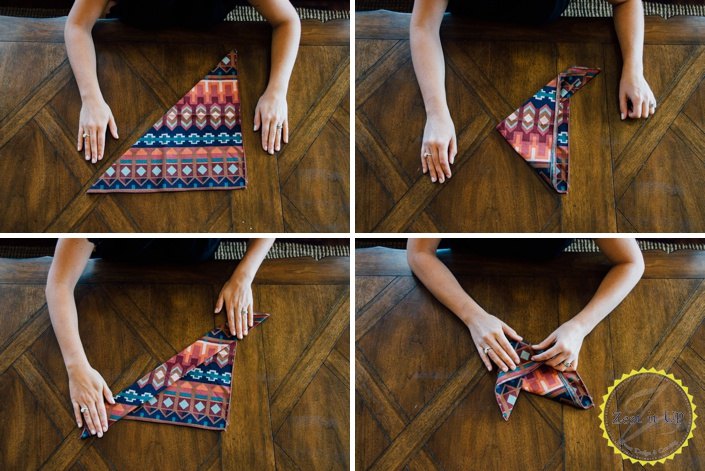
The Bowl
This look is great for storing something on the plate- chopsticks, a favor, maybe a little fortune or truffle for dessert? You name it! First take a square napkin and fold to make a triangle. Next fold about one inch of the napkin over to create a smaller triangle. Next take the far right corner and fold the triangle in alf to have both ends meet. Lastly fold the far left corner towards the right and let a small flap of the triangle overhang.
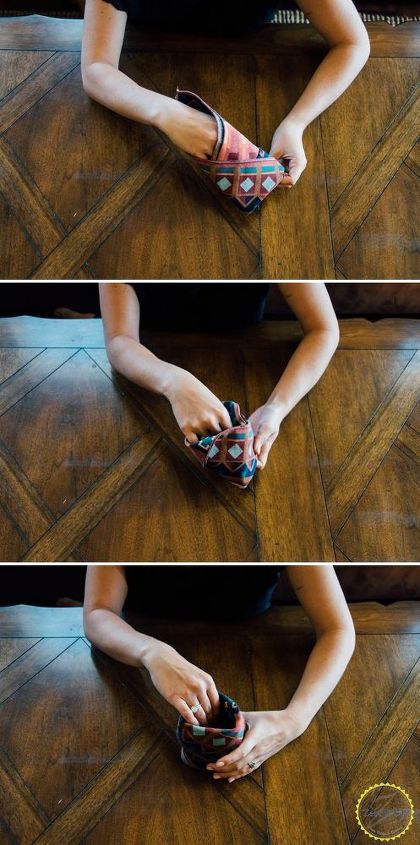
This will create a small “pocket”
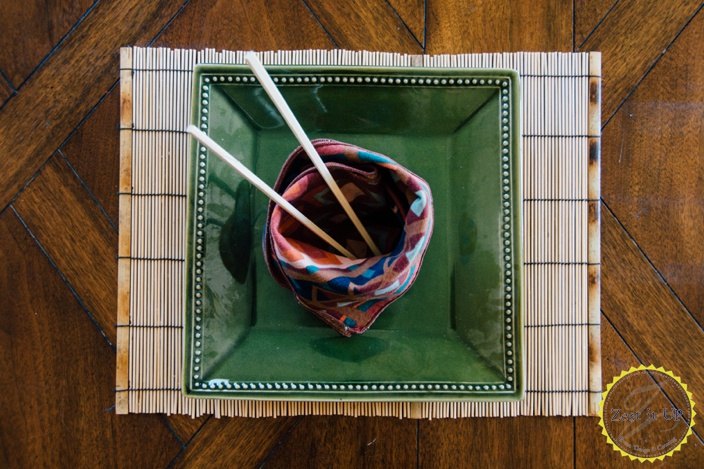
Fold the top flap over the outside of the pocked and voila!

The Bow
This one is for my dear gal Tera Perry who LOVES all things bows!! Simply tale a napkin and fold it into thirds. Next fold both halves towards each other like so.
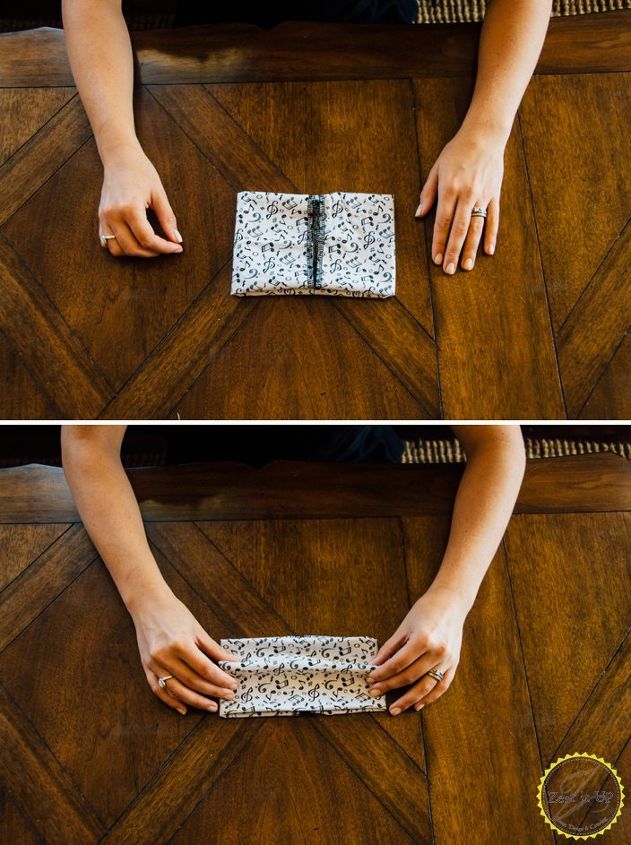
See? Next pinch the center together, creating an accordion look.
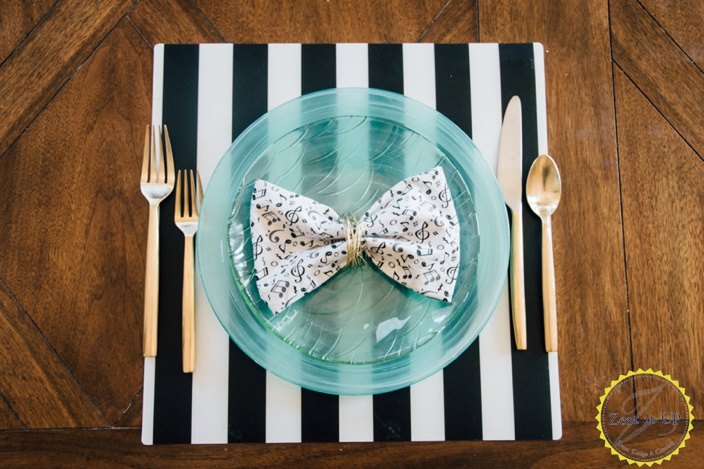
Flip the napkin over with the fold remaining and slip a napkin ring on to secure the bunching, creating a bow!
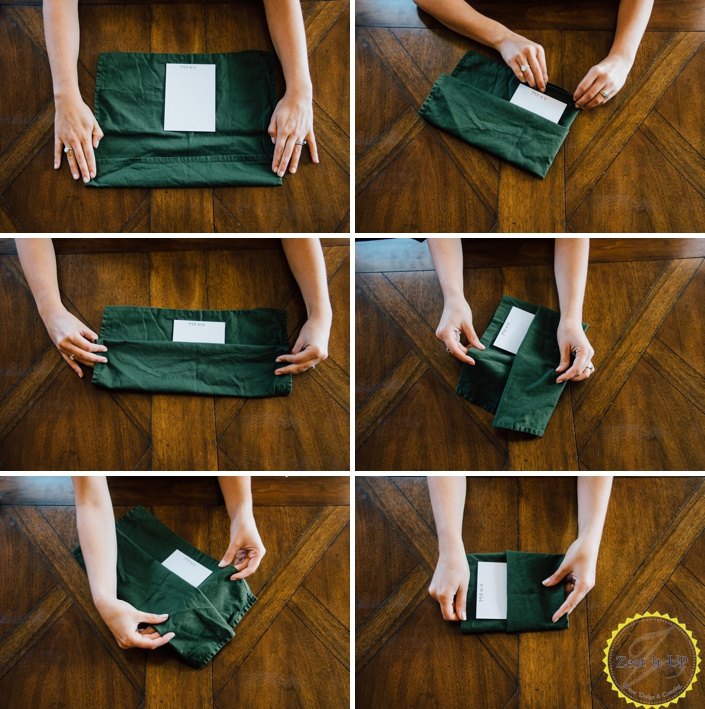
The Menu Pocket
Next we have a little cubby that we are creating for a menu, table number or even a little note. First make sure you have a piece of paper that resembles the size, or the actual menu. We don’t want to see the seam so start with folding about one inch up towards the menu. Next fold about 4 inches up towards the menu. Then simply tuck the sides under the base of the napkin to create a “pocket.”

Tada!
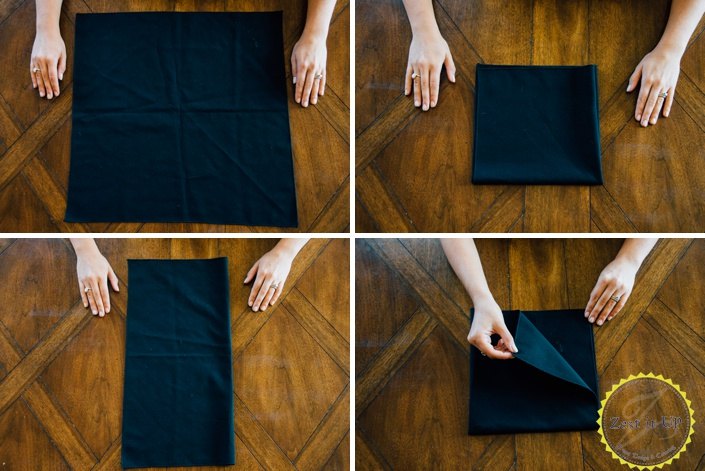
The Triple Staircase
I have to admit this one looks complicated and snazzy but is actually really easy! Here we are going to create a pocket for the fork, knife and spoon- hence the triple staircase. Start by folding your napkin in half to create a rectangle. Next fold one more time to create a square. The pull back on layer of the napkin, just like the pic in bottom right.
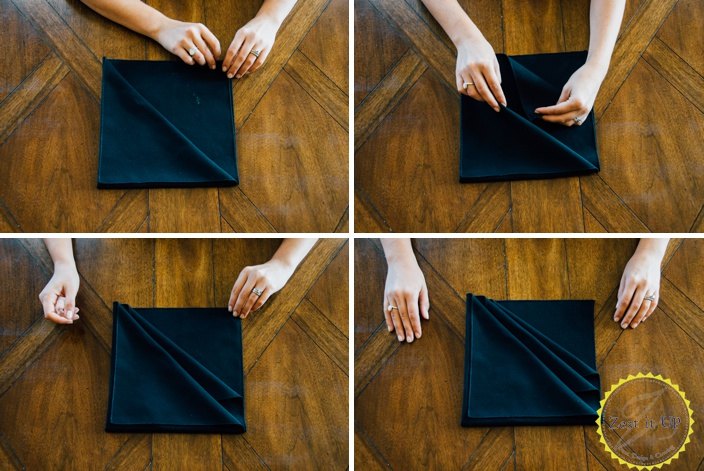
Fold that first layer all the way to meet the bottom left corner. Then you are going to repeat this step twice more, but these times you are tucking the fold into the previous one.
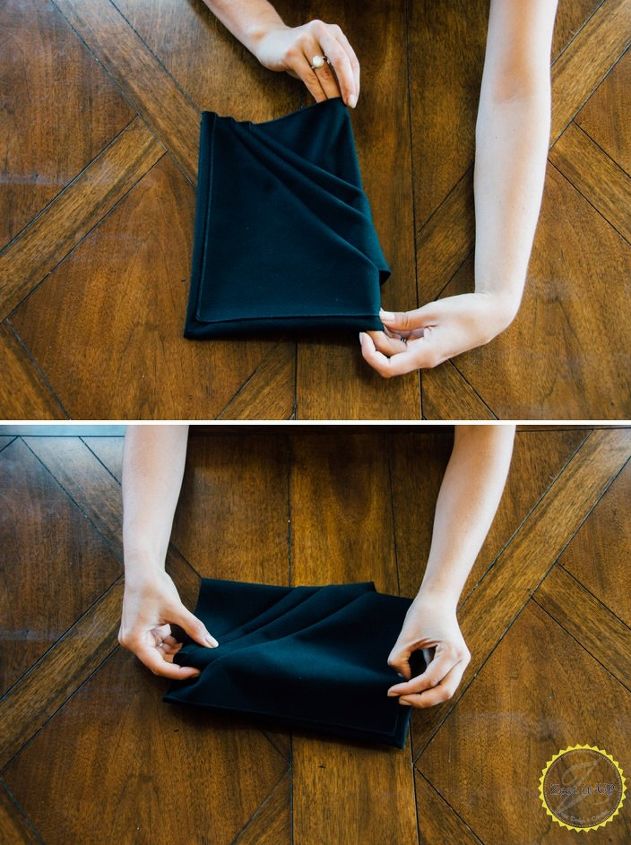
Got your three folds? Now time to make this square a rectangle by folding the sides in.
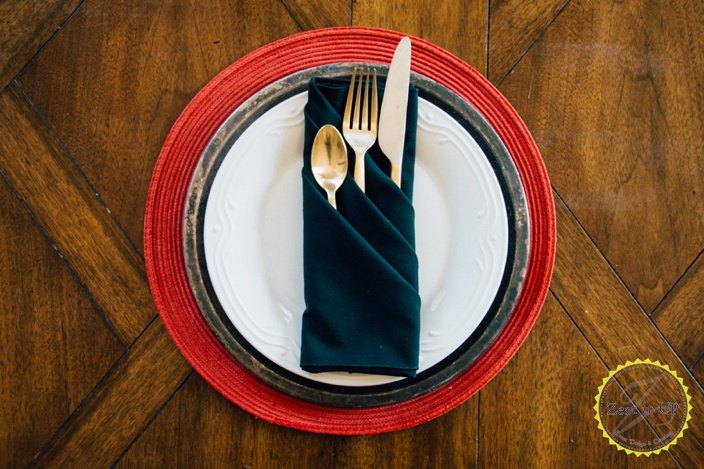
Voila! Have fun playing with napkins!! Find more napkin folds on our original blog post! We also have some great linen napkins for sale on our online shop at shopzestitup.com!
xo,
Sam
Want more details about this and other DIY projects? Check out my blog post!
Comments
Join the conversation
3 of 15 comments
-
Some interesting wraps for napkins.......I like them, very clever!!

-
Needed this prior to Thanksgiving! Thankful for Pintrest.


Frequently asked questions
Have a question about this project?
Like the triple staircase but I just couldn't get the fold process. Do you ever do video's. Thanks
Why don't you have "pin it" link? we can save it for the next party.