


How to Make a DIY Fall Pumpkin Napkin Ring Out of Modeling Clay

It's time to add a touch of seasonal charm to your table decor. In this DIY tutorial, I'll show you how to create a DIY fall pumpkin napkin ring for your Thanksgiving dinner or any fall gathering. With just a few simple materials and a dash of creativity, you can craft these lovely napkin holders and impress your guests.
This post was transcribed by a member of the Hometalk editorial team from the original HometalkTV episode.
Tools and materials
- Cardboard tube
- Tin foil
- Sculpey clay (brown, green, orange)
- Sculpting tools or toothpicks
- Small pieces of card
Steps
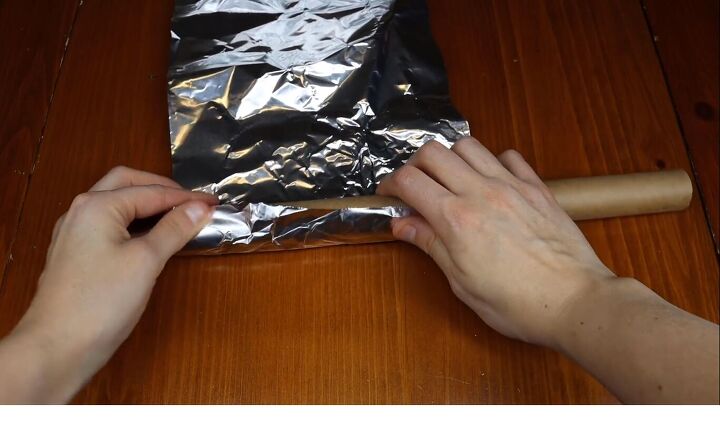
1. Wrap a cardboard tube with tin foil
Start off with a cardboard tube. The tube that I actually used is from a tin foil roll. Place a piece of tin foil underneath this roll and wrap it just about ten times with aluminum or tin foil.
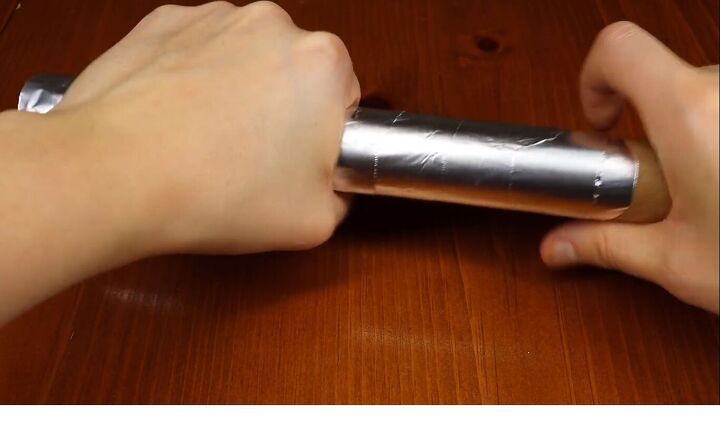
After every full rotation, make sure you press the tin foil or aluminum foil down a little bit, and once you get to the end, crumple it together a little bit. Make sure it's tightly secured onto the tube.
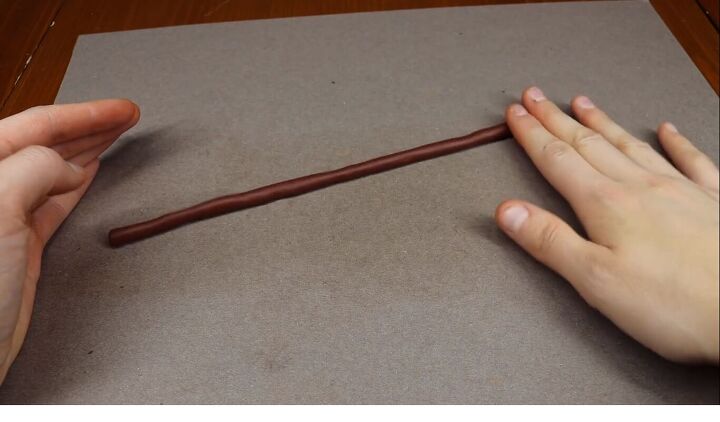
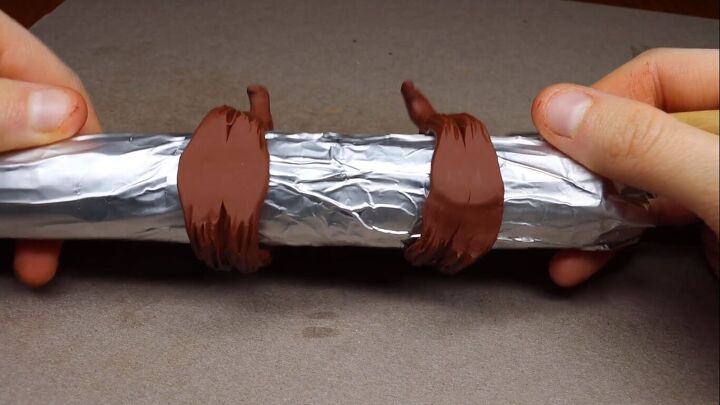
2. Make the pumpkin vine
Take a piece of Sculpey clay, roll it into a ball, and then start to roll it out into a cylinder. Stretch the cylinder while you're rolling it by rolling both sides with your hands. After it's rolled out to just about six to seven inches, it's ready to go and put onto your tube.
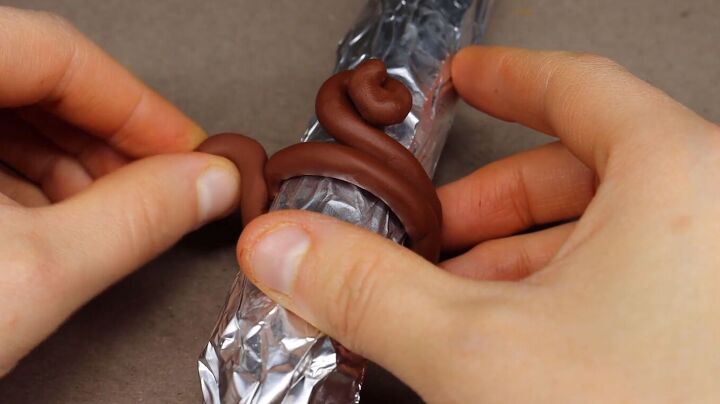
Wrap your clay around your tube. One of the ends you should put into a spiral. Wrap it once and after it's wrapped there should be a little piece left at the end. When you have this little piece at the end, curve it and leave it to the side.
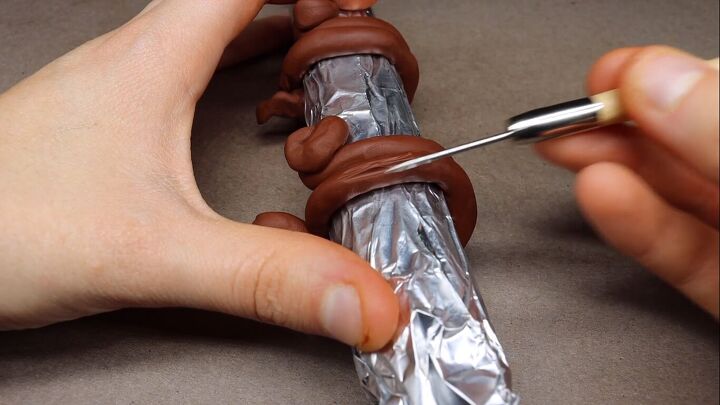
3. Add detail to the vine
Take a sculpting tool or a toothpick and start scoring into your clay. Drag the toothpick or the sculpting tool to create little lines. Do this around the entire piece of clay. Layer the lines on top of each other, but you can also leave the bottom blank.
4. Flatten the bottom
After you've put lines on the entire piece, flatten out the bottom of your clay by simply pressing down on the tube.
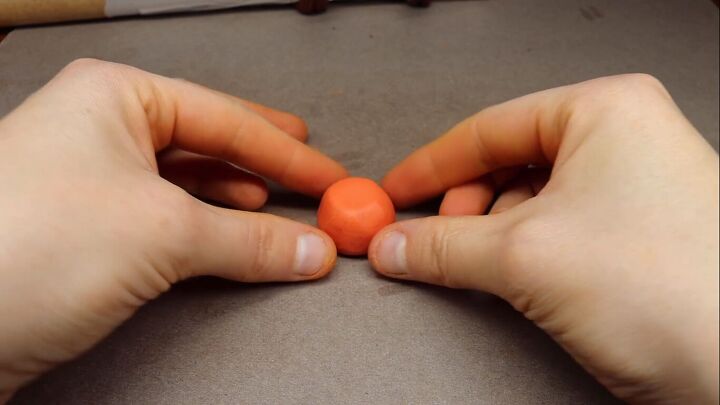
5. Make the pumpkin
Grab a ball of orange clay. Roll it into a ball, and press the top and the bottom in a little bit.
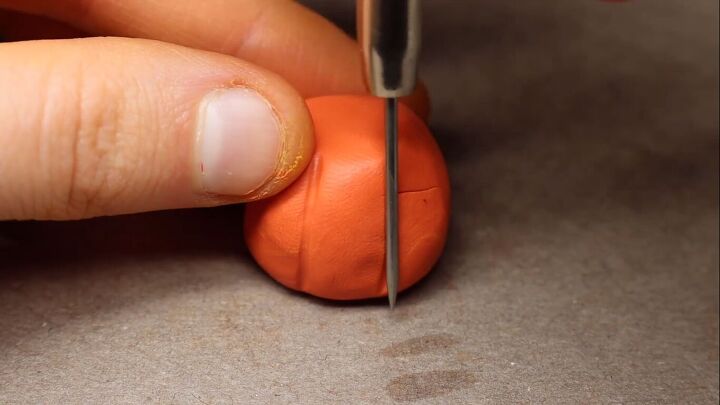
Then start to make lines from the bottom to the top. When you're doing this, it should look like a pumpkin.
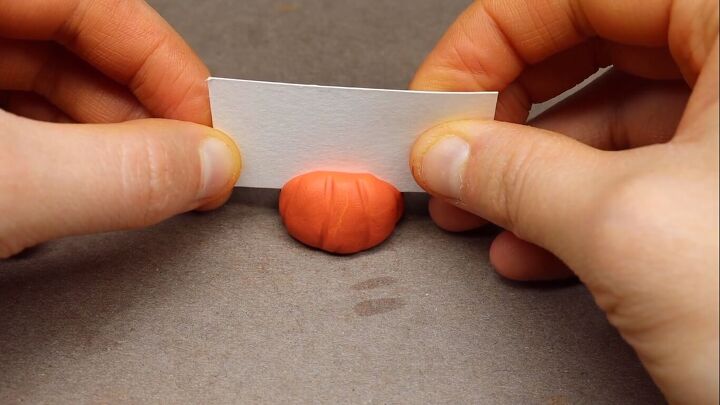
6. Press paper into the clay
After you have all of your lines complete, take a piece of paper, move it over a little bit before the center of your pumpkin, and then press it down. Make sure to not fully and totally cut through the clay. This should not go all the way down to the bottom of the clay, but should just create a little separation.
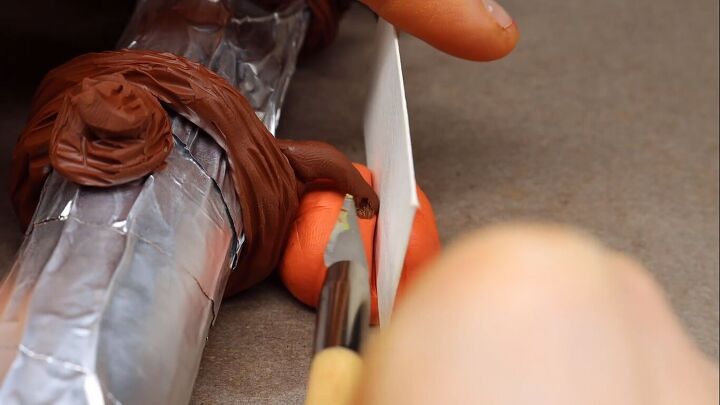
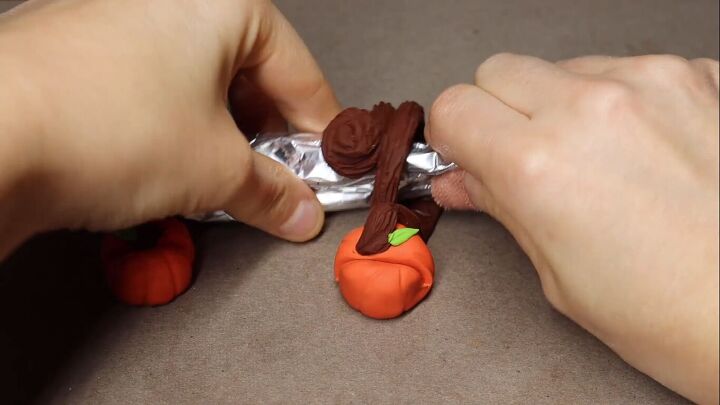
7. Attach the pumpkin to the vine
Leave the piece of paper in the pumpkin and connect it to your Use a sculpting tool or a toothpick to take the vine and press it into the pumpkin. Push the pumpkin onto the vine and then take a toothpick or a sculpting tool and press both the brown and the orange clay together.
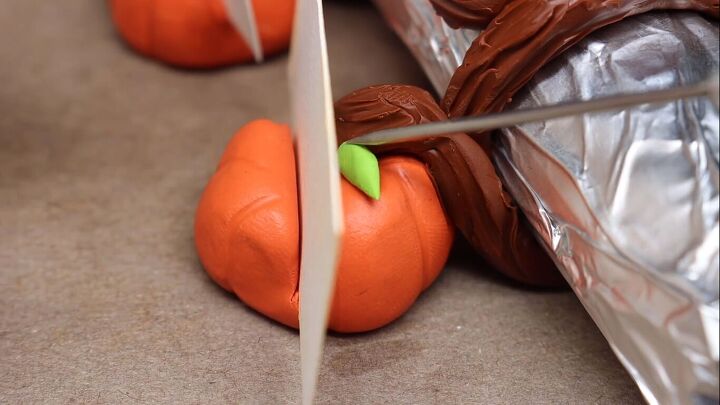
8. Add a leaf
Sculpt out a little tiny leaf and then press it onto the top of your pumpkin.
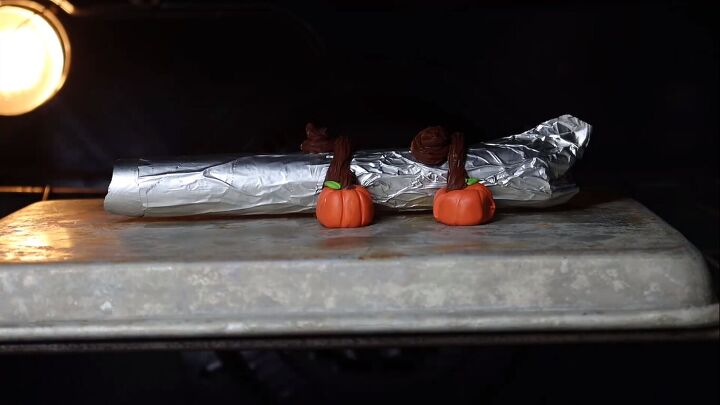
9. Bake the clay
Take the cardboard tube out, but make sure to leave all of the tinfoil behind. You can simply do this by carefully pulling out the tube. Take the pieces of paper out as well, and now it's time for it to bake.
This had to bake at 275 degrees Fahrenheit. Most Sculpey clays bake at just about that temperature as well. After just about 15 minutes, it should be ready. But if you're going a little bit thicker or thinner, the times may vary.
Take it out of the oven and let it cool off. It's going to take just about ten to 20 minutes for it to fully cool down.
10. Remove the tin foil
To remove your sculpture from the tin foil, press the tin foil in and it'll pull off the clay. Make sure to do this really slowly so you do not break your clay napkin holder. Once the tin foil is fully removed, then you can take your DIY napkin ring off.
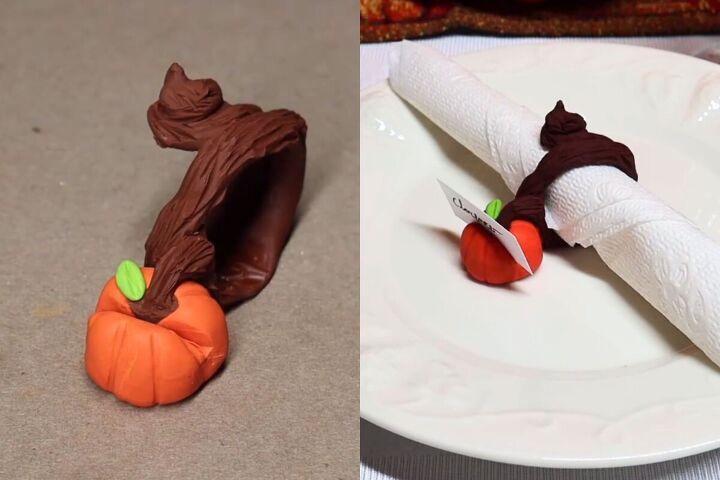
DIY fall pumpkin napkin ring
This is going to be the perfect accent for a great Thanksgiving tablescape and a great example of simple DIY fall decor. What do you think of this fall pumpkin napkin ring? Let me know in the comments below.
Thank you for watching and I'll see you next time.
DIY fall crafts
For more creative autumnal decor projects, discover Hometalk's best fall craft ideas here.


Frequently asked questions
Have a question about this project?