


Inspirational Signs: Start Your Day Off Right!
6 Materials
$25
2 Days
Medium
Wake-Up Wall: Inspirational Signs for a 'Kick-In-The-Pants' start to your day!
Kick off your day with a little inspiration & get things going right! Create a ‘Wake-Up Wall’ and remind yourself each morning to have the most amazing day you can! Inspire yourself… inspire others… enjoy life & live to the fullest! Repetition helps us create habits so let your ‘Wake-Up Wall’ create the habit of starting off your day on a positive note & help carry that through the rest of your life. Follow along as we create inspirational signs for our daily dose of positivity!
Keep in touch and never miss a project. Sign up for The nluv Memos @ nluvstudio.com/nluv-memos-blog-jaime-pirozzi/.
Inspirational Signs to point your day in the right direction
No matter where you live, what you do or who you are, we all have to wake-up each day to get things started, even if waking up is at night. It’s safe to say that the way you start your day, usually dictates the rest of it. So with that in mind, let’s put our creativity to work and help kick off each day with at positive ‘kick-in-the-pants’ & do our best to have the best day we can!
Wake-Up Wall design
At nluv Studio, we have a long list of inspirational & motivating sayings we love and try to remind ourselves of all the time. With so much negativity broadcasting in the world today, we came up with the ‘Wake-Up Wall’ design as a way to inject a little positivity into our day as soon as we open our eyes. We want our first thoughts to be great ones and help us keep that upbeat attitude the rest of the day, not only for ourselves but everyone we come in contact with. Inspirational signs are a fun, easy & personal way to remind yourself of what’s most important to you and keep your ‘positivity engine’ running on high!
Step-by-step Instructions
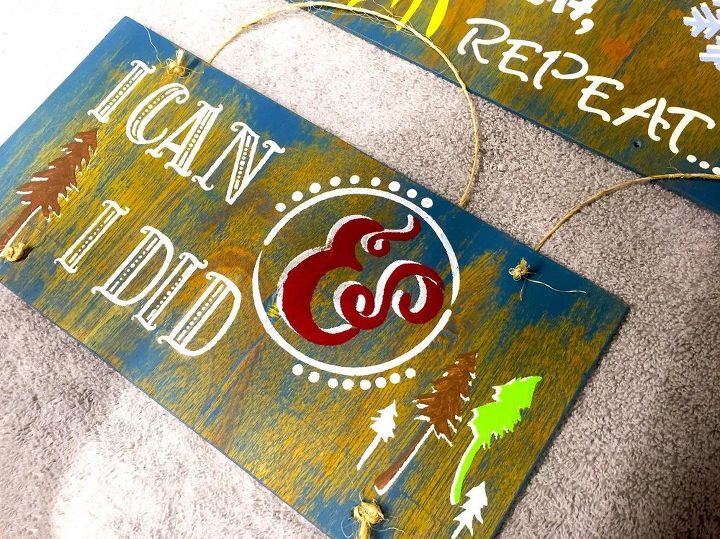
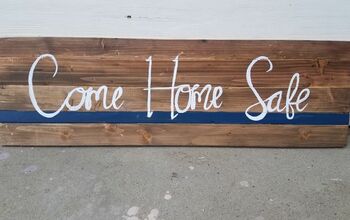
Step 1 – Gather up any remnant, reclaimed or even pallet wood. Anything will work for this one! I used pieces of a door skin left over from another project called (Bin) Label It! Tag your way to organization. I like this wood for hanging signs as it’s very thin, light and easy to work with. You can create a larger design from it without worrying about the weight of the finished project.
Step 2 – The dimensions of my door skin boards are 12″ x 6″. This is a great size to notice on a wall but not take over. If you have sayings that are long, I would consider cutting larger board sizes so the stencil font isn’t too small & hard to read. The whole point is to read it & let it soak in so don’t make the writing a strain on your eyes!
Step 3 – I like to stain the wood first. This will ensure a uniform underlying appearance as well as a striking base color when distressed and wiped back. The color you see above in the photo is Golden Oak.
Step 4 – Drill your holes now so you can make sure your design doesn’t get affected by the process. I don’t like to measure over and over so I drill the holes all at once! Tape the boards together to keep them lined up & mark on the top board where the holes will go. Drill holes across the top and bottom. These holes will then connect the pieces with twine and create the wall hanging feature. Don’t worry about perfection.
Step 5 – Now it’s time for painting! Choose a base color for your boards and paint a nice single coat. It doesn’t have to be a full coverage coat as I will be sanding and wiping it back anyway to show the stain through for contrast. To make painting easier, I tape the boards on another piece of wood so they don’t move around. It really works!
Step 6 – When the paint is dry, sand, wipe or distress however you want. I wiped back most of the paint so there was a hint of the color but not allowing it to be overpowering.
Step 7 – Follow with 1 coat of clear wax to lightly seal surface and deepen the colors as they are intended to be. This is also the time to use colored wax, such as dark, black or white for further aging effects – if you so desire. Do it now unless you want to do after stenciling. And remember… the antiquing effect will be over your stencil as well so make sure that is your desired end result if you do wait till the end. I don’t want my stencil aged, so I will do all the wax-aging and sanding at this stage.
NOTE: I also like this wax layer between the base & the stencils especially if I’m doing textured stencils. If needed, I can easily wipe or even pull off a recently dried stencil if I don’t like it. You can make a change or correction with no traces left behind! It’s a great trick that will save you time & frustration. If you will have layers of stencils, don’t be afraid to wax between the layers. It will seal the last layer in & allow wiping and corrections to your next layer.
Step 8 – It’s stencil time. Add stencils both with paint and textured mediums for a little added depth on ‘key words’ or ‘images’. Let stencils fully dry. Have your design planned out for all boards so you can go back & forth between them during the drying cycles. This step will take awhile if your design is complex. Don’t rush and smear your hard work.
Step 9 – When your done with all stenciling, finish up the design with another light coat of clear wax to seal everything together. If you want a little sheen, buff after 24 hrs otherwise leave the boards alone.
Step 10 – The final steps are to tie the boards together so they can hang as wall art. Tie twine between holes to link together the boards. I did double knots and used a dab of hot glue on the back to hold everything in place. Cut and tie a knot only for the bottom of the last board to finish off the look.
Step 11 – Last thing to do is find the perfect place to hang your Wake-Up Wall art. Find a place so you’ll see it each day when you rise! Inspirational signs should be front & center so you never miss them!
You are the only one controlling how your day goes. It isn’t what happens to you during the day, it’s how you react. Have a great day & keep on inspiring others!
Keep in touch and never miss a project. Sign up for The nluv Memos @ nluvstudio.com/nluv-memos-blog-jaime-pirozzi/.
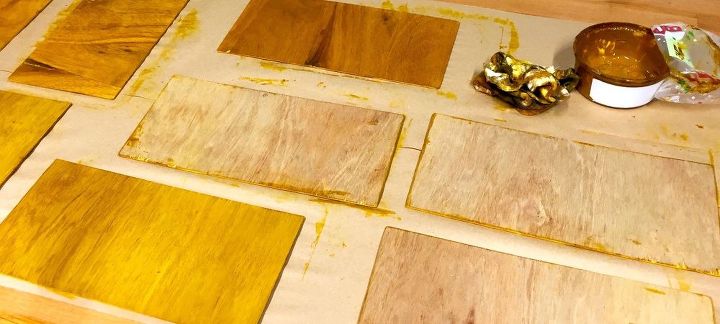
Remnant door skins, stained as a base color.
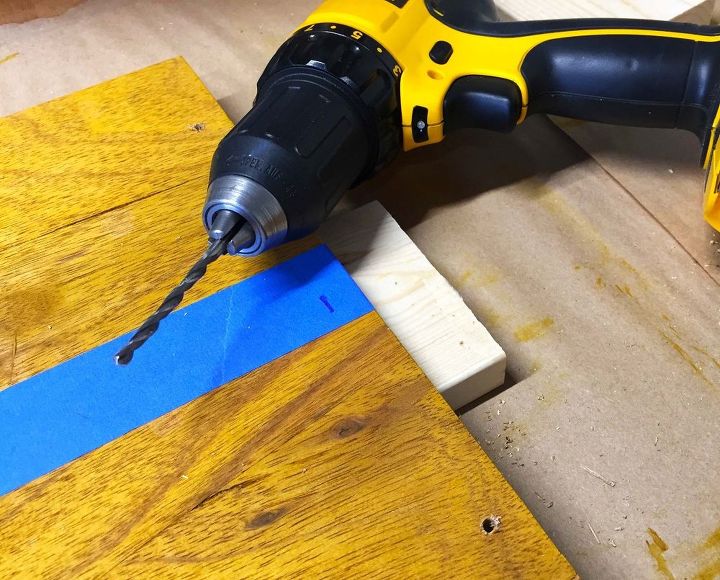
Tape boards together & drill the holes once!

Tape pieces to another board for easier painting.
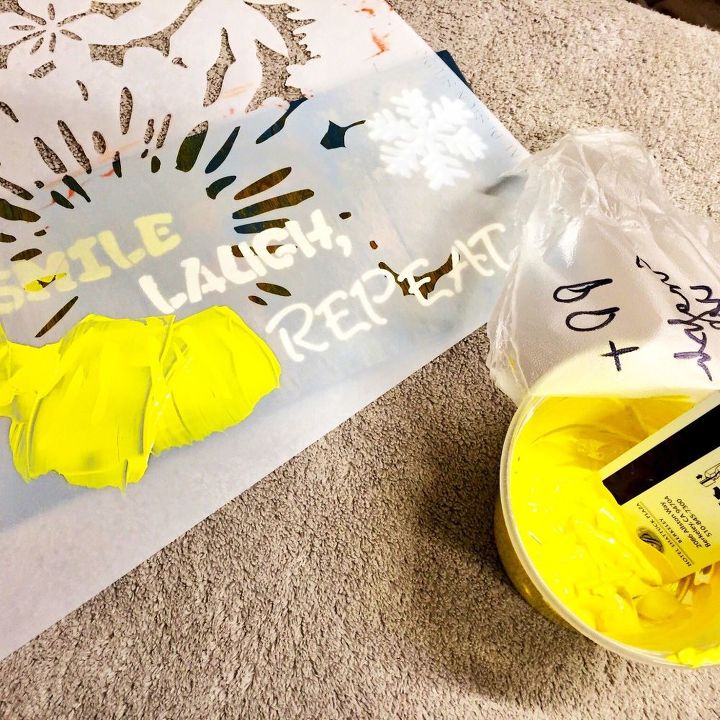
Let your stencils dry between layers… don’t rush!
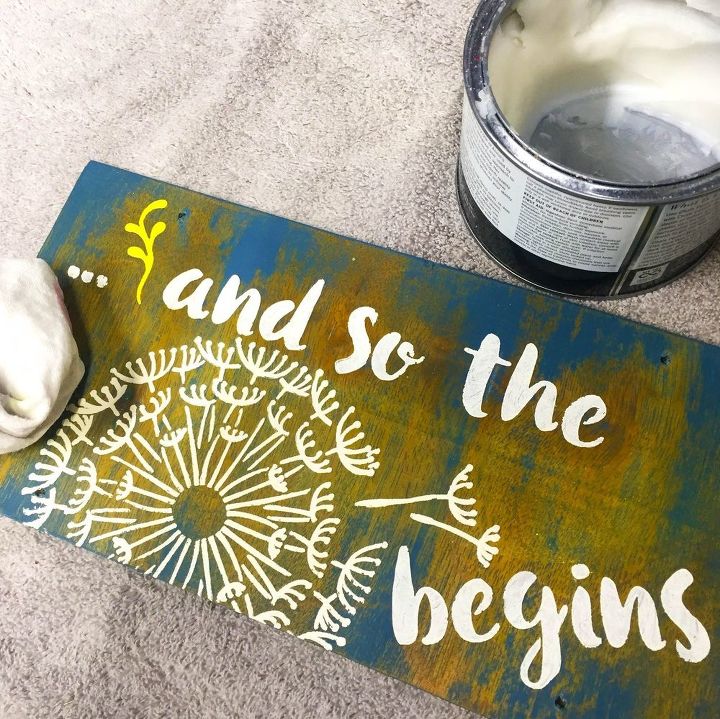
Wax between stencil layers to seal & allow for changes.
Use twine to tie the boards together & hang on the wall.
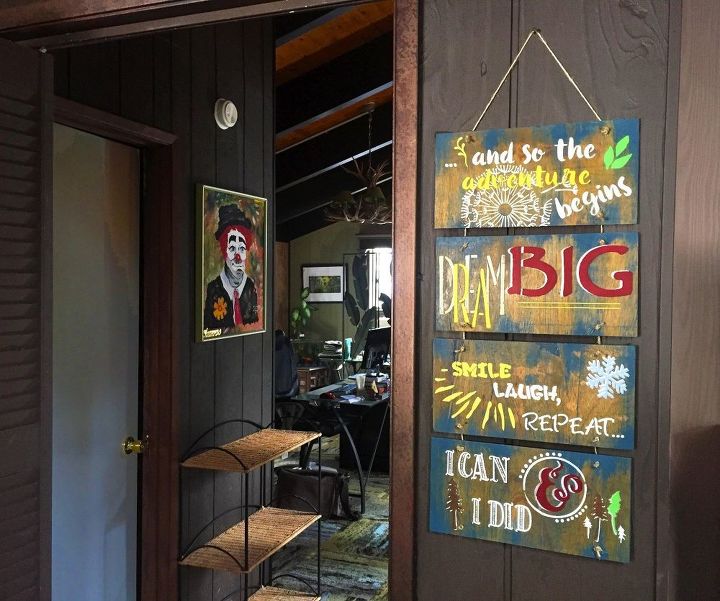
Start your day on a positive note!

Want more details about this and other DIY projects? Check out my blog post!


Frequently asked questions
Have a question about this project?
Love these but how did you get that finish before the stencils? Did I miss something?
Can you give more details on the wax product you mention? Not sure what it is or how it's applied. Where do you get it? Love this! Thanks!
I saw wood planks that were 51/2 ft. Tall some were carved hey girlie strata crossed up and down there were no pictures they were colors and then there was a beautiful staying a virgin and I don’t know who makes them but they’re beautiful do you have any idea where I can find them I thought you made them???