


Simple Wooden Bench
2 Materials
$10
3 Hours
Medium
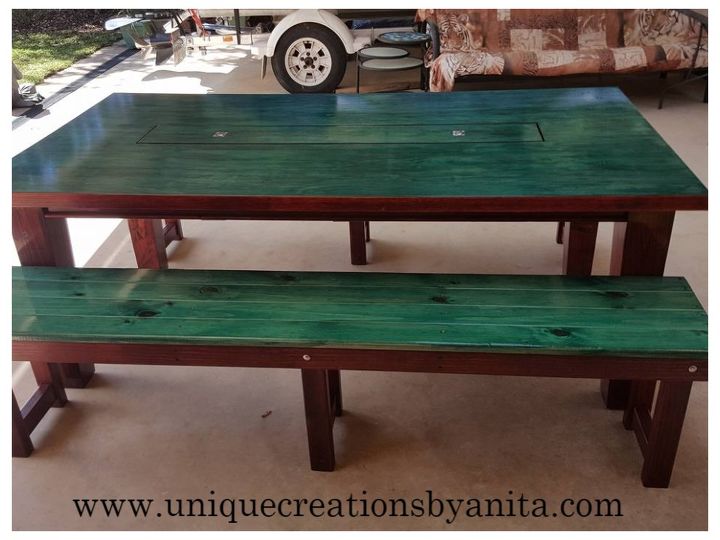
I had made a party table and to make it more appealing to a buyer I made these simple benches to go with it. My table was 2 metres long so my benches had to be the same.
Most of my wood was recycled so the outside was dirty and marked. I ran all my wood through the planer machine to clean it all up. This is my most important machine that saves me money, it makes old wood look new again. I did my last pass on a very small turn of the wheel and gave it a quick sand using 180 grit sandpaper.

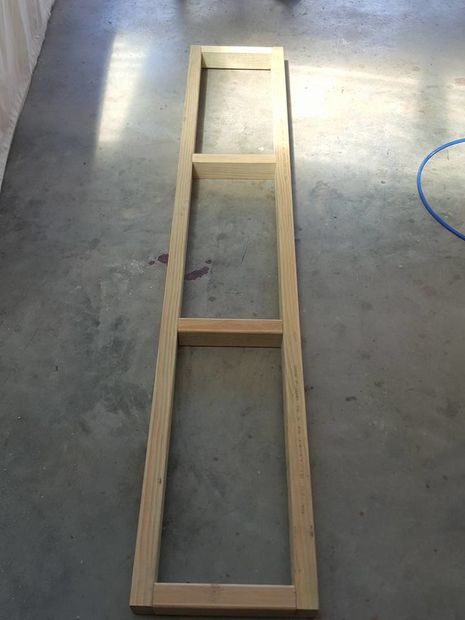
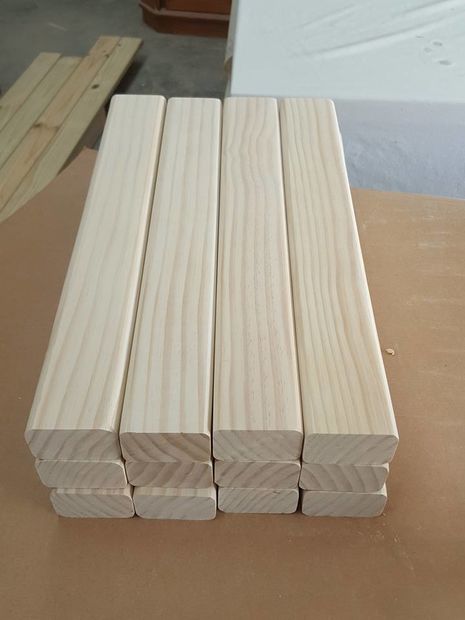
I used a table saw to cut 4 x 2 m lengths for the sides and cut 8 x 19cm centre supports and screwed them together as per the picture to make my frame. I counter sunk the screws so they would not be visible. For my legs I cut 12 lengths of wood 46 cm (L) x 10cm (w) x 5 cm thickness using a table saw. I rounded all the edges with a router just to give the bench a better cosmetic look.
Wooden Bench
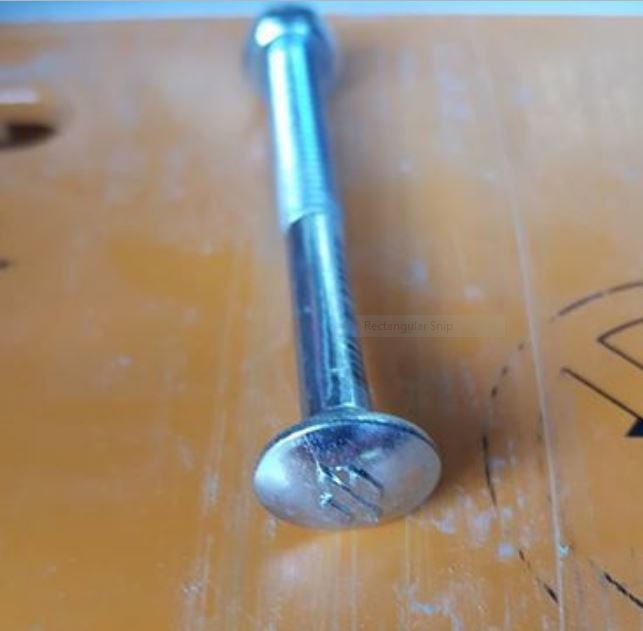
I did not have the correct size bolts to go through both pieces of wood and being a Sunday the hardware store was closed.
Wooden Bench
These are the bolts I used and the big dome head gave the bench a bit of character.
Wooden Bench
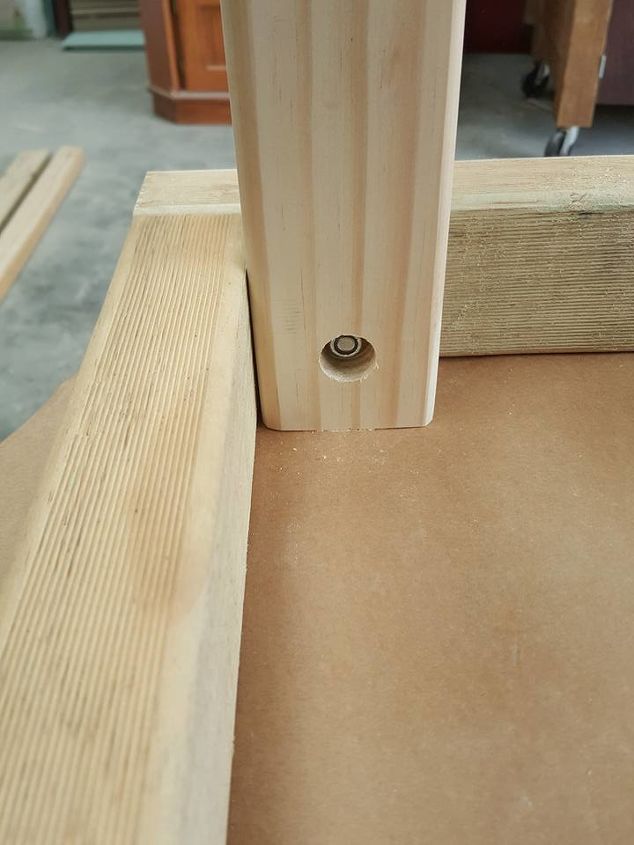
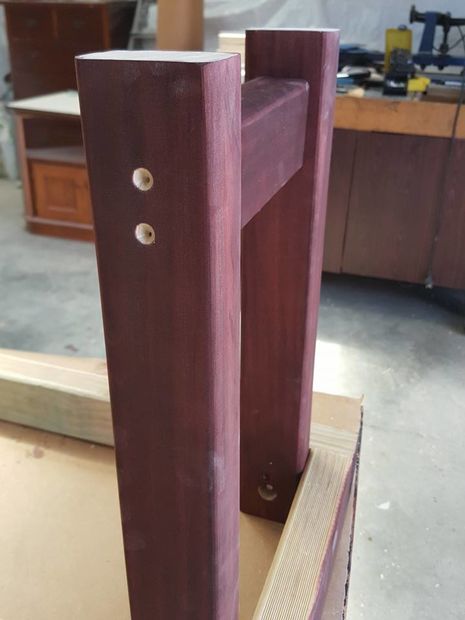
I lined up the legs using a square ruler. I glued the legs to the frame as well as bolting them so there was no chance of them moving.
Wooden Bench
I wanted to add some strength to my bench so I added support beams between the legs so if the bench is dragged around the legs would have no chance of collapsing. I drilled my holes and used a countersinking drill bit to hide my screws.
Wooden Bench
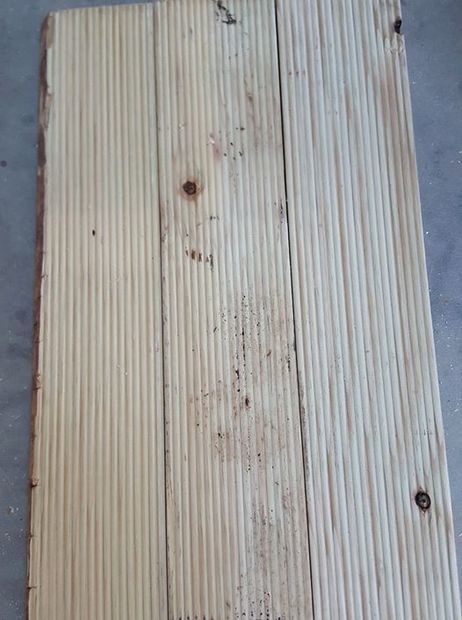
My top bench planks were also recycled from a house construction site. But a few runs through the planer and the were as good as new. I screwed down each length into the base and the centre support beams. (Those suckers were going nowhere). Between the pieces I had a fair bit of overhang which was great when it came to tidying the sides and ends up. I marked a line where I wanted to cut and used a circular saw to remove the excess.
Wooden Bench
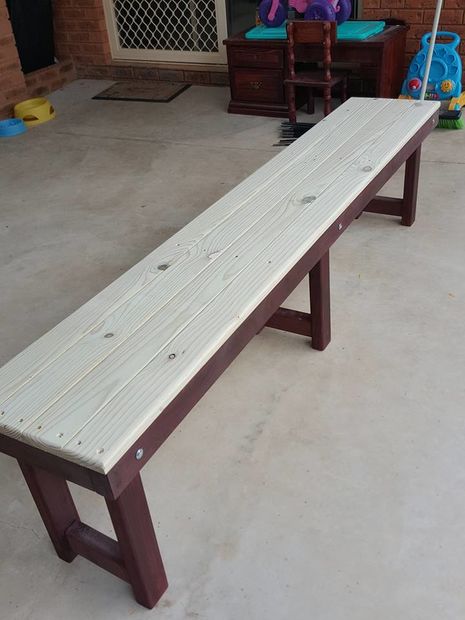
I rounded off the edges with a router so there were no rough edges to cause splinters. I filled in the holes with wood filler ready for staining.
Wooden Bench
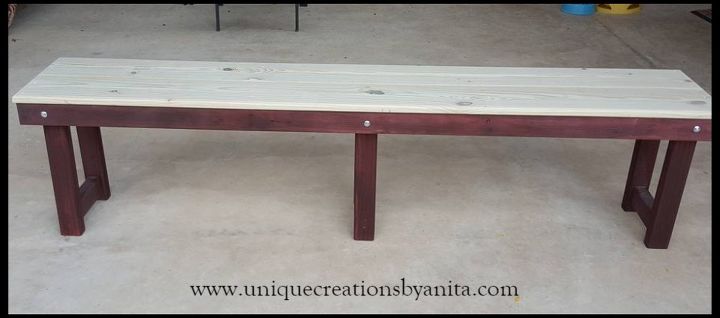
I stained the base dark mahogany and the top was a stain and glaze called unicorn spit . I added two coats of polyurethane and it was all done.
Wooden Bench
To see more unique creations
Because my project was made from recycled wood I was unable to cost it properly. But for me it was under $10

Want more details about this and other DIY projects? Check out my blog post!
Comments
Join the conversation
4 of 17 comments
-
Love the style, the colors and the sturdiness. Very nice set. We are going to give it a try.
-
I love this! The colors are awesome!!


Frequently asked questions
Have a question about this project?