


Industrial Stacking Cart Table

by
Zac Builds
5 Materials
$60
4 Hours
Medium
How I rescued and refurbished a cool industrial stacking cart from the vaults of the Bank of Canada and gave it a second life as a coffee table.
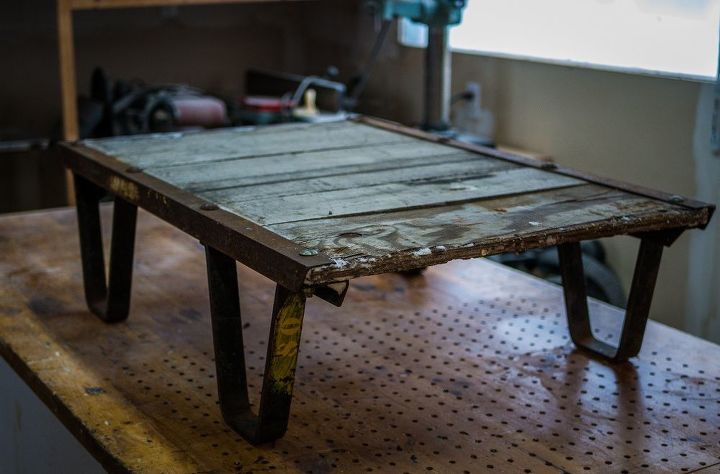
Here's what it looked like when I bought it. The guy who sold it to me claims it came from the vaults of the Bank of Canada, not sure I believe him, but it's a good story so who am I to argue with him!
Not exactly pretty right? Don't worry, we'll fix that! I see potential in this little stacking cart.
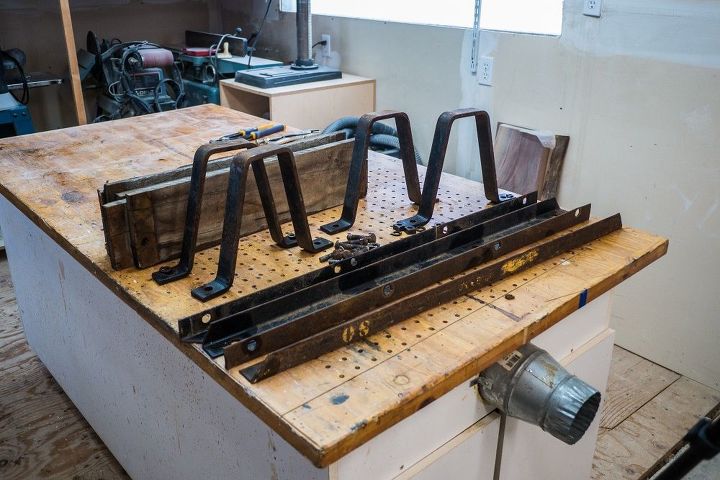
The first step was to dissemble everything and figure out what was worth saving and what wasn't.
I quickly decided the wood surface was completely shot, so I'd be replacing the wood. The metal frames and legs however were definitely worth saving. The old hardware was rusted out completely and not worth saving.
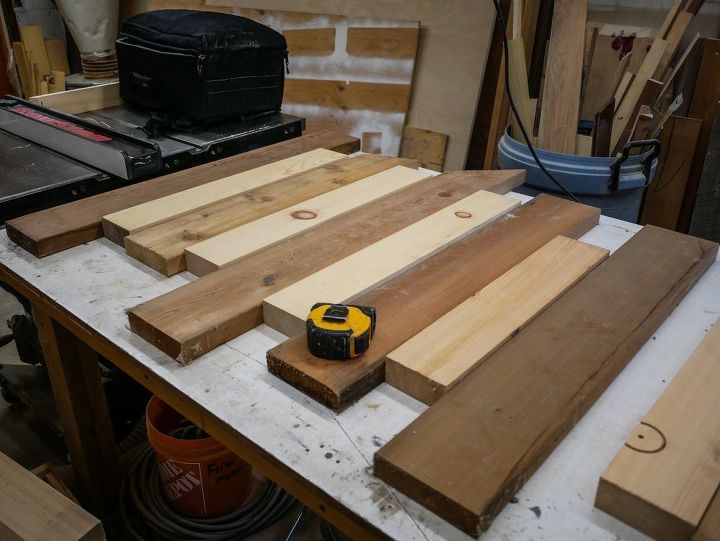
I decided to replace the wood with a combination of red cedar and yellow pine. I laid out my boards in an alternating pattern to get a rough idea of how it would look.
As you can probably see the wood is all different sizes and lengths. This is all wood I had left over from other projects so I was going to have to do a bit of work to make it all fit together.
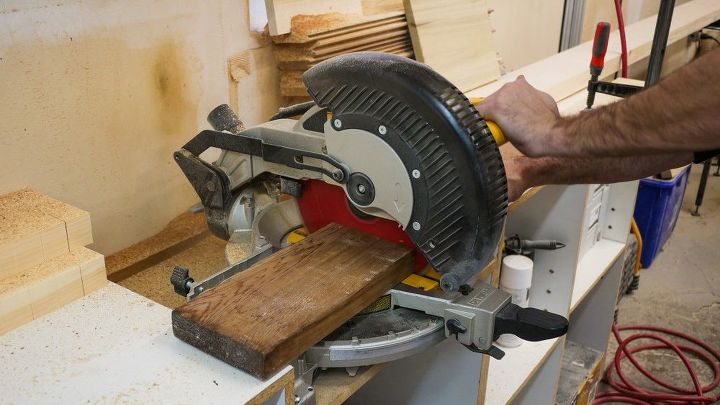
First I cut the length of each of my boards to 24". That was the original width of the stacking cart and I didn't see any reason to change that.
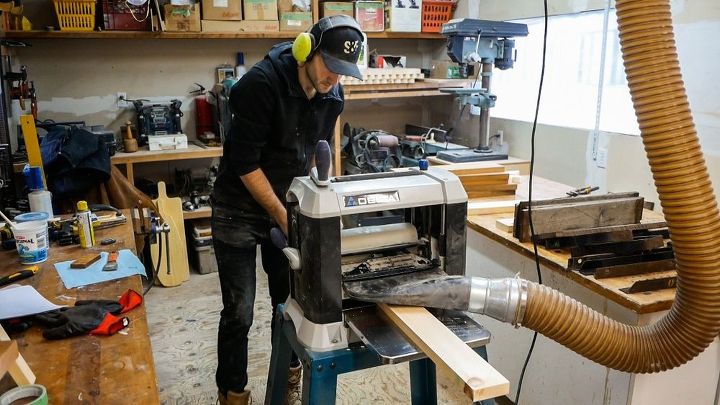
Then I planed everything down so that it was the same thickness and nice and smooth. If you were to buy wood of the same thickness and not recycle stuff you had around the shop like I did you could skip this step! Most people don't have planers in their garage shops.
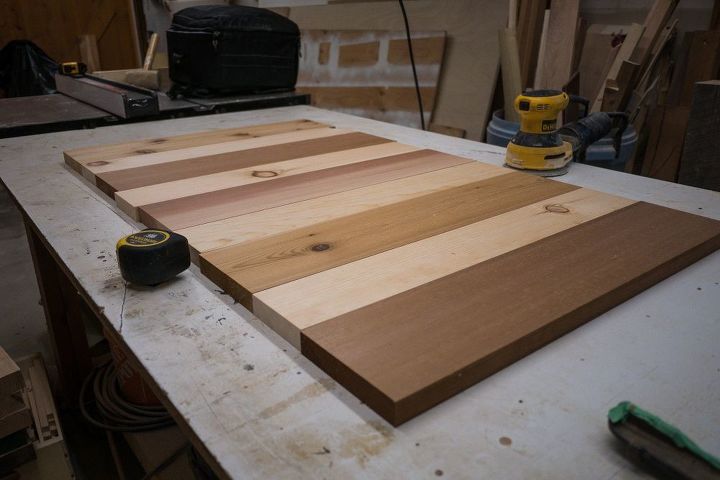
Now that everything was the same thickness and length it was starting to look a lot more like a table surface.
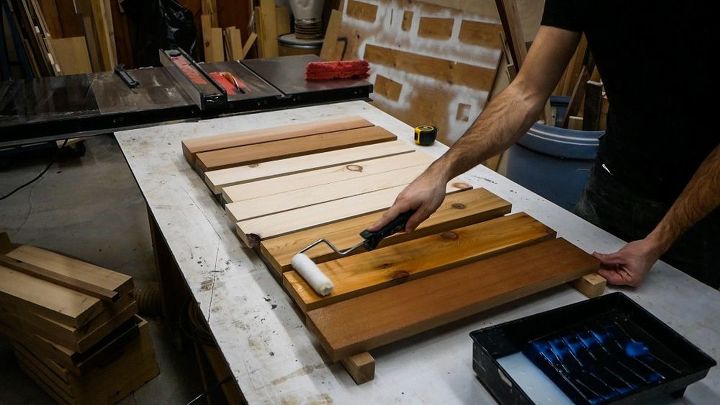
I coated the wood with a water based floor varnish by Saman . The floor varnish serves two purposes. One it makes the wood resistant to moisture (great for spills and other stains) and two it really makes the grain and details in the wood pop!
I did 3 coats of the floor varnish, applying it with a small roller and a low nap cover. I sanded between each coat with 220 grit sand paper. This floor varnish dries quickly, so I was able to get it all done in a reasonable amount of time.
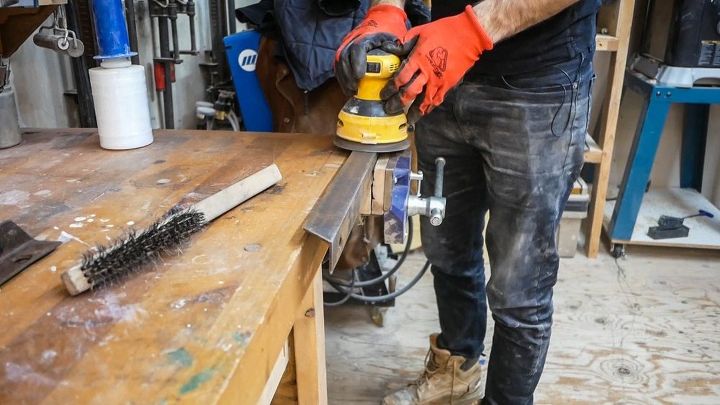
While the wood was drying I setup my Dewalt random orbital sander with 80 grit sand paper and went to town on all the metal pieces. I was sanding them to remove the paint, rust and grime that had accumulated on them over the years.
I sanded down all 4 metal frames and the 4 legs.
When I was done the metal was still far from perfect, but I didn't want it to look perfect. I wanted to keep the industrial aesthetic in the final product.
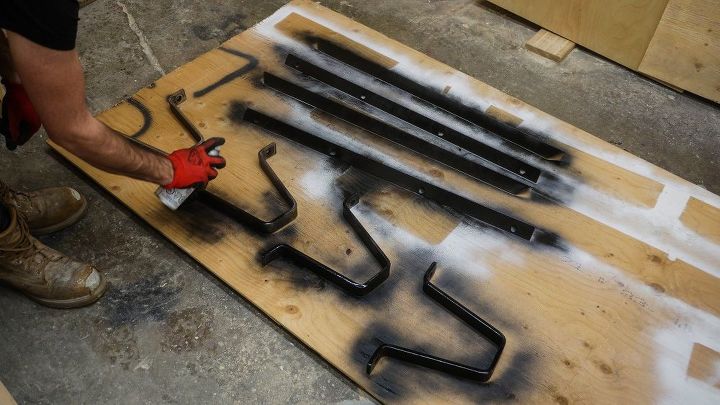
After the metal was all cleaned up I hit it with some Tremclad semi gloss black spray paint. This is a rust converting spray paint that doesn't require a primer.
Multiple coats required a lot of drying time, but it was worth it in the end. It looks really sharp in black.
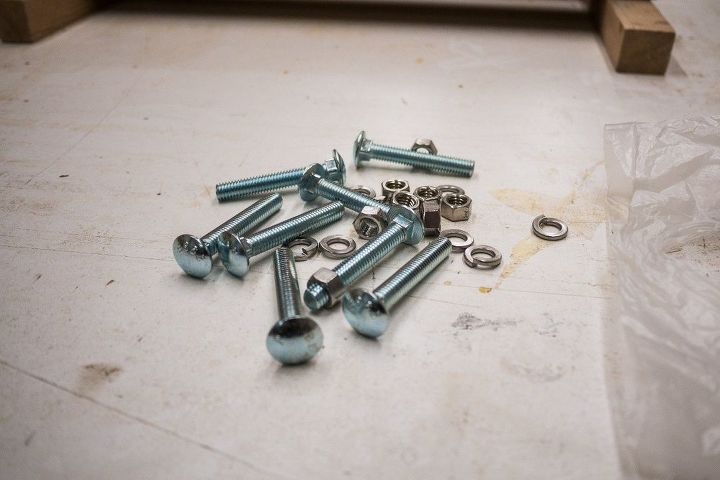
The old hardware was shot, so I picked up some new nuts and bolts at Home Depot.
The bolts are 5/16, 2" carriage bolts. I used a regular 5/16 nuts along with lock washer to assure that the bolts don't loosen on their own over time.
The bolts that hold everything together have to pass through the metal frame and the wood surface.
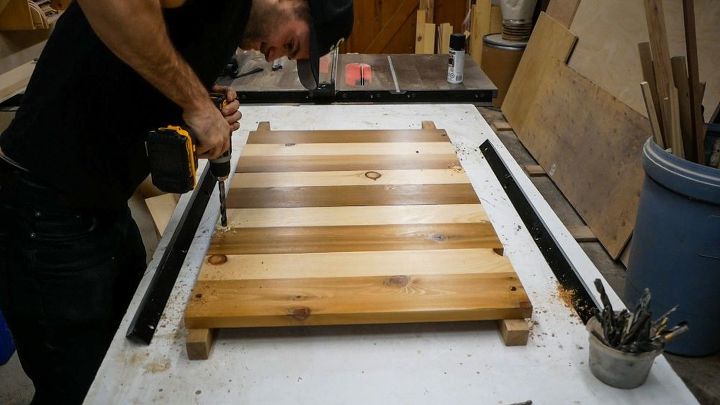
There were holes already in the metal frame, but I had to re-drill holes in the wood table surface since that wood was all new. I placed the metal frame over top of the wood and marked the center of each hole.
A couple of minutes drilling each of the pencils marks with a 1/2" drill bit and I was ready to resembled everything.
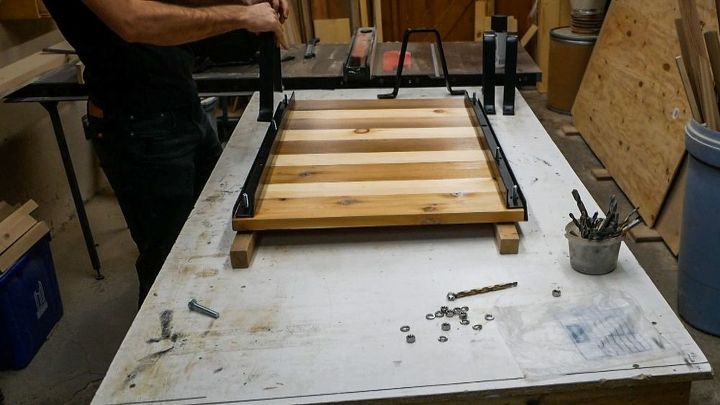
Resembling everything alone was actually kind of tough and took a lot of patience. Eventually I got there, but really would've been nice to have some help here!
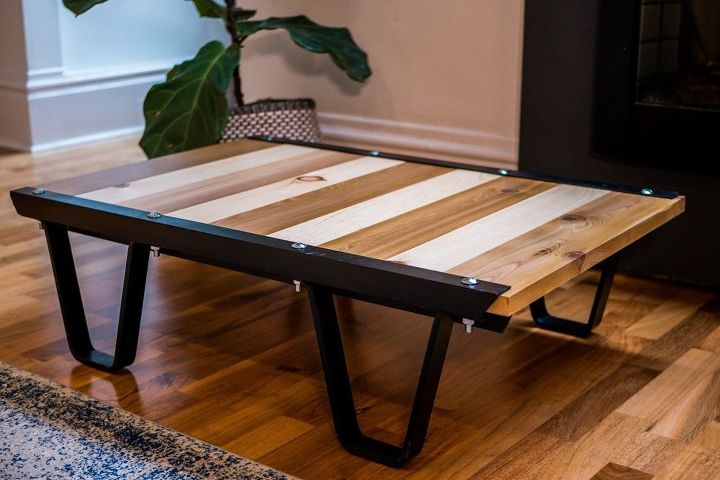
Here's the finish product back in place at my house. I love the contrast of the black frame and the light wood. It looks great and feel STURDY. Seriously, I can jump up on top of this thing and not worry about it at all! I
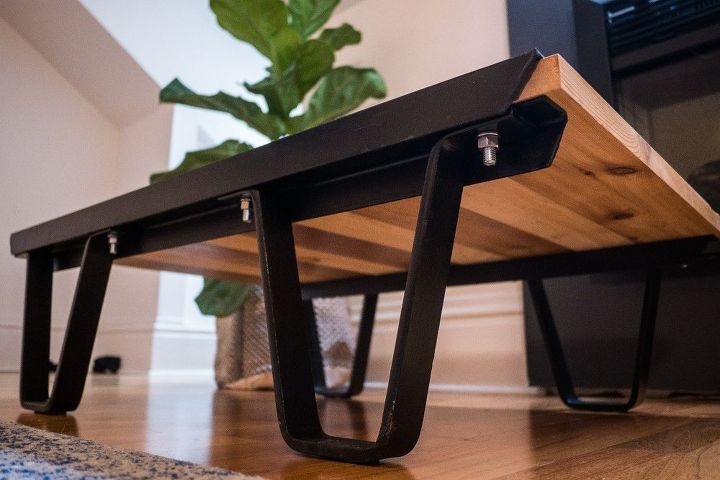
At just over 12" tall it's definitely a low table, but in my space it works great! The new hardware looks really great, I left it bare, but you could easily have painted it black as well for a completely blacked out look!
{
"id": "4566783",
"alt": "",
"title": "",
"video_library_id": "7308",
"thumbnail": "https://cdn-fastly.hometalk.com/media/2018/01/02/4566783/industrial-stacking-cart-table.jpg"
}
{
"width": 634,
"height": 357,
"showRelated": true,
"noautoplay": ""
}
Every project needs a good "sizzle reel"! Enjoy! Let me know if you have any questions and check out my blog link at the end of the post for a more in depth guide!
Resources for this project:
See all materials


Any price and availability information displayed on [relevant Amazon Site(s), as applicable] at the time of purchase will apply to the purchase of this product.
Hometalk may collect a small share of sales from the links on this page.More info
Want more details about this and other DIY projects? Check out my blog post!
Comments
Join the conversation
4 comments
-
I am currently working on a tall rolling metal cart I am transforming into an entertainment center. Yours looks great!! I also love the industrial look. Great job.
- See 2 previous


Frequently asked questions
Have a question about this project?