


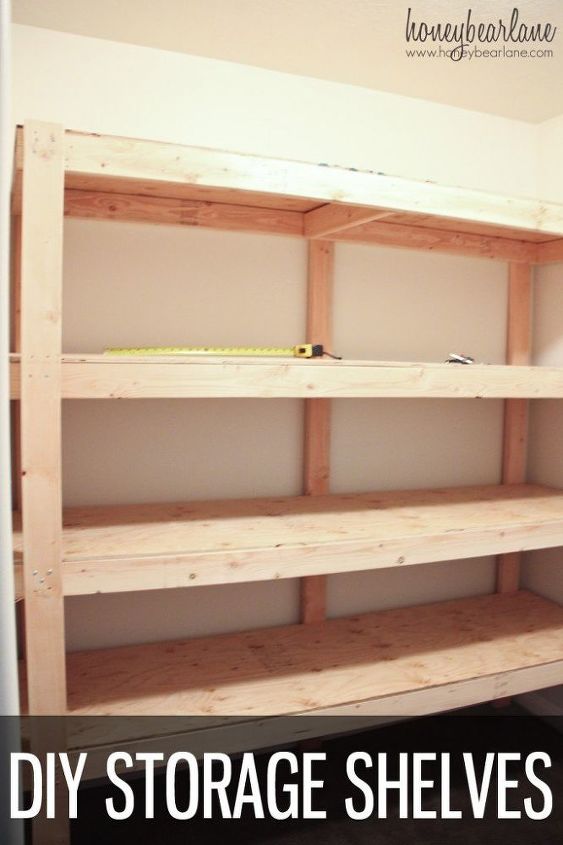
DIY Storage Shelves
7 Materials
$94
1 Day
Easy
Things have been crazy around here, especially since I have decided to declutter my house all at the same time, so everything is just OUT all over the place and in the midst of it I have about five other projects due, Easter and my son’s birthday, and soccer season starting. I really hope I don’t just drown in all the craziness.
But one thing that is making me happy is my newly organized storage room. At least there’s that. Ironically the messiest room is now the cleanest and the clean-ish house is shambles. I built some custom heavy duty diy storage shelves inspired by this post.
I am going to show you how to make one of these heavy duty storage shelves. It’s not really that hard, especially if you have the right tools. My particular unit is only 7 feet wide to fit my space. But these instructions are for 8 foot wide shelves so you can maximize your materials (and do less cutting.)
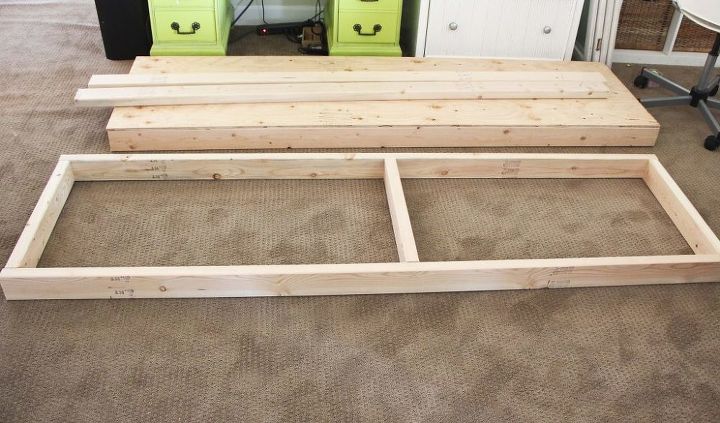
Cut List:
- Cut the two sheets of plywood in half lengthwise so you have four pieces of 2×8′ board. Ask them to do this at Home Depot because it’s much easier to transport this way.
- 12 2×4 cut to 21 inches
- 6 2×4 cut to 80 inches (These are for 16″ spaces between shelves. I suggest measuring your largest bins and adjusting accordingly. You may need larger or smaller gaps.)
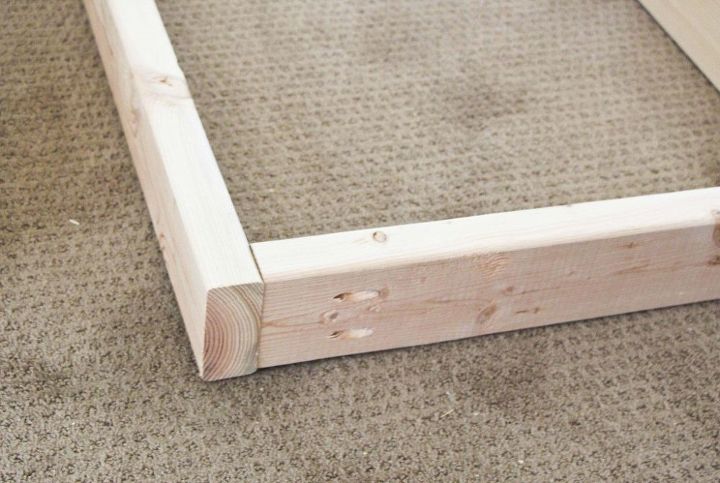
The first thing you need to do is build the shelves. This comes together very quickly. Put two pocket holes in each 21″ piece on both ends. Then drill one 21″ piece into one of the 8′ pieces at one end, in the middle, and the other end. I sometimes find it tricky to make joints on the end of the wood piece because it seems more slippery or something. So you can clamp it down with a right angle clamp or a kreg right angle clamp but I don’t have one (yet) so I will drive the screw in, back it out, then drive it back in. Also, you do not HAVE to use a Kreg Jig but I prefer the strength of the pocket hole joints to a butt joint.
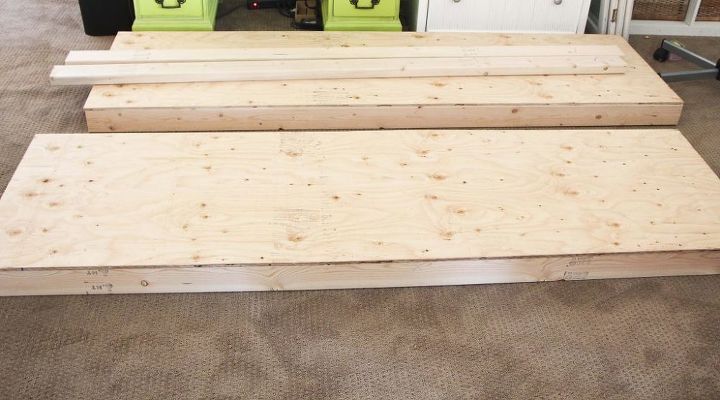
Once you have the E shape, add the other 2x4x8 and make the full apron. Then using a nailer (like my Ryobi Brad Nailer) you can put the plywood right on top and secure in place with nails. If you don’t have a nailer, you can screw the plywood to the 2x4s in several places.
Resources for this project:
See all materials


Any price and availability information displayed on [relevant Amazon Site(s), as applicable] at the time of purchase will apply to the purchase of this product.
Hometalk may collect a small share of sales from the links on this page.More info

Want more details about this and other DIY projects? Check out my blog post!
Comments
Join the conversation
2 comments
-
This would work perfect for all my canning goods, and my yarn bins. Thank you.
-
Sounds great but my closet is under stairs,it’s heard for me to get in and out of it.


Frequently asked questions
Have a question about this project?